Elderberry Jam Recipe: Jam lovers, this one’s for you! If you’re tired of the same old strawberry and raspberry jams, it’s time to venture into the world of elderberry jam—a deep, dark, and richly flavored spread that brings both taste and health benefits to your table.
This easy-to-follow, step-by-step elderberry jam recipe will show you exactly how to turn those little berries into a magical homemade jam you’ll be proud to share.
Whether you’re new to jam making or a seasoned pro looking for a twist, this guide will walk you through everything from gathering ingredients to storing your final product.
What is Elderberry Jam?
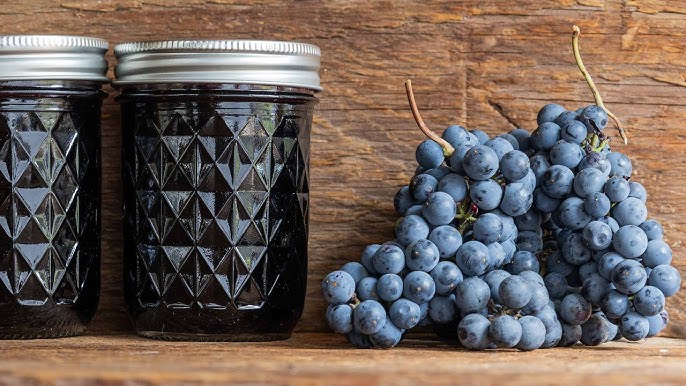
Elderberry jam is a sweet and slightly tart preserve made from the tiny, purple-black berries of the elder tree. These berries have been used for centuries in herbal remedies, wines, and yes—delicious jams! Known for their bold, earthy flavor, elderberries pack a unique punch that sets them apart from other fruits.
The taste? Imagine a blend between blackberries and grapes, with a hint of wild berry depth. When turned into jam, elderberries create a smooth, dark spread with rich flavor and a gorgeous color that looks as good as it tastes. It pairs well with toast, yogurt, cheeses, or even as a filling for pastries. Whether you harvest them yourself or buy frozen, elderberries transform into jam with just a few simple ingredients.
Health Benefits of Elderberries
Let’s talk about why elderberries are more than just tasty—they’re a powerhouse for your health. Packed with antioxidants, especially anthocyanins (the same compounds that give them their deep color), elderberries help neutralize free radicals in your body. That means less oxidative stress and a potential immune system boost.
Elderberries are most famous for their role in helping with cold and flu symptoms. Many people use elderberry syrup during flu season as a natural remedy. So when you turn elderberries into jam, you’re not just treating your taste buds—you’re also sneaking in a bit of immune support.
Other benefits include:
- High levels of Vitamin C and fiber
- Anti-inflammatory properties
- May support heart health
Just remember: raw elderberries, stems, and leaves contain toxins, so always cook them before consuming.
List of Ingredients You’ll Need
Let’s break down exactly what you need to whip up a batch of elderberry jam.
Basic Ingredients
- 4 cups of fresh or frozen elderberries
- 3 cups of granulated sugar
- 2 tablespoons of lemon juice
- 1/2 cup of water
These simple ingredients are the heart of this recipe. They work together to create that classic jam flavor and help the mixture thicken and set properly.
Optional Add-Ins
Want to personalize your jam? Try these optional ingredients:
- Pectin – Helps jam set faster, especially if your berries are low in natural pectin.
- Spices – A pinch of cinnamon or cloves can add warmth.
- Other fruits – Apples or blueberries add texture and help with thickening naturally.
Equipment You’ll Need
To make elderberry jam efficiently, having the right tools makes a big difference. Here’s your checklist:
- Large saucepan or stockpot
- Fine mesh strainer or cheesecloth
- Wooden spoon or spatula
- Sterilized canning jars with lids
- Jar funnel and ladle (for easy pouring)
- Plate or metal spoon (for doneness testing)
- Tongs or jar lifter (if canning)
Preparation is key, especially when dealing with hot liquids and sterilized jars. Lay everything out before you start to make your process smooth and safe.
Preparing the Elderberries
Harvesting or Selecting Elderberries
If you’re lucky enough to forage for your own elderberries, make sure to pick only the fully ripe, dark purple-black berries. They should fall off the stem easily. Green or red berries are unripe and unsafe to eat.
Buying instead? Many health food stores and online retailers offer frozen elderberries. Make sure they’re labeled as edible and cleaned.
Cleaning the Berries
This part is crucial—never skip it. Elderberries grow in clusters with stems, leaves, and sometimes small bugs. Use a fork to gently pull berries from stems over a bowl. Rinse them thoroughly in a colander under cold water.
Note: The stems, leaves, and unripe berries are toxic, so be diligent when cleaning.
Step-by-Step Guide to Making Elderberry Jam
Ready to transform those dark little berries into luscious jam? Follow these easy, detailed steps to get the perfect jar of elderberry goodness every time.
Step 1: Cook the Elderberries
Rinse ripe elderberries and remove stems. Place them in a pot with a small amount of water. Bring to a gentle boil and cook for 10–15 minutes, stirring occasionally, until the berries burst and release their juice. This softens the fruit and extracts maximum flavor.
Step 2: Strain the Mixture
Pour the cooked berries through a fine sieve or cheesecloth to remove seeds and skins. Press gently to extract as much liquid as possible. For an extra-smooth jam, strain twice and avoid forcing pulp through the sieve.
Step 3: Add Sugar and Lemon Juice
Measure the strained juice and return it to the pot. Add sugar—typically equal to the amount of juice, adjusting to taste. Stir in fresh lemon juice. Lemon juice is crucial because it balances sweetness and provides acidity needed for proper setting.
Step 4: Simmer and Thicken
Bring the mixture to a steady simmer over medium heat. Cook for 20–30 minutes, stirring often to prevent sticking. The jam will thicken as moisture evaporates and sugars concentrate.
Step 5: Optional – Add Pectin or Spices
If you prefer a firmer set, add commercial pectin according to package instructions. For flavor variations, add cinnamon, cloves, ginger, or vanilla during the simmer. Remove whole spices before jarring.
Step 6: Test Jam for Doneness
Use the spoon test: dip a spoon into the jam and let it cool briefly—if it coats the spoon and drips slowly, it’s ready. Alternatively, use the plate test by placing a drop on a chilled plate; it should wrinkle when pushed. The temperature method targets about 105°C (220°F).
Step 7: Jar the Jam
Sterilize jars and lids by boiling or using a hot oven. Carefully ladle hot jam into jars, leaving a little headspace. Wipe rims clean, seal, and let cool undisturbed.
Step 8: Canning (Optional)
For shelf stability, process sealed jars in a boiling water bath for 10 minutes. Cool completely and check seals before storing.
Storing Your Elderberry Jam
Proper storage ensures your elderberry jam stays fresh, delicious, and safe to eat for months to come. After all that hard work, you’ll want to make sure it lasts!
Canned Jam (Shelf-Stable)
If you used the water bath canning method, your jam can be safely stored at room temperature in a cool, dark place like a pantry or cupboard. Here are some key tips:
- Shelf life: 12–18 months unopened
- Best storage temperature: Below 75°F (24°C)
- After opening: Refrigerate and consume within 3–4 weeks
Refrigerated Jam (Uncanned)
If you skipped the canning process and simply poured your jam into jars:
- Store in the refrigerator immediately
- Use within 3–4 weeks for the best taste and safety
- Make sure the lid is sealed tightly every time after use
Freezing Elderberry Jam
Don’t want to can? No problem! Freezer jam is another great storage method.
- Use freezer-safe jars or containers
- Leave some space for expansion at the top (jam expands when frozen)
- Jam lasts up to 6–8 months in the freezer
- Thaw in the refrigerator before use
Label your jars with the date and flavor before storing. You’ll thank yourself later when you’re digging through your pantry or freezer looking for a tasty breakfast addition!
Serving Suggestions
Now for the fun part—eating your homemade elderberry jam! Its bold, slightly tangy flavor pairs beautifully with both sweet and savory dishes. Here are some mouthwatering ways to use your jam:
Breakfast Favorites
- Spread on toast, bagels, or English muffins
- Swirled into yogurt or oatmeal
- As a topping for pancakes, waffles, or French toast
- Inside crepes or pastries
Baking & Desserts
- Use as a filling for thumbprint cookies
- Swirl into cheesecake batter
- Layer between cake layers or inside cupcakes
- Dollop on ice cream or sorbet
Savory Pairings
- Serve with cheese boards (especially Brie, goat cheese, or sharp cheddar)
- Glaze for roasted meats like chicken, turkey, or pork
- Stir into vinaigrettes for a berry-infused salad dressing
- Combine with mustard for a gourmet sandwich spread
The flavor is so versatile, it can go from breakfast to dinner without missing a beat.
Troubleshooting Common Issues
Even if you follow every step, sometimes your jam doesn’t turn out quite right. Don’t worry—here’s how to fix common elderberry jam problems:
1. My Jam Didn’t Set
This can happen if:
- The mixture wasn’t cooked long enough
- The elderberries had low natural pectin
- Not enough sugar or lemon juice was used
Fix:
Return the jam to the pot, add a bit of pectin, and boil again for 5–10 minutes. Retest for doneness using the spoon or plate method.
2. My Jam is Too Thick
This usually means it was overcooked.
Fix:
Try warming the jam slightly and stirring in a bit of hot water or fruit juice to loosen it up.
3. It’s Too Sweet or Too Tart
If it’s too sweet:
- Add a splash of lemon juice to brighten it
- Mix it with a less sweet spread before serving
If it’s too tart:
- Serve it with sweet dishes to balance the flavors
- Add more sugar next time during the cooking phase
4. There’s Mold on Top
Unfortunately, mold is a sign that bacteria got into the jar—probably due to improper sealing or storing.
Fix:
Discard the jar. Don’t try to scrape off the mold. In the future, ensure jars are sterilized and sealed correctly.
FAQs about Elderberry Jam Recipe
1. Can I make elderberry jam without sugar?
Yes, you can use alternatives like honey, maple syrup, or natural sweeteners, but the texture and preservation time may change. Consider adding pectin to help it set, and store in the fridge.
2. Is elderberry jam safe for kids?
Absolutely! Once properly cooked, elderberries are safe and nutritious for children. Just ensure no raw parts of the plant are included.
3. How long does homemade elderberry jam last?
If canned and sealed properly, up to 18 months. Once opened, it should be refrigerated and used within 3–4 weeks.
4. Can I freeze elderberry jam?
Yes! Just make sure to use freezer-safe containers and leave space for expansion. Thaw in the fridge before using.
5. What’s the difference between elderberry syrup and jam?
Elderberry syrup is thinner and used more for medicinal purposes (like cold remedies), while jam is thicker, sweetened, and made for spreading on food.
Conclusion
Homemade elderberry jam isn’t just another sweet spread—it’s a celebration of flavor, health, and tradition. From picking and prepping the berries to watching your jam thicken on the stove, the entire process is deeply satisfying. Whether you’re making it for the family, for gifts, or just to try something new, elderberry jam offers a delightful change from the ordinary.
Now that you’ve got the full step-by-step process, the right ingredients, and all the tips you need, it’s your turn. Get in the kitchen, grab those berries, and create a jar of jam that’s as unique as it is delicious.
And remember—every spoonful tells a story.