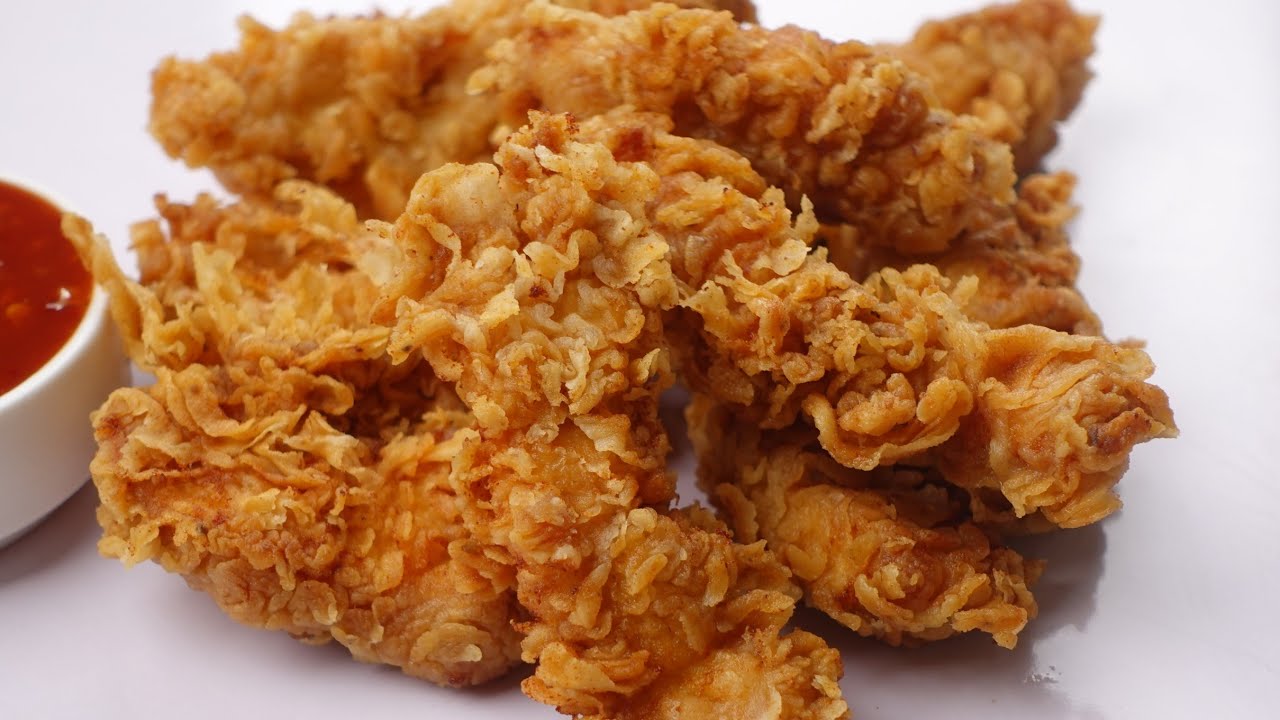
Crispy Chicken Strips Recipe: There’s something about crispy chicken strips that brings out the kid in all of us. Crunchy on the outside, tender and juicy on the inside—what’s not to love? Whether you’re planning a fun family dinner, a game-day snack, or just a comfort meal for yourself, this crispy chicken strips recipe has your back. Forget fast food or frozen options—these homemade strips are on another level.
This step-by-step guide will walk you through every detail, from choosing the right cut of chicken to mastering the perfect fry. We’ll also talk about marination, breading techniques, frying tips, and how to serve them like a pro. Let’s dive in and get your kitchen smelling absolutely mouthwatering!
Ingredients You’ll Need
Before jumping into the recipe, let’s break down all the ingredients you’ll need to make the best crispy chicken strips ever. Gathering everything in advance makes the cooking process much smoother.
Chicken
- 2 pounds boneless, skinless chicken breasts (or tenders)
Chicken breasts are ideal for this recipe because they cook evenly and stay juicy. You can also use chicken tenders if you want to skip the slicing step.
For the Marinade
- 2 cups buttermilk
- 1 teaspoon salt
- 1 teaspoon black pepper
- 1 teaspoon paprika
- ½ teaspoon garlic powder
Buttermilk is a game-changer—it helps tenderize the chicken while adding a mild tang. The spices in the marinade begin building the flavor from the inside out.
For the Breading
- 1½ cups all-purpose flour
- ½ cup cornstarch
- 1½ cups breadcrumbs (panko or regular)
The secret to that ultra-crispy exterior is the combination of flour, cornstarch, and breadcrumbs. Cornstarch makes the coating light and crisp, while breadcrumbs add extra crunch.
Seasoning Mix (for the breading)
- 1 teaspoon paprika
- 1 teaspoon garlic powder
- 1 teaspoon onion powder
- ½ teaspoon cayenne pepper (optional for spice)
- Salt and black pepper to taste
Don’t skip seasoning your breading! This step adds another layer of flavor.
For Frying
- Vegetable oil or canola oil
You’ll need enough to fill your skillet or fryer with 2-3 inches of oil.
Optional Dipping Sauces
- Ranch, BBQ, honey mustard, buffalo sauce, or anything you love.
Kitchen Tools You’ll Need
Before you get started, make sure you have the right tools:
- Sharp knife for slicing chicken
- Cutting board
- Mixing bowls (for marinade and breading)
- Tongs or forks for handling raw chicken
- Deep skillet or deep fryer
- Cooking thermometer (helps monitor oil temp)
- Wire rack or paper towels (for draining)
Having these ready will make the process smooth and safe, especially when frying.
Step-by-Step Guide to Make Crispy Chicken Strips
Let’s get to the good stuff! Here’s a detailed breakdown of how to make the crispiest chicken strips ever.
Step 1: Choose the Right Chicken
Boneless, skinless chicken breasts or chicken tenders work best because they cook evenly and stay tender. They’re easy to slice and perfect for achieving a consistent, crispy coating.
Step 2: Slice Into Even Strips
Cut the chicken into uniform strips, about the same width and length. Even sizing ensures all pieces cook at the same rate, preventing some from drying out while others remain undercooked.
Step 3: Marinate the Chicken
Marinate the chicken in buttermilk, seasoned yogurt, or a mix of milk and spices for at least 30 minutes. This step adds flavor and keeps the meat juicy while also helping the breading stick better.
Step 4: Prepare the Breading Station
Set up two bowls: one with seasoned flour and another with beaten eggs or buttermilk. This dry-and-wet setup creates layers that build texture and flavor.
Step 5: Double Dredging for Extra Crunch
Dip each strip into flour, then wet mixture, then back into flour. Press gently to help the coating adhere. This double dredge is the secret to extra crunch.
Step 6: Heat the Oil
Heat oil in a deep pan to 350°F (175°C). Proper temperature is crucial—too cool makes the chicken greasy, too hot burns the coating before the inside cooks.
Step 7: Fry the Chicken Strips
Fry in small batches for 4–6 minutes, turning once, until golden brown and fully cooked. The strips should float and sizzle steadily when done.
Step 8: Drain Properly for Crispiness
Remove chicken and drain on a wire rack or paper towels. Proper draining prevents sogginess and keeps the crust crisp.
Step 9: Serve Hot with Dipping Sauce
Serve immediately with sauces like honey mustard, ranch, or spicy mayo. Pair with fries, coleslaw, or a fresh salad for a complete meal.
Tips for the Best Crispy Chicken Strips
Let’s be real—nobody wants soggy or bland chicken strips. Here are some tried-and-true tips to make yours turn out crispy, flavorful, and unforgettable every single time.
1. Don’t Skip the Marinade
Marinating in buttermilk not only flavors the chicken but also tenderizes it. Even 30 minutes makes a difference, but overnight is ideal for juicy results.
2. Use Cornstarch in Your Flour Mixture
Adding cornstarch to the flour lightens the batter and gives that classic crisp you expect from restaurant chicken strips.
3. Double Dredge for Texture
Flour → egg → flour/breadcrumbs combo is the secret to extra crunch. Press the coating on firmly so it sticks and doesn’t fall off in the oil.
4. Use the Right Oil Temperature
Always heat your oil to 350°F (175°C) and maintain it. Too hot, and you’ll burn the outside; too cold, and the strips turn oily and limp. Use a thermometer for best results.
5. Let the Coating Rest Before Frying
After dredging, let the coated chicken strips sit for about 10–15 minutes. This helps the breading stick better and fry up crispy.
6. Drain on a Wire Rack
Skip the plate of soggy paper towels. A wire rack allows air to circulate around the chicken, keeping it crispy on all sides.
7. Serve Immediately
These are best eaten fresh and hot. If you’re making a big batch, keep them warm in the oven at low heat while frying the rest.
Bonus Tip: Spice It Up
Want spicy chicken strips? Add extra cayenne pepper or a touch of hot sauce to your marinade or flour mix. You can even dust them with chili powder after frying.
How to Make Baked or Air-Fried Chicken Strips
Looking for a healthier alternative to frying? No problem! You can still get that crispy texture using the oven or air fryer with a few simple adjustments.
Baked Chicken Strips
- Preheat your oven to 425°F (220°C).
- Place breaded chicken strips on a greased baking sheet or one lined with parchment paper.
- Lightly spray the tops with cooking spray or a little oil.
- Bake for 20–25 minutes, flipping halfway through, until golden and cooked through.
While they may not be as deep-fried crunchy, baked strips are still crispy and satisfying—plus you’re saving on calories and oil.
Air-Fried Chicken Strips
- Preheat the air fryer to 375°F (190°C).
- Place chicken strips in the basket in a single layer—don’t overcrowd.
- Spray lightly with cooking spray.
- Cook for 12–15 minutes, flipping halfway through, until crispy and fully cooked.
The air fryer is an excellent tool for quick, healthier meals with less mess. And yes—these strips still come out golden and delicious!
Storing and Reheating Chicken Strips
Made too many? (Lucky you!) Here’s how to store and reheat them without sacrificing crispiness.
Storing Leftovers
- Let strips cool completely.
- Store in an airtight container in the fridge for up to 3–4 days.
- For longer storage, freeze them in a zip-top bag with parchment paper between layers (so they don’t stick). They’ll last up to 2 months frozen.
Reheating Tips
- Oven: Preheat to 375°F (190°C) and bake for 10–15 minutes.
- Air fryer: 5–7 minutes at 375°F (190°C).
- Avoid microwaving—this makes them soggy!
What to Serve with Chicken Strips
Chicken strips go with just about everything, but here are some amazing pairing ideas to round out your meal:
Classic Sides
- French fries or curly fries
- Mashed potatoes
- Mac and cheese
- Coleslaw
- Cornbread or biscuits
Healthier Sides
- Mixed green salad
- Roasted veggies
- Sweet potato wedges
- Brown rice or quinoa
Fun Combos
- Serve in a wrap or sandwich
- Toss in buffalo sauce for spicy bites
- Add them to a loaded salad for extra protein
Drinks like lemonade, iced tea, or even a fizzy soda pair perfectly. For dessert? Try cookies, brownies, or something fruity to balance the meal.
Nutritional Information (Per Serving – Approximate)
| Nutrient | Amount |
|---|---|
| Calories | 380–450 kcal |
| Protein | 28–32g |
| Fat | 18–22g |
| Carbohydrates | 25–30g |
| Fiber | 1–2g |
| Sodium | 600–800mg |
Note: Values vary based on ingredients and cooking method.
FAQs about Crispy Chicken Strips Recipe
1. Can I freeze chicken strips before or after frying?
Yes! You can freeze breaded but uncooked strips for up to 2 months. Lay them flat on a tray first, freeze, then transfer to a bag. Fried leftovers can also be frozen, just reheat in the oven or air fryer for best results.
2. Can I use chicken thighs instead of breasts?
Absolutely. Thighs are juicier and more flavorful, though slightly fattier. Just make sure they’re boneless and cut into strips.
3. How do I make spicy chicken strips?
Add cayenne pepper or hot sauce to your marinade and flour mix. You can also dust the cooked strips with chili powder or drizzle with buffalo sauce.
4. What oil is best for frying chicken strips?
Neutral oils like vegetable, canola, or peanut oil are best because they have high smoke points and don’t affect the flavor.
5. Can I use gluten-free flour or breadcrumbs?
Yes! Substitute with gluten-free all-purpose flour and gluten-free panko. The results are still crispy and delicious.
Conclusion
Crispy chicken strips are the ultimate comfort food—golden, crunchy, juicy, and packed with flavor. With this step-by-step guide, you’ve got everything you need to make restaurant-style chicken strips right at home. From the secret buttermilk marinade to the double dredge technique, you’re guaranteed to wow your taste buds (and anyone you share with).
And hey—whether you deep-fry, bake, or air fry, these strips never disappoint. So next time that crispy craving hits, skip the takeout and whip up a batch yourself.
Give it a try, experiment with flavors, and make it your own!


