Corn Relish Recipe: Ever bitten into a burger and thought, “This needs something extra”? That “something” might just be corn relish. It’s sweet, tangy, a little crunchy, and adds a splash of color and flavor that transforms ordinary dishes into crowd-pleasers. Corn relish is a beloved condiment in many households, known for its vibrant taste and versatility. It can elevate a plain hot dog, bring freshness to tacos, or add a sweet bite to grilled meats.
So, what exactly is corn relish? It’s a combination of corn kernels and chopped vegetables, usually cooked with vinegar, sugar, and spices. The result is a bright, slightly pickled relish that’s packed with texture and flavor. Think of it as the cousin to salsa but more mellow and slightly sweeter.
This guide is perfect whether you’re making your first jar or looking to upgrade grandma’s old-school recipe. Let’s dive into everything you need to know about making the best corn relish from scratch.
History of Corn Relish
Corn relish isn’t a new thing—it’s been around for generations. Traditionally, it originated in the Southern United States, where preserving vegetables for winter was a must. Back before refrigeration, folks relied on vinegar, sugar, and spices to keep their harvests edible throughout the year.
The beauty of corn relish is in its simplicity and adaptability. Families added what they had: bell peppers, onions, mustard seeds, and even hot peppers for some kick. Over time, this humble preserve made its way to dinner tables across the country and even beyond, becoming a staple at cookouts, barbecues, and potlucks.
Today, it’s more than a preservation technique—it’s a flavor boost, a way to keep summer alive in a jar. Homemade corn relish has had a revival thanks to the farm-to-table movement and home canning trends. And lucky for us, it’s never been easier to make.
Health Benefits of Corn Relish
Sure, corn relish is tasty—but it also has its perks. While it’s not a superfood, it does offer some nutritional value, especially when made with fresh, whole ingredients.
Here’s a breakdown of the health benefits:
- Rich in fiber – Thanks to the corn and vegetables, this relish supports healthy digestion.
- Low in fat – Unless you’re eating it by the bucket, it won’t impact your fat intake much.
- Full of antioxidants – Ingredients like bell peppers, onions, and corn are full of good-for-you compounds.
- Vitamins galore – Corn relish contains Vitamin C, A, and several B-complex vitamins from the veggies.
- Customizable for dietary needs – You can reduce sugar, go low-sodium, or make it organic.
In moderation, corn relish is a flavor-packed way to get more vegetables into your meals—without sacrificing taste.
Types of Corn Used in Relish
You might be wondering—should I use fresh, frozen, or canned corn? Each has its place depending on what’s available and how much time you have.
Fresh Corn
- Best flavor and texture.
- Use when corn is in season (late summer).
- Requires husking and boiling or grilling.
Frozen Corn
- Convenient and still flavorful.
- Can be added directly to the pot—no need to thaw.
- Great for off-season relish making.
Canned Corn
- Easiest to use but slightly softer in texture.
- Drain well before using to avoid a watery mixture.
- Good for quick batches or beginners.
If you want that crunchy, just-picked flavor, go for fresh. If you’re in a hurry or cooking out of season, frozen or canned work just fine.
Best Time to Make Corn Relish
The ideal time? Late summer to early fall—right when corn is at its peak. Farmer’s markets are full, produce is cheaper, and the flavors are unbeatable. That’s the season for big-batch canning, too.
But don’t let the calendar stop you. Thanks to frozen and canned corn, you can whip up a jar of corn relish year-round. It’s one of those rare recipes that doesn’t rely too heavily on the season—just on good-quality ingredients.
List of Ingredients You’ll Need
Here’s your go-to grocery list for making a classic, flavorful batch of corn relish. Keep in mind, quantities will vary depending on how much you’re making, but this list covers the essentials:
Vegetables
- Corn kernels – 4 cups (fresh, frozen, or canned)
- Red bell pepper – 1 cup, finely chopped
- Green bell pepper – 1 cup, finely chopped
- Celery – 1 cup, chopped
- Onion – 1 cup, diced (white or yellow)
Spices & Seasonings
- Salt – 2 tablespoons (non-iodized for canning)
- Sugar – 3/4 to 1 cup (adjust to taste)
- Mustard seeds – 1 tablespoon
- Celery seeds – 1 teaspoon
- Turmeric – 1/2 teaspoon (optional for color)
Liquids
- White vinegar (5% acidity) – 2 cups
- Water – 1/2 cup
Optional Add-Ins:
- Chopped jalapeños (for heat)
- Fresh herbs like dill or cilantro
- A clove or two of garlic (minced)
Get everything chopped and measured before you start cooking—it makes the process way easier and smoother.
Tools & Equipment Required
Making corn relish doesn’t require fancy gadgets, but having the right tools can save you a lot of stress.
- Large pot or saucepan
- Sharp knife and cutting board
- Measuring cups and spoons
- Stirring spoon (preferably wooden)
- Clean jars with lids (for storage or canning)
- Canning funnel (if preserving)
- Ladle
- Tongs or jar lifter (if canning)
- Towels or paper towels (for cleanup)
Optional but helpful:
- Food processor (for quick chopping)
- Wide-mouth jars for easier filling
Step-by-Step Guide to Making Corn Relish
Ready to make your own batch of corn relish? Follow these steps carefully and you’ll end up with jars full of sweet-tangy goodness.
Step 1: Prepping Your Ingredients
Start by gathering and preparing all your ingredients. Shuck fresh corn and cut the kernels from the cob, or drain canned corn if using. Finely chop onions, bell peppers, and any hot peppers for heat. Measure out vinegar, sugar, salt, and spices so everything is ready to go.
Step 2: Cooking the Corn Mixture
In a large saucepan, combine the corn, chopped vegetables, vinegar, sugar, and seasonings. Stir well and bring the mixture to a gentle boil over medium heat. Cooking releases the natural sweetness of the corn and blends the flavors.
Step 3: Simmering to Perfection
Reduce the heat and let the mixture simmer, stirring occasionally. Simmer until the vegetables are tender and the liquid slightly thickens. This step allows the relish to develop its sweet-and-tangy balance without becoming mushy.
Step 4: Cooling and Storing
Remove the relish from heat and allow it to cool completely. Once cooled, transfer to airtight containers or jars. Store in the refrigerator for short-term use or process in sterilized jars if canning for longer storage.
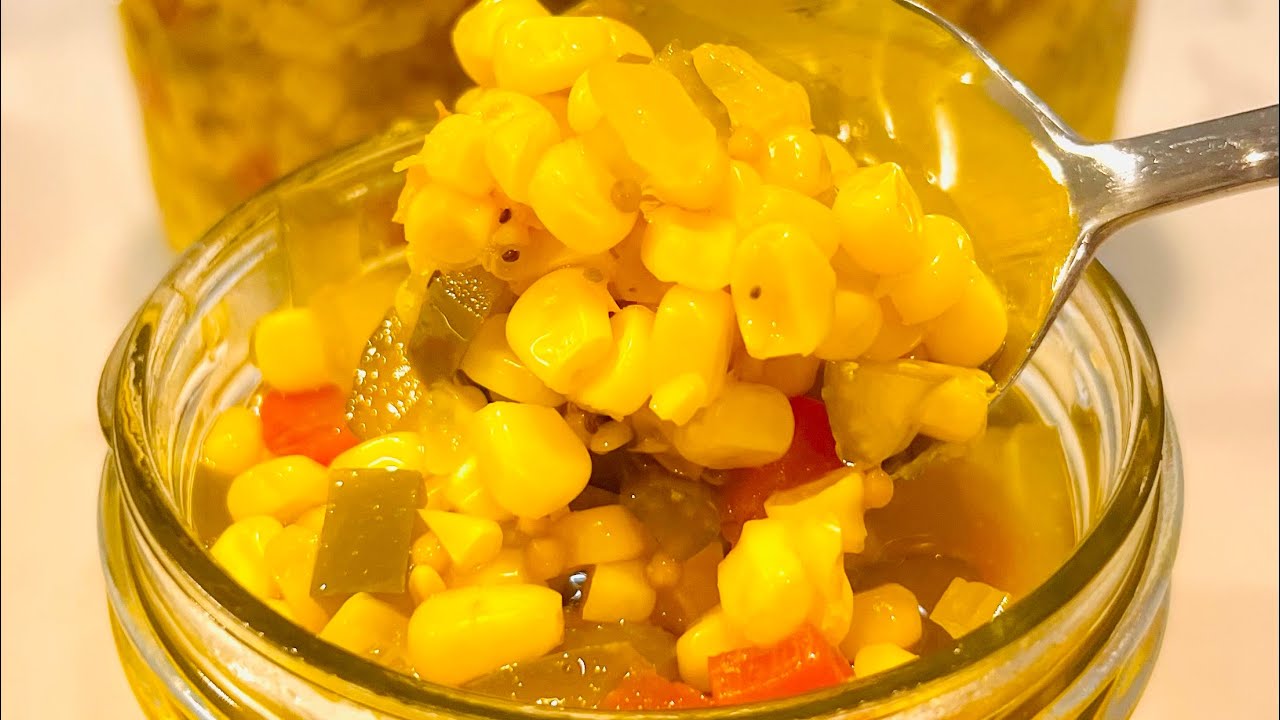
Bright, sweet, and tangy—corn relish is the perfect topping for grilled meats, sandwiches, and summer dishes 🌽✨
Tips for Perfect Corn Relish
Getting the perfect batch of corn relish is part science, part art. Here are some pro tips to level up your game:
- Use fresh, firm vegetables: Avoid wilted or soft produce—it affects texture and flavor.
- Balance the flavors: Taste your mixture while cooking. Too sweet? Add vinegar. Too sour? Add a touch more sugar.
- Spice wisely: Don’t overdo the spices on your first batch. Start light and add more in future batches once you know what you like.
- Cook low and slow: Avoid high heat to prevent overcooking your veggies into mush.
- Don’t skip the seeds: Mustard and celery seeds are what give relish that classic flavor profile.
- Use non-reactive cookware: Stainless steel or enamel pots are best since vinegar can react with aluminum.
Once you master your base recipe, you can experiment with different veggies, spices, and even fruit additions like pineapple or mango for a tropical twist.
How to Store Corn Relish
Corn relish stores beautifully—whether you’re keeping it in the fridge for quick use or preserving it for later.
Refrigeration
If you’re planning to eat your relish within a few weeks, simply seal the jars after cooling and pop them in the fridge. It will stay fresh for about 3–4 weeks.
Freezing
You can freeze corn relish in airtight containers or freezer-safe jars. Just leave enough space at the top of the jar for expansion. It keeps well for up to 6 months in the freezer. Thaw in the fridge overnight before using.
Canning for Long-Term Storage
To make your relish shelf-stable:
- Sterilize your jars and lids in boiling water.
- Fill the jars with hot relish, leaving 1/2 inch of headspace.
- Wipe rims, apply lids, and seal.
- Process in a boiling water bath for 15 minutes.
- Let cool and check that the lids sealed (they should not flex up and down when pressed).
Properly canned corn relish can last 12 months or more in a cool, dark pantry.
Ways to Use Corn Relish
This stuff isn’t just for BBQs (though it’s a hit there). Corn relish is a surprisingly versatile condiment that can enhance a ton of dishes.
As a Side Dish
- Serve alongside grilled meats like chicken, steak, or pork.
- Spoon next to roasted vegetables for extra flavor.
As a Topping
- Load it onto burgers, hot dogs, or sausages.
- Spoon over tacos or burrito bowls.
- Add to grilled cheese or sandwiches for a sweet crunch.
In Recipes
- Stir into pasta or potato salad for extra zing.
- Mix with beans and avocado for a fresh summer salad.
- Top off baked potatoes or rice bowls.
Once you start using it, you’ll find excuses to add it to almost everything. It’s that addictive!
Common Mistakes to Avoid
Even simple recipes can go sideways. Here are a few mistakes to avoid with corn relish:
- Using overly ripe corn – It can be too starchy or soft.
- Not tasting as you go – You’ll miss the chance to balance flavors.
- Overcooking – Mushy veggies ruin the texture.
- Skipping sterilization when canning – You risk spoilage.
- Improper storage – Always use airtight containers and refrigerate if not canning.
Avoid these pitfalls, and you’ll end up with a batch you can be proud of.
Customizing Your Corn Relish
The best part of homemade recipes? You’re the boss. Here’s how to tailor your corn relish to your own flavor preferences:
Adding Heat
- Toss in chopped jalapeños or serrano peppers.
- Add a pinch of cayenne or red pepper flakes.
- Use hot paprika instead of sweet.
Making It Sweeter or Tangier
- Adjust sugar and vinegar ratios slightly.
- Use apple cider vinegar for a fruity tang.
- Swap some sugar for honey or maple syrup for depth.
You can even add fruit (pineapple, mango) or herbs (cilantro, parsley) for a unique twist. Play around with small batches until you find your signature version.
FAQs about Corn Relish Recipe
1. Can I make corn relish without sugar?
Yes, you can reduce or substitute the sugar with alternatives like honey or stevia. Just note that the texture and taste may change slightly.
2. Is corn relish gluten-free?
Yes! Most homemade versions are naturally gluten-free. Just be sure to check labels if using processed ingredients.
3. How long does homemade corn relish last?
If canned properly, it lasts up to a year in the pantry. In the fridge, it stays fresh for 3–4 weeks.
4. Can I freeze corn relish?
Absolutely. Just use airtight containers and leave space at the top for expansion. It’ll keep for about 6 months.
5. What can I serve with corn relish?
Use it on burgers, hot dogs, grilled meats, tacos, salads, or even baked potatoes. It adds color, crunch, and a ton of flavor.
Conclusion
Corn relish isn’t just a throwback condiment—it’s a flavor-packed, colorful addition to your kitchen that turns everyday meals into something special. Whether you’re preserving the summer harvest or just looking to brighten up a sandwich, this step-by-step guide gives you everything you need to create a batch of this classic relish.
Homemade always tastes better, and once you try this corn relish recipe, you’ll never go back to store-bought jars again. So grab some fresh veggies, a big pot, and get cooking. Your taste buds (and your guests) will thank you.


