Cookies and Cream Ice Cream Recipe: If you’ve ever dreamed of making your own creamy, dreamy cookies and cream ice cream at home, you’re in the right place.
This guide breaks everything down for you—step by step—so you can whip up a batch of this classic treat with confidence, no matter your skill level. Whether you have an ice cream maker or not, we’ve got you covered.
So grab your apron, and let’s churn up some fun!
Why You’ll Love This Recipe
Cookies and cream ice cream is one of those timeless flavors that just hits the sweet spot every time. What makes this recipe a keeper? First off, it’s easy. No fancy tools needed, no cooking or eggs—just a few simple ingredients and a little patience. It’s also super customizable. Want extra cookies? Go for it. Like it extra creamy? We’ll show you how. Whether you’re serving it on a hot summer day or just want to impress your friends, this recipe delivers that rich, crunchy, creamy combo that you just can’t get enough of.
What Is Cookies and Cream Ice Cream?
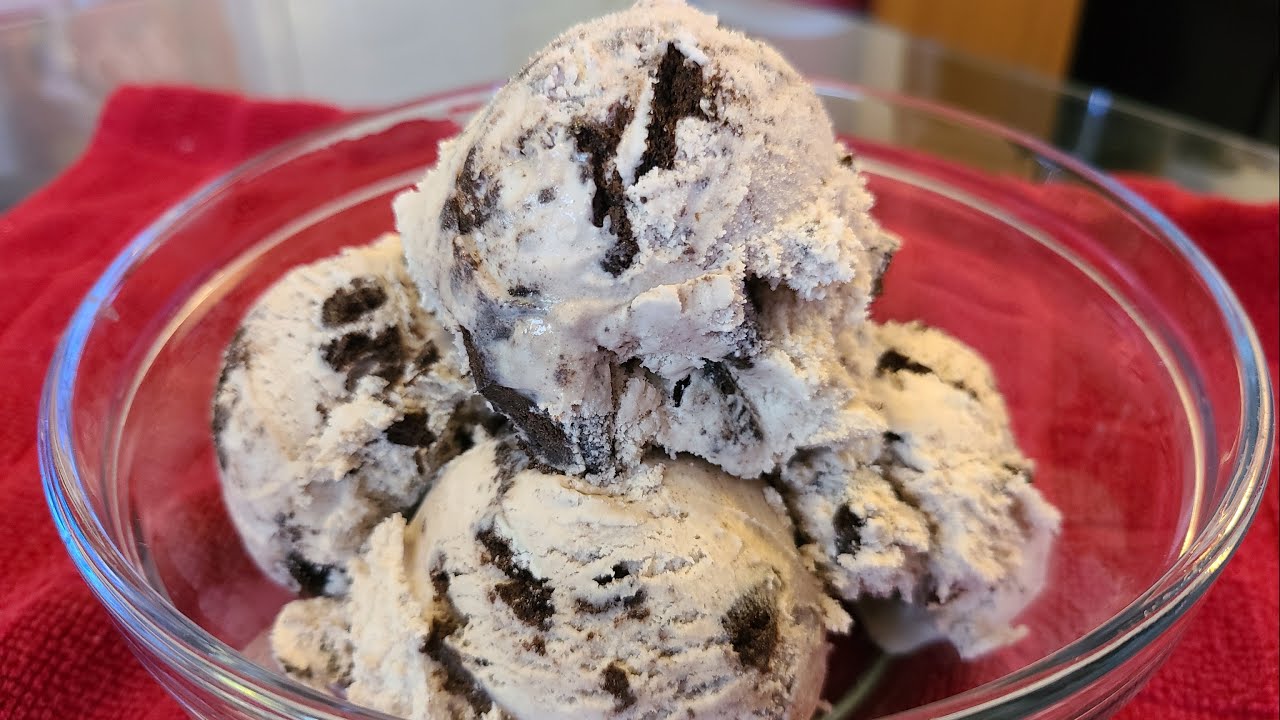
Cookies and cream ice cream is a blend of sweet cream or vanilla ice cream mixed with crushed chocolate sandwich cookies (usually Oreos). The result? A smooth, rich, and velvety treat with delightful cookie bits in every bite. The balance of creamy base and crunchy cookies makes it a fan favorite for kids and adults alike. It’s often considered the best of both worlds—classic vanilla flavor with the bonus of chocolatey crunch and flavor bursts throughout.
The Origin of Cookies and Cream Ice Cream
Believe it or not, cookies and cream ice cream is a relatively new invention compared to classics like vanilla and chocolate. It first made its appearance in the late 1970s or early ’80s. Multiple brands claim to have created the first version, but it became widely popular after major ice cream producers added it to their lineups. The flavor gained fame because it brought together America’s favorite cookie and ice cream—how could it not be a hit?
List of Ingredients You’ll Need
Basic Ingredients
To make a basic batch of cookies and cream ice cream (about 1.5 quarts), here’s what you’ll need:
- 2 cups heavy whipping cream (cold)
- 1 can (14 oz) sweetened condensed milk
- 2 teaspoons pure vanilla extract
- 15-20 Oreo cookies (or any chocolate sandwich cookies)
Optional Add-ins for Extra Flavor
Want to jazz it up a bit? Here are a few optional ingredients:
- A pinch of salt (to enhance flavor)
- ½ cup mini chocolate chips
- ¼ cup crushed chocolate fudge
- 2 tablespoons cocoa powder (for a chocolate base)
These extras can add texture, richness, or a fun twist on the original recipe.
Kitchen Tools and Equipment
Before diving into the recipe, make sure you have these tools ready:
- Large mixing bowl
- Hand mixer or stand mixer (or a whisk if you want an arm workout!)
- Rubber spatula
- Measuring cups and spoons
- Airtight freezer-safe container
- Rolling pin or food processor (to crush cookies)
Optional: Ice cream scoop for serving and parchment paper to prevent freezer burn.
How to Choose the Best Cookies
The star of cookies and cream ice cream? The cookies, of course! While Oreos are the go-to, don’t be afraid to experiment. Double-stuffed cookies make the ice cream richer and more indulgent. You can also try flavored sandwich cookies—like mint, peanut butter, or golden vanilla—for fun variations. Just make sure they’re crunchy enough to hold up during freezing. Avoid soft cookies, which can turn mushy.
Step-by-Step Guide to Make Cookies and Cream Ice Cream
Step 1: Chill the Mixing Bowl and Whisk
Why chill the bowl and whisk? Cold tools help the cream whip faster and better, which means a fluffier ice cream base. Just pop your bowl and whisk into the freezer for about 15-20 minutes before you start. Trust us—it makes a difference.
Step 2: Crush the Cookies
Now the fun part! Place your cookies in a ziplock bag and crush them with a rolling pin. Don’t turn them into dust—you want chunky bits for texture. Aim for a mix of small crumbs and larger pieces. Alternatively, you can pulse them a few times in a food processor. But again—don’t overdo it.
Step 3: Prepare the Ice Cream Base
In your chilled mixing bowl, pour in the cold heavy cream. Whip it using a hand or stand mixer on medium-high speed until stiff peaks form. This usually takes about 3–5 minutes. Be careful not to overwhip—you’re going for fluffy, not buttery.
Step 4: Whip the Cream
This step is key to a creamy, airy texture. Whip the cream until it holds peaks. You’ll know you’re there when you can lift the whisk and the cream stands straight up without drooping. It should look smooth and cloud-like.
Step 5: Fold in Sweetened Condensed Milk
Once your cream is whipped, gently fold in the sweetened condensed milk and vanilla extract using a spatula. Don’t stir aggressively—you’ll lose the air you worked so hard to whip in. Fold slowly until fully combined.
Step 6: Add Crushed Cookies
Now toss in your cookie chunks and fold them into the base. Be generous here—this is cookies and cream after all. Save a few for topping if you like that classic speckled look on top.
Step 7: Pour into a Container and Freeze
Scoop the mixture into a freezer-safe container. Smooth out the top with a spatula, then sprinkle the reserved cookie bits over the top. Cover the container tightly with a lid or plastic wrap.
Step 8: Freeze for 6+ Hours or Overnight
Patience pays off! Let your ice cream set in the freezer for at least 6 hours, but overnight is best. The longer it chills, the firmer and scoopable it becomes. Once ready, grab a scoop and enjoy your homemade masterpiece.
How to Make It Without an Ice Cream Maker
No ice cream maker? No problem! This recipe is intentionally designed to be no-churn, which means you can make it with just a few kitchen tools. Here’s how it works:
Instead of relying on an ice cream maker to churn and aerate the mixture, we use whipped cream as the base. When you whip heavy cream until it forms stiff peaks, you’re incorporating a lot of air—this gives the ice cream that light, creamy texture. The sweetened condensed milk adds the sweetness and smooth consistency that traditional churned ice cream would normally get from a cooked custard base.
All you do is whip, fold, and freeze. That’s it. The hardest part is waiting for it to set up in the freezer, but trust us—it’s worth the wait. Plus, you’ll impress anyone who tries it by saying, “Yep, I made it myself. No machine needed.”
Tips for the Creamiest Ice Cream
Getting that ultra-creamy, dreamy texture isn’t just luck—it’s about technique. Here are some pro tips to make your cookies and cream ice cream taste just like the premium stuff:
- Use full-fat ingredients. Low-fat cream or milk won’t whip properly and can lead to icy results.
- Don’t overmix. Over-stirring your whipped cream or the final mix can break down the air bubbles that create the fluffy texture.
- Chill everything. Cold tools and ingredients whip better and faster. Keep your cream cold until the moment you use it.
- Add a pinch of salt. This enhances the sweetness and flavor complexity without making it salty.
- Let it freeze fully. Rushing the freezing process can lead to a softer texture and uneven firmness. Give it a full 6–8 hours, or even better, overnight.
Following these little tips can take your homemade ice cream from good to whoa, you made this? level.
How to Store Your Homemade Ice Cream
Proper storage matters. If your ice cream isn’t stored well, it can develop ice crystals, lose its creaminess, and even absorb weird freezer smells (nobody wants garlic-scented cookies and cream). Here’s how to keep it perfect:
- Use an airtight container. A shallow, flat container is best because it helps the ice cream freeze evenly and makes scooping easier.
- Cover with parchment paper. Press a layer of parchment directly on the surface before sealing the container. This prevents freezer burn and keeps the top smooth.
- Store in the back of the freezer. The back is usually the coldest part and has the least temperature fluctuation.
- Consume within 2–3 weeks. While it may last longer, the texture and flavor are at their best within this window.
Creative Variations of Cookies and Cream Ice Cream
Once you master the classic version, why stop there? Here are some fun twists to take your cookies and cream ice cream to the next level:
1. Mint Cookies and Cream
Add a few drops of peppermint extract and use mint chocolate sandwich cookies for a refreshing spin.
2. Peanut Butter Swirl
Warm up a bit of peanut butter and swirl it into the mix before freezing. Add peanut butter-filled cookies for double the fun.
3. Chocolate Overload
Add cocoa powder to the whipped cream base for a chocolate ice cream base, then mix in crushed cookies and chocolate chips.
4. Strawberry Cookies and Cream
Mix in chopped strawberries or a strawberry jam swirl for a fruity twist that pairs surprisingly well with cookies.
5. Salted Caramel Crunch
Drizzle in caramel sauce and a pinch of flaky sea salt. The sweet-salty combo makes every bite extra indulgent.
The possibilities are endless. Once you’ve nailed the base, you can let your creativity run wild!
Common Mistakes to Avoid
Even simple recipes have their pitfalls. Here are a few things to watch out for when making cookies and cream ice cream:
- Using warm ingredients. Room temperature cream won’t whip well. Everything should be as cold as possible.
- Over-whipping the cream. This can turn it grainy or even into butter. Stop once it forms stiff peaks.
- Over-crushing the cookies. You want some chunkiness, not cookie dust. Too fine, and they’ll just disappear into the cream.
- Freezing too little. Impatient? We get it—but 2–3 hours just won’t cut it. Give it a full freeze to avoid a slushy texture.
- Not sealing it tightly. Exposure to air = freezer burn. Seal it well and use parchment paper if possible.
Avoiding these mistakes will save you from a disappointing batch and make sure you end up with a dessert worth sharing (or keeping all to yourself—no judgment here!).
Serving Suggestions
Now that you’ve got your creamy masterpiece ready, let’s talk about how to serve it up in style. Sure, a bowl and a spoon work fine, but why not level it up?
- Classic Cone or Waffle Bowl – Let’s be real: everything tastes better in a cone.
- Ice Cream Sandwiches – Scoop between two cookies and freeze for a handheld treat.
- Milkshake – Blend with a little milk for the ultimate cookies and cream milkshake.
- Ice Cream Cake – Layer between brownies or cake slices and freeze for a killer dessert.
- Toppings Bar – Add chocolate syrup, whipped cream, sprinkles, or more crushed cookies.
Get creative and make it a whole dessert experience.
FAQs about Cookies and Cream Ice Cream Recipe
1. Can I use low-fat cream instead of heavy cream?
Not recommended. Heavy cream is essential for creating the thick, fluffy texture. Low-fat options won’t whip well and may result in icy ice cream.
2. How long does homemade cookies and cream ice cream last?
If stored properly in an airtight container, it should last 2–3 weeks in the freezer. After that, it may develop ice crystals and lose its smooth texture.
3. Can I make this ice cream vegan?
Yes! Use coconut cream in place of heavy cream and a plant-based condensed milk alternative. Also, use vegan sandwich cookies.
4. Why did my ice cream turn icy?
This can happen if the cream wasn’t whipped enough, ingredients were too warm, or the container wasn’t sealed properly. Always use cold tools and freeze in a well-sealed container.
5. Do I need to remove the cream filling from the cookies?
Nope! The filling adds extra flavor and sweetness to the mix. Keep it in for that classic cookies and cream taste.
Conclusion
Making cookies and cream ice cream at home is so much easier than it sounds—and so much more satisfying. With just a few simple ingredients and some chill time, you can create a creamy, dreamy, cookie-packed treat that rivals any store-bought version. Plus, you get to control the ingredients, adjust the sweetness, and toss in as many cookies as your heart desires. Whether you’re a total beginner or a kitchen pro, this step-by-step guide will have you scooping out your new favorite dessert in no time. So next time you’re craving something sweet, skip the store and make your own. You’ll be amazed at how delicious homemade can be.


