Chocoflan Recipe: If you’ve ever wished for a dessert that combines the rich decadence of chocolate cake with the silky sweetness of flan, chocoflan is your answer. This stunning treat, often called the “Impossible Cake,” has a surprising twist: despite the layers going in one order, they switch places during baking like some kind of dessert magic trick.
Think about it—a layer of chocolate cake batter, topped with flan mixture, and then baked, only for the flan to somehow end up on top after it cools and is flipped out of the pan. That’s not just dessert; that’s culinary alchemy. But don’t worry, it’s not actually “impossible” to make. In fact, with the right steps and a little patience, you can whip up your own chocoflan masterpiece right in your kitchen.
Whether you’re making it for a birthday, family gathering, or just because you want something special to impress your friends (and yourself), this recipe guide will walk you through every step of the process. Let’s start by learning where this magical dessert comes from.
History and Origin of Chocoflan
Chocoflan traces its origins back to Mexico, where flan itself is a deeply loved dessert. The combination of flan with chocolate cake is a relatively modern twist but has become a staple in Mexican-American households and Latin kitchens around the world. The name “chocoflan” speaks for itself—chocolate plus flan—and reflects the fusion of two distinct dessert cultures.
In Mexican celebrations like birthdays, Día de los Muertos, and holidays, chocoflan often makes an appearance as a show-stopping dessert. It’s also gained popularity thanks to its dramatic appearance and unexpected layer switch. No matter how many times you make it, the moment you flip it out of the pan and see those layers perfectly reversed never gets old.
The dessert has also become popular in bakeries and restaurants across the U.S., especially in areas with strong Latin communities. It’s proof that great food knows no borders.
What Makes Chocoflan So Unique?
Let’s be honest—there are tons of desserts out there. But chocoflan stands out not just for its flavor, but for its unexpected process. It combines two desserts into one masterpiece and surprises everyone by defying baking logic.
The most fascinating part? The layer switch. You pour the chocolate cake batter first, then the flan. Normally, you’d expect the denser flan to stay at the bottom, right? Wrong. During baking, the flan mixture sinks, pushing the chocolate cake batter to the top. When you invert the pan after baking, the flan is perfectly sitting on top, smooth and golden, while the chocolate cake forms a soft base.
Flavor-wise, it’s rich and creamy, sweet but not overly sugary. The chocolate layer adds depth and contrast to the silky custard. Together, they balance each other out perfectly. Plus, a drizzle of caramel sauce takes it to the next level.
List of Ingredients You’ll Need
Before we get started with the actual steps, let’s gather everything you’ll need. Prep your kitchen like a pro so nothing slows you down.
For the Caramel Layer:
- 1/2 cup sugar (for homemade caramel) or 1/2 cup store-bought caramel sauce
For the Chocolate Cake Layer:
- 1 cup all-purpose flour
- 1/2 cup unsweetened cocoa powder
- 1 tsp baking soda
- 1/2 tsp salt
- 1/2 cup unsalted butter (room temperature)
- 1 cup granulated sugar
- 2 large eggs
- 1 tsp vanilla extract
- 3/4 cup buttermilk
Optional shortcut: Use a boxed chocolate cake mix instead. Follow package instructions but only prepare half the batter.
For the Flan Layer:
- 1 can (12 oz) evaporated milk
- 1 can (14 oz) sweetened condensed milk
- 4 large eggs
- 1 tbsp vanilla extract
- 4 oz cream cheese (optional for a creamier flan)
Tools and Equipment:
- 12-cup Bundt pan
- Large roasting pan (for the water bath)
- Mixing bowls
- Blender (for flan)
- Whisk or electric mixer
- Aluminum foil
- Non-stick spray
Once you’ve got everything ready, let’s get that oven warmed up and start baking magic.
Before You Begin: Kitchen Prep Tips
Proper prep makes a huge difference with chocoflan. This isn’t the kind of dessert where you can wing it. So before you even touch your ingredients, take a few minutes to prep your tools and workspace.
Preheat the Oven:
Start by preheating your oven to 350°F (175°C). Since chocoflan uses a water bath, the oven needs to be hot and consistent to cook both layers evenly.
Prepare the Bundt Pan:
Spray the inside of the Bundt pan generously with non-stick spray. Get every nook and cranny to prevent sticking. Then, pour in the caramel sauce (either homemade or store-bought) to coat the bottom evenly.
If you’re making your own caramel, melt 1/2 cup sugar in a saucepan over medium heat until it turns golden brown. Quickly pour it into the pan before it hardens.
Set Up the Water Bath:
Place your Bundt pan inside a larger roasting pan. Once the batter and flan are assembled (we’ll get to that in the next step), you’ll pour hot water into the outer pan to create a gentle steam that cooks the flan slowly and evenly. This technique prevents curdling and keeps everything silky smooth.
Step-by-Step Guide: How to Make Chocoflan
Now that your ingredients are gathered and your tools are prepped, let’s get baking! This part might seem like a lot, but follow it step by step and you’ll be amazed at how easy it actually is.
Step 1: Preparing the Caramel Sauce
Begin by making the caramel. Heat sugar in a saucepan over medium heat, stirring gently until it melts and turns a deep amber color. Work carefully, as caramel gets very hot. Once smooth, immediately pour the caramel into a bundt or flan pan, tilting the pan to coat the bottom evenly. Set aside to harden.
Step 2: Mixing and Pouring the Chocolate Cake Batter
Prepare the chocolate cake batter by mixing flour, cocoa powder, sugar, baking powder, eggs, oil, milk, and vanilla until smooth. Pour the batter gently over the hardened caramel layer. Spread lightly without mixing into the caramel.
Step 3: Making the Flan Mixture
In a blender, combine eggs, sweetened condensed milk, evaporated milk, and vanilla extract. Blend until smooth and well combined. The mixture should be silky and pourable.
Step 4: Assembling Everything in the Pan
Slowly pour the flan mixture over the chocolate cake batter. Don’t worry if it seems backward—the layers will magically switch during baking, with flan rising to the top and cake settling at the bottom.
Step 5: Creating the Water Bath and Baking
Place the pan into a larger baking dish and add hot water halfway up the sides to create a water bath. Bake in a preheated oven until set. Once done, cool completely, then refrigerate for several hours before unmolding.
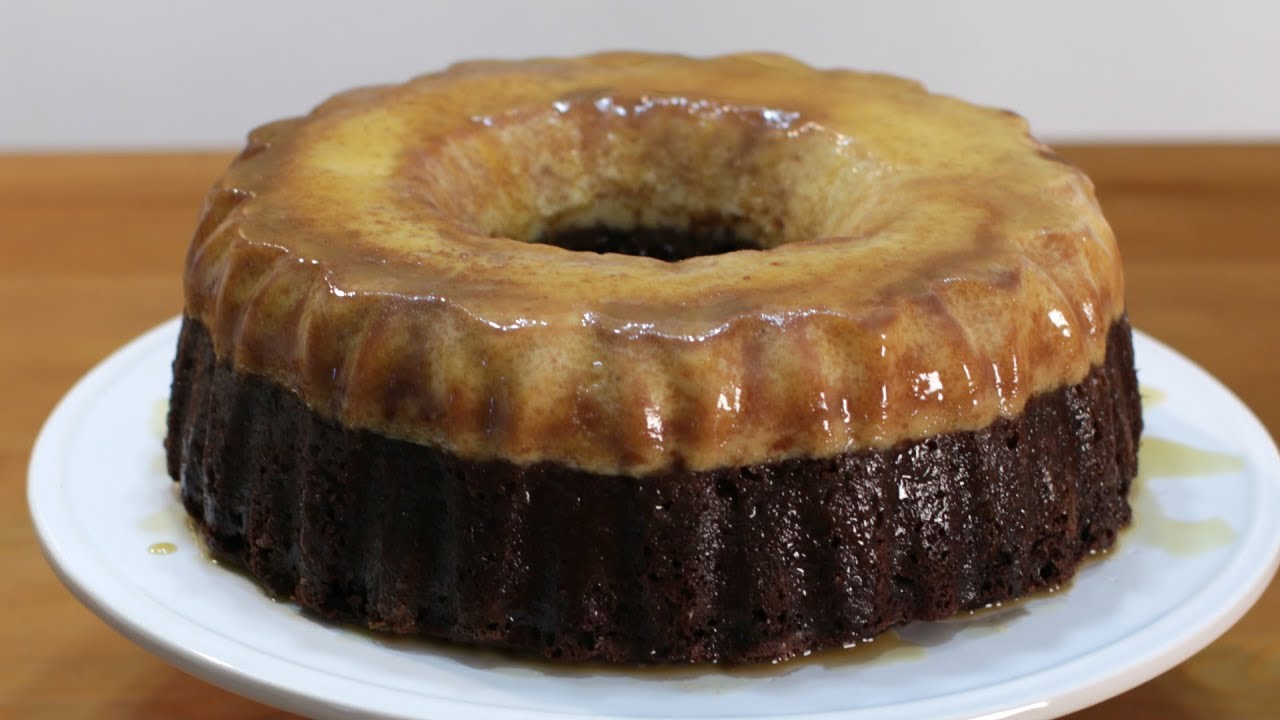
Rich, creamy, and beautifully layered—chocoflan is a dessert that never fails to impress 🍮🍫
What Happens in the Oven?
This is where the magic kicks in. Even though you poured the chocolate cake layer on the bottom and the flan on top, once it’s baked and flipped, the flan is sitting beautifully on top like it was there all along.
Why? Density. The flan mixture is heavier and denser than the chocolate batter. As the cake bakes and rises, the flan slowly sinks through it, switching places in the oven without any help. That’s why it’s called the “Impossible Cake”—because it defies what you’d expect during baking.
You don’t need to stir or layer things perfectly. As long as you follow the steps, this gravity-defying switch will happen all on its own. Science never tasted so sweet.
Cooling and Flipping the Chocoflan
Once your chocoflan is out of the oven, don’t rush to flip it. It needs time to set properly. After baking:
- Let it cool in the pan at room temperature for about an hour.
- Then refrigerate it (in the pan) for at least 4 hours, or overnight. The longer it chills, the better it holds together.
When you’re ready to flip:
- Run a thin knife around the edges of the Bundt pan to loosen the sides.
- Place a serving plate over the pan.
- Take a deep breath, and quickly flip it upside down in one confident motion.
- Gently lift the pan—voilà! You’ll see the flan on top, perfectly set, with the rich chocolate cake underneath.
If it cracks a little or some caramel sticks, that’s okay! Just drizzle any leftover caramel on top and no one will notice.
Serving Suggestions
Now that your chocoflan is beautifully plated, it’s time to serve and impress.
Top It Off Right:
- Whipped cream
- Fresh berries (strawberries or raspberries add a nice tart contrast)
- Extra caramel drizzle
- A sprinkle of sea salt for a salted caramel twist
Serving Tips:
Use a sharp knife dipped in hot water to slice clean pieces. Wipe the knife between slices for the best presentation. Each slice will reveal the luscious, golden flan and dark, moist cake—perfectly layered.
This dessert is rich, so smaller slices go a long way. It’s ideal for dinner parties, holidays, or family celebrations. Serve chilled or at room temperature.
Common Mistakes to Avoid
Even simple recipes can go sideways if you’re not careful. Here’s how to avoid chocoflan disasters:
- Skipping the Water Bath: Flan requires gentle, moist heat. Without it, your flan might crack or curdle.
- Flipping Too Soon: If you don’t let it chill and set fully, it may collapse or fall apart when you try to invert it.
- Overbaking: If you bake it too long, the flan gets rubbery and the cake dries out. Stick to the timing and test carefully.
- Pouring Too Aggressively: When adding the flan mixture, pour gently so it doesn’t mix into the cake batter.
- Wrong Pan Size: Use a standard 12-cup Bundt pan. Anything smaller may overflow during baking.
Tips for the Perfect Chocoflan
Want bakery-level results? Keep these expert tips in mind:
- Use Room Temperature Ingredients: Cold eggs or milk can affect texture. Let them warm up before mixing.
- Cream Cheese = Richer Flan: It adds a cheesecake-like texture that takes it to another level.
- Tap Out Air Bubbles: After pouring in the flan mixture, tap the pan gently on the counter to pop any bubbles.
- Don’t Skip the Foil: Covering the Bundt pan keeps the top moist and prevents overbrowning.
- Let It Rest: Flavors improve after a night in the fridge. If you can wait, it’ll taste even better the next day.
Chocoflan Variations You Can Try
Once you’ve mastered the classic chocoflan, you can start experimenting with fun and delicious variations. Trust me—this dessert is super flexible, and each version has its own wow factor.
1. Dulce de Leche Chocoflan
Instead of regular caramel, try using dulce de leche at the bottom of the pan. It’s thicker and richer, with a deep, toasty flavor that pairs beautifully with both the flan and chocolate layers. Just warm it slightly to make it easier to spread.
2. Coffee-Infused Cake
Add a tablespoon of instant espresso powder to the chocolate cake batter. It enhances the chocolate flavor and gives the cake a subtle mocha kick. If you’re a coffee lover, this version will steal your heart.
3. Vanilla or Cinnamon Flan
Switch up the flan layer by adding a touch of ground cinnamon or using vanilla bean paste instead of extract. These small changes can make a big difference in flavor, especially if you’re serving it for a holiday event.
4. Nutty Crunch
Sprinkle chopped pecans, walnuts, or almonds over the caramel layer before adding the cake batter. When you flip the cake, you’ll have a delicious crunchy topping baked right in.
5. Spiced Chocolate Cake
Add spices like cayenne pepper, cinnamon, or chili powder to the chocolate batter for a Mexican hot chocolate twist. The heat is subtle, but it gives the dessert an exciting edge that’s hard to resist.
These variations keep the base process the same but let you add your own creative touch. Whether you’re spicing things up or adding a new flavor profile, chocoflan is the perfect canvas for dessert innovation.
Storing and Reheating Chocoflan
Once your chocoflan is made, you’ll definitely want to enjoy it over a few days (if it lasts that long!).
Storing:
- Keep it refrigerated in an airtight container or wrapped tightly with plastic wrap.
- It stays fresh in the fridge for up to 5 days.
- The flan may release a bit of moisture over time—this is normal. Just drain excess liquid before serving.
Freezing:
Yes, you can freeze chocoflan! Wrap individual slices in plastic wrap and then foil, or use an airtight freezer container. Freeze for up to 1 month.
To thaw, place in the refrigerator overnight. Avoid thawing at room temperature, as this can cause the texture of the flan to break down.
Reheating:
It’s best served chilled or at room temperature, but if you prefer it slightly warm:
- Microwave individual slices for 10–15 seconds—just enough to take the chill off.
- Don’t overheat or the flan might get rubbery.
Nutritional Information (Approximate)
Here’s a rough estimate of the nutrition per slice (assuming 12 servings):
| Nutrient | Amount per Serving |
|---|---|
| Calories | 420–480 kcal |
| Total Fat | 22g |
| Saturated Fat | 13g |
| Carbohydrates | 52g |
| Sugar | 38g |
| Protein | 7g |
| Fiber | 1g |
Note: This will vary depending on whether you use full-fat ingredients, add cream cheese, or use boxed cake mix.
Why You Should Try Making Chocoflan at Home
You don’t need to be a professional baker to pull off chocoflan—it’s honestly one of the most impressive, yet achievable, desserts you can make at home. From the mesmerizing layer switch to the decadent flavor combo, it delivers on every level.
Plus, making it yourself means you can customize it to your taste. Want extra caramel? Go for it. Prefer a spiced chocolate cake? Mix it in. You’re in control, and that’s the beauty of home baking.
Even better, chocoflan is a conversation starter. People will ask how you did it, they’ll be amazed at the texture, and they’ll go back for seconds (and thirds).
So whether it’s for a birthday, dinner party, or just a weekend treat—you owe it to yourself to try this magical dessert. You’ll be glad you did.
FAQs about Chocoflan Recipe
1. Can I make chocoflan without a Bundt pan?
Yes! You can use a deep round cake pan (about 9–10 inches wide and 3 inches deep). Just make sure it’s oven-safe and can handle the water bath setup.
2. Why did my layers mix instead of separating?
If the flan was poured too forcefully, it may have mixed into the cake batter. Next time, pour gently and slowly to keep the layers separate. Also, check that your cake batter isn’t too runny.
3. Can I use a cake mix instead of homemade batter?
Absolutely. A boxed chocolate cake mix works just fine. Just prepare half the mix to avoid overflow, and continue with the flan as directed.
4. How far in advance can I make chocoflan?
You can make it up to 2 days in advance. In fact, it tastes better after chilling overnight. Just keep it refrigerated and covered until you’re ready to serve.
5. What’s the best chocolate to use?
Use unsweetened cocoa powder for the cake layer. If you want a richer taste, you can also mix in a bit of melted semi-sweet chocolate or use a dark chocolate cocoa blend.
Conclusion
Chocoflan isn’t just a dessert—it’s an experience. From the moment you pour in the layers to that satisfying flip where the cake reveals itself in all its caramel-dripping glory, it’s a culinary thrill ride. And the best part? It’s not as hard as it looks.
With a little patience, the right ingredients, and this step-by-step guide, you can create a chocoflan that’s not only delicious but downright show-stopping. Whether you stick with the classic or try a creative twist, you’re guaranteed to impress your guests—and maybe even yourself.
Go ahead and give it a try. Let your kitchen become the stage for a little dessert magic.


