Chili Thai Sauce Recipe: Thai cuisine is all about that bold, sweet, spicy, and tangy flavor combo that hits all the right spots. One of the sauces that ties it all together is the iconic Thai Chili Sauce. Whether you’re dipping spring rolls, glazing grilled meats, or tossing it in noodles, this sauce brings a fiery punch that’s hard to resist. What makes it better? Making it at home from scratch! It’s easier than you think, more flavorful than store-bought versions, and you get to control everything—from heat to sweetness.
If you’ve ever wondered how to make restaurant-quality Thai chili sauce in your own kitchen, you’re in for a treat. This guide breaks down everything step by step, with all the tips and tricks you need to get that perfect consistency and flavor.
What is Thai Chili Sauce?
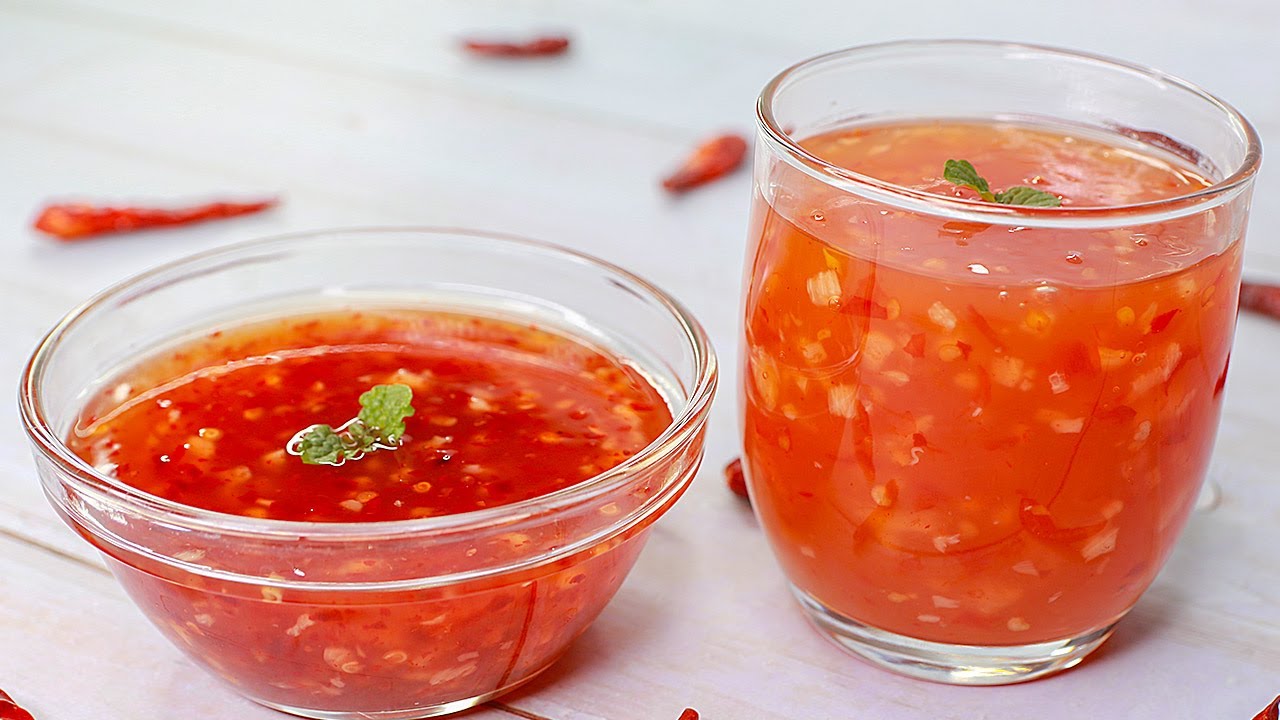
Thai Chili Sauce, often known as Nam Jim or Nam Prik Pao (depending on the version), is a versatile sauce made from fresh chilies, garlic, vinegar, sugar, and fish sauce. Think of it as the Thai version of ketchup, but way more complex and exciting. It can be sweet, tangy, spicy—or all three in one punch.
There are a few versions: some are thick and jammy, great for dipping, while others are thinner and perfect for cooking. The one we’re making today is the sweet Thai chili dipping sauce, commonly served with egg rolls, grilled chicken, and crispy tofu.
Why Make Your Own Thai Chili Sauce at Home?
Sure, you can grab a bottle off the grocery store shelf, but homemade Thai chili sauce is on another level. Here’s why you should go the DIY route:
- No preservatives or chemicals. 100% natural and fresh.
- Customize the heat level. Make it mild or fiery depending on your taste.
- Better taste. Fresh garlic, chilies, and no artificial sugar substitutes.
- Budget-friendly. A little goes a long way, and you’ll save money.
Plus, it’s super satisfying to make your own sauce. Once you try it, you’ll never go back to the bottled stuff.
Flavor Profile of Thai Chili Sauce
Thai Chili Sauce is a masterclass in flavor balance. Here’s what to expect in every spoonful:
- Sweet: From sugar or honey, balancing out the heat.
- Spicy: Thanks to Thai bird’s eye chilies or red chili flakes.
- Sour: Vinegar brings that punchy tang.
- Savory/Umami: A touch of fish sauce or soy sauce gives it depth.
- Garlicky: Fresh garlic adds pungency and warmth.
It’s this perfect blend that makes it addictive—dip once, and you’ll keep going back.
List of Ingredients You’ll Need
Fresh Ingredients
- Garlic cloves (4–5 large): Adds a deep, pungent base flavor.
- Red Thai chilies or bird’s eye chilies (10–12): Adjust based on spice tolerance.
- Shallots (1 small, optional): Adds a sweet, aromatic undertone.
Pantry Staples
- White vinegar (½ cup): Adds sourness and acts as a preservative.
- White sugar (½ cup): Balances the spice with sweetness.
- Water (½ cup): Helps thin out the sauce to desired consistency.
- Fish sauce (1–2 tablespoons): For umami richness.
- Salt (½ teaspoon): Enhances all other flavors.
- Cornstarch (1 tablespoon): Mixed with water to thicken the sauce.
Optional Add-Ins
- Honey or palm sugar: For a richer, more complex sweetness.
- Soy sauce: For a vegan/vegetarian version in place of fish sauce.
- Lime juice: For a citrusy brightness.
These ingredients are easy to find at any Asian market or well-stocked grocery store.
Equipment Needed
Before you begin, gather your kitchen tools:
- Small saucepan
- Blender or food processor
- Wooden spoon or spatula
- Fine mesh strainer (optional)
- Sterilized glass jar or container for storage
Having everything ready will make the process seamless.
Step-by-Step Guide to Making Thai Chili Sauce
Step 1: Prepping the Ingredients
Start by washing and drying your chilies thoroughly. Remove the stems, but keep the seeds if you want a spicy kick. Peel your garlic cloves and shallots (if using). Roughly chop everything just to make blending easier.
Wear gloves if you’re sensitive to chili oils—they can burn!
You can also pre-measure your vinegar, sugar, fish sauce, and water. This way, everything’s ready to go, and you’re not scrambling mid-recipe.
Step 2: Blending the Base
Toss your chilies, garlic, and shallots into a blender or food processor. Add just a splash of vinegar or water to help it blend smoothly. Pulse until you get a coarse paste—don’t worry about making it too fine. You want to see bits of chili in the final sauce for that authentic texture.
If you prefer a super smooth sauce, blend longer and strain it later.
Step 3: Cooking the Sauce
Pour the chili-garlic paste into a saucepan over medium heat. Add the rest of your vinegar, sugar, water, and fish sauce. Stir constantly to dissolve the sugar and keep it from burning.
Bring it to a gentle simmer. After about 5–7 minutes, the sauce will start to thicken and develop a glossy texture. This is where the magic happens—the raw flavors cook out, and everything blends beautifully.
Step 4: Adjusting Consistency and Taste
Mix the cornstarch with a tablespoon of cold water to create a slurry. Slowly pour it into the sauce while stirring. Let it simmer for another 2–3 minutes until the sauce thickens further.
Now, taste and tweak:
- Need more sweetness? Add sugar or honey.
- Too sour? Add a pinch more sugar.
- Too thick? Add a splash of water.
Remember, the sauce will thicken more as it cools, so don’t overdo the cornstarch.
Step 5: Cooling and Storing
Once your sauce is just right, remove it from the heat and let it cool to room temperature. Pour it into a clean, airtight glass jar.
Store it in the refrigerator for up to 3 weeks. The flavors get even better after a day or two, so consider making it ahead!
Tips for Making the Best Thai Chili Sauce
Getting Thai chili sauce just right is an art—but with these tips, you’ll be on your way to a perfect batch every time:
- Use fresh ingredients. Fresh garlic and chilies bring much more flavor than dried or pre-minced versions.
- Balance is key. Thai food is all about balance—sweet, sour, spicy, and salty. Taste as you go and adjust based on what your tongue tells you.
- Simmer slowly. Don’t rush the cooking process. Letting the sauce gently simmer helps meld the flavors together.
- Customize to your preference. Want it spicier? Add more chilies. Prefer a sweeter version? Increase the sugar or add a bit of honey.
- Blend texture and flavor. A slightly chunky texture adds authenticity. If you want it smoother, strain or blend longer.
- Sterilize your jar. This is crucial if you plan to store the sauce for more than a few days. Boil your glass container before filling it with sauce.
These small but important tips make a big difference, especially if you plan to use the sauce regularly or give it as a gift.
Variations You Can Try
Thai chili sauce is incredibly versatile, and once you’ve nailed the basic recipe, you can get creative with it. Here are some tasty variations:
- Mango Thai Chili Sauce: Add pureed ripe mango during blending for a fruity twist that pairs well with seafood.
- Garlic-Lime Version: Squeeze in fresh lime juice and add extra garlic for a zesty, punchy flavor.
- Smoky Thai Chili Sauce: Use dried smoked chilies or roast your fresh ones before blending to add depth.
- Vegan Thai Chili Sauce: Substitute fish sauce with soy sauce, tamari, or a vegan fish sauce alternative.
- Extra Spicy Version: Mix in habaneros or dried chili flakes for an extra burn.
Feel free to experiment and make it your own. That’s the fun part of cooking!
How to Store Your Thai Chili Sauce
Proper storage is essential to keeping your Thai chili sauce fresh, safe, and delicious.
Here’s how:
- Cool completely before storing. Never store hot sauce—it causes condensation that can spoil the batch.
- Use a clean, sterilized jar. Glass is better than plastic for long-term storage.
- Refrigerate immediately. This helps extend shelf life and preserves the fresh flavors.
- Use a clean spoon every time. Avoid dipping food or dirty utensils directly into the jar.
Stored correctly in the fridge, your homemade Thai chili sauce will last for up to 3 weeks, possibly longer. Always check the smell and appearance before using.
Shelf Life and How to Tell If It’s Gone Bad
Homemade sauces don’t contain preservatives, so it’s important to monitor shelf life closely.
Shelf Life:
- Refrigerated in a sealed jar: 2 to 3 weeks
- Frozen (in small portions): Up to 3 months
Signs It’s Gone Bad:
- Sour or off smell: Indicates spoilage
- Mold or discoloration: Toss it immediately
- Fizzy texture or bubbles: Could mean fermentation
When in doubt, throw it out. Food safety always comes first.
How to Use Thai Chili Sauce
This sauce isn’t just for dipping—there are so many delicious ways to use it!
As a Dipping Sauce
Perfect for:
- Spring rolls
- Fried tofu
- Chicken nuggets
- Dumplings
Just serve it in a small dish and let everyone dip away.
As a Marinade
Brush it onto:
- Chicken thighs
- Pork chops
- Shrimp
Let it marinate for 30 minutes to a few hours before grilling or baking for a sweet and spicy glaze.
As a Stir-Fry Sauce
Add 2–3 tablespoons to:
- Stir-fried veggies
- Noodles
- Rice dishes
Mix it with a splash of soy sauce and lime juice for an instant stir-fry base.
As a Glaze
Use it as a sticky glaze on:
- BBQ ribs
- Baked tofu
- Roasted Brussels sprouts
Brush it on near the end of cooking for a shiny, caramelized finish.
This sauce truly adds magic to any meal!
Nutrition Breakdown (Per Tablespoon)
| Nutrient | Amount |
|---|---|
| Calories | 40–45 |
| Carbohydrates | 9g |
| Sugars | 8g |
| Sodium | 220mg |
| Fat | 0g |
| Protein | 0g |
Note: Values may vary depending on your specific ingredients, especially if you use alternatives like honey or low-sodium soy sauce.
Common Mistakes to Avoid
Even though this recipe is beginner-friendly, there are a few pitfalls to watch out for:
- Overcooking the sauce: It can become too thick or even caramelize and burn.
- Using too many chilies without testing heat. Thai chilies are HOT. Always start small and increase gradually.
- Skipping the cornstarch slurry. This thickens the sauce and gives it that glossy finish.
- Not tasting as you go. You need to balance the flavors—you can’t fix it once it’s bottled.
- Improper storage. Hot sauce in a sealed jar can build condensation and spoil.
Follow the process carefully, and you’ll avoid these hiccups.
FAQs about Chili Thai Sauce Recipe
1. Can I make Thai chili sauce without fish sauce?
Yes! You can substitute with soy sauce or tamari for a vegetarian or vegan version. It still tastes great and keeps that umami kick.
2. How spicy is Thai chili sauce?
It depends on the number and type of chilies you use. Thai bird’s eye chilies are very hot, so reduce or remove seeds if you prefer it milder.
3. Can I freeze Thai chili sauce?
Absolutely. Pour it into ice cube trays or small containers and freeze for up to 3 months. Thaw as needed.
4. Is Thai chili sauce the same as sriracha?
Not exactly. Sriracha is smoother, more garlicky, and usually fermented. Thai chili sauce is sweeter, chunkier, and has a tangy balance.
5. How can I thicken my Thai chili sauce without cornstarch?
You can reduce it longer over low heat or use arrowroot powder as an alternative thickener.
Conclusion
And there you have it—your complete guide to making authentic, bold, and flavorful Thai Chili Sauce at home! Whether you love it fiery hot or prefer it sweet with just a kick, this customizable sauce will quickly become a staple in your kitchen. It’s so much more than a condiment—it’s a flavor booster, a marinade master, and a stir-fry savior all in one.
Once you’ve made your own batch, you’ll see just how rewarding (and addictive) homemade Thai chili sauce can be. Get creative, adjust the heat to your liking, and use it in everything from noodles to grilled meats. Trust me—your taste buds will thank you!


