Cheese Curd Recipe: If you’ve ever been to the Midwest or dined at a cheese festival, chances are you’ve heard people rave about cheese curds. But what exactly are they? Cheese curds are bite-sized nuggets of fresh cheese, known for their signature “squeak” when you bite into them. This squeaky texture, coupled with their mild creamy flavor, makes them an absolute favorite for cheese lovers everywhere.
Cheese curds are typically a byproduct of the cheddar cheese-making process. But don’t let the word “byproduct” fool you—these delightful little morsels are worthy of the spotlight themselves. They’re enjoyed both fresh and fried and can be eaten on their own or added to dishes like the famous Canadian poutine.
So why should you make cheese curds at home? For one, it’s fun and educational. You’ll learn a bit of kitchen chemistry and gain a deeper appreciation for how cheese is made. Plus, you’ll have total control over the ingredients, which means fresher, more natural flavors—and zero unnecessary additives.
Health Benefits of Cheese Curds
While cheese curds may not be your typical “health food,” they actually come with some surprising benefits. Since they’re minimally processed, cheese curds retain a lot of the natural nutrients found in milk. This includes high-quality protein, calcium, vitamin B12, and phosphorus—all of which support healthy bones, muscles, and nerve function.
Cheese curds also contain probiotics if made using a live starter culture, which supports gut health. Compared to heavily processed cheeses, they’re a cleaner option with fewer preservatives and chemicals. That’s especially true if you make them at home using organic or grass-fed milk.
Of course, like any cheese, curds should be enjoyed in moderation due to their fat and calorie content. But when included as part of a balanced diet, cheese curds can be a wholesome and satisfying treat.
Types of Cheese Curds
Cheese curds come in a few delicious varieties. Let’s break them down:
Fresh Cheese Curds
These are the most basic form—mild, squeaky, and enjoyed right after they’re made. No aging involved, just pure dairy goodness. You can eat them plain, season them with a bit of salt, or experiment with herbs and spices.
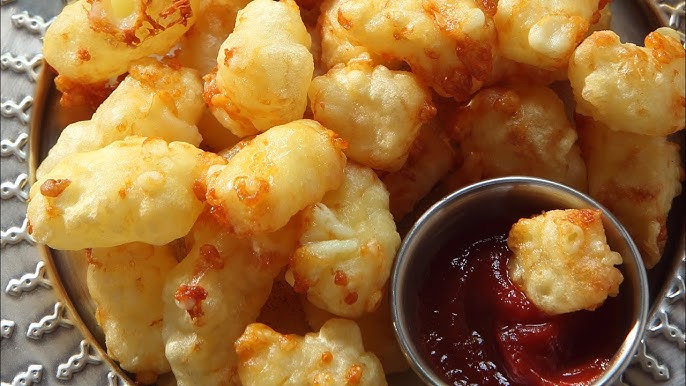
Fried Cheese Curds
A popular bar snack in the U.S., especially in Wisconsin, these are battered and deep-fried to golden perfection. They’re crispy on the outside and melty on the inside—basically comfort food heaven.
Flavored Cheese Curds
You can mix things up by adding jalapeños, garlic, dill, smoked paprika, or even ranch seasoning during the salting stage. The possibilities are endless.
List of Ingredients You’ll Need
Creating cheese curds at home doesn’t require a ton of ingredients, but it’s important to get the right ones for the best result.
Main Ingredients
- 1 gallon of whole milk (non-UHT pasteurized is best)
- 1/4 teaspoon liquid rennet (or rennet tablets as per the brand instructions)
- 1/4 teaspoon mesophilic starter culture
- Non-iodized salt (for flavor and preservation)
- Chlorine-free water (for dissolving rennet)
Optional Add-ins
- Fresh herbs (like dill or chives)
- Crushed garlic
- Cracked black pepper
- Chili flakes or jalapeños for spice
Equipment Checklist
- Large stainless steel pot
- Thermometer
- Long knife or curd cutter
- Slotted spoon
- Colander
- Cheesecloth or butter muslin
- Measuring spoons
- Mixing bowls
Having everything ready before you start makes the process smooth and enjoyable. Trust me, you don’t want to be searching for cheesecloth mid-recipe!
How to Choose the Right Milk
The quality of your milk can make or break your cheese curd experience.
Raw vs. Pasteurized Milk
Raw milk is ideal for flavor and texture, but not everyone has access to it. Pasteurized milk works great too—just make sure it’s non-UHT (Ultra High Temperature) pasteurized, as UHT milk doesn’t curdle well.
Fat Content Matters
Whole milk gives the richest, creamiest curds. You can use 2% milk, but you may sacrifice some flavor and texture. Avoid skim milk unless you absolutely have to—it just doesn’t deliver the same satisfying result.
Step-by-Step Cheese Curd Recipe Guide
This is where the magic happens! Let’s walk through the process from start to finish.
Cheese curds are fresh, mild, and delightfully squeaky. Making them at home is easier than you might think—just follow these simple steps.
Step 1: Preparing the Milk
Pour fresh, high-quality whole milk into a large stainless-steel pot. Slowly heat it to about 86°F (30°C), stirring gently to prevent scorching. Maintain a steady temperature—consistent heat is key to proper curd formation.
Step 2: Adding the Rennet and Starter Culture
Sprinkle the starter culture over the warm milk and let it hydrate for a minute, then stir gently. Dissolve the rennet in cool, non-chlorinated water and stir it into the milk using an up-and-down motion. Cover and let the milk rest undisturbed for 30–45 minutes until it sets like soft gelatin.
Step 3: Cutting the Curd
Using a long knife, cut the curd into ½-inch cubes. Cutting releases whey and helps develop the curds’ structure. Let the cut curds rest for 5 minutes to firm up slightly.
Step 4: Cooking the Curd
Slowly raise the temperature to about 102°F (39°C) over 30 minutes, stirring gently to keep the curds from clumping. The curds will shrink and become springy as whey is released.
Step 5: Draining and Pressing
Drain the curds in a colander lined with cheesecloth. Allow excess whey to drip off, then gently press the curds together to form slabs. Cut or tear them into bite-sized pieces.
Step 6: Salting and Flavoring
Sprinkle salt over the warm curds and toss gently to coat. Add herbs or spices if desired. Enjoy fresh for the best squeak, or refrigerate for up to 2 days.
Tips for Perfect Cheese Curds
Making cheese curds is both a science and an art. The good news? With a few helpful tips, you’ll be squeaking your way to cheesy perfection in no time.
1. Be Precise with Temperature
One of the most important things to watch when making cheese curds is your temperature. A few degrees too high or too low can mess with the consistency of your curds. Use a reliable thermometer and heat slowly so you stay in control.
2. Stir Gently
When you stir the curds, especially during the cooking phase, be gentle. Stirring too aggressively can break the curds apart and result in a mushy texture. Think of it like stirring marshmallows—you want to keep them whole, not turn them into mush.
3. Don’t Skip the Resting Time
Letting the curds sit undisturbed after cutting gives them time to firm up. This helps keep their shape during cooking. It might be tempting to rush through this part, but patience is key to perfect curds.
4. Use Non-Iodized Salt
Iodine in salt can interfere with the bacterial culture and affect the taste of your cheese. Stick to cheese salt, kosher salt, or sea salt for best results.
5. Test for a Clean Break
When checking if your curds are ready to be cut, insert a knife at an angle. If it comes out clean and the curd splits easily, you’re good to go. If it’s still gooey or doesn’t split well, give it more time.
6. Practice Makes Perfect
Don’t be discouraged if your first batch isn’t ideal. Like baking bread or learning guitar, cheesemaking takes a bit of practice. Keep tweaking and trying—you’ll get there!
How to Store Cheese Curds
Fresh cheese curds are best enjoyed within a day or two, but if you need to keep them longer, proper storage is key to preserving flavor and texture.
Refrigeration Tips
- Store your cheese curds in an airtight container to prevent them from drying out.
- For best taste and texture, consume them within 3-4 days.
- If your curds start to lose their squeak, don’t worry—they’re still safe to eat, just less fresh.
Freezing Cheese Curds
You can freeze cheese curds, but it’s not ideal if you’re chasing that squeaky texture. Freezing changes the moisture content, making the curds crumbly once thawed.
If you do freeze them:
- Use a freezer-safe bag or container.
- Portion them out so you only defrost what you need.
- Thaw slowly in the fridge before reheating.
Pro tip: Frozen curds are still perfect for frying—so if you’re planning to make battered cheese curds later, freezing isn’t a bad idea.
How to Reheat Cheese Curds for Maximum Freshness
Lost that satisfying squeak? Reheating can help bring back some of the magic—especially when done right.
Microwave Method
- Place curds in a microwave-safe bowl.
- Cover with a damp paper towel to maintain moisture.
- Microwave on low or medium heat for 10–15 seconds.
- Shake the bowl or stir, then check for warmth and texture.
Stovetop Steam Method
- Place curds in a heat-safe bowl over a pot of simmering water.
- Cover loosely and let the steam warm them up for 2–3 minutes.
- This method helps preserve texture better than microwaving.
Avoid overheating—they’ll melt into a blob, and that’s not what you want unless you’re making a grilled cheese.
Making Fried Cheese Curds
Now we’re getting into the guilty pleasure zone. Fried cheese curds are crispy, gooey, and downright addictive. Here’s how to make them at home.
Ingredients for Battering
- 1 cup all-purpose flour
- 1 teaspoon baking powder
- 1/2 teaspoon garlic powder
- 1/2 teaspoon salt
- 1 egg
- 1 cup cold beer or sparkling water (makes it light and crispy)
- 2 cups fresh cheese curds
- Oil for frying (canola or vegetable oil)
Frying Process
- Heat oil in a deep pan to 375°F (190°C).
- In a mixing bowl, combine flour, baking powder, salt, and garlic powder.
- Add egg and beer (or water). Mix until smooth.
- Dip cheese curds into the batter using a fork or slotted spoon.
- Carefully drop them into the hot oil in small batches.
- Fry until golden brown, about 1–2 minutes per batch.
- Remove and place on a paper towel to drain excess oil.
- Serve hot with your favorite dipping sauce—ranch, marinara, or spicy aioli.
These are perfect for parties, game days, or just treating yourself. Just be warned: once you start, it’s hard to stop.
Serving Suggestions
Cheese curds are incredibly versatile. Whether you’re serving them as a snack, side, or main dish, there are plenty of creative ways to enjoy them.
1. Fresh and Simple
Serve them right after salting with:
- Crackers
- Apple slices
- Honey drizzle
- Fresh herbs
2. Poutine-Style
Add your cheese curds to:
- Hot French fries
- Thick brown gravy
- Optional toppings: shredded meat, mushrooms, caramelized onions
3. Fried with Dip
Pair fried curds with:
- Spicy chipotle mayo
- Classic ranch
- Buffalo or BBQ sauce
4. Cheese Curd Salad
Yep, it’s a thing!
- Toss fresh curds with cherry tomatoes, cucumbers, olives, and Italian dressing.
5. Curd-Stuffed Burgers
Level up your burger game by pressing cheese curds into your patties before grilling. When you bite in, melty cheese heaven awaits.
FAQs about Cheese Curd Recipe
1. Can I make cheese curds using goat or sheep milk?
Yes, absolutely! The process is the same, but the flavor will be tangier and more distinct. Goat and sheep milk have different fat and protein profiles that give unique character to the curds.
2. What gives cheese curds their squeaky texture?
That famous squeak comes from the protein structure in fresh curds rubbing against your teeth. It fades as the curds age and lose moisture, which is why squeaky curds = fresh curds.
3. Is it safe to eat the whey leftover from cheese curds?
Totally! Whey is rich in protein and nutrients. You can use it in smoothies, soups, baking (like bread or pancakes), or even to ferment vegetables.
4. Can I turn my cheese curds into aged cheddar?
Not directly. While curds are the base of cheddar cheese, aging involves pressing, molding, and storing the curds under specific conditions for months. It’s a separate process—but you’re halfway there!
5. Why didn’t my milk curdle?
This could be due to:
- Using ultra-pasteurized milk (it won’t work)
- Not adding enough rennet or expired rennet
- Temperature being too low
- Using chlorinated water (it can deactivate cultures/rennet)
Double-check your ingredients and try again—it’s all part of the learning curve!
Conclusion
So there you have it—a complete, step-by-step guide to making cheese curds at home like a pro. Whether you’re going for that classic squeaky bite or planning to fry up some golden curds for the ultimate comfort snack, this guide has you covered from start to finish.
Homemade cheese curds aren’t just delicious—they’re also rewarding to make. You get to control the ingredients, learn the craft of cheesemaking, and impress your friends or family with something that tastes amazing and feels a little gourmet.
The best part? Once you’ve nailed this recipe, you can start experimenting. Try different milk sources, add creative flavors, or even invent your own signature fried curd snack. Cheesemaking opens up a world of possibilities—one curd at a time.


