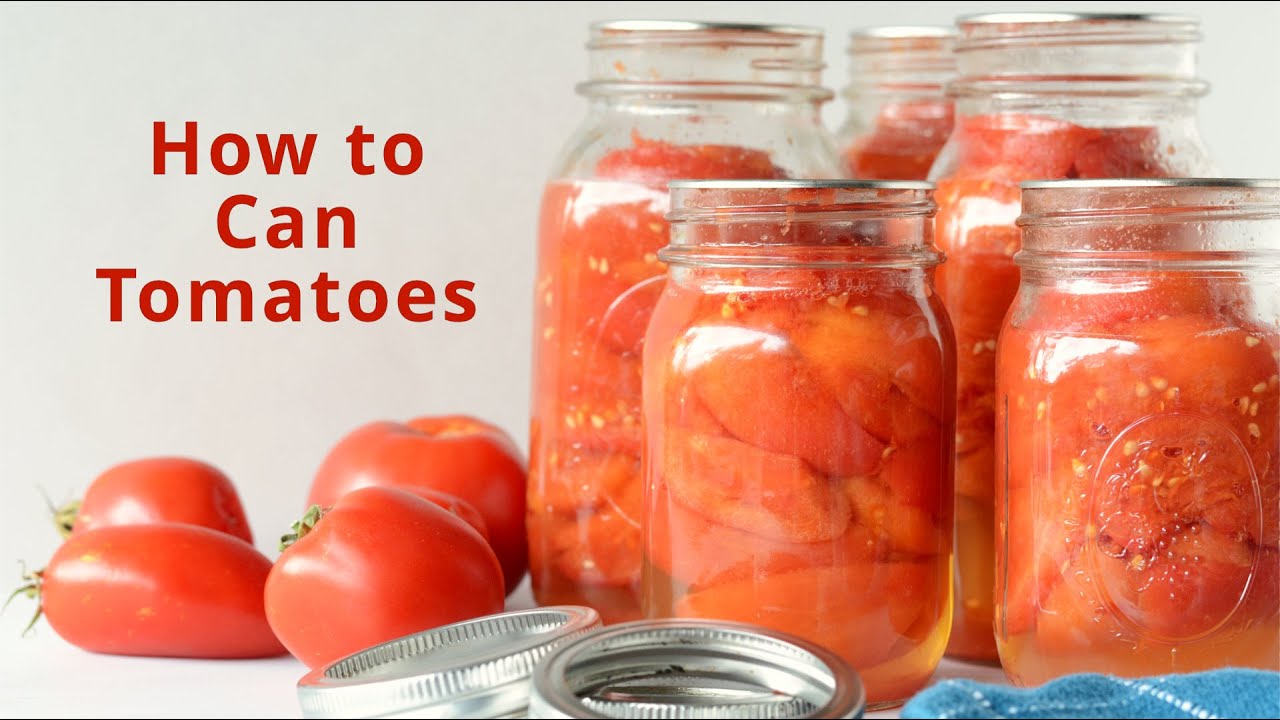
Canned Tomatoes Recipe: Nothing beats the taste of summer-ripe tomatoes—especially when they’re preserved in a jar and ready to pop open any time of year. Canning tomatoes is one of the easiest and most satisfying food preservation projects you can do right in your kitchen. Whether you’ve harvested a bumper crop or scored a killer deal at the farmer’s market, this step-by-step guide will show you how to can tomatoes safely and efficiently.
You don’t need to be a homesteader or a pro chef to get this right. All you need is a little prep work, the right gear, and some juicy tomatoes. Once you start, you’ll wonder why you didn’t do this sooner. Let’s dive in and preserve that delicious tomato flavor for soups, sauces, and stews all year long!
Why Canning Tomatoes is Totally Worth It
Canning tomatoes at home is more than just a nostalgic throwback—it’s a smart move for anyone who loves cooking. Store-bought canned tomatoes? Sure, they work. But once you’ve had the homemade kind, there’s no going back. They’re richer in flavor, less processed, and you have full control over the ingredients. No preservatives, no unnecessary salt, just pure tomato goodness.
Canning also helps reduce waste. Instead of letting your ripe tomatoes go bad, you extend their shelf life for a year or more. Plus, it’s a huge money-saver in the long run. Imagine making your own pasta sauce or chili with home-canned tomatoes—it just hits different.
Besides, it’s super satisfying to see your pantry stocked with rows of beautiful jars filled with bright red tomatoes. It feels like an accomplishment—and it is!
Health Benefits of Canned Tomatoes
Believe it or not, canned tomatoes can actually be healthier than fresh ones in some ways. Why? Because the canning process boosts the bioavailability of lycopene, a powerful antioxidant that gives tomatoes their red color and helps fight off free radicals in your body.
Canned tomatoes are:
- Rich in vitamin C, potassium, and folate
- A great source of fiber
- Low in calories
- Naturally fat-free
Since you’re in control of what goes in the jar, you can keep sodium to a minimum and skip all the mystery ingredients found in commercial cans. Homemade canned tomatoes are heart-friendly, gut-friendly, and simply good for your body.
Different Types of Tomatoes You Can Use
Not all tomatoes are created equal—especially when it comes to canning. Some are juicy and seedy, while others are meaty and low in moisture. The type you choose will affect the texture and taste of your final product.
Best Tomato Varieties for Canning
- Roma (Plum) Tomatoes – Thick flesh, low moisture, fewer seeds. Ideal for sauces and paste.
- San Marzano – A premium plum tomato with intense flavor, perfect for Italian dishes.
- Amish Paste – Sweet, meaty, and great for both sauce and whole-tomato canning.
- Celebrity or Rutgers – Good all-purpose tomatoes for slicing and canning.
- Heirloom Varieties – More flavor, but often more watery and delicate.
Roma vs Beefsteak Tomatoes
Beefsteaks are delicious, but they’re super juicy and contain a lot of seeds, which can make your canned tomatoes watery. If you’re just starting out, go with Roma or San Marzano—they’re easier to handle and give you a more concentrated tomato flavor.
Essential Tools and Equipment
Before you jump in, make sure you’ve got the right tools on hand. These aren’t fancy, but they’re must-haves for safe and efficient canning.
Canning Jars
Go with Mason jars—they’re sturdy, reusable, and made for high-heat canning. Use pint or quart sizes depending on your storage needs.
Water Bath Canner
This is a large pot with a rack inside. It lets you safely boil jars at the right temperature to kill bacteria and seal the lids.
Jar Lifter and Funnel
A jar lifter makes it easy (and safe!) to move hot jars in and out of boiling water. A funnel helps you pour tomatoes into jars without a mess.
Other handy items:
- Large stockpot for blanching
- Slotted spoon
- Ladle
- Clean kitchen towels
- Bubble remover (or a chopstick works too!)
Ingredients You’ll Need
Here’s what you need for basic canned tomatoes:
- Fresh, ripe tomatoes (Roma or San Marzano preferred)
- Bottled lemon juice OR citric acid
- Non-iodized salt (optional) – for flavor, not preservation
- Boiling water
That’s it. You don’t need vinegar, herbs, or oil—those can interfere with the acidity levels required for safe canning.
Use 2 tablespoons of bottled lemon juice per quart jar (or 1 tablespoon for pint jars) to maintain the correct pH level. This is essential for preventing bacterial growth.
Preparation Before You Start
Sterilizing the Jars
This step is crucial. Even the tiniest contaminant can spoil your batch. Wash your jars, lids, and rings in hot soapy water, then rinse well. You can sterilize them by:
- Boiling them in water for 10 minutes, or
- Running them through the dishwasher on a hot cycle
Keep them warm until you’re ready to fill.
Washing and Peeling Tomatoes
Wash your tomatoes thoroughly. Then blanch them to remove the skins:
- Bring a pot of water to boil.
- Score a small “X” on the bottom of each tomato.
- Drop them in boiling water for 30–60 seconds.
- Immediately transfer to an ice water bath.
- Skins will slip right off.
Remove any bad spots or cores. Now you’re ready to can!
Step-by-Step Canned Tomatoes Recipe
Let’s get into the real action. This process is beginner-friendly and totally doable in one afternoon.
Step 1: Boil and Peel Tomatoes
Wash ripe, firm tomatoes thoroughly. Bring a large pot of water to a boil and score a small “X” on the bottom of each tomato. Boil for 30–60 seconds, then transfer immediately to an ice bath. Once cooled, the skins will slip off easily. Core the tomatoes and leave whole or cut into halves or quarters as desired.
Step 2: Prepare Jars with Lemon Juice or Citric Acid
Sterilize clean canning jars by keeping them hot. Add acidity to each jar for safe canning—use 2 tablespoons bottled lemon juice or ½ teaspoon citric acid per quart jar (half the amount for pint jars). This step is essential to maintain proper acidity.
Step 3: Pack Tomatoes into Jars
Pack the peeled tomatoes into the prepared jars, pressing gently to release juices. Leave about ½ inch headspace at the top. You may add boiling water or tomato juice to cover the tomatoes if needed.
Step 4: Remove Air Bubbles and Seal
Run a non-metal utensil around the inside of each jar to release trapped air bubbles. Adjust liquid if needed to maintain headspace. Wipe jar rims clean, place lids on top, and screw bands on until fingertip-tight.
Step 5: Process in Water Bath Canner
Lower jars into a boiling water bath, ensuring they are fully submerged. Process for 40–45 minutes, adjusting for altitude if necessary. Carefully remove jars and let cool undisturbed for 12–24 hours. Check seals before storing.
Properly sealed jars can be stored in a cool, dark place for up to 1 year.
Hot Pack vs Raw Pack: Which Method is Better?
Both methods work great—it just depends on your preference and how much time you’ve got.
Raw Pack
- Tomatoes are peeled and packed raw into jars.
- Boiling water or tomato juice is added before sealing.
- Quicker prep, but more air bubbles and floating tomatoes.
- Often results in less volume per jar.
Hot Pack
- Tomatoes are peeled, then simmered for 5 minutes before packing.
- Less air in the jar, better seal, more concentrated flavor.
- You get more tomatoes per jar because they shrink slightly.
- Great if you’re planning to use them in thick sauces later.
If you want the best quality and don’t mind a few extra minutes, hot pack is the way to go. But raw pack works fine too—especially if you’re in a hurry or just starting out.
Tips for Perfectly Canned Tomatoes
Want to nail this process every time? Follow these bonus tips:
- Use bottled lemon juice instead of fresh—it has a consistent acidity level.
- Don’t skip headspace. Too little = overflow, too much = weak seal.
- Label your jars with the date—oldest jars should be used first.
- Don’t tilt hot jars to check seals—let them cool completely first.
- Store without the rings after cooling to avoid moisture buildup and rust.
And most importantly, if a jar doesn’t seal—don’t panic. Just refrigerate and use within a few days, or freeze the contents for later.
How to Store Your Canned Tomatoes
Once your jars are sealed and cooled, wipe them down and store them in a cool, dark, and dry place like:
- A pantry
- A kitchen cabinet (away from heat)
- A basement or cellar
Avoid direct sunlight, which can cause fading and reduce shelf life.
Don’t stack jars on top of each other unless there’s a divider or cardboard between them. Too much pressure on the lids could compromise the seal.
How Long Do Canned Tomatoes Last?
Properly canned tomatoes can last 12 to 18 months—sometimes even longer if stored in perfect conditions. For best flavor and texture, aim to use them within a year.
Before using, always inspect each jar:
- Is the seal tight?
- Is the lid bulging?
- Any signs of mold or weird smells?
If you notice anything off, don’t use it. Better safe than sorry.
Common Mistakes to Avoid
First time canning? Everyone makes mistakes, but here are a few big ones to watch out for:
- Skipping the acid – Never forget the lemon juice or citric acid. It’s critical for safe canning.
- Overfilling jars – Always leave proper headspace to avoid leaks and failed seals.
- Not processing long enough – Shortcuts here can lead to dangerous bacteria growth.
- Using fresh lemon juice – The acidity varies too much. Always go with bottled.
- Reusing lids – Only use brand-new lids for sealing. Used ones may not seal properly.
Double-check your process and follow reliable recipes to avoid any canning disasters.
Creative Ways to Use Canned Tomatoes
Now that your pantry’s full, what should you make?
- Homemade pasta sauce – Simmer with garlic, basil, and onions.
- Chili or stew – Adds depth and tang to slow-cooked meals.
- Shakshuka – Middle Eastern eggs in tomato sauce—delicious and easy!
- Pizza sauce – Blend and season for a perfect homemade pizza base.
- Tomato soup – A cozy meal in minutes with a splash of cream and herbs.
Canned tomatoes are like a blank canvas. You can turn them into almost anything!
FAQs about Canned Tomatoes Recipe
Do I need a pressure canner for tomatoes?
No, tomatoes are high-acid enough to be safely canned using a water bath canner, as long as you add lemon juice or citric acid.
Can I add onions or garlic before canning?
Technically yes, but be cautious. Adding too many low-acid foods (like onions or garlic) may reduce the acidity of your jar. If you want to play it safe, add those ingredients when cooking, not during canning.
Is foam during boiling normal?
Yes! Tomatoes can foam a bit when simmering. Skim it off with a spoon before packing into jars.
Can I use heirloom tomatoes?
Absolutely. Heirlooms are full of flavor but may have more water content. Consider hot packing or draining slightly for thicker results.
Should I peel all tomatoes before canning?
It’s highly recommended. Skins can become tough and may harbor bacteria. Blanching makes peeling super easy.
Final Thoughts
Canning tomatoes might seem old-school, but it’s honestly one of the most rewarding kitchen projects you can do. It saves money, reduces food waste, and gives you control over what you’re feeding yourself and your family. Plus, once you get the hang of it, it’s surprisingly easy and fun.
Whether you’re looking to preserve your summer harvest or just want to ditch store-bought cans, this step-by-step guide has everything you need to start canning like a pro. So grab those tomatoes and get started—you’ll thank yourself come winter!


