Blueberry Ice Cream Recipe: There’s something undeniably magical about homemade ice cream, especially when it’s bursting with the flavor of fresh, juicy blueberries. Whether you’re cooling off on a hot summer day or simply craving a sweet treat, blueberry ice cream hits all the right notes. Creamy, fruity, and beautifully purple, this dessert doesn’t just taste incredible—it looks like something from a fancy ice cream shop.
But guess what? You don’t need to be a pro chef or own a gourmet kitchen to make it. With just a handful of ingredients and a little patience, you can whip up a batch of homemade blueberry ice cream that’s smoother, tastier, and way more satisfying than anything store-bought. This guide will walk you through everything—from the ingredients to storage tips, and every creamy step in between.
So grab your mixing bowls and let’s dive in!
Ingredients You’ll Need
Before we get into the fun part (making the ice cream), let’s take a look at what you’ll need to gather. This recipe sticks to simple, whole ingredients that bring out the natural flavor of blueberries while keeping the texture rich and creamy.
Here’s your basic shopping list:
- 2 cups of fresh or frozen blueberries
- ¾ cup granulated sugar (divided)
- 1 tablespoon lemon juice (freshly squeezed)
- 1½ cups heavy cream
- 1½ cups whole milk
- 1 teaspoon vanilla extract
- A pinch of salt
Let’s break that down a bit.
Fresh vs Frozen Blueberries
Both work perfectly fine, but fresh blueberries tend to have a slightly more vibrant flavor. If using frozen, don’t worry—just cook them down a little longer during the puree step to reduce excess water.
Cream and Milk
This combo gives the perfect texture—rich but not too heavy. If you’re going for a lighter version, you can use half-and-half, but keep in mind the ice cream won’t be quite as creamy.
Sweeteners & Flavor Enhancers
Granulated sugar is the go-to here, but you could experiment with honey or agave. A little lemon juice adds brightness, while vanilla brings warmth and balance.
Equipment You’ll Need
To make blueberry ice cream from scratch, you’ll need a few basic kitchen tools. Some optional equipment can make the job easier, but even without an ice cream maker, you can still create a smooth and creamy dessert.
Essential Tools:
- Saucepan – For cooking the blueberries down into a syrupy puree.
- Blender or Food Processor – To puree the berries into a smooth consistency.
- Fine mesh strainer (optional) – If you prefer seed-free ice cream.
- Mixing bowls – For combining and cooling ingredients.
- Whisk or spoon – For mixing the ice cream base.
- Ice cream maker – Not required, but it makes the texture better and speeds things up.
Optional but Helpful Tools:
- Digital thermometer – Helps monitor your base if you’re heating it.
- Ice bath setup – For quickly chilling your mixture before churning.
- Freezer-safe container with lid – For storing the ice cream without it picking up freezer odors.
What If You Don’t Have an Ice Cream Maker?
No worries. You can still make amazing blueberry ice cream using the no-churn method (we’ll cover that in detail below). It takes a bit more time and patience, but the results are still impressive.
How to Choose the Best Blueberries
The flavor of your ice cream starts with the fruit. Blueberries may be small, but their taste and sweetness can vary a lot depending on the type and ripeness.
Fresh vs Frozen:
- Fresh Blueberries: These are best during their peak season—summer months (June to August). They offer a bright, juicy flavor and are easier to check for ripeness.
- Frozen Blueberries: Convenient and available year-round. They’re picked at peak ripeness and frozen fast, so they still pack a flavorful punch.
Tips for Picking the Right Berries:
- Look for deep blue color with a slight silvery sheen.
- Avoid berries that are shriveled, mushy, or leaking juice.
- Taste one (if possible). Ripe blueberries should be sweet with a slight tartness.
Organic or Not?
While it’s not absolutely necessary to buy organic, blueberries tend to be on the “Dirty Dozen” list, which means they can carry higher pesticide residues. If budget allows, organic is a safer bet—especially since we’re not peeling or cooking them extensively.
Step-by-Step Guide to Make Blueberry Ice Cream
Now for the fun part—let’s walk through the full recipe, one step at a time. Whether you’re a kitchen newbie or a seasoned cook, this step-by-step process will help you make perfect blueberry ice cream every time.
Step 1: Prepare the Blueberry Purée
Add fresh or frozen blueberries to a saucepan with sugar and a splash of lemon juice. Simmer for 8–10 minutes until the berries burst and the mixture thickens. Blend until smooth, then strain to remove skins for a silky texture. Let it cool completely.
Step 2: Make the Ice Cream Base
In a saucepan, combine heavy cream, milk, and sugar (a classic ratio is more cream than milk for richness). Heat gently until the sugar dissolves—don’t boil. This warming helps the sugar fully integrate, giving smoother ice cream. Let the base cool.
Step 3: Mix Blueberry Purée with Cream Base
Ensure both the purée and cream base are fully cooled. Stir them together until evenly blended. Taste and adjust sweetness or add a little more lemon juice to brighten the flavor if needed.
Step 4: Chill the Mixture Thoroughly
Chilling is crucial for creamy texture. Refrigerate the mixture for at least 4 hours (or overnight). For faster cooling, place the bowl in an ice bath and stir occasionally.
Step 5: Churn in Ice Cream Maker
Pour the chilled mixture into your ice cream maker and churn according to the manufacturer’s instructions. It’s ready when it reaches a soft-serve consistency.
No-churn option: Fold the mixture into whipped cream and freeze.
Step 6: Freeze the Ice Cream
Transfer to an airtight container, press parchment on top, and freeze for 3–4 hours. This prevents ice crystals and keeps the ice cream smooth and scoopable.
Tips for Perfect Blueberry Ice Cream
Want to elevate your ice cream game? These tips will help you get restaurant-quality results from your home kitchen.
1. Boost the Flavor
- Add a pinch of cinnamon or nutmeg for warmth.
- A dash of lavender extract can bring a floral, gourmet touch.
- Swirl in some blueberry jam or lemon curd for an eye-catching ripple effect.
2. Get That Vibrant Color
- Natural blueberry ice cream tends to be pale. If you want a more intense purple, add a few drops of natural food coloring (or use wild blueberries—they’re naturally more vibrant).
3. Improve the Texture
- Add a tablespoon of corn syrup or vodka to reduce iciness.
- Don’t skip the chilling stage before churning—this is key for smoothness.
- Avoid over-churning—it can lead to a grainy, buttery feel.
Variations to Try
One of the best things about homemade ice cream is how easy it is to customize. Once you’ve mastered the basic blueberry version, the possibilities are endless. Whether you’re craving something tangy, rich, or dairy-free, these creative variations will take your blueberry ice cream to the next level.
1. Blueberry Cheesecake Ice Cream
This is a total crowd-pleaser. Add small cubes of cream cheese to the base and swirl in some graham cracker crumbs during the last few minutes of churning. You can also layer in chunks of cheesecake or a cheesecake swirl using softened cream cheese and sugar.
2. Vegan Blueberry Ice Cream
Going dairy-free? No problem. Swap out the dairy with:
- Full-fat coconut milk or cashew cream for creaminess
- Maple syrup or agave as sweeteners
Blend with the blueberry puree and freeze like normal. It’s surprisingly creamy and rich.
3. Blueberry Lemon Swirl
Add lemon zest to the base for a bright, citrusy kick. As the ice cream churns, drizzle in lemon curd to create a tart swirl. It’s the perfect balance between tangy and sweet.
4. Blueberry Almond Crunch
For a crunchy twist, stir in toasted almonds and dark chocolate chunks just before the churning ends. The nutty flavor complements the blueberries perfectly.
5. Boozy Blueberry Ice Cream (For Adults Only)
Add a tablespoon or two of blueberry liqueur or vodka to the mix. It won’t freeze quite as hard (alcohol lowers the freezing point), but it’ll be ultra-smooth and flavorful.
Serving Suggestions
You’ve put in the work—now let’s talk about how to enjoy your delicious blueberry ice cream in style. Whether you’re serving guests or just treating yourself, presentation makes a big difference.
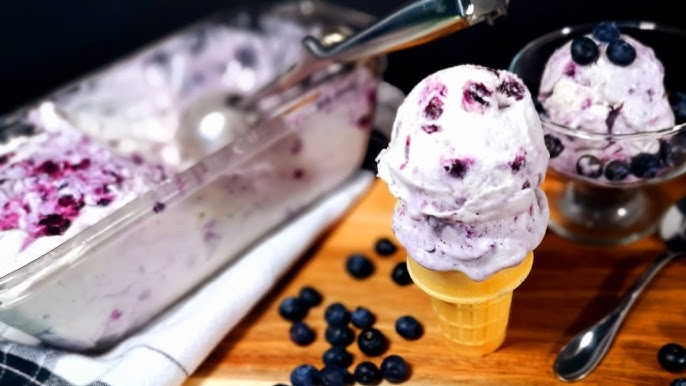
1. Classic Cones or Bowls
Scoop into sugar cones, waffle cones, or simple dessert bowls. Garnish with:
- Fresh blueberries
- Mint leaves
- Whipped cream
2. Blueberry Ice Cream Sandwiches
Spread a thick layer of ice cream between soft sugar cookies, then freeze for 30 minutes. So fun and easy for parties or snacks.
3. Ice Cream + Waffles = Heaven
Top warm Belgian waffles with a generous scoop of blueberry ice cream and drizzle with maple syrup or blueberry sauce.
4. Blueberry Milkshake
Blend 2–3 scoops with a splash of milk for a dreamy milkshake. Add whipped cream on top for extra indulgence.
5. Berry Sundae Bar
Make a DIY sundae station with:
- Chopped nuts
- Berry compote
- Hot fudge
- Coconut flakes
Let everyone build their perfect scoop.
Storage Tips
Proper storage keeps your homemade ice cream tasting fresh and creamy for as long as possible. Here’s how to make it last:
1. Use the Right Container
Choose a shallow, airtight container—metal or BPA-free plastic is ideal. Avoid deep containers; they slow freezing and can affect texture.
2. Cover to Prevent Ice Crystals
Press a sheet of plastic wrap or wax paper directly onto the surface before sealing the lid. This prevents moisture buildup and crystal formation.
3. Label and Date
Homemade ice cream is best eaten within 2 weeks, though it can last longer if stored well. Label it so you don’t forget when it was made.
4. Avoid Frequent Thawing
Repeated thawing and refreezing causes freezer burn and a grainy texture. When you’re ready to enjoy, let it sit out just until scoopable—then pop it right back in the freezer.
Common Mistakes to Avoid
Even a simple recipe like this one can go sideways if you’re not careful. Here are some common pitfalls and how to avoid them.
1. Skipping the Chill Step
We’ve said it before and we’ll say it again—chill your mixture before churning. Warm base = icy ice cream.
2. Using Too Much Fruit
Overloading your mix with fresh blueberries might sound delicious, but too much fruit means excess water, leading to icy texture. Stick to the puree method for better results.
3. Over-churning
More time in the ice cream maker doesn’t mean better ice cream. In fact, over-churning can make the mix buttery and weird. Stop when it reaches soft-serve consistency.
4. Not Storing It Properly
Leaving your ice cream uncovered or using the wrong container invites freezer burn and ruins flavor.
5. Ignoring Texture Adjustments
If your mix is too thick, it won’t churn well. Too thin? It might not freeze properly. Keep your eye on consistency and adjust with cream or milk as needed.
FAQs about Blueberry Ice Cream Recipe
1. Can I make this ice cream without an ice cream maker?
Yes! Use the no-churn method by folding whipped cream into sweetened blueberry puree and freezing it. It’s creamy and delicious, no machine required.
2. How long can homemade blueberry ice cream be stored?
For best flavor and texture, enjoy within 2 weeks. Keep it in an airtight container and press plastic wrap against the surface to prevent freezer burn.
3. Can I use canned blueberries?
You can, but fresh or frozen berries offer better flavor. If using canned, drain any syrup and reduce sugar in your base.
4. Is it possible to reduce the sugar?
Yes, but keep in mind that sugar helps with texture and freezing. Reduce slightly, but don’t cut it too much or your ice cream may become icy.
5. What makes homemade ice cream grainy?
Usually it’s due to not chilling the base enough, over-churning, or storing improperly. Follow the chilling and freezing tips closely for smooth results.
Conclusion
There’s nothing quite like a bowl of homemade blueberry ice cream—fresh, flavorful, and made with love. Whether you’re cooling down on a hot day or craving something sweet and fruity, this recipe delivers big time. Plus, with all the fun variations and serving ideas, you’ll never get bored.
The best part? It’s totally doable, even if you’re new to making ice cream. So gather your ingredients, take it step by step, and get ready to wow yourself (and everyone else) with your very own frozen masterpiece.


