Bhindi Masala Recipe: Bhindi Masala is one of those classic Indian dishes that never goes out of style. Whether you’re a beginner in the kitchen or a seasoned cook, this simple yet flavorful stir-fried okra recipe will win you over. Bhindi (okra or ladyfinger) is a staple vegetable in Indian households, and when it’s cooked with aromatic spices and herbs, it turns into a satisfying side dish that’s perfect with roti, paratha, or even rice.
What makes Bhindi Masala special is its balance. It’s not too spicy, not too bland—just the right mix of flavors. Plus, it’s healthy, naturally gluten-free, and can easily be made vegan. Packed with fiber and essential nutrients, okra is a great veggie to include in your diet. So, if you’re ready to cook something traditional yet super easy, keep reading. This step-by-step guide has everything you need.
What is Bhindi Masala?
Bhindi Masala is a dry or semi-dry Indian stir-fried dish made using fresh okra, onions, tomatoes, and a blend of spices. The name says it all—“bhindi” means okra, and “masala” refers to the spicy mixture it’s cooked in. It’s a favorite across India and is often found in lunch boxes, dinner tables, and even restaurant menus.
Different regions in India have their own takes on Bhindi Masala. In North India, it’s often cooked with onions, tomatoes, and dried spices like amchur (dry mango powder). In South India, it may include curry leaves, mustard seeds, and coconut. There’s even a gravy version of Bhindi Masala that pairs beautifully with steamed rice. Whether dry or saucy, it always hits the spot.
Another reason this dish is loved so much? It’s ridiculously adaptable. Want to skip onions? Go Jain style. Love garlic? Add more of it. Prefer a tangy kick? Squeeze in some lemon juice. The base recipe is super flexible and can be customized to match your taste.
Ingredients You’ll Need
Here’s a breakdown of everything you’ll need to make the perfect Bhindi Masala:
Fresh Produce
- Bhindi (Okra) – 500 grams (fresh and tender)
- Onions – 2 medium-sized, thinly sliced
- Tomatoes – 2 medium-sized, finely chopped
- Green Chilies (optional) – 1 or 2, slit
Spices
- Cumin Seeds – 1 tsp
- Turmeric Powder – ½ tsp
- Red Chili Powder – 1 tsp (adjust to taste)
- Coriander Powder – 1½ tsp
- Garam Masala – ½ tsp
- Amchur (Dry Mango Powder) – 1 tsp
- Salt – to taste
Others
- Oil – 3 tbsp (mustard oil or any vegetable oil)
- Ginger-Garlic Paste (optional) – 1 tsp
- Kasuri Methi (dried fenugreek leaves) – 1 tsp (crushed)
Optional Garnish
- Fresh coriander leaves – finely chopped
These are the basic yet flavorful ingredients that come together to create an incredible home-cooked meal. Make sure to prep them properly to bring out the best flavor.
How to Choose Fresh Bhindi (Okra)
Choosing the right bhindi is the first step to nailing this recipe. Here are some quick tips to pick the freshest ones:
- Check for Tenderness: Gently bend the tip of the okra. If it snaps easily, it’s fresh. If it bends and feels rubbery, it’s overripe.
- Look for Bright Color: Go for vibrant green okra with no dark spots or wrinkles.
- Size Matters: Pick medium-sized pods, not too long or fat. Large ones are usually tough and fibrous.
Once you’ve picked them, avoid washing them immediately if you don’t plan to cook the same day. Moisture is the enemy of crispy okra—it encourages sliminess.
Store unwashed bhindi in a paper towel or breathable bag in your refrigerator’s vegetable drawer. It usually stays fresh for up to 3–4 days.
Prepping the Bhindi
Getting the prep right for bhindi (okra) can make or break your dish. This vegetable is known for releasing a sticky, slimy substance when cut or cooked, which turns off a lot of first-timers. But don’t worry—with a few smart tips, you can make your bhindi perfectly dry and non-sticky every time.
Washing and Drying Techniques
Always wash bhindi before cutting it. If you wash it after slicing, it’ll get slimy in seconds. Rinse the okra thoroughly under running water, then spread it out on a kitchen towel or paper towels to dry. Let it air dry for at least 30–60 minutes, or pat it completely dry using a clean cloth. Any moisture on the surface will make it sticky during cooking.
Cutting the Bhindi Right
Use a dry cutting board and knife. Make sure your hands are also dry. Slice off the ends and chop the bhindi into ½ to 1-inch pieces. Try to keep the sizes even for uniform cooking. If you want them to cook faster, cut them slightly thinner.
Pro tip: The more you disturb the okra while cutting, the more slime comes out. Be quick and clean.
Tips to Reduce Sliminess During Cooking
- Sauté separately: Cook the bhindi alone first in a bit of oil until it’s no longer sticky before adding it to the masala.
- Don’t overcrowd the pan: Cook in batches if needed.
- Use acidic ingredients: A dash of lemon juice or amchur (dry mango powder) helps cut the slime.
- Avoid covering the pan while bhindi is cooking. Trapped steam causes sogginess.
Proper preparation is 80% of the job. Get this part right, and your bhindi masala will have the perfect texture—soft on the inside, lightly crisp outside, and completely slime-free.
Kitchen Tools You’ll Need
Good tools can make cooking smoother and faster. For Bhindi Masala, you don’t need anything fancy, but having the right basics will help.
Essential Tools:
- Sharp Knife – for cleanly slicing bhindi without crushing it.
- Chopping Board – preferably wooden or plastic, kept dry while cutting bhindi.
- Heavy-Bottomed or Non-Stick Pan – this ensures even heat distribution and prevents sticking. A cast-iron skillet is great if you want that rustic touch.
- Wooden Spatula – won’t damage your non-stick cookware and is gentle on vegetables.
- Mixing Bowls – for prepping and setting aside chopped veggies.
Optional Tools:
- Garlic press – if you’re using fresh garlic.
- Spice box or masala dabba – to keep all your Indian spices organized and handy.
Having these simple tools will make your cooking process faster and way more enjoyable. Plus, less hassle means you’ll actually want to cook more often!
Step-by-Step Bhindi Masala Recipe Guide
Now let’s dive into the heart of this recipe—the actual cooking process. This step-by-step guide ensures that even if you’ve never made an Indian dish before, you’ll get it right on the first try.
Step 1: Wash and Dry Bhindi Properly
Wash the bhindi (okra) thoroughly under running water. Drain completely and pat dry using a clean kitchen towel. This step is very important—any moisture left on the bhindi can make it slimy during cooking. Let it air-dry for a few minutes before chopping.
Step 2: Chop Vegetables
Trim off the top and tail of each bhindi, then cut into 1-inch pieces. Finely slice onions and chop tomatoes. Keep green chilies, ginger, and garlic ready if using. Uniform chopping ensures even cooking.
Step 3: Sauté Bhindi Until Non-Sticky
Heat oil in a wide pan over medium heat. Add the chopped bhindi and sauté without covering for 8–10 minutes, stirring occasionally. Cook until the bhindi looks crisp, glossy, and non-sticky. Remove from the pan and set aside.
Step 4: Sauté Onions and Tomatoes
In the same pan, add a little more oil if needed. Add sliced onions and sauté until golden brown. Stir in ginger-garlic paste and green chilies, cooking until fragrant. Add chopped tomatoes and cook until soft and oil starts to separate.
Step 5: Add Spices
Lower the heat and add turmeric, red chili powder, coriander powder, cumin powder, and salt. Mix well and cook for 1–2 minutes to blend the spices without burning them.
Step 6: Combine Bhindi and Masala
Add the sautéed bhindi back into the pan. Gently mix so the okra is evenly coated with the masala. Cook uncovered for 5–7 minutes on low heat.
Step 7: Simmer and Finish with Garnishing
Sprinkle garam masala and mix lightly. Simmer for 2 minutes, then turn off the heat. Garnish with fresh coriander leaves and serve hot with roti, paratha, or rice.
Tips to Make Restaurant-Style Bhindi Masala
Ever wonder why Bhindi Masala tastes so much better in a restaurant than at home? The secret isn’t just in the spices—it’s in the technique. Let’s break down how you can replicate that same delicious flavor and texture right in your own kitchen.
1. Sauté Bhindi Separately
This is the number one trick. Restaurants often fry or sauté okra separately until it’s cooked through and no longer slimy. Doing this before adding it to the masala keeps it crisp, well-cooked, and full of flavor. It also prevents the dish from turning soggy or sticky.
2. Use Kasuri Methi
Dried fenugreek leaves (kasuri methi) add an earthy, slightly bitter note that gives depth to the masala. Just a pinch goes a long way. Crush it between your palms before adding to release its aroma.
3. Cook Masala Until Oil Separates
Don’t rush the onion-tomato base. Let it cook slowly until the oil begins to separate from the masala. This not only enhances the flavor but ensures the spices are cooked properly—no raw taste, just bold, layered flavors.
4. Finish with Garam Masala and Amchur
Adding garam masala at the end keeps its aroma fresh and pungent. Amchur (dry mango powder) brings in a subtle tanginess that balances the spices and elevates the taste.
5. Use Less Water or None at All
Since this is a dry dish, avoid adding water. Moisture encourages sliminess in bhindi and makes the dish mushy. If you must, add just a teaspoon or two to deglaze the pan.
6. Low Flame is Key
After combining bhindi with the masala, always cook on a low flame. This allows the flavors to blend well without burning or overcooking the vegetables.
By following these steps, you’ll have a Bhindi Masala that rivals your favorite restaurant version—perfectly cooked, aromatic, and full of authentic Indian flavor.
Dry Bhindi Masala vs Gravy Bhindi Masala
Bhindi Masala can be enjoyed in two main styles: dry and gravy. Each version has its unique charm and best serving options. Let’s look at both so you can pick what suits your mood or meal best.
Dry Bhindi Masala
This is the most common version and the one we’ve covered in this guide. It’s perfect for everyday meals and pairs beautifully with roti, chapati, or paratha. It’s also travel-friendly and doesn’t spoil easily, making it great for lunch boxes.
Features:
- No added water or cream
- Cooked until the masala clings to the bhindi
- Ideal for wrapping in parathas or serving as a side
Best Paired With:
- Whole wheat roti
- Tandoori paratha
- Dahi (curd) or simple dal
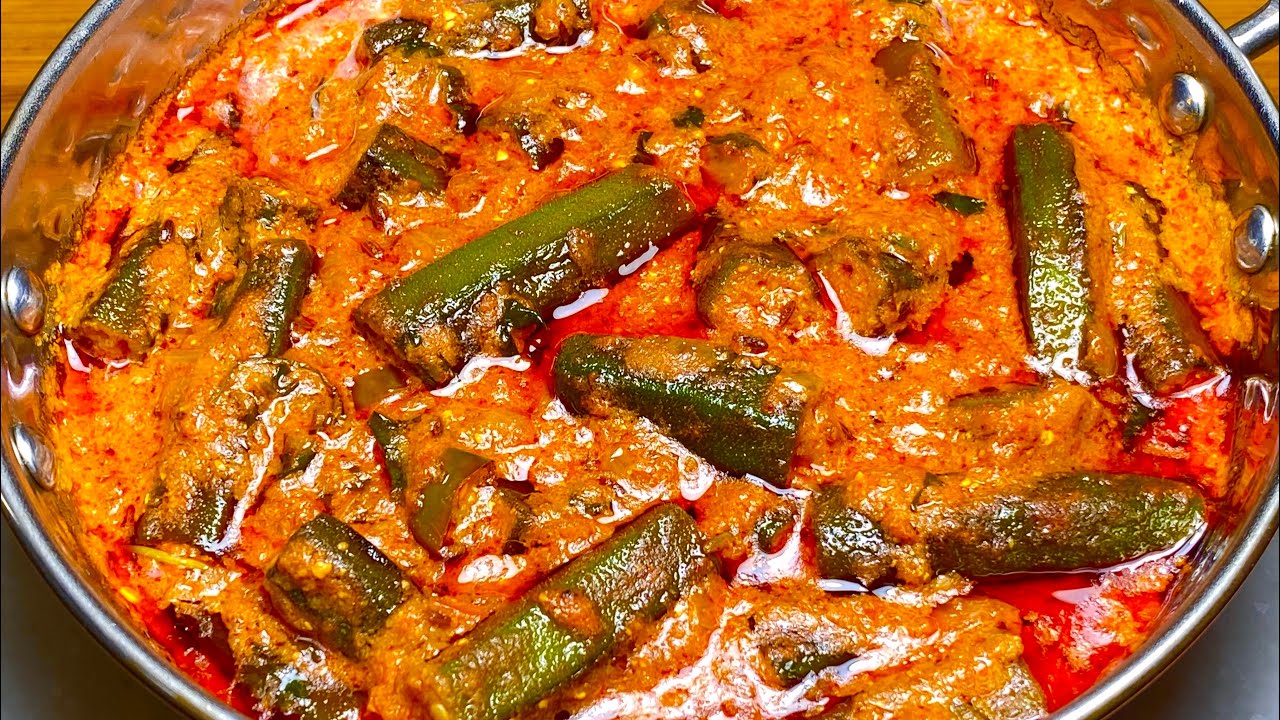
Gravy Bhindi Masala
If you’re looking for something a bit more luxurious, try the gravy version. This includes either a tomato-onion base with added water or even a cashew/cream-based gravy. It’s richer and more suitable for serving at dinner parties or with rice dishes.
Features:
- Slightly saucy consistency
- May include cream, cashews, or coconut
- More indulgent and filling
Best Paired With:
- Jeera rice or plain basmati rice
- Butter naan or garlic naan
- Raita and pickle
So, dry for the daily grind, gravy for those special occasions. You really can’t go wrong with either.
Common Mistakes to Avoid
Bhindi Masala seems simple, but there are a few common errors that can ruin the texture and flavor. Avoiding these mistakes will help you master the recipe like a pro.
1. Cooking with Wet Bhindi
This is the number one reason your dish turns into a slimy mess. Always dry your bhindi completely before chopping and cooking.
2. Overcrowding the Pan
When you add too much bhindi at once, it releases steam, making it soggy. Cook in batches if needed to maintain that nice sautéed texture.
3. Skipping the Separate Sauté
Bhindi needs its own cooking time to get rid of slime. If you throw it straight into the masala, it’ll release moisture and ruin the dish.
4. Burning the Masala
The onion-tomato base is delicate. High heat or impatience can cause the spices to burn, turning the whole thing bitter. Always cook it slowly on medium heat until the oil separates.
5. Adding Too Much Oil
Yes, you need oil to sauté, but overdoing it makes the dish greasy. Stick to about 2.5 to 3 tablespoons for a balanced texture and flavor.
Avoiding these simple mistakes is the difference between a dull and a delicious Bhindi Masala. Be mindful of these tips, and you’ll see a major improvement.
Variations of Bhindi Masala
Feeling adventurous? Once you master the basic recipe, you can explore different variations of Bhindi Masala from across India. Each style brings a new dimension to this humble veggie dish.
1. South Indian Style Bhindi Masala
This version includes mustard seeds, curry leaves, and sometimes coconut. Tamarind pulp may also be added for a tangy twist. It’s usually eaten with rice and has a very different flavor profile from the North Indian version.
2. Jain Bhindi Masala
Made without onions and garlic, this version still packs tons of flavor using tomatoes, asafoetida (hing), and a touch of lemon juice. Great for those following a sattvic or Jain diet.
3. Bhindi Do Pyaza
“Do pyaza” literally means “double the onions.” This rich variation uses large chunks of onions, sautéed in stages, along with the bhindi and masala. It’s slightly saucy and super satisfying.
4. Stuffed Bhindi Masala
Instead of mixing everything in a pan, bhindi is slit and stuffed with a dry spice mix (like coriander, amchur, chili, and turmeric), then shallow-fried. A fun, flavorful twist for when you want something different.
Each variation offers a unique take on Bhindi Masala, so don’t be afraid to experiment and find your favorite.
What to Serve with Bhindi Masala
Bhindi Masala is a versatile dish, which makes pairing it with other items super easy. Whether you like your meals simple or a bit indulgent, bhindi can be a perfect companion to many Indian staples. Let’s explore the best combinations that bring out the full flavor of this dish.
1. Indian Breads
Nothing complements Bhindi Masala better than a stack of warm, soft flatbreads.
- Roti/Chapati: These are the go-to options for most Indian households. They’re light, healthy, and perfect for scooping up the masala-coated bhindi.
- Paratha: Want something richer? Try it with plain or stuffed parathas. The buttery layers pair well with the spice of the bhindi.
- Naan: For a more indulgent meal, especially if you’re serving guests, naan (especially garlic or butter naan) makes a delicious combo.
2. Rice Dishes
Yes, you can absolutely eat Bhindi Masala with rice!
- Plain Steamed Rice: A simple but comforting combination. Add a bit of dal or raita on the side and it becomes a complete meal.
- Jeera Rice (Cumin Rice): Adds a fragrant, slightly spicy flavor that complements the bhindi beautifully.
- Pulao or Vegetable Fried Rice: If you have leftovers, throw them into a quick veggie pulao for a wholesome meal.
3. Side Dishes
Round out your plate with some of these extras for a balanced and satisfying meal.
- Dal Tadka or Dal Fry: The creamy texture of dal balances the spices of the bhindi perfectly.
- Raita: Whether it’s cucumber, boondi, or mint, a cool raita helps mellow down the heat and adds a refreshing touch.
- Papad & Pickle: A crispy papad and a bit of spicy mango or lime pickle can elevate even the simplest bhindi meal.
Bhindi Masala fits into any meal—whether it’s a quick weekday dinner or a full weekend spread. The trick is to match it with the right textures and flavors to make every bite count.
How to Store and Reheat
Cooked a big batch? No problem! Bhindi Masala stores well and tastes just as good the next day—if not better. Follow these tips to keep the taste and texture intact.
Storing in the Fridge
- Let the bhindi cool down to room temperature before storing.
- Transfer to an airtight container.
- Store in the fridge for up to 3 days.
- Avoid stacking other food on top of the container to prevent squishing the okra.
Freezing Bhindi Masala
While freezing is possible, it’s not ideal. Okra tends to lose its texture and becomes mushy when thawed. If you must freeze it:
- Use a freezer-safe container.
- Avoid adding tomatoes or high-moisture ingredients in the version you plan to freeze.
- Freeze for up to 1 month.
Reheating Tips
- Stovetop (Best Option): Heat a pan on low heat. Add a teaspoon of oil or water if it looks dry. Stir gently until heated through.
- Microwave: Cover with a microwave-safe lid or plate. Heat for 1–2 minutes in intervals, stirring in between.
- Avoid Overheating: This can make bhindi too soft or mushy. Reheat only as much as you plan to eat.
Properly stored and reheated, your Bhindi Masala will be just as enjoyable as when you first made it.
Is Bhindi Masala Healthy?
Absolutely! Bhindi Masala isn’t just tasty—it’s also incredibly good for you. When prepared with the right ingredients and in moderate oil, it can easily fit into most balanced diets.
Nutritional Benefits of Bhindi (Okra)
- High in Fiber: Supports digestion and keeps you full longer.
- Rich in Antioxidants: Contains vitamins A, C, and other antioxidants that help protect against cell damage.
- Good for Blood Sugar Control: Okra has properties that may help regulate blood sugar levels.
- Low in Calories: A 100g serving of okra contains just around 30-35 calories.
Health Benefits of Spices
- Turmeric: Anti-inflammatory and boosts immunity.
- Cumin: Aids digestion and metabolism.
- Amchur (Dry Mango Powder): Adds tanginess and also helps in digestion.
- Ginger-Garlic Paste: Antibacterial and boosts your immune system.
Oil and Fat Content
To keep it healthy, use minimal oil—just enough to sauté. You can also use heart-healthy oils like olive or cold-pressed mustard oil. Avoid deep frying to keep the calorie count in check.
Make It Vegan or Low-Carb
- This recipe is naturally vegan (unless you add cream or yogurt).
- It’s also low-carb, making it great for those on keto or diabetic diets.
So yes, Bhindi Masala is a guilt-free way to enjoy Indian food while sticking to your health goals.
FAQs about Bhindi Masala Recipe
1. Can I freeze Bhindi Masala?
It’s not ideal to freeze Bhindi Masala because okra tends to become mushy once thawed. If you must, freeze a dry version without tomatoes or added moisture for better results.
2. How do I remove slime from bhindi?
Dry the bhindi thoroughly before cutting, sauté it separately in oil, and avoid overcrowding the pan. Adding acidic ingredients like amchur or lemon juice also helps.
3. Is Bhindi Masala vegan?
Yes! This recipe is naturally vegan unless you add dairy-based garnishes like cream or yogurt. Use plant-based oil to keep it completely vegan.
4. Can I use frozen bhindi for this recipe?
You can, but expect a change in texture. Thaw completely and pat dry before cooking. It’s best used in gravy-style dishes where texture matters less.
5. How long can I store cooked Bhindi Masala?
In the fridge, it lasts up to 3 days in an airtight container. Reheat on the stove or microwave before serving.
Conclusion
Bhindi Masala is more than just a simple stir-fry—it’s a celebration of textures, flavors, and Indian home cooking at its best. Whether you’re cooking for a weekday dinner or treating guests to a flavorful Indian meal, this dish never disappoints. With its perfect blend of spices, tender yet crisp okra, and the rich aroma of sautéed onions and tomatoes, it’s easy to see why this classic remains a favorite across generations.
And the best part? You can tweak it any way you like—add garlic, skip onions, make it dry or add a gravy twist. Once you try this step-by-step recipe and get the texture just right, you’ll be coming back to it again and again. So grab some fresh okra, heat up that pan, and treat yourself to a hearty plate of Bhindi Masala today.


