Bear Claw Recipe: Who can resist a buttery, flaky, nutty pastry that’s shaped like a bear’s claw? Not many, right? Bear claws are an iconic bakery treat, often spotted in pastry displays alongside croissants and danishes. But did you know you can make these fancy-looking pastries at home, with minimal stress and maximum reward?
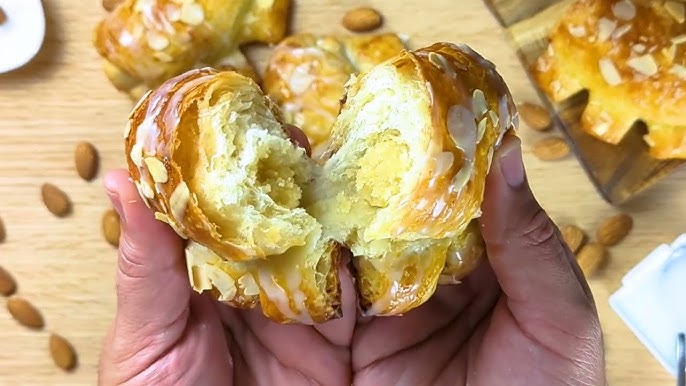
A bear claw isn’t just a sweet pastry; it’s a breakfast champion, a cozy Sunday treat, or a show-stopper for brunch. Traditionally filled with almond paste and topped with sliced almonds, this pastry gets its name from the claw-like cuts made before baking. Once you understand the process, you’ll wonder why you ever bought them from the store.
So let’s dive into this detailed, foolproof guide to baking bear claws from scratch. Whether you’re a baking beginner or someone looking to master pastry at home, this guide will walk you through each step. Let’s bake some magic.
List of Ingredients You’ll Need
Before we get started with the steps, it’s super important to have everything lined up. Trust me, nothing throws off your baking vibe like realizing halfway through that you forgot the almond paste!
Dough Ingredients:
- 3 ½ cups all-purpose flour
- ¼ cup granulated sugar
- 1 tsp salt
- 1 packet (2 ¼ tsp) active dry yeast
- ¾ cup warm milk (around 110°F)
- 2 large eggs
- 1 tsp vanilla extract
- ½ cup unsalted butter (softened)
Almond Filling Ingredients:
- 1 cup almond paste
- ¼ cup granulated sugar
- 1 large egg white
- 1 tbsp flour
- ½ tsp almond extract (optional but recommended)
Glaze & Topping Ingredients:
- 1 cup powdered sugar
- 2 tbsp milk (or more to adjust consistency)
- ½ tsp vanilla extract
- ½ cup sliced almonds
Make sure all your ingredients are at room temperature for best results. This helps the dough rise properly and keeps everything smooth and easy to mix.
Kitchen Tools Required
You don’t need a fancy bakery setup, but having the right tools can make a big difference:
- Large mixing bowls
- Stand mixer with dough hook (optional but helpful)
- Rolling pin
- Sharp knife or pizza cutter
- Parchment paper or silicone baking mats
- Baking sheet
- Pastry brush
- Plastic wrap or clean kitchen towel
- Cooling rack
Now that we’re all geared up, let’s jump into the real fun: making the dough!
Making the Dough
Dough is the heart of your bear claw. You want it soft, slightly sweet, and easy to roll out. Here’s how to make it perfectly.
Step 1: Activate the Yeast
In a small bowl, mix warm milk and sugar. Sprinkle the yeast over the top and let it sit for 5–10 minutes. You’re looking for a foamy top—this means your yeast is alive and ready to work its magic.
Step 2: Mix the Dough
In a large mixing bowl (or your stand mixer), combine the flour and salt. Add in the yeast mixture, eggs, vanilla extract, and softened butter. Mix until everything starts to come together.
Step 3: Knead the Dough
If using a mixer, knead for about 5–6 minutes until the dough is smooth and elastic. If kneading by hand, it may take 8–10 minutes. The dough should be slightly sticky but manageable.
Step 4: First Proofing
Place the dough in a greased bowl and cover with plastic wrap or a kitchen towel. Let it rise in a warm, draft-free place for about 1 to 1.5 hours, or until it has doubled in size.
Pro tip: You can also do a slow proof in the refrigerator overnight—this enhances flavor and makes it easier to work with the next day.
Preparing the Almond Filling
Here’s where the magic begins. The almond filling is what gives bear claws their signature rich, nutty flavor. It’s creamy, slightly sweet, and has just the right texture to complement the buttery dough.
Step 1: Break Down the Almond Paste
Start by crumbling the almond paste into small chunks in a mixing bowl. Almond paste can be dense, so don’t worry—it’ll soften as you mix.
Step 2: Add Sugar and Egg White
Add the granulated sugar and egg white. These help to loosen up the almond paste and create a smooth, pipeable consistency. The egg white adds moisture and makes the filling nice and fluffy.
Step 3: Mix Well
Using a hand mixer or a sturdy spoon, blend the mixture until it’s smooth and spreadable. If it still seems too thick, you can add a tiny bit more egg white or a dash of milk.
Optional Flavor Boost: Add almond extract for an extra punch of flavor. Just half a teaspoon will intensify that nutty richness.
Texture Tip: If your mixture is too thin, sprinkle in a bit of flour to bring it back to a thicker consistency. You want it thick enough to stay in place when spreading it on the dough but not so stiff that it’s difficult to work with.
Now that our filling is ready and your dough is rested, it’s time to bring everything together.
Assembling the Bear Claws
This is where your kitchen turns into a bakery. It might look tricky at first, but the process is actually pretty straightforward once you get going.
Step 1: Roll Out the Dough
Lightly flour your surface and rolling pin. Roll out the dough into a large rectangle, about ¼ inch thick. Try to keep the shape even, around 10×20 inches, to make it easier to cut and fold.
Step 2: Spread the Filling
Take your almond filling and spread it across half the dough (lengthwise). Keep the layer even and smooth, leaving a ½ inch border around the edge so the filling doesn’t ooze out when folding.
Step 3: Fold the Dough
Fold the empty half of the dough over the filled side, like closing a book. Press down lightly to seal the edges.
Step 4: Cut into Sections
Using a sharp knife or pizza cutter, cut the folded dough into 2 to 3-inch wide sections. These are your individual bear claws.
Getting excited? Let’s shape them next!
Shaping the Claws – The Signature Look
This step gives the bear claw its iconic appearance—those “toes” that spread out when baked.
Step 1: Make the Cuts
Take each pastry section and, on the sealed side, make 3 to 4 small cuts about ¾ of the way up from the edge. These slits will separate into “toes” during baking.
Step 2: Fan Them Out
Gently curve the pastry into a slight arc and fan out the cut sections. This gives it that distinctive claw shape. Don’t worry if it doesn’t look perfect—it’ll puff up beautifully in the oven.
Step 3: Transfer to Baking Sheet
Place each shaped pastry on a parchment-lined baking sheet, leaving enough space in between since they will expand as they rise and bake.
Your pastries are looking great already. But don’t rush to the oven yet—proofing round two is next.
Second Rise – Letting the Dough Rest
Patience pays off here. The second proof gives the pastries that light, airy texture we all love.
Step 1: Cover and Rest
Cover your shaped bear claws with a clean towel or plastic wrap and let them rise for 30 to 45 minutes. The dough should look puffy and soft but not doubled.
Step 2: Warm Environment
If your kitchen is chilly, place the baking sheet in the oven with just the light on. The gentle warmth helps them rise faster and more evenly.
Why This Step Matters: Skipping the second proof can lead to dense, flat bear claws. Letting the dough rest again makes them tender and gives them that bakery-style lift.
Once they’ve puffed up, it’s time to bake!
Baking the Bear Claws
Alright, the moment of truth—let’s get these beauties into the oven.
Step 1: Preheat the Oven
Preheat your oven to 375°F (190°C). Make sure it’s fully heated before the bear claws go in.
Step 2: Bake Time
Bake the pastries for about 15–20 minutes, or until they’re golden brown and puffed. Keep an eye on them—every oven is a little different.
Step 3: Check for Doneness
You’ll know they’re done when the tops are a deep golden color, and the dough around the claws is firm to the touch. If you tap the bottom and hear a hollow sound, that’s another good sign.
Cooling Tip: Transfer them to a cooling rack right away to avoid soggy bottoms. Let them cool completely before glazing.
We’re almost there… time for the sweet finishing touch!
Preparing the Glaze
This glaze is the cherry on top—sweet, smooth, and shiny. It adds that professional bakery look and taste.
Step 1: Mix It Up
In a small bowl, whisk together the powdered sugar, milk, and vanilla extract. Start with 2 tablespoons of milk and add more if needed until you reach a pourable consistency.
Step 2: Apply the Glaze
Once the bear claws have cooled completely, drizzle the glaze over the top using a spoon or piping bag. You can go light or heavy—totally up to you.
Step 3: Optional Almond Topping
While the glaze is still wet, sprinkle sliced almonds on top. They’ll stick nicely and add a bit of crunch and elegance.
Boom—your bakery-style bear claws are ready to impress!
Decorating and Topping
Now that your bear claws are baked to golden perfection and glazed like a dream, it’s time to put the final touch on these beauties. Decorating isn’t just about looks—it adds texture, flavor, and that irresistible bakery feel.
Sliced Almonds for the Win
Sprinkle a generous handful of sliced almonds over the wet glaze. Not only do they add a gorgeous crunch, but they also let everyone know this pastry has that classic almond flavor inside. Want them extra toasty? You can lightly toast the almond slices in a dry pan for a few minutes before adding them.
Extra Glaze Drizzle
Love a double-glazed finish? After the first layer sets, go in with a second light drizzle. This adds an extra glossy look and a boost of sweetness.
Dusting of Powdered Sugar (Optional)
For an elegant, snowy touch, sift a bit of powdered sugar over the claws just before serving. It makes them look straight out of a Parisian bakery window.
Other Topping Ideas:
- Cinnamon Sugar: Sprinkle a cinnamon-sugar mix right after glazing for a sweet-spicy finish.
- Chocolate Drizzle: Melt a little chocolate and zig-zag it across the top.
- Caramel Drizzle: If you’re feeling extra indulgent, a drizzle of salted caramel works wonders.
Decorating is the fun, creative part—so play around and make it your own!
Tips for Perfect Bear Claws Every Time
You’ve come this far, so let’s make sure your bear claws turn out top-tier every time you bake them. Here are some pro tips you’ll thank yourself for later:
1. Chill the Dough if It’s Too Sticky
Working with sticky dough? Chill it in the fridge for 30 minutes before rolling it out. This makes shaping and cutting way easier.
2. Don’t Overfill
While it’s tempting to go heavy on the filling, too much can cause leaks and mess during baking. A thin, even layer is all you need.
3. Use Fresh Yeast
Old or expired yeast = flat pastries. Always check the date, and if in doubt, test it in warm water with sugar to see if it foams.
4. Even Cuts Matter
When shaping the “claws,” make sure the slits are evenly spaced and not too deep. This helps them bake evenly and look uniform.
5. Don’t Skip the Second Rise
Seriously, it makes a big difference in texture. The second proof gives the dough time to puff and develop a softer bite.
6. Rotate the Tray Halfway Through Baking
Ovens have hot spots. Rotating the baking sheet ensures even browning on all sides.
7. Cool Before Glazing
Glazing a hot bear claw will cause the glaze to melt and slide off. Let them cool at least 20–30 minutes first.
These tips may seem small, but they add up to a pastry that’s not just good—but unforgettable.
Storing Bear Claws
So, you’ve made a big batch (nice!) and now you’re wondering what to do with the extras. Here’s how to keep your bear claws fresh, delicious, and ready to enjoy anytime.
Room Temperature Storage
If you plan to eat them within 2 days, keep them in an airtight container at room temperature. Line the container with paper towels to absorb any moisture and prevent sogginess.
Refrigerating
Not recommended unless your kitchen is really warm or humid. Refrigerators tend to dry out pastries unless they’re wrapped tightly.
Freezing for Later
Bear claws freeze beautifully. Wrap each one individually in plastic wrap, then store them in a freezer-safe bag. They’ll last up to 2 months.
How to Reheat
- From room temp: Warm in a 300°F (150°C) oven for about 5–8 minutes.
- From frozen: Let thaw overnight or microwave on low power for 30 seconds, then finish in the oven to crisp them back up.
Avoid Microwaving Alone: Microwaving makes the dough rubbery. Always finish with a quick oven reheat if you can.
Variations of Bear Claw Recipe
The classic almond bear claw is a favorite—but once you master the basics, you can go wild with different fillings and styles. Here are a few delicious twists to try:
1. Chocolate Bear Claws
Swap almond paste for chocolate hazelnut spread (like Nutella). Sprinkle with chocolate chips before folding, and drizzle with melted chocolate after baking.
2. Apple Cinnamon Claws
Use a cooked apple filling with cinnamon and brown sugar. This gives cozy apple pie vibes in a portable pastry form.
3. Cream Cheese Claws
Mix cream cheese, sugar, and vanilla for a tangy-sweet filling. Top with a fruity glaze like strawberry or raspberry.
4. Fruit Jam Claws
Layer your favorite fruit jam (apricot, raspberry, cherry) under the almond filling or use it on its own for a brighter, sweeter flavor.
5. Vegan or Gluten-Free Options
- Use plant-based milk and butter, and replace the egg with applesauce or flax egg.
- For gluten-free, use a 1:1 baking flour blend with xanthan gum.
Get creative and make your own signature flavor—your friends and family will be impressed!
Serving Suggestions
Wondering when and how to serve these golden beauties? Bear claws are surprisingly versatile and fit into just about any part of your day.
Best Time to Serve
- Breakfast or Brunch: Pair with a hot latte or fresh orange juice.
- Afternoon Treat: Perfect with tea or iced coffee.
- Dessert: Serve warm with a scoop of vanilla ice cream.
Great Pairings
- Fresh fruit or fruit salad
- Greek yogurt with honey
- A side of scrambled eggs for a savory contrast
- Coffee with cinnamon or vanilla creamer
Hosting a Brunch?
Bear claws make a fantastic addition to a brunch spread. Arrange them on a wooden board with fruit, mini quiches, and cheeses for a beautiful, delicious display.
Why Homemade Beats Store-Bought
Sure, grabbing a bear claw from your local bakery or store is convenient. But homemade? It’s a whole different level.
1. Freshness You Can Taste
Nothing beats the taste of a fresh-baked pastry made with real butter and love. Store-bought ones often contain preservatives that dull the flavor.
2. Customization
You get to control everything—flavors, sweetness, size, fillings. Want to make a gluten-free version with a fruit twist? Go for it.
3. Cost-Effective
Pastries from a high-end bakery aren’t cheap. Making a batch at home gives you more servings at a fraction of the price.
4. Fun Baking Experience
Baking is therapeutic. Kneading the dough, shaping the claws, and watching them puff in the oven—it’s satisfying in a way that store-bought just can’t match.
Once you make these from scratch, you might never go back.
FAQs about Bear Claw Recipe
1. Can I use puff pastry instead of homemade dough?
Yes! Puff pastry is a great shortcut. It gives you flaky layers without all the work, but the texture will be a bit lighter than traditional bear claw dough.
2. How long do bear claws stay fresh?
They’re best eaten within 2 days when stored at room temperature. You can also freeze them for up to 2 months.
3. Can I make the dough ahead of time?
Absolutely. Make the dough and store it in the fridge overnight. Just let it come to room temperature before rolling and shaping.
4. What can I substitute for almond paste?
You can make your own with almonds and powdered sugar, or try using other nut pastes or even cream cheese for a different twist.
5. How do I make vegan bear claws?
Use dairy-free milk and butter, and swap eggs for flaxseed meal or applesauce. Make sure your filling is plant-based too.
Conclusion
So, there you have it—the complete, step-by-step guide to making the perfect bear claws at home. From the flaky dough to the sweet almond filling, crispy edges, and glossy glaze, every bite is worth the time and love you put into it.
Don’t be intimidated by the steps; once you do it once, it becomes a fun and rewarding process. Bake a batch, share with friends or family (or not—we won’t judge), and enjoy the taste of homemade goodness.
Let your kitchen smell like a bakery and make mornings a little more magical with these classic pastries.


