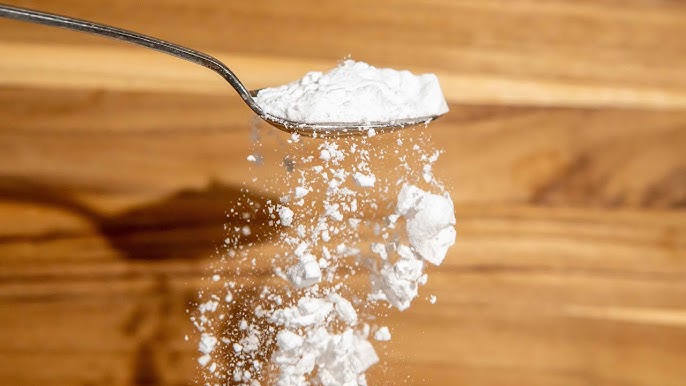
Baking Powder Recipe: Let’s face it: running out of baking powder when you’re in the middle of a recipe is the worst. But here’s the good news—you can actually make it yourself with just a few basic pantry ingredients. And it’s not just about avoiding a last-minute store run. Making your own baking powder gives you control over the ingredients, skips the unnecessary additives, and can even save you money in the long run.
But why would anyone want to make something that’s already so easy to buy? For one, most store-bought baking powders include aluminum-based compounds that can leave a metallic taste in some recipes. Not to mention, commercial blends often contain preservatives or anti-caking agents that many people prefer to avoid. With a homemade version, you’ll always know exactly what’s going into your food.
In this guide, you’ll learn everything you need to know: what ingredients to use, how to mix them, how to store your baking powder, and how to make sure it’s still fresh and working. Let’s dive into this simple yet powerful kitchen staple.
Ingredients You’ll Need
Here’s what you’ll need to whip up your very own batch of homemade baking powder. It only takes three ingredients, all of which you probably already have in your kitchen.
Basic Ingredients:
- Baking soda (sodium bicarbonate) – 1 part
- Cream of tartar (potassium bitartrate) – 2 parts
- Cornstarch (optional) – 1 part
Let’s break down what each ingredient does:
- Baking Soda: This is your main leavening agent. It’s alkaline and reacts with acids to produce carbon dioxide gas, which helps baked goods rise.
- Cream of Tartar: This is the acidic part of the equation. It reacts with baking soda to create the fizz and rise we need in cakes, muffins, and pancakes. It also helps stabilize mixtures.
- Cornstarch: This ingredient is optional but recommended. Its job is to absorb moisture and prevent clumping, which is especially important if you’re making a large batch and want to store it for future use.
Using a 2:1 ratio of cream of tartar to baking soda is what turns these basic ingredients into an effective, aluminum-free baking powder substitute. If you’re storing the mix, add an equal part of cornstarch to extend its shelf life.
What Does Baking Powder Do in Baking?
If you’ve ever wondered why baking powder is such a critical ingredient in recipes like cakes and pancakes, here’s the scoop: it’s all about the bubbles. Baking powder is a chemical leavening agent, which means it helps baked goods rise by releasing carbon dioxide gas when it reacts with moisture and heat.
This gas gets trapped in the batter or dough, forming tiny bubbles that expand and lift your baked goods. That’s what gives you light, fluffy muffins or a soft, airy cake.
There are two types of baking powder:
- Single-acting: This type reacts and produces gas as soon as it’s mixed with liquid. You need to bake it right away.
- Double-acting: Most store-bought powders fall into this category. They react in two stages—first when mixed with liquid and again when heated. This gives you more flexibility during baking.
Homemade baking powder is typically single-acting unless you incorporate certain heat-sensitive ingredients. It works great in recipes that go into the oven immediately after mixing. Want more rise? Be sure to get it into the oven quickly!
Homemade Baking Powder vs. Store-Bought
When it comes to baking powder, you might be wondering if making it at home can really compare to the commercial stuff. The short answer? Yes—sometimes it’s even better. Let’s look at how homemade and store-bought versions stack up against each other.
Effectiveness
Homemade baking powder can be just as effective—if not more so—than the store-bought kind. Since it’s made fresh, it hasn’t been sitting on a store shelf for months losing potency. The active ingredients, particularly baking soda and cream of tartar, react quickly and reliably. However, it’s worth noting that homemade powder is usually single-acting, which means it starts reacting as soon as you mix it with liquid. So, you need to bake your mixture right away.
On the other hand, store-bought baking powder is double-acting, meaning it gives you two rounds of lift: once when mixed, and again when heated. That can be helpful for recipes where you’re mixing ahead of time or need more time before baking.
Shelf Life
Commercial baking powders often contain stabilizers and anti-caking agents that help them last longer—sometimes up to 6–12 months. Homemade baking powder, if made with cornstarch and stored properly, lasts about 6 weeks to 3 months. It’s still long enough for most home bakers, especially if you make it in small batches.
Ingredients & Clean Eating
This is where homemade baking powder really shines. Many commercial brands include aluminum-based compounds (like sodium aluminum sulfate), which some people avoid due to taste or dietary preferences. Homemade versions are aluminum-free and made with just three simple ingredients. No preservatives, no fillers—just what you need.
If you’re into clean eating or simply like knowing what’s in your food, making baking powder at home puts you in complete control. Plus, it’s allergy-friendly and easy to adjust if you need a corn-free or gluten-free alternative.
How to Choose the Best Ingredients
Making a top-notch baking powder starts with high-quality ingredients. Since the recipe is so simple, the quality of each component makes a noticeable difference in performance and flavor.
1. Baking Soda
Go for a pure baking soda without any added ingredients. Most popular brands like Arm & Hammer work just fine. If you’re looking for something more natural, look for aluminum-free and food-grade baking soda. Store it in an airtight container to keep it from absorbing odors from your pantry.
2. Cream of Tartar
This is the most important ingredient for ensuring proper acidity. Choose a fine, white, powdery cream of tartar that’s food-grade. It’s typically found in the spice aisle. Some brands offer organic or non-GMO versions, which are great if you’re trying to avoid additives.
Fun fact: Cream of tartar is a byproduct of winemaking—yep, it comes from grape fermentation!
3. Cornstarch (Optional but Recommended)
Cornstarch acts as a drying agent, preventing the baking soda and cream of tartar from reacting prematurely. If you’re avoiding corn due to allergies or dietary needs, you can replace it with arrowroot powder, tapioca starch, or potato starch. Just make sure it’s finely ground and neutral in taste.
Tip: Always check expiration dates. Fresh ingredients lead to better baking powder, which leads to fluffier pancakes, cakes, and muffins.
Tools You’ll Need
You don’t need fancy equipment to make baking powder—just a few basic kitchen tools:
- Measuring spoons – Accuracy matters here, so use proper measuring spoons rather than estimating.
- Mixing bowl – A small glass or ceramic bowl works best to mix the ingredients evenly.
- Whisk or spoon – Use this to stir the ingredients thoroughly so everything is well blended.
- Airtight container or spice jar – This is essential if you plan to store the baking powder. A small glass jar with a tight-fitting lid is ideal.
- Label – Not required, but it helps to label the jar with the contents and the date you made it.
Optional: A small kitchen scale for weighing ingredients if you want to be ultra-precise.
Step-by-Step Guide to Making Baking Powder
Alright, here’s the fun part. Making baking powder at home is quick, easy, and seriously satisfying.
Step 1: Measure Your Ingredients
Use the following basic ratio:
- 1 part baking soda
- 2 parts cream of tartar
- 1 part cornstarch (optional, but recommended for storage)
For example:
- 1 tsp baking soda
- 2 tsp cream of tartar
- 1 tsp cornstarch
Step 2: Mix Baking Soda and Cream of Tartar
Add the baking soda and cream of tartar to your mixing bowl. Stir them together gently but thoroughly with your whisk or spoon. Make sure there are no clumps.
This is your basic baking powder mix. If you’re going to use it right away, you can stop here.
Step 3: Add Cornstarch (for Storage)
If you’re planning to store your homemade baking powder for later use, now’s the time to add cornstarch. This helps absorb moisture and keeps the powder from clumping or reacting prematurely.
Mix again until everything is fully blended and evenly distributed.
Step 4: Transfer to an Airtight Container
Carefully spoon the mixture into your airtight container or spice jar. Seal the lid tightly to keep out air and moisture.
Step 5: Label and Store
Write the date on the container. Homemade baking powder stays fresh for about 6 to 8 weeks, especially if stored in a cool, dry place.
Boom—you’ve just made your own baking powder. Feels good, right?
Homemade Baking Powder Ratio
Getting the ratio right is key to making sure your baking powder works just like the store-bought kind. The good news? It’s incredibly easy to remember:
Standard Ratio:
- 1 part baking soda
- 2 parts cream of tartar
- 1 part cornstarch (optional, for storage)
This ratio gives you a reliable blend that mimics the effects of commercial baking powder without the additives. Let’s break it down:
- The baking soda provides the leavening power.
- The cream of tartar acts as the acid that activates the baking soda.
- The cornstarch keeps the mixture dry and shelf-stable.
Example Measurements for Small Batch:
- 1 teaspoon baking soda
- 2 teaspoons cream of tartar
- 1 teaspoon cornstarch
This will give you about 1 tablespoon (3 teaspoons) of homemade baking powder.
Scaling the Recipe:
Need a bigger batch? Just multiply each part equally.
For 1/2 cup of baking powder:
- 4 tablespoons baking soda
- 8 tablespoons cream of tartar
- 4 tablespoons cornstarch
Mix thoroughly and store in an airtight jar.
How Much to Use in Recipes?
Use homemade baking powder in the same amount as the recipe calls for. For example:
- If your recipe says 2 teaspoons of baking powder, use 2 teaspoons of your homemade version.
Just remember: Since this is usually single-acting, be ready to bake immediately after mixing your batter or dough. Delaying might mean less rise in your final bake.
How to Store Homemade Baking Powder
Storage is super important if you want your homemade baking powder to stay fresh and effective. Exposure to moisture or air can cause it to lose its fizz—literally.
Best Storage Containers:
- Use an airtight glass jar or small spice container with a tight-sealing lid.
- Avoid plastic containers unless they’re food-safe and airtight.
Where to Store It:
- Keep it in a cool, dry place, like your pantry or a cupboard.
- Don’t store it near the stove, dishwasher, or other warm, humid spots in the kitchen.
How Long Will It Last?
- With cornstarch: Up to 3 months
- Without cornstarch: 1 to 2 weeks, best used immediately
Write the date you made it on the container so you can track its freshness.
Pro Tip: Only make small batches at a time—enough to last for a few weeks. That way, your baking powder is always fresh and effective.
How to Test If Baking Powder Still Works
Not sure if your homemade baking powder is still active? Here’s a quick and easy test to make sure it still has some “pop.”
The Hot Water Test:
- Heat up about 1/4 cup of water until it’s hot but not boiling.
- Drop in 1/2 teaspoon of your baking powder.
- Watch closely.
If it fizzes and bubbles right away, your baking powder is still good to use. If it just sits there or barely bubbles, it’s time to toss it and make a fresh batch.
Why This Works:
The acid (cream of tartar) and base (baking soda) in your powder react with water to produce carbon dioxide gas. This is what causes the bubbles—and what makes your baked goods rise in the oven.
Always test old baking powder before using it in a recipe, especially if it’s been stored for over a month.
Gluten-Free & Corn-Free Alternatives
If you’re sensitive to gluten or corn, don’t worry—you can still make a safe, effective baking powder at home by swapping out one ingredient.
Corn-Free Starch Substitutes:
If you’re avoiding cornstarch, use one of these options:
- Arrowroot powder
- Tapioca starch
- Potato starch
- Rice flour (in small amounts)
These alternatives act the same way cornstarch does: they absorb moisture and help keep your baking powder dry and clump-free.
Is Homemade Baking Powder Gluten-Free?
Yes—as long as you check your labels. Baking soda and cream of tartar are naturally gluten-free, but cross-contamination can happen during packaging. Always look for brands that are certified gluten-free if you’re highly sensitive.
This makes homemade baking powder a safe and smart option for anyone with dietary restrictions or food allergies.
Is Homemade Baking Powder Really Healthier?
Let’s be real: in a world where ingredient labels are getting longer and harder to understand, knowing exactly what’s going into your food is a major win. That’s one of the biggest advantages of making baking powder at home—it’s simple, clean, and transparent.
1. No Aluminum
Many commercial baking powders contain aluminum-based compounds like sodium aluminum sulfate or sodium aluminum phosphate. While these are considered safe by food authorities, some people avoid them due to concerns about taste or long-term exposure. Aluminum in baking powder can also leave a metallic aftertaste in certain recipes—especially delicate ones like angel food cake or muffins.
With homemade baking powder, you’re in control. You’re using just three natural ingredients—none of which are aluminum-based. That alone makes it a healthier option for many people.
2. Fewer Additives
Store-bought baking powder can include additives like:
- Anti-caking agents
- Preservatives
- Stabilizers
- Fillers
These are fine for shelf life and mass production, but they’re not necessary for most home baking. When you make it yourself, you skip all of that. What you get is a pure leavening agent—no extras, no chemicals, no weird stuff.
3. Allergy-Friendly and Clean Label
Homemade baking powder is perfect for those following special diets:
- Gluten-free
- Corn-free
- Aluminum-free
- Paleo or Whole30 (with the right starch)
- Organic (if you choose organic ingredients)
You can also pick brands that are non-GMO, vegan, or certified clean, depending on your dietary goals.
4. Freshness = Better Results
Another health perk? Fresh baking powder means less need for re-dos. When baking powder loses its potency, recipes flop—and you might be tempted to double the amount or over-bake, which can dry out your food or make it taste off. With a fresh homemade version, your baked goods will turn out better, more consistent, and less prone to failure.
Troubleshooting Common Issues
Even with a simple recipe like baking powder, things can sometimes go sideways. Let’s troubleshoot a few common issues you might run into—and how to fix them fast.
1. My Baking Powder Is Clumping
This usually happens when moisture sneaks in. It could be from:
- Using a damp spoon
- Leaving the lid off for too long
- Storing it near the stove or dishwasher
Fix: Break it up with a fork or re-mix with a little fresh cornstarch. For best results, toss and make a new batch if it’s clumpy or hard.
Tip: Always use a dry spoon and seal the container tightly after each use.
2. My Baked Goods Aren’t Rising
There are a few possibilities here:
- The baking powder is old or inactive (test with hot water)
- You didn’t use enough
- It reacted too early (you waited too long to bake the batter)
- Wrong ingredient ratios
Fix: Double-check your measurements. Always bake immediately after mixing your dough or batter when using homemade (single-acting) baking powder.
3. My Recipe Tastes Bitter
Too much baking powder can leave a harsh or bitter flavor, especially if it didn’t fully react during baking.
Fix: Measure carefully and avoid overusing. Stick to the recipe’s recommended amount, and make sure your oven is fully preheated before baking.
Creative Uses of Baking Powder
Believe it or not, baking powder isn’t just for cookies and cupcakes. This versatile mix has multiple uses beyond baking, especially around the house.
1. Natural Cleaner
Baking powder can work like baking soda in some cleaning situations. While it doesn’t pack quite the same punch, it can still help with:
- Scrubbing sinks and stovetops
- Deodorizing trash cans
- Cleaning grout and tiles
Mix with water to create a paste and apply with a sponge or brush.
2. DIY Beauty
Add a pinch of baking powder to:
- Facial scrubs
- Foot soaks
- Homemade masks
It helps exfoliate and balance skin, though it should be used with care if you have sensitive skin.
3. Freshen Laundry
Add a teaspoon of homemade baking powder to your laundry for a boost. It helps neutralize odors and can gently clean delicate fabrics.
4. Science Experiments
Got kids or love fun kitchen science? Use baking powder in classic DIY volcanoes or fizzy reactions for an educational, interactive activity.
FAQs about Baking Powder Recipe
1. Can I use lemon juice instead of cream of tartar?
Yes, you can. Lemon juice is acidic and can activate baking soda. However, it’s best used in wet recipes (like pancakes or muffins), and it will change the moisture level. If substituting, adjust the liquids accordingly.
2. Can baking soda be used alone in baking?
Not usually. Baking soda needs an acid to react. Without one, your recipe won’t rise properly. That’s why baking powder (which includes both acid and base) is used when no other acid is present in the recipe.
3. How do I substitute store-bought baking powder with homemade?
Use homemade baking powder in the same quantity as commercial. Just remember, it’s often single-acting, so bake your recipe immediately after mixing.
4. How much baking powder should I use per cup of flour?
A good rule of thumb is 1 to 1 1/4 teaspoons of baking powder per cup of all-purpose flour. Always follow the recipe, but this guideline works well for most baked goods.
5. Is baking powder the same as baking soda?
Nope! Baking soda is a base, and it needs an acid to work. Baking powder contains both the acid and the base, so it can rise on its own. They’re not interchangeable without adjusting other ingredients.
Conclusion
So, there you have it—a complete, step-by-step guide to making your own baking powder at home. Whether you’re avoiding additives, chasing freshness, or just want to be a little more self-sufficient in the kitchen, homemade baking powder is a simple switch that makes a big difference.
It’s easy, budget-friendly, and totally customizable. Plus, you get that amazing satisfaction of knowing exactly what’s going into your food. Trust us: once you try making your own baking powder, you’ll never want to go back to the store-bought kind.
Happy baking—and don’t forget to test it with a fizz!