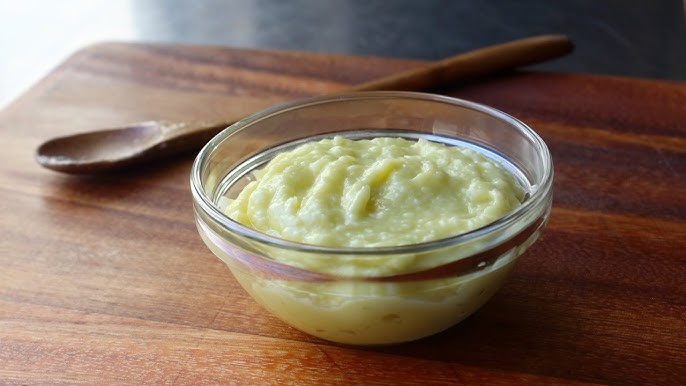
Garlic Aioli Recipe: There’s something magical about a sauce that takes just a handful of ingredients and transforms them into something bold, creamy, and irresistibly flavorful. That’s what garlic aioli does. Whether you’re dipping fries, spreading it on a sandwich, or drizzling it over roasted vegetables, garlic aioli instantly elevates whatever it touches. In this guide, I’ll walk you through how to make it from scratch — no gimmicks, no shortcuts, just pure flavor.
Homemade garlic aioli blows store-bought mayo-based versions out of the water. It’s creamy with a punch of garlic and a tang of lemon that hits all the right notes. And trust me — once you taste it, you’ll never go back to the bottled stuff.
What Is Garlic Aioli?
Garlic aioli is a Mediterranean condiment that traditionally combines crushed garlic with olive oil, emulsified into a creamy, thick sauce. The name “aioli” literally means “garlic and oil” in Catalan and Provençal. This ancient sauce hails from Spain and Southern France, where it’s often served with seafood, vegetables, or meats.
Nowadays, especially in North America, garlic aioli is often made by blending garlic into mayonnaise, creating a shortcut version. While tasty, it’s not quite the same as traditional aioli, which relies on emulsification — the process of slowly mixing oil into egg yolk and garlic to create a velvety texture.
The real-deal aioli uses:
- Fresh garlic
- Egg yolk (optional in traditional recipes)
- Lemon juice or vinegar
- Olive oil
- Salt
Why You’ll Love This Garlic Aioli Recipe
There are so many reasons to fall in love with this garlic aioli recipe:
- Flavor-packed: It has a deep, bold garlic taste without being too harsh.
- Fresh and real: No preservatives, additives, or artificial flavors.
- Versatile: It goes with practically everything — fries, fish, veggies, burgers.
- Easy to make: Just a few steps and common ingredients.
- Customizable: Adjust the garlic level, try new herbs, or spice it up.
If you’ve never made aioli before, you’re in for a treat. It’s a staple in Mediterranean cooking for good reason — one taste and you’ll understand why.
List of Ingredients You’ll Need
Here’s what you’ll need to whip up a delicious homemade garlic aioli:
Main Ingredients
- 2–3 garlic cloves (peeled)
- 1 egg yolk (room temperature)
- 1 tsp Dijon mustard (optional but helps emulsify)
- 1 tablespoon lemon juice (freshly squeezed)
- ½ teaspoon salt (or to taste)
- ¾ cup light olive oil (not extra virgin for a milder taste)
- Freshly ground black pepper (to taste)
Optional Add-ins
- White wine vinegar (in place of lemon for tang)
- Fresh herbs (like parsley, basil, or dill)
- Smoked paprika or chili flakes for heat
Ingredient Notes:
- Garlic: Fresh cloves are a must. Pre-minced or jarred garlic won’t deliver the same punch.
- Oil: Use a neutral oil or light olive oil. Extra virgin olive oil can be too bitter for emulsifying.
- Egg yolk: Helps with stability and creaminess.
Essential Tools for Making Aioli
To make garlic aioli successfully, you’ll need a few basic tools. Good news? You likely already have them in your kitchen.
Tools You’ll Need
- Mixing bowl
- Whisk or immersion blender
- Garlic press or mortar and pestle
- Measuring spoons and cup
- Food processor (optional for faster prep)
- Rubber spatula (to scrape down the sides)
Pro Tip:
If you’re using a food processor or immersion blender, make sure your container or bowl is tall and narrow. This helps the aioli emulsify faster and more evenly.
How to Make Garlic Aioli – Step-by-Step Guide
Making garlic aioli at home might seem intimidating, but it’s surprisingly simple if you follow these steps closely.
Step 1: Prep Your Ingredients
Start by gathering and measuring all your ingredients. Make sure the egg yolk is at room temperature — this makes emulsifying easier.
Step 2: Mash the Garlic
Use a mortar and pestle to mash the garlic with a pinch of salt until it forms a smooth paste. If you don’t have a mortar and pestle, use the flat side of a knife and smash it into a paste on a cutting board.
Step 3: Combine the Base
In a mixing bowl, whisk together the egg yolk, Dijon mustard, lemon juice, and garlic paste. This is your emulsification base.
Step 4: Slowly Add the Oil
Here’s the trickiest (but most important) part. While whisking constantly, begin to add the oil drop by drop. Once it starts to thicken, you can drizzle the oil in a thin stream.
- Go slow: Adding oil too fast can break the emulsion.
- Whisk vigorously: This helps create that creamy, stable texture.
Step 5: Season and Finish
Once all the oil is incorporated and your aioli is thick and creamy, taste and adjust the seasoning. Add more salt, pepper, or lemon juice as needed.
Congratulations — you’ve made garlic aioli from scratch!
Using a Food Processor or Blender
If you’re short on time or prefer a less labor-intensive method, a food processor or immersion blender can be your best friend for making aioli. While the traditional method gives you more control, the modern version speeds things up without sacrificing taste.
How to Use a Food Processor:
- Add egg yolk, mustard (if using), lemon juice, and garlic paste into the processor.
- Pulse a few times to combine.
- With the processor running on low, slowly drizzle in the oil through the top spout. This slow addition is key — rushing can ruin the emulsion.
- Once all the oil is added and the mixture is thick and pale, season with salt and pepper.
Using an Immersion Blender:
- Place all ingredients into a tall container or jar.
- Insert the immersion blender all the way to the bottom.
- Start blending on high without moving the blender — once the bottom starts emulsifying, slowly move the blender upward.
- In about 30 seconds, your aioli will be ready.
Note: The immersion blender method is almost foolproof and is a favorite for many home cooks who want fast, creamy results every time.
Pro Tips for Perfect Garlic Aioli
Making aioli is an art, but once you know a few tricks, you’ll nail it every single time.
1. Use Room Temperature Ingredients
Cold egg yolks or lemon juice can make it harder to emulsify. Let everything come to room temp for best results.
2. Don’t Overdo the Garlic
Garlic is the star here, but too much can overpower the entire sauce. Start small — you can always add more.
3. Add the Oil Slowly
This cannot be stressed enough. Drizzle, don’t dump. If you add too much oil too fast, your aioli might split and never come together.
4. Whisk Like You Mean It
Especially in the early stages, consistent and fast whisking helps create a stable base for emulsification.
5. Fixing a Broken Aioli
If your aioli breaks (gets runny or separates), don’t panic:
- Start with a new egg yolk in a clean bowl.
- Slowly whisk the broken mixture into the new yolk until it emulsifies again.
Common Mistakes to Avoid
Even the best home cooks slip up. Here are the top mistakes you should steer clear of when making aioli:
Mistake 1: Using Extra Virgin Olive Oil
While it sounds fancy, EVOO can be too bitter for aioli. Stick with a mild or light olive oil.
Mistake 2: Rushing the Emulsion
Speed kills here. Pouring oil too quickly causes the sauce to separate. Slow and steady wins.
Mistake 3: Skipping the Mustard or Acid
Mustard and lemon juice aren’t just for flavor — they also help stabilize the sauce. If you skip them, it may not hold together well.
Mistake 4: Using Cold Ingredients
Cold eggs and lemon juice can make it harder for the aioli to emulsify.
Mistake 5: Not Tasting as You Go
Balance is everything. Don’t forget to adjust the salt, lemon, and garlic to get that perfect flavor.
Variations You Can Try
Garlic aioli is amazing as-is, but why not switch things up once you’ve mastered the basics? Here are some tasty twists:
1. Lemon Herb Aioli
Add chopped parsley, basil, or thyme along with lemon zest. Perfect for grilled veggies or seafood.
2. Chipotle Aioli
Mix in 1 tablespoon of chopped chipotle peppers in adobo sauce. Adds a smoky, spicy kick great for tacos and burgers.
3. Truffle Aioli
Add a dash of truffle oil for a luxurious, earthy flavor. Ideal for dipping fries or serving with steak.
4. Sriracha Aioli
Spicy lovers rejoice! Add 1–2 teaspoons of sriracha sauce for a bold kick.
5. Roasted Garlic Aioli
Swap raw garlic for roasted garlic to mellow out the flavor and add sweetness.
The base recipe is super adaptable, so don’t be afraid to experiment with your own flavor combinations.
How to Store Garlic Aioli
Freshly made garlic aioli doesn’t have preservatives, so it needs proper storage.
Refrigeration Tips:
- Store in an airtight container or sealed jar.
- Keep it in the fridge at all times.
- Use within 3 to 5 days for best quality.
Can You Freeze Aioli?
Not recommended. Freezing can cause the emulsion to break, leaving you with a watery mess.
Pro Tip: Label your container with the date you made it so you know when it’s time to toss and make a fresh batch.
Serving Ideas for Garlic Aioli
Garlic aioli isn’t just for dipping fries — though it is absolutely amazing for that! Here are some creative ways to use your homemade aioli:
1. As a Dipping Sauce
- Sweet potato fries
- Fried calamari
- Chicken tenders
- Roasted vegetables
2. Sandwiches and Burgers
Spread it on:
- Grilled chicken sandwiches
- Veggie burgers
- Turkey wraps
- Pulled pork sliders
3. Seafood Dishes
- Drizzle over grilled shrimp or fish
- Use as a side sauce for crab cakes
- Mix into a seafood pasta dish
4. Salads
Thin it out with a bit of lemon juice and turn it into a creamy salad dressing.
5. Eggs and Breakfast
- Spread on toast with poached eggs
- Add to breakfast wraps or burritos
Honestly, once you have it in your fridge, you’ll start putting it on everything.
Is Aioli Healthy?
Aioli, like most condiments, should be enjoyed in moderation. It’s rich in flavor — and calories.
Nutritional Highlights (per tablespoon):
- Calories: ~100
- Fat: ~11g
- Protein: <1g
- Carbs: 0g
- No sugar, gluten-free
It’s keto and low-carb friendly but can be high in fat, depending on how much you use.
Healthier Tips:
- Use olive oil instead of canola or vegetable oil for better fats.
- Cut calories by using Greek yogurt to replace half the oil (though texture will change).
FAQs about Garlic Aioli Recipe
1. Can I Make Garlic Aioli Without Eggs?
Yes, you can! If you want an egg-free version, replace the egg yolk with aquafaba (the liquid from canned chickpeas). Use about 2 tablespoons. Aquafaba works well as a stabilizer and emulsifier, especially for vegan versions.
2. How Long Does Homemade Aioli Last?
Homemade aioli typically lasts 3 to 5 days in the refrigerator when stored in an airtight container. Always check for changes in smell or texture before using it past this window.
3. Can I Use Garlic Powder Instead of Fresh Garlic?
While fresh garlic gives the best flavor, yes, you can use garlic powder in a pinch. Start with ¼ teaspoon and adjust to taste. Just remember, the flavor will be milder and less punchy than using raw garlic cloves.
4. Why Did My Aioli Separate or Break?
Usually, aioli breaks when the oil is added too quickly, or if the ingredients are too cold. To fix it, whisk a new egg yolk in a clean bowl, then slowly add the broken aioli mixture while whisking constantly to re-emulsify.
5. Can I Make Garlic Aioli in Advance?
Absolutely! In fact, the flavor often improves after a few hours in the fridge as the garlic has more time to infuse. Just make sure you store it properly and use it within a few days.
Conclusion
Garlic aioli is more than just a fancy mayonnaise — it’s a flavorful, creamy, and versatile condiment that adds richness and depth to any dish. Whether you’re dipping fries, spreading it on sandwiches, or drizzling it over roasted veggies, this simple sauce turns the ordinary into extraordinary.
Once you’ve made it from scratch, you’ll never want to go back to the store-bought versions. And with all the variations you can try — from spicy chipotle to herby lemon — it’s a sauce that keeps on giving. Don’t be afraid to get creative with your own twists.
So next time you want to impress guests, elevate a weeknight dinner, or just treat yourself to a next-level dip, whip up a batch of homemade garlic aioli. It’s easier than you think, and your taste buds will thank you.

