Vanilla Flavor Recipe: Vanilla flavor is one of those comforting, sweet-smelling ingredients that instantly makes a kitchen smell like home. From cookies and cakes to ice cream and coffee, vanilla adds a warm, rich depth that can’t be replaced. While it’s easy to buy a bottle off the shelf, have you ever considered making your own vanilla flavor at home?
Making homemade vanilla is simpler than it sounds. It takes only a few ingredients, a little patience, and a love for pure, authentic flavor. The bonus? You’ll end up with a product that’s far superior to most store-bought varieties—no additives, no artificial colorings, just deep, rich, natural flavor.
Plus, once you get into the habit of making your own vanilla, you’ll never go back. It’s cost-effective, easy to customize, and makes an impressive DIY gift for your baking-obsessed friends. Ready to dive in? Let’s start by taking a look at the ingredients you’ll need.
List of Ingredients You’ll Need
When it comes to making vanilla flavor at home, fewer ingredients usually mean better quality. Here’s everything you’ll need to get started:
Basic Ingredients
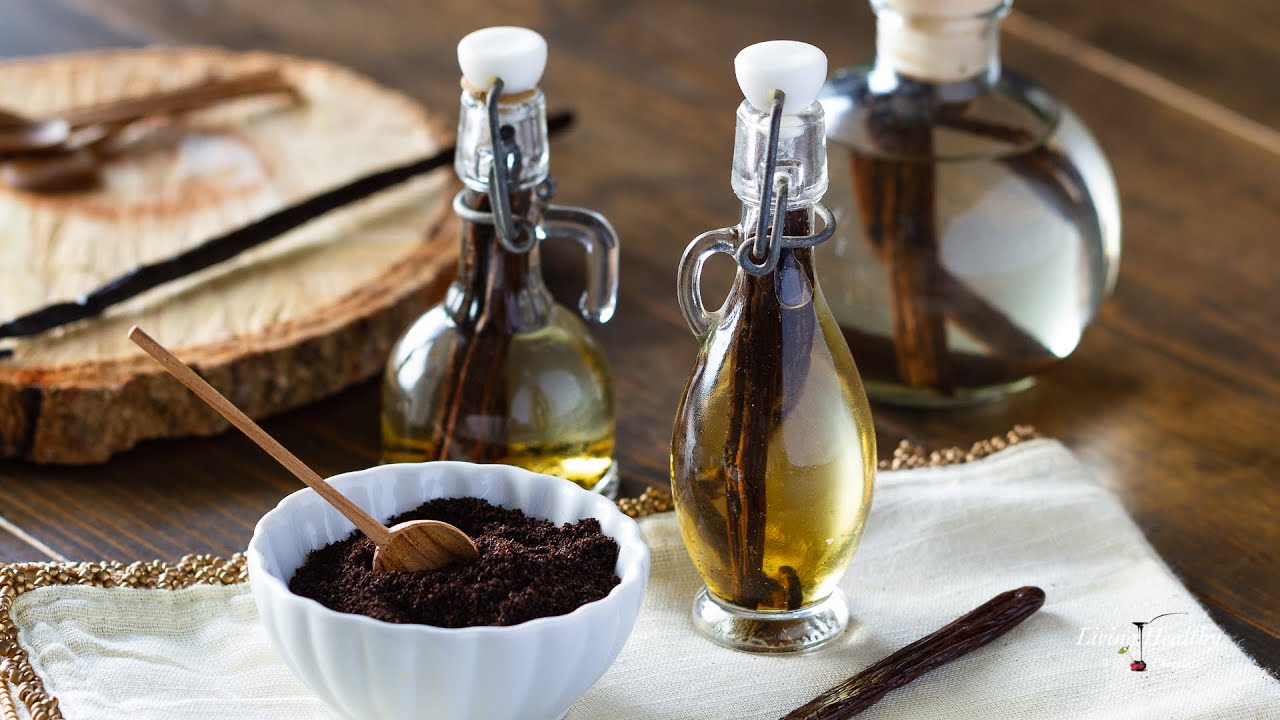
- Vanilla Beans (5 to 7 whole beans per 8 oz. of liquid)
- Alcohol (Vodka, bourbon, or rum – 35–40% alcohol by volume)
That’s it. Really. Two ingredients. But you can elevate things by considering a few optional add-ins.
Optional Add-ins for Extra Flavor
- A cinnamon stick (for a warm spice note)
- A few coffee beans (for depth and complexity)
- A bit of orange zest or whole cloves (for a unique twist)
Tools and Equipment You’ll Need
- Sharp paring knife
- Clean glass bottles or jars (amber bottles preferred)
- Funnel
- Measuring cup
- Labels and marker for dating your batch
Making sure everything is clean and dry is essential—especially your bottles. Contaminated bottles can ruin a batch or cause spoilage, which no one wants after waiting months for the perfect infusion.
Choosing the Right Vanilla Beans
Not all vanilla beans are created equal. To get the best homemade vanilla flavor, you’ve got to choose high-quality beans that match your flavor preferences.
Madagascar vs. Tahitian vs. Mexican Vanilla Beans
- Madagascar Beans: The most popular variety. They’re creamy, sweet, and full-bodied, perfect for classic baking.
- Tahitian Beans: These are floral and delicate. Better for lighter desserts like custards or whipped creams.
- Mexican Beans: Rich and spicy with a darker tone. Great for savory dishes or chocolate-based desserts.
Grade A vs. Grade B Beans
- Grade A (Gourmet): These are moist, plump, and ideal for recipes where beans are scraped directly into a dish. They’re more expensive and less suited for extraction.
- Grade B (Extract Grade): Drier and cheaper, but loaded with flavor compounds. These are the best for making vanilla extract at home.
How to Store Vanilla Beans
Always keep unused beans in a cool, dark place in an airtight container—away from direct sunlight and moisture. Some people wrap them in wax paper and store them in glass tubes. Do not refrigerate them; it can dry them out or cause mold.
Step-by-Step Guide to Making Vanilla Flavor
Let’s get hands-on! This step-by-step guide will walk you through the exact process to create rich, aromatic, homemade vanilla flavor.
Step 1: Gather Ingredients and Supplies
You’ll need whole vanilla beans, alcohol (such as vodka) or an alcohol-free alternative, a clean glass bottle or jar with a tight lid, a sharp knife, and labels for storage. Use good-quality vanilla beans for the best aroma.
Step 2: Slice the Vanilla Beans Properly
Lay each vanilla bean flat and slice it lengthwise down the center using a sharp knife. Do not cut all the way through—just open the bean to expose the tiny seeds inside. This allows maximum flavor extraction.
Step 3: Select the Right Alcohol Base (or Alcohol-Free Alternatives)
Vodka is most commonly used because of its neutral flavor, but rum or bourbon can add warm notes. For alcohol-free vanilla flavor, use food-grade glycerin mixed with water (about 70% glycerin, 30% water).
Step 4: Add Beans to the Bottle
Place the sliced vanilla beans into the bottle, making sure they fit fully inside. Pour in enough liquid to completely cover the beans. Seal the bottle tightly.
Step 5: Shake and Store
Shake the bottle gently to distribute the vanilla seeds. Store it in a cool, dark place such as a pantry or cupboard. Shake the bottle once or twice a week to encourage even infusion.
Step 6: How Long to Wait – Infusion Time
Allow the vanilla to infuse for at least 6–8 weeks. For a deeper, more concentrated flavor, wait 3–6 months. The liquid will darken and develop a rich aroma over time.
Step 7: Straining (Optional)
Straining is not required. Many people leave the beans in the bottle to continue strengthening the flavor. If you prefer a clear liquid, strain through a fine mesh sieve.
Step 8: Bottling and Labeling Your Vanilla Extract
Label the bottle with the date and type of vanilla used. Your homemade vanilla flavor is now ready to use and will last for years when stored properly.
Tips for Best Results
Making vanilla is easy, but a few smart tips can make it even better.
Storage Tips for Long-Lasting Flavor
- Keep it in a cool, dark place, like a pantry or cupboard.
- Avoid direct sunlight and heat, which can degrade the flavor.
- Don’t refrigerate—cold temps can mess with the extraction process.
How to Know When It’s Ready
- The liquid should be a deep, rich amber color.
- It should smell sweet, floral, and full-bodied.
- You should NOT smell strong alcohol—that means it needs more time.
Common Mistakes to Avoid
- Using too few beans: This weakens the extract and leaves you disappointed.
- Storing in plastic containers: Always use glass. Plastic can absorb smells and leach chemicals.
- Opening too early: If you open the bottle often during the process, you’ll lose aroma and delay infusion.
Be patient. Your vanilla will thank you.
Creative Variations of Vanilla Flavor
Once you’ve nailed the basics, get creative. Vanilla is versatile, and there are many ways to customize your homemade flavor.
Vanilla Bean Paste
Want a more concentrated option for baking? Scrape the seeds from the beans and blend them with a small amount of corn syrup or glycerin for a thick, flavorful paste.
Non-Alcoholic Vanilla Flavor
Use food-grade vegetable glycerin as the base instead of alcohol. Just know it takes a bit longer (up to 6–8 months) to fully develop.
Vanilla Powder
After infusing the beans, dry them completely and grind them into powder. This makes a great sugar substitute for adding aroma and taste to recipes.
Infused Vanilla Sugar or Syrup
Place used vanilla beans in a jar of sugar for a subtly scented sweetener, perfect for coffee, tea, or baking.
Or make a simple syrup with water, sugar, and split vanilla beans—great for cocktails or iced lattes!
Uses of Homemade Vanilla Flavor
Wondering how to put all that rich vanilla goodness to use? Here are some ideas:
Baking
- Cookies, cakes, muffins, brownies—you name it!
- Use 1:1 as you would store-bought extract.
Beverages
- Add a few drops to coffee, hot cocoa, smoothies, or milkshakes.
- Try it in homemade creamers or cocktails for a sweet twist.
Savory Dishes
- A touch of vanilla in sauces, marinades, or glazes can balance flavors and add depth.
- Works especially well with seafood and root vegetables.
DIY Gifts and Home Fragrance
- Homemade vanilla extract makes a heartfelt gift.
- Try a drop or two in a diffuser for a warm, sweet-smelling room.
Vanilla is truly the MVP of flavors—simple, sweet, and wildly versatile.
How Long Does Homemade Vanilla Flavor Last?
One of the biggest benefits of homemade vanilla flavor is its shelf life.
Shelf Life
If stored properly, your homemade vanilla extract can last indefinitely—in fact, it often gets better with age.
Most people find that it’s at peak flavor between 6 months to 2 years. After that, it may start to mellow, but it won’t go bad unless it’s been contaminated.
How to Store for Maximum Potency
- Keep it tightly sealed.
- Store in a dark glass bottle.
- Don’t leave it near heat sources or windows.
And remember, as long as the aroma is pleasant and the color is dark, your vanilla is still good to go.
Is Homemade Vanilla Flavor Better than Store-Bought?
Let’s break it down.
Taste Test Comparison
Homemade vanilla is deeper, richer, and far more aromatic. Store-bought versions—especially cheap ones—are often diluted, artificially flavored, or packed with additives.
Ingredient Transparency
With homemade vanilla, you know exactly what’s inside: beans and alcohol (or glycerin). That’s it. No fake colors, no preservatives, no artificial anything.
Cost Analysis
While vanilla beans can be pricey upfront, making extract in bulk actually saves money over time—especially if you bake often.
One batch of 16 oz. homemade vanilla can cost half of what you’d spend buying the same amount at the store—and taste twice as good.
Troubleshooting Your Vanilla Flavor Recipe
Ran into some issues? Don’t worry—here are solutions to common problems.
Why is it Cloudy?
Cloudiness can be caused by:
- Not straining
- Over-shaking
- Using unfiltered alcohol
Strain it through a coffee filter and store in a clean, dry bottle.
It’s Not Strong Enough – What to Do
- Let it steep longer (minimum 8 weeks, ideally 6 months).
- Add more vanilla beans to boost intensity.
You can also top it off with fresh alcohol and let it infuse again.
Weird Smells or Off-Color
- If it smells sour, metallic, or funky, it may be contaminated.
- Mold inside the bottle? Toss it and start over.
- Always use sterilized equipment and sealed containers.
Clean tools = clean extract.
Sustainability and Sourcing Vanilla Responsibly
Vanilla may be a beloved ingredient, but it’s also one of the most labor-intensive spices in the world. That’s why responsible sourcing is essential—not just for quality but for supporting the communities that grow and harvest it.
Where to Buy Ethical Vanilla Beans
When buying vanilla beans, look for vendors that clearly label their beans as ethically sourced, organic, or fair trade. Some trusted sources include:
- Small farms and co-ops from Madagascar, Mexico, or Uganda
- Online retailers that focus on traceable, farm-direct products
- Specialty spice stores that work with sustainable growers
You’ll usually find better quality beans, and your purchase supports fair wages and sustainable agriculture practices.
How to Reuse the Beans
Here’s something cool: even after making extract, your beans can live on!
Reuse ideas:
- Vanilla Sugar: Bury the beans in a jar of sugar and let them infuse.
- Infused Syrups: Simmer used beans in a mix of water and sugar for homemade coffee syrup.
- Flavoring Milk or Cream: Add the used bean to cream or milk before heating for puddings or custards.
- Dry and Grind: Turn dry beans into a fine vanilla powder.
This zero-waste approach is not only sustainable but super satisfying.
FAQs about Vanilla Flavor Recipe
1. Can I use vodka alternatives for making vanilla extract?
Yes! While vodka is the most neutral and popular choice, you can use bourbon, rum, or brandy for a different flavor profile. Just make sure the alcohol content is around 35–40% (70–80 proof).
2. How long do I need to wait before using homemade vanilla?
The minimum wait is 8 weeks, but for best results, let it steep for 6 months or more. The longer it sits, the richer and deeper the flavor becomes.
3. Can I reuse vanilla beans after the first batch?
Absolutely! Used beans can be added to a new batch, turned into vanilla sugar, dried and ground into powder, or used to infuse syrups, creams, and milk. Just make sure they’re still in good condition.
4. What alcohol percentage is best for making vanilla flavor?
The sweet spot is 35–40% alcohol by volume (70–80 proof). Too high and it might overpower the flavor; too low and the extraction won’t happen properly.
5. Can children consume food made with homemade vanilla extract?
Yes—because you’re using small amounts in recipes and most of the alcohol burns off during baking or cooking. If you’re concerned or want to make a child-friendly version, opt for an alcohol-free vanilla flavor using food-grade glycerin instead.
Conclusion
Homemade vanilla flavor isn’t just a kitchen project—it’s a game-changer. With just two ingredients, a bit of patience, and a love for real flavor, you can create a rich, aromatic extract that outperforms most commercial options in every way.
Not only does it taste better, but it’s also cleaner, more customizable, and cost-effective. Whether you’re a baking enthusiast, a coffee lover, or just someone who appreciates the small joys of kitchen crafting, this is a recipe worth adding to your repertoire.
And once you make your first batch, you’ll never go back. Seriously.
Give it a try, experiment with variations, and share your creations. You might just start a new tradition—and inspire a few others to do the same.


