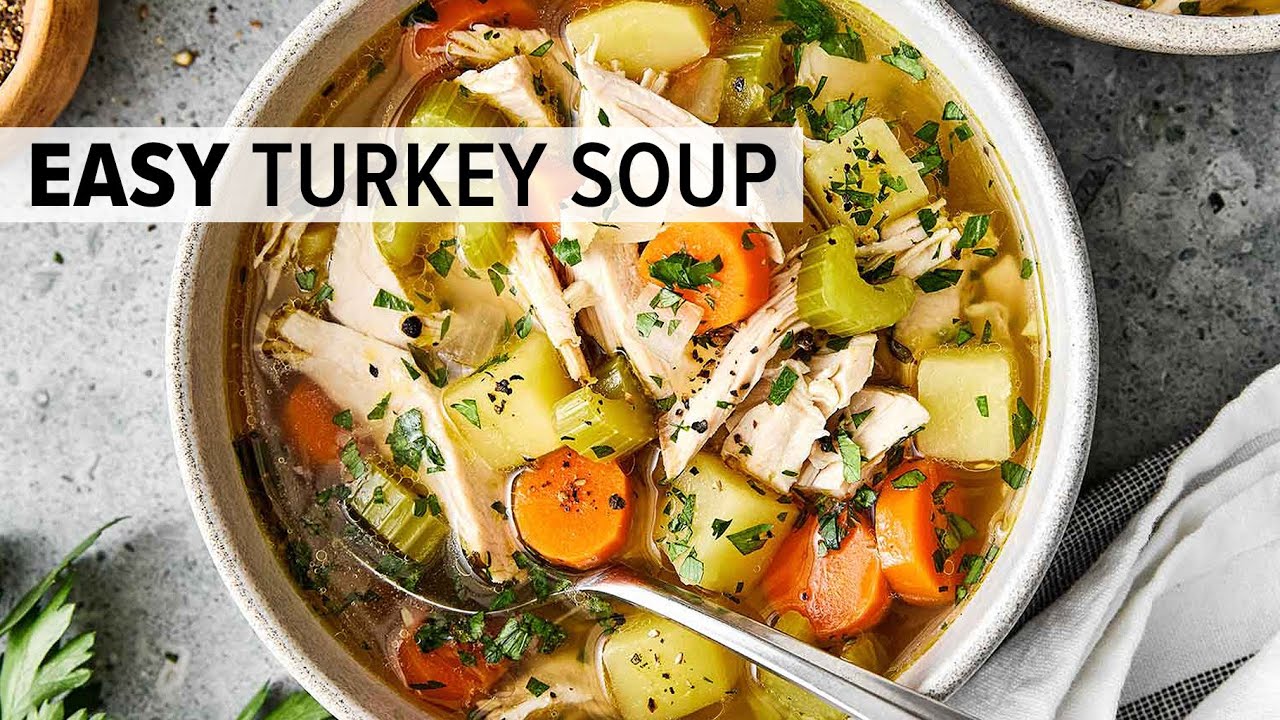
Turkey Broth Recipe: There’s something deeply comforting about a pot of turkey broth simmering on the stove. The rich aroma, the anticipation of a hearty soup, or the satisfaction of knowing you’re making something nourishing from scratch—it’s all part of the experience. Turkey broth is one of those underrated kitchen staples that deserves more attention. Whether you’re using up leftover Thanksgiving turkey or making a batch to freeze for winter meals, homemade turkey broth is not only simple to make but also significantly more flavorful than store-bought versions.
Why bother making it at home? Because nothing matches the deep, savory flavor of broth simmered for hours with real bones and vegetables. It’s the base for so many dishes—soups, gravies, risottos, and sauces—and adds incredible depth wherever it goes. In this guide, we’re walking you through every step of the process—from picking the best bones to storing your golden broth. Ready to turn that leftover turkey carcass into liquid gold? Let’s dive in.
Benefits of Turkey Broth
Turkey broth isn’t just tasty—it’s packed with benefits that make it worth every minute. First off, it’s incredibly nutritious. When you simmer bones, connective tissues, and vegetables over time, you extract essential nutrients like collagen, gelatin, and minerals like calcium, magnesium, and phosphorus. These compounds are known to support joint health, digestion, and immune function.
Beyond health, turkey broth is a budget-friendly way to stretch your meals. You’re turning scraps—bones, skins, and veg peels—into something valuable and delicious. Think of it as free flavor from things you’d otherwise toss. Plus, the taste is unmatched. Homemade broth has a depth and complexity that bouillon cubes or boxed broths just can’t touch.
It also gives you full control over the ingredients. No preservatives, no excess sodium, and you can customize the flavors to suit your dish. Want a bit of heat? Add some peppercorns. Want it sweeter? Toss in a carrot or two more. The possibilities are endless.
Ingredients You’ll Need
Let’s break down what you’ll need to whip up a perfect pot of turkey broth. These ingredients can be tweaked based on what you have on hand, but here’s a solid foundation to start with:
Essential Ingredients:
- Turkey bones: Carcass, wings, neck, or leftover pieces with a bit of meat on them
- Onion: Quartered, no need to peel
- Carrots: Chopped into chunks, no need to peel
- Celery: Roughly chopped
- Garlic: Whole cloves, slightly smashed
- Bay leaves: 1 or 2 for depth
- Whole peppercorns: About 1 tsp
- Salt: Optional, or add to taste at the end
- Water: Enough to fully submerge the ingredients
Optional Add-ins:
- Parsley or thyme sprigs
- Leek tops
- Parsnips or turnips
- Apple cider vinegar (1–2 tbsp): Helps extract minerals from the bones
Pro Tip: The vegetables don’t need to be pretty. Use scraps and peels from clean produce. It’s economical and sustainable.
Tools and Equipment
Making turkey broth doesn’t require fancy tools, but having the right equipment can make the process smoother and more efficient. Whether you’re a beginner or a seasoned home cook, these essentials will help you make the best broth with minimal hassle.
Must-Have Tools:
- Large stockpot (at least 8-quart): This is essential. You need plenty of room for bones, veggies, and water to simmer freely.
- Fine-mesh strainer or cheesecloth: To separate the rich, golden broth from the solids without leaving debris.
- Tongs or slotted spoon: For easy removal of large bones and vegetables.
- Cutting board and knife: To roughly chop your veggies.
- Storage containers: Glass jars, BPA-free plastic containers, or freezer-safe bags.
Optional but Helpful:
- Skimmer or ladle: For removing foam or fat during simmering.
- Slow cooker or Instant Pot: A great hands-off option that allows broth to simmer safely overnight or while you’re away.
- Fat separator: If you want a leaner broth, this tool helps remove excess fat after straining.
Using the proper tools makes cleanup easier and ensures a cleaner, clearer broth. If you’re planning to make broth regularly (trust me, you’ll want to!), investing in a few quality items can make a big difference.
Choosing the Right Turkey Bones
Not all bones are created equal when it comes to making broth. The best turkey broth comes from using a mix of meaty and bony parts. Here’s how to pick the right ones:
Best Parts to Use:
- Carcass: The backbone of your broth (literally and figuratively). It holds lots of flavor and gelatin.
- Neck and wings: Loaded with connective tissue and cartilage for a rich, silky broth.
- Drumsticks or thighs: Add both flavor and a bit of meatiness.
- Giblets (optional): The neck is great. Liver is too strong for most broths, but hearts and gizzards can be used sparingly.
Raw vs. Roasted Bones:
- Raw bones give you a lighter, cleaner flavor.
- Roasted bones provide a deeper, richer, more complex taste. If you’re using leftover turkey from a roasted bird (like Thanksgiving), you’re already on the right track.
Tips for Leftover Turkey:
- Don’t throw out that leftover carcass! Strip off the meat for sandwiches or soup, then toss the bones into a freezer bag. They’ll keep for months until you’re ready to make broth.
- If you don’t have enough bones, combine with chicken parts or save up multiple carcasses over time.
Remember, the key to amazing broth is bones with connective tissue. That’s where the magic of collagen and flavor comes from.
Preparing the Vegetables
Vegetables play a critical supporting role in your turkey broth. They don’t just add flavor—they balance the richness of the bones and help create a well-rounded base.
Best Vegetables for Broth:
- Onions: Adds sweetness and body. No need to peel—just quarter them.
- Carrots: Adds color and a natural sweetness.
- Celery: Adds an earthy, slightly bitter note that balances the broth.
Optional Veggies:
- Leeks: Use the green tops to add a mild onion flavor.
- Parsnips or turnips: For a more complex, slightly peppery flavor.
- Tomatoes: A small tomato or a bit of tomato paste can add richness and umami.
Should You Peel the Veggies?
Nope. As long as they’re clean, you can toss them in with the skins. The peels actually deepen the flavor and color of your broth. Just scrub thoroughly and chop roughly.
Veg-to-Bone Ratio: A good rule of thumb is 1 part vegetables to 2 parts bones. You want the veggies to complement, not overpower. Too many vegetables can make your broth taste like vegetable soup rather than turkey.
Prepping your veggies takes just a few minutes, and they’ll infuse your broth with subtle sweetness and complexity.
The Water Ratio Rule
Getting the water-to-ingredient ratio right is crucial. Too much water? Your broth ends up bland and weak. Too little? You risk burning or making a bitter, overly concentrated brew.
How Much Water Should You Add?
- Just enough to cover your bones and vegetables by 1–2 inches.
- For a typical batch using one turkey carcass and 3–4 cups of vegetables, 12 to 16 cups (3 to 4 quarts) of water is usually perfect.
Avoid These Common Mistakes:
- Don’t fill the pot to the brim. You need room for boiling and stirring.
- Avoid adding water later in the cooking process unless it’s absolutely necessary. It can dilute flavor.
- If you’re using a slow cooker or pressure cooker, check your user manual for safe maximum liquid levels.
Want a Richer Broth?
Use less water. It may reduce your final yield, but the flavor payoff is worth it.
By sticking to the proper water ratio, you ensure that every sip of your broth is full-bodied and flavorful.
Step-by-Step Guide to Making Turkey Broth
Now that we’ve covered the basics, it’s time to get cooking. Here’s a detailed step-by-step breakdown to guide you through making your own turkey broth from scratch:
Step 1: Gather Your Ingredients
Get your turkey bones, veggies, herbs, and water ready. Prep your vegetables by roughly chopping them—no need to peel. Make sure your bones are thawed if frozen.
Step 2: Roast the Bones (Optional, but Recommended)
Roasting adds depth. Preheat your oven to 425°F (220°C). Spread the bones in a single layer on a baking sheet and roast for 30–40 minutes until golden brown. This step is especially useful if your bones weren’t already roasted.
Step 3: Add Bones and Vegetables to the Pot
Place roasted bones in your stockpot or slow cooker. Add in the chopped vegetables and herbs. Don’t forget peppercorns and bay leaves!
Step 4: Fill with Water and Season
Add enough water to cover everything by 1–2 inches. You can add a splash of vinegar at this point—it helps extract minerals from the bones. Hold off on adding salt until the end.
Step 5: Simmer Gently
Bring to a gentle boil, then immediately reduce to a low simmer. You want a few small bubbles—not a rolling boil. Cover loosely and simmer for at least 6–8 hours, or up to 24 hours for deeper flavor.
Step 6: Skim the Foam
As the broth simmers, foam and fat will rise to the surface. Skim it off every 30–60 minutes during the first few hours for a cleaner, clearer broth.
Step 7: Strain and Cool
Once it’s done simmering, carefully remove large bones with tongs. Strain the broth through a fine mesh sieve or cheesecloth. Let it cool completely before storing.
How Long to Cook Turkey Broth
Timing can make or break your broth. Too short, and you won’t extract all the goodness from the bones. Too long at the wrong temperature, and you risk a cloudy or bitter broth. So how long should you simmer your turkey broth?
On the Stovetop:
- 6 to 12 hours is ideal.
- For a lighter broth, stick to around 6 hours.
- For a rich, gelatinous broth, aim for 10 to 12 hours.
- Always use a low simmer—you should see just a few bubbles breaking the surface.
In a Slow Cooker:
- Cook on low for 10 to 24 hours.
- This is perfect if you want to set it and forget it overnight.
- Avoid cooking on high—it can make your broth cloudy.
In an Instant Pot (Pressure Cooker):
- Use the “Soup” setting or Manual High Pressure for 2 to 3 hours.
- Allow for natural pressure release to avoid splatter and preserve flavor.
- Great for quick broth that still tastes slow-simmered.
Signs It’s Done:
- The broth smells rich and savory.
- The color is a golden amber or deep brown (if roasted bones were used).
- The bones look brittle or fall apart easily.
- When cooled, it may gel—this means you’ve extracted collagen!
Remember: the longer you cook it (gently), the better your broth will be—as long as it doesn’t boil aggressively.
Tips for a Clear, Rich Broth
Ever wonder why your broth turns out cloudy or lacks flavor? Here are some simple but effective tricks to get a rich, clear, golden broth every single time.
1. Don’t Boil—Simmer Gently
A rolling boil agitates everything and breaks down particles, making your broth murky. Simmer on low with just the occasional bubble rising to the surface.
2. Skim Regularly
During the first few hours of cooking, foam (impurities) will rise to the top. Skim it off every 30–60 minutes using a spoon or skimmer.
3. Roast Your Bones
If you haven’t already, roast your bones before adding them to the pot. This brings out deeper umami flavors and gives the broth a richer color.
4. Don’t Stir
Resist the urge to stir while it’s cooking. This just breaks up particles and clouds the broth.
5. Use Cold Water
Start with cold water—it slowly draws the collagen and nutrients out of the bones as it heats.
6. Use Vinegar
A splash of apple cider vinegar (1–2 tablespoons) can help extract more minerals from the bones. Don’t worry, you won’t taste it in the finished product.
7. Strain Carefully
Use a fine mesh strainer or cheesecloth to get rid of tiny bits of bone or veg. Let the broth settle for a few minutes before straining for best clarity.
These small details can make a big difference when it comes to the final look and taste of your turkey broth.
Storage and Shelf Life
You’ve simmered your broth to perfection—now what? Proper storage is key to making your turkey broth last and stay fresh.
In the Fridge:
- Pour cooled broth into airtight containers or mason jars.
- Lasts 4 to 5 days in the fridge.
- Store in smaller portions for easier use in recipes.
In the Freezer:
- Freeze broth in freezer-safe containers or resealable freezer bags.
- Label and date each one so you know how long it’s been in there.
- Lasts up to 6 months when properly sealed.
Pro Storage Tips:
- Use ice cube trays to freeze small portions—perfect for sauces or sautéing veggies.
- Let broth cool completely before freezing to avoid condensation and freezer burn.
- If using glass, leave room for expansion or the jars might crack.
Proper storage not only extends shelf life but also lets you enjoy homemade broth anytime you want.
How to Freeze Turkey Broth
Freezing turkey broth the right way is a game-changer. It saves space, keeps it fresh longer, and makes it easy to portion out just what you need.
Step-by-Step Freezing Instructions:
- Cool It Down Fast
- Place your strained broth in a large bowl or shallow pan.
- Set in an ice bath if you’re in a hurry. Cooling quickly helps prevent bacteria growth.
- Choose the Right Containers
- Use BPA-free plastic containers, silicone molds, freezer-safe bags, or glass jars.
- For soups and stews later, freeze in 2–4 cup portions.
- For quick use, freeze in ice cube trays or muffin tins.
- Label Everything
- Always write the date and quantity on the container or bag.
- Add “turkey broth” to avoid freezer mystery meals.
- Lay Flat for Easy Storage
- If using freezer bags, lay them flat on a baking sheet until frozen.
- Then stack them vertically like file folders for organized storage.
- Thawing Tips
- Thaw overnight in the fridge, or place sealed bag in a bowl of warm water.
- For fast use, microwave broth cubes or simmer on the stove.
Freezing in multiple sizes gives you flexibility for everything from a big pot of soup to a tablespoon of flavor.
Creative Ways to Use Turkey Broth
Don’t let that golden broth sit in the fridge too long—it’s liquid gold, and it deserves to shine. Here are some awesome and easy ways to use turkey broth beyond just soup:
1. Soups & Stews
- Turkey noodle soup
- Creamy wild rice soup
- Hearty vegetable stew
2. Cook Your Grains
- Use broth instead of water for rice, quinoa, couscous, or bulgur to add depth of flavor.
3. Make Gravy or Sauce
- Whip up a savory pan gravy, reduction sauce, or even a roux-based cream sauce with your broth.
4. Braise or Simmer
- Braise meats or veggies in broth for richer results.
- Use it as the base for shakshuka, chili, or curry.
5. Sip It Like Tea
- Heat up a mug, sprinkle in some salt, black pepper, or herbs, and sip it like a comforting tea.
6. Add to Mashed Potatoes
- For a lighter, flavorful mash, use broth instead of milk or cream.
Once you start using it creatively, turkey broth becomes a go-to ingredient you’ll never want to run out of.
Common Mistakes to Avoid
Even the simplest recipes can go wrong if you’re not careful. Here are the most common mistakes people make with turkey broth—and how to avoid them:
1. Boiling Instead of Simmering
- A rolling boil can break apart solids and make the broth cloudy and greasy. Keep it low and slow.
2. Skipping the Skim
- Not removing foam and fat during simmering results in an off-tasting, murky broth.
3. Using Too Much Water
- Don’t drown your ingredients. Just cover them with water by about 1–2 inches.
4. Overseasoning Early
- Salt intensifies as the broth reduces. Always season at the end so you don’t end up with something too salty.
5. Stirring the Pot
- Stirring disturbs the clarity. Just let it simmer undisturbed for a cleaner broth.
6. Not Cooling Properly Before Storing
- Putting hot broth directly in the fridge or freezer can promote bacteria growth and ruin texture. Always cool first.
Avoid these pitfalls, and your turkey broth will turn out rich, clear, and delicious every time.
FAQs about Turkey Broth Recipe
1. Can I make turkey broth without vegetables?
Yes, but it will be less flavorful. Vegetables like onion, carrot, and celery add depth. If you’re out, herbs and seasonings can help make up the difference.
2. Can you pressure can turkey broth?
Absolutely, but only in a pressure canner (not a water bath). Follow USDA guidelines for safe canning to avoid botulism.
3. Can I reuse the bones for a second batch?
You can, but the second batch will be much weaker. It’s often called a “remouillage.” Good for lighter soups or rice dishes.
4. What’s the difference between broth and stock?
Broth is usually seasoned and made with more meat, while stock is made primarily with bones and is often unseasoned. Turkey broth often falls somewhere in between.
5. Can I use giblets in turkey broth?
Yes! The neck, heart, and gizzards add flavor. Avoid the liver—it can overpower your broth with a metallic taste.
Conclusion
Turkey broth is more than just a way to use leftovers—it’s a flavorful, nutritious base that elevates countless dishes. By making it at home, you’re not just saving money and reducing waste, but also giving yourself a healthier, more flavorful alternative to anything store-bought. Plus, once you’ve tasted the real thing, there’s no going back.
Whether you’re sipping it solo on a cold day, building a hearty soup, or freezing it for future use, this step-by-step guide has everything you need to turn bones and scraps into a broth you’ll be proud of.
So next time you have leftover turkey, don’t toss the bones—make broth, and make it count.


