Tapioca Pearls Recipe: Tapioca pearls — those shiny, chewy balls you find at the bottom of your favorite bubble tea — have become a global sensation. But did you know you can make them right at home? It’s easier than you think, and even more satisfying when you control the flavor, texture, and color. Whether you’re a boba fanatic or just curious about trying something new in the kitchen, this step-by-step tapioca pearls recipe is here to help you craft perfect pearls every time.
What Are Tapioca Pearls?
Tapioca pearls are small balls made from tapioca starch, which is extracted from the cassava root. When boiled, they turn from a white powdery ball to a glossy, chewy sphere that’s slightly translucent. They’re a staple in bubble tea, but also used in desserts like tapioca pudding. The texture is the real winner — that bouncy, chewy bite is what makes them so addictive.
Origins and Popularity
Originating in Southeast Asia and South America, tapioca has long been a versatile staple in traditional cooking. However, it wasn’t until the 1980s in Taiwan that tapioca pearls found their way into sweet milk teas, creating what we now know as bubble tea. From street vendors in Bangkok to trendy cafes in New York, tapioca pearls are a global icon.
Why Make Tapioca Pearls at Home?
Sure, you can buy ready-made pearls — but where’s the fun in that? Making them at home means:
- You choose the ingredients.
- You can customize size, flavor, and color.
- It’s fresher and often healthier.
- It’s a fun activity (especially with friends or kids).
Plus, homemade boba means no artificial preservatives and the satisfaction of knowing you made it from scratch.
Different Types of Tapioca Pearls
Before we dive into the recipe, let’s break down the types:
Black Tapioca Pearls
These are the most common in bubble tea. Their color comes from brown sugar or food coloring. They’re sweet and have a rich flavor.
White/Clear Tapioca Pearls
These are more neutral in flavor and made without coloring. They’re often used in traditional desserts.
Mini Tapioca Pearls
Perfect for puddings and smoother drinks. They cook faster and have a softer texture.
Ingredients You’ll Need
Let’s get you started with a simple list of what you need. These ingredients are for traditional black tapioca pearls, but you can adjust them to create different flavors or colors.
List of Ingredients:
- 1 cup tapioca starch (also called cassava starch)
- ½ cup water (hot, not boiling)
- 2 tablespoons brown sugar or black sugar (for darker pearls)
- Optional: food coloring (if you want to experiment with different colors)
Key Ingredients Explained:
- Tapioca Starch: This is the ONLY type of starch that works. Cornstarch, rice flour, or any other starch will not create the right chewy texture.
- Brown Sugar: Adds flavor and color. For authentic Taiwanese boba, use muscovado or black sugar.
- Hot Water: Helps bind the starch into a dough. Cold water won’t work — it’ll stay crumbly.
Essential Kitchen Tools
To make the process smooth, gather these tools beforehand:
- A medium saucepan
- Mixing bowl
- Wooden spoon or spatula
- Clean surface for kneading
- Knife or dough scraper
- Slotted spoon
- Strainer
- Airtight container (for storing)
Step-by-Step Guide to Making Tapioca Pearls from Scratch
Let’s roll up our sleeves. Here’s how to make perfect, chewy tapioca pearls at home:
Step 1: Preparing the Dough
Start by placing tapioca starch in a heatproof bowl. Bring water to a boil, then slowly pour the hot water into the starch while stirring continuously with a spoon or spatula. The mixture will look crumbly at first—this is normal. Once it’s cool enough to handle, knead the dough by hand until it becomes smooth, soft, and pliable. If it feels too dry, add a few drops of hot water; if sticky, sprinkle in a little more starch.
Step 2: Rolling the Dough
Divide the dough into small portions to prevent drying. Roll each portion on a clean surface into long, thin ropes, about the thickness of a straw. Keep unused dough covered with a damp cloth to maintain moisture and prevent cracking.
Step 3: Shaping the Pearls
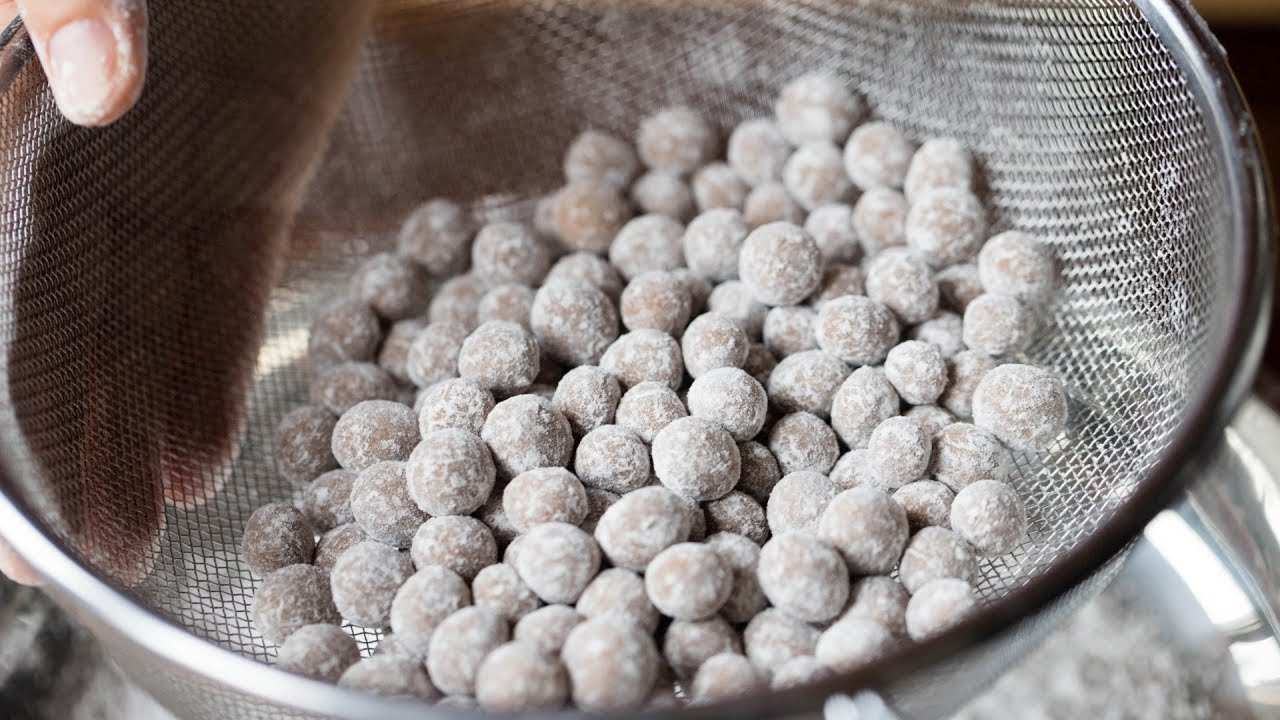
Cut the dough ropes into tiny, even pieces. Roll each piece gently between your palms to form small round balls. Lightly dust the pearls with tapioca starch to stop them from sticking together.
Step 4: Cooking the Pearls
Bring a large pot of water to a rolling boil. Add the tapioca pearls and stir gently to prevent clumping. Cook until the pearls float and become translucent, usually 15–20 minutes. Turn off the heat, cover, and let them sit for an additional 10 minutes for a chewy texture.
Step 5: Cooling and Soaking
Drain the cooked pearls and rinse briefly with cold water. Soak them in sugar syrup or honey to enhance flavor and keep them soft. Your homemade tapioca pearls are now ready to use in bubble tea or desserts.
How to Store Homemade Tapioca Pearls
Once your pearls are perfectly cooked and soaked in syrup, you might be wondering how to keep them fresh.
Short-Term Storage:
- Keep them in their syrup at room temperature for up to 4 hours.
- If you refrigerate them, they will harden — not ideal for bubble tea.
Reheating:
- If they’ve hardened, reheat them gently in syrup or hot water for 2–3 minutes before use.
- Never microwave without liquid — they’ll dry out and crack.
Dry Storage (Uncooked Pearls):
- If you’ve rolled out extra pearls but haven’t cooked them, lay them on a tray and air-dry them for a few hours.
- Once dried, store them in an airtight container for up to 2 weeks.
- Cook as usual when ready — they’ll just take a bit longer to boil.
Important: Never refrigerate cooked tapioca pearls overnight without syrup — they’ll clump and lose their signature chewy texture.
How to Use Tapioca Pearls in Drinks and Desserts
Once your pearls are prepped and chewy, the fun begins! Tapioca pearls aren’t just for bubble tea — they can be used in a variety of creative and delicious ways.
In Bubble Tea:
- Add ¼ to ½ cup of pearls to any cold milk tea, fruit tea, or smoothie.
- Top with crushed ice or shake for an authentic feel.
In Desserts:
- Use mini pearls in tapioca pudding with coconut milk and vanilla.
- Try mixing cooked pearls into ice cream, fruit cocktails, or jellies.
Fun Recipes to Try:
- Thai Tapioca Dessert (Saku): A sweet pudding with coconut milk and sugar.
- Boba Pancakes: Sprinkle pearls over pancakes for a sweet and chewy twist.
- Boba Ice Cubes: Freeze sweetened pearls in ice trays for a fun surprise in drinks.
Common Mistakes to Avoid
Even with a great recipe, a few missteps can lead to sticky, mushy, or undercooked pearls. Watch out for these common errors:
1. Using the Wrong Starch:
Only tapioca starch will work. Others like corn or potato starch will not produce the chewy texture.
2. Cold Water Mixing:
Cold or lukewarm water won’t form a proper dough. Use hot water only to activate the starch.
3. Underkneading the Dough:
If your dough isn’t smooth, your pearls won’t form well and may crack during cooking.
4. Skipping Soaking Time:
Soaking cooked pearls in syrup makes them flavorful and keeps them soft. Skipping this step can leave them bland or hard.
5. Overcooking or Undercooking:
Time it right — too short and they’re tough, too long and they turn to mush.
Tips for Perfect Tapioca Pearls Every Time
Want to master the art of boba-making? Keep these expert tips in mind:
- Work Fast: Tapioca dough dries quickly. Keep it covered with a damp towel while rolling.
- Use Plenty of Water: When boiling, use at least 6 cups of water per cup of pearls for even cooking.
- Stir Frequently: Prevent sticking and clumping in the pot by stirring during the first few minutes.
- Don’t Overcook: Chewiness is key. Cook until they’re soft in the center, but not falling apart.
- Customize Your Flavor: Infuse your syrup with vanilla, matcha, or fruit extracts for a gourmet twist.
Troubleshooting: What to Do if They’re Too Hard or Mushy
If Too Hard:
- You may not have cooked them long enough.
- Try simmering for another 5–10 minutes, then soak in hot water.
If Too Mushy:
- You may have overcooked them or added too much water to the dough.
- Next time, adjust cooking time or knead dough a bit more.
If They Stick Together:
- Dust the rolled pearls with a little tapioca starch before boiling.
- Stir during boiling and rinse well after cooking.
Flavoring and Coloring Tapioca Pearls
Want to get creative with your pearls? It’s easier than you think to add a burst of flavor or fun color.
Flavor Ideas:
- Brown Sugar Syrup: For a classic boba tea flavor.
- Matcha Powder: Add to the dough for green tea flavor.
- Fruit Juices: Replace water in the dough with juice (like strawberry or mango).
Natural Coloring Options:
- Beetroot Powder: For pink/red pearls.
- Activated Charcoal: For deep black.
- Butterfly Pea Flower: For blue/purple pearls.
Pro Tip: If using powders or juices, adjust the water-to-starch ratio to maintain a workable dough consistency.
FAQs about Tapioca Pearls Recipe
1. Can I make tapioca pearls ahead of time?
Yes! You can shape and dry them for storage, then boil when ready. Cooked pearls, however, are best consumed within 4 hours for optimal texture.
2. How do I keep pearls from sticking together?
Dust with tapioca starch before boiling, and stir frequently during cooking. After boiling, rinse with cold water and store in syrup.
3. Are tapioca pearls gluten-free?
Absolutely! Tapioca starch is naturally gluten-free, making this recipe safe for those with gluten sensitivities or celiac disease.
4. Can I freeze homemade tapioca pearls?
Uncooked pearls can be frozen in an airtight bag. Just boil straight from frozen. Do not freeze cooked pearls — they lose their texture.
5. How long do tapioca pearls last?
- Cooked pearls: Best within 4–6 hours.
- Dried, uncooked pearls: Up to 2 weeks in an airtight container.
Conclusion
Making tapioca pearls at home is more than just a recipe — it’s a hands-on experience that lets you truly connect with the food you love. From that first squish of the warm dough to watching the pearls dance in boiling water, it’s all part of the joy. Once you taste your homemade pearls in a glass of milk tea or a sweet dessert, you’ll know it was worth every minute.
So the next time you’re craving bubble tea, skip the store-bought pearls and roll up your sleeves instead. Your perfect, chewy, flavorful tapioca pearls are just a few simple steps away.