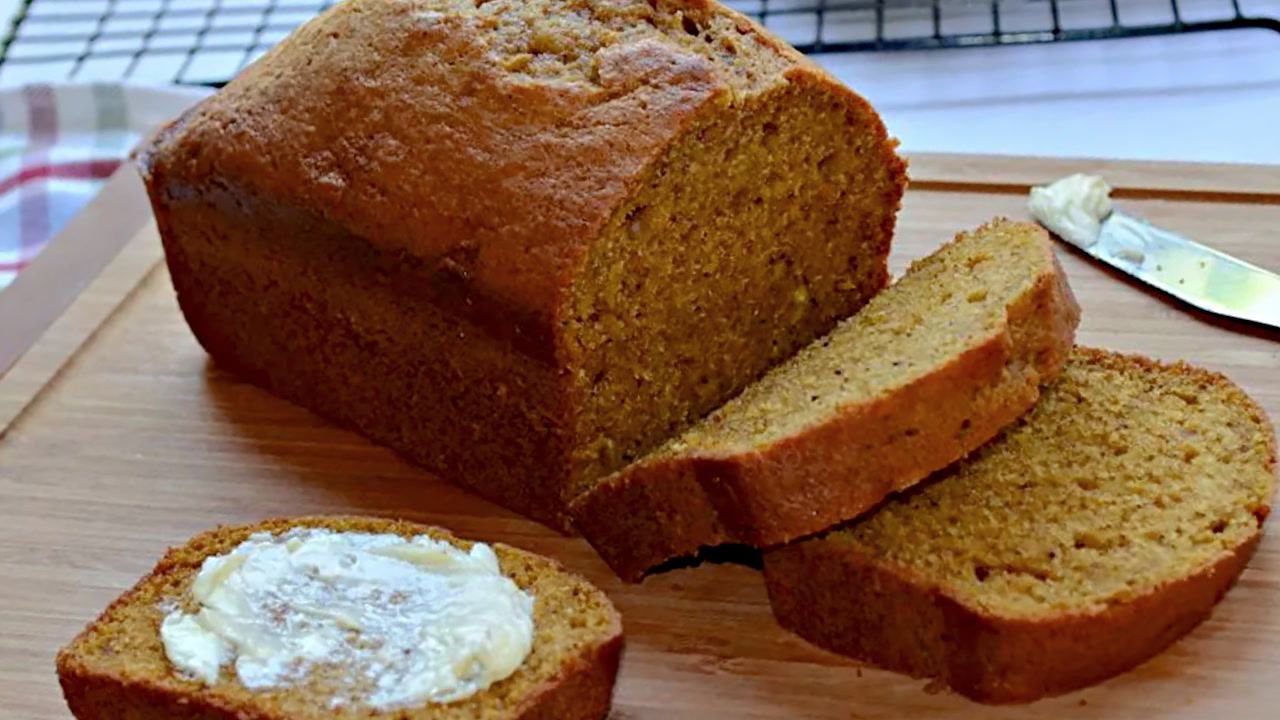
Starbucks Pumpkin Bread Recipe: There’s something about the comforting smell of warm spices and pumpkin filling the air that makes fall feel just right. And if you’ve ever walked into Starbucks during autumn, you’ve probably been tempted by their iconic Pumpkin Bread. It’s moist, rich, and perfectly spiced—basically fall in a slice.
But here’s the thing: why pay $4+ a slice when you can recreate that cozy deliciousness at home? This Starbucks Pumpkin Bread copycat recipe is just what you need. Not only is it easy to make, but it’s also just as moist, flavorful, and loaded with pumpkin spice goodness.
Let’s dive into this step-by-step guide and bring the taste of Starbucks to your kitchen—without the price tag.
Ingredients You’ll Need
Before we start baking, gather all your ingredients. Making pumpkin bread from scratch is simple, but having everything prepped will make the process even smoother.
Dry Ingredients:
- 1 3/4 cups all-purpose flour
- 1 teaspoon baking soda
- 1/2 teaspoon baking powder
- 1/2 teaspoon salt
- 2 teaspoons ground cinnamon
- 1/2 teaspoon ground nutmeg
- 1/4 teaspoon ground cloves
- 1/4 teaspoon ground allspice (optional but recommended)
Wet Ingredients:
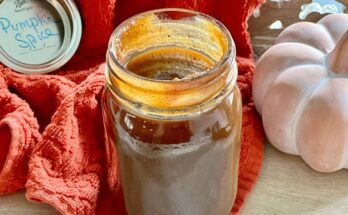
- 1 cup canned pumpkin puree (not pumpkin pie filling)
- 2 large eggs
- 1/2 cup vegetable oil (or melted coconut oil)
- 1 cup granulated sugar
- 1/2 cup packed brown sugar
- 1 teaspoon vanilla extract
Optional Topping:
- 2 tablespoons shelled pepitas (pumpkin seeds) – just like Starbucks uses on top
This mix of ingredients ensures your bread will be flavorful, moist, and taste just like the real deal.
Tools and Equipment Required
Let’s make sure you’ve got the right gear to pull this recipe off like a pro:
- 2 mixing bowls (1 large, 1 medium)
- Measuring cups and spoons
- Whisk
- Rubber spatula
- 9×5-inch loaf pan
- Non-stick spray or parchment paper
- Cooling rack
- Toothpick (for doneness test)
Having your tools ready will streamline the process and keep your kitchen mess-free.
Why You’ll Love This Copycat Pumpkin Bread Recipe
Sure, you could head to Starbucks and grab a slice, but baking it yourself? That hits different.
- Incredible flavor – The warm spices, real pumpkin, and moist texture taste just like Starbucks—maybe even better.
- More for your money – One loaf costs less than two store-bought slices.
- Make it your own – Want extra nuts? No problem. Prefer it less sweet? You got it.
- Smells amazing while baking – Your kitchen will smell like fall heaven.
And let’s be real, homemade always wins. It’s cozy, comforting, and made with love.
Step-by-Step Guide to Make Starbucks Pumpkin Bread
Ready to get baking? Follow this easy step-by-step guide to whip up your own Starbucks-style pumpkin bread at home.
Step 1: Preheat Your Oven
Start by preheating your oven to 350°F (175°C). This gives it enough time to reach the right temperature while you prep the batter. A properly heated oven ensures even baking and a beautiful golden crust.
Step 2: Prepare Your Loaf Pan
Take your 9×5 inch loaf pan and grease it with non-stick spray or line it with parchment paper. This step is crucial—no one wants their perfect loaf sticking to the pan!
You can also dust the greased pan with a little flour for extra insurance.
Step 3: Combine Dry Ingredients
In a medium mixing bowl, whisk together all your dry ingredients:
- Flour
- Baking soda & baking powder
- Salt
- Cinnamon
- Nutmeg
- Cloves
- Allspice (if using)
Make sure everything is well mixed. This helps evenly distribute the spices so each bite has that warm, cozy flavor.
Step 4: Mix Wet Ingredients
In a large mixing bowl, combine the following:
- Pumpkin puree
- Eggs
- Granulated sugar
- Brown sugar
- Vegetable oil
- Vanilla extract
Whisk until the mixture is smooth and creamy. This is your flavor base—it should smell incredible already!
Step 5: Blend Wet and Dry Mixtures Together
Slowly add your dry mixture to the wet mixture in batches. Use a rubber spatula to fold everything together gently.
Don’t overmix. A few lumps are totally fine. Overmixing can lead to dense, rubbery bread.
Step 6: Pour Batter into the Loaf Pan
Once your batter is ready, pour it into the prepared loaf pan. Use the spatula to smooth out the top.
You want it evenly distributed so the bread rises properly.
Step 7: Top with Pepitas
Sprinkle the shelled pepitas evenly on top of the batter. These give the bread that signature Starbucks look—and a nice crunch too.
If you don’t have pepitas, you can skip them or substitute with chopped nuts like pecans or walnuts.
Step 8: Bake to Perfection
Place the pan in the preheated oven and bake for 55 to 65 minutes. Every oven is different, so keep an eye on it after the 50-minute mark.
You’re looking for a golden-brown top and a firm center.
Step 9: Check for Doneness
Stick a toothpick into the center of the loaf. If it comes out clean or with a few crumbs, your pumpkin bread is done.
If it’s wet, give it another 5 minutes and test again.
Step 10: Cool Before Serving
Remove the loaf from the oven and let it cool in the pan for 10-15 minutes. Then transfer it to a wire rack to cool completely.
It smells amazing, but patience is key—slicing too early can ruin the texture!
Tips for Making the Best Pumpkin Bread
Want your pumpkin bread to turn out next-level delicious every single time? Here are some tried-and-true tips:
- Use canned pumpkin puree – It has the perfect texture and moisture content. Avoid using pumpkin pie filling—it’s too sweet and spiced.
- Measure your flour properly – Scoop and level. Too much flour makes dense bread.
- Don’t overmix the batter – Stir until just combined. Overmixing activates the gluten in the flour, making the bread chewy instead of soft.
- Check your spices – Fresh spices make a big difference. If your ground cinnamon or nutmeg is old, the flavor won’t pop.
- Let it cool completely – Seriously. Let the loaf rest on a wire rack before slicing. Cutting too soon will make it crumbly.
- Room temperature ingredients – Eggs and pumpkin mix more evenly when not cold.
These small adjustments make a huge difference in how your bread turns out—trust me.
Ingredient Substitutions and Add-ins
Want to tweak the recipe a bit? Whether you have dietary needs or you’re just feeling creative, here are some smart substitutions and tasty add-ins:
Substitutions:
- Gluten-free flour: Use a 1:1 gluten-free baking flour. Bob’s Red Mill is a great brand.
- Oil alternatives: Swap vegetable oil with melted coconut oil, avocado oil, or even unsweetened applesauce (for a lower-fat version).
- Sugar swaps: Replace white sugar with coconut sugar or use maple syrup/honey for natural sweetness (just adjust wet ingredients slightly).
- Egg-free: Use flax eggs (1 tbsp ground flaxseed + 2.5 tbsp water = 1 egg) to make it vegan.
Add-ins:
- Chocolate chips – Pumpkin and chocolate? Yes, please!
- Chopped walnuts or pecans – Adds great texture and flavor.
- Dried cranberries – For a tart surprise.
- Cream cheese swirl – Add a layer of sweetened cream cheese for a decadent twist.
Just remember, if you add extras, don’t overload the batter—stick to about 1 cup of add-ins total.
How to Store and Freeze Pumpkin Bread
You baked it. It’s beautiful. Now, how do you keep it fresh?
Room Temperature Storage:
- Wrap the cooled loaf tightly in plastic wrap or foil.
- Store in an airtight container for up to 4 days.
- Keep it away from direct sunlight and heat.
Refrigeration:
- Pumpkin bread lasts up to 1 week in the fridge.
- Store in a sealed container to prevent it from drying out.
Freezing Instructions:
- Let the loaf cool completely.
- Wrap in plastic wrap, then foil.
- Freeze whole or sliced.
- Stays fresh for up to 3 months.
- Thaw at room temperature or microwave individual slices for a quick treat.
This makes it a perfect make-ahead snack or breakfast for busy mornings.
How to Serve Pumpkin Bread
Sure, pumpkin bread is amazing all by itself—but why not elevate your slice?
Ways to Serve:
- Warm it up – A quick 10 seconds in the microwave brings out the flavors.
- With a spread – Try butter, cinnamon butter, honey, or cream cheese.
- Toasted – Slice and lightly toast it for a crispy outside and soft center.
- Pair with drinks – Pumpkin bread goes beautifully with coffee, tea, or a glass of cold milk.
Turn it into dessert by adding whipped cream or a scoop of vanilla ice cream. Fall comfort at its best.
Common Mistakes to Avoid
Even simple recipes can go sideways if you’re not careful. Here are a few missteps to steer clear of:
1. Using the Wrong Pumpkin
Only use canned pumpkin puree—not pumpkin pie filling. The latter has added sugar and spices that’ll throw off the taste and texture.
2. Overmixing the Batter
It’s tempting to beat the heck out of your mix—but don’t. Overmixing leads to a dense, rubbery loaf.
3. Baking at the Wrong Temperature
Too hot, and the top burns before the inside is cooked. Always preheat your oven to 350°F and use an oven thermometer if needed.
4. Not Testing for Doneness
Every oven is different. Always test with a toothpick in the center. If it’s wet, it’s not ready.
5. Not Letting It Cool
Let the loaf rest! Slicing into hot pumpkin bread makes it fall apart and lose moisture.
Avoid these pitfalls and your bread will be bakery-level good.
Nutritional Breakdown (Approximate)
Want to know what’s in a slice? Here’s a general idea based on this recipe (1 of 10 slices):
| Nutrient | Amount (Approx.) |
|---|---|
| Calories | 280–310 kcal |
| Total Fat | 13–15g |
| Saturated Fat | 1.5g |
| Carbohydrates | 40–45g |
| Sugars | 20–22g |
| Protein | 3–4g |
| Fiber | 1–2g |
For a healthier loaf, reduce sugar or oil, or add ground flaxseed or whole wheat flour.
Why Homemade is Better Than Starbucks
Let’s get real for a second: Starbucks makes amazing baked goods. But when you bake it at home?
You win. Here’s why:
- No preservatives or artificial flavors
- Customizable – Make it sweeter, healthier, chunkier—your call
- Cost-effective – One loaf = about 8–10 slices = huge savings
- Fresher and warmer – Nothing beats warm-from-the-oven pumpkin bread
- Fun and therapeutic – Baking is self-care, right?
You can even get the whole family involved and make memories while you’re at it.
FAQs about Starbucks Pumpkin Bread Recipe
1. Can I use fresh pumpkin instead of canned puree?
Yes, but it should be roasted, pureed, and well-drained. Canned is more consistent and less watery.
2. How long does pumpkin bread stay fresh?
Up to 4 days at room temperature, 1 week in the fridge, or 3 months in the freezer.
3. What can I use instead of pepitas on top?
Chopped walnuts, pecans, or even chocolate chips work great. Or leave it plain!
4. Can I make this recipe vegan?
Absolutely—use flax eggs instead of eggs, and a plant-based oil or applesauce in place of regular oil.
5. Why is my bread too dense?
Overmixing or too much flour can cause a dense loaf. Make sure you measure correctly and stir gently.
Conclusion
There you have it—a spot-on Starbucks Pumpkin Bread copycat recipe that you can make from scratch in your own kitchen. It’s simple, cozy, and way more satisfying than a store-bought slice.
So the next time you’re craving a slice of that warm, pumpkin-spiced perfection, skip the coffee shop line and whip up your own loaf. Your kitchen will smell amazing, your wallet will thank you, and your taste buds? Oh, they’ll be celebrating.
Now go ahead—bake it, slice it, and enjoy every bite.