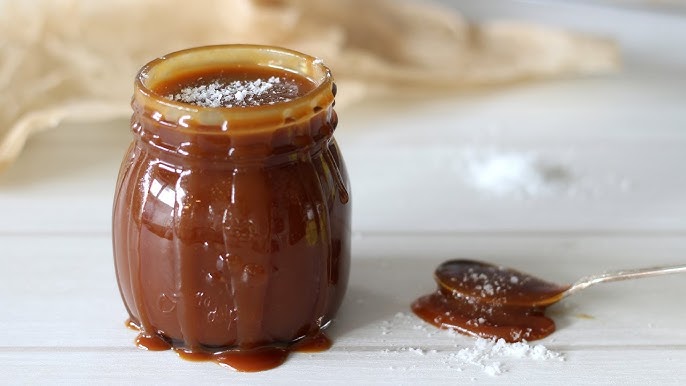
Salted Caramel Sauce Recipe: Let’s face it—there’s something magical about salted caramel sauce. That rich, buttery sweetness with a subtle salty kick can transform the simplest desserts into masterpieces. Whether drizzled over vanilla ice cream, layered in a decadent cake, or stirred into your morning coffee, this golden elixir is a pantry powerhouse. But did you know you can easily make it at home in under 15 minutes?
Unlike store-bought versions that often come packed with preservatives, artificial flavors, and questionable ingredients, homemade salted caramel sauce is pure, fresh, and fully customizable. And the best part? You probably already have everything you need in your kitchen.
In this step-by-step guide, we’ll break down exactly how to make salted caramel sauce like a pro, even if you’ve never touched a saucepan in your life. No candy thermometer? No problem. This recipe is beginner-friendly, foolproof, and incredibly rewarding. So, tie your apron and get ready to stir up something amazing.
Benefits of Homemade Salted Caramel Sauce
There’s a real sense of pride in creating your own sauces from scratch. But beyond the satisfaction, there are actual benefits to making salted caramel sauce at home. For starters, you get full control over the ingredients. Want to reduce the sugar a bit? Prefer a deeper caramel flavor? Need a dairy-free version? You can tweak it however you like.
Another huge advantage is the freshness. When you make it yourself, you skip the preservatives and artificial additives often found in commercial sauces. That means a cleaner flavor and a healthier choice overall.
Plus, homemade caramel is cheaper in the long run. A small jar of premium salted caramel sauce from the store can cost $8 to $12, while making your own costs just a couple of dollars and gives you a much bigger batch.
Lastly, the versatility is unmatched. Use it warm, cold, thick, or runny. You can make it your own secret weapon in the kitchen for desserts, breakfasts, and beverages.
List of Ingredients You’ll Need
To keep things simple, here’s your essential ingredient list:
- Granulated sugar – 1 cup
- Unsalted butter – 6 tablespoons (cut into cubes)
- Heavy cream – 1/2 cup (room temperature)
- Sea salt – 1 teaspoon (adjust to taste)
Optional Ingredients:
- Vanilla extract – 1/2 teaspoon (for extra depth)
- Brown sugar – Can be used instead of white sugar for a richer flavor
Tools Needed:
- Medium-sized heavy-bottomed saucepan
- Wooden spoon or heat-proof spatula
- Whisk
- Heat-resistant jar or container for storage
Make sure all ingredients are pre-measured and within arm’s reach. Timing is crucial in caramel-making!
Choosing the Right Ingredients
It might seem like a small detail, but ingredient quality really makes a difference in a recipe like this where there are only a few components.
- Sugar: Go for regular white granulated sugar. Avoid powdered sugar or coarse turbinado sugar, as they behave differently when heated. If you want a more molasses-like depth, you can try half white and half light brown sugar.
- Butter: Always use unsalted butter. Salted butter can make your sauce overly salty or inconsistent in flavor. European-style butter, which has a higher fat content, can give your sauce a smoother finish.
- Cream: Use heavy cream or whipping cream. Make sure it’s at room temperature to prevent bubbling and splattering when added to hot sugar.
- Salt: Sea salt is your best bet here. It dissolves well and enhances the sweetness without being overpowering. Don’t use iodized table salt—it can add a metallic aftertaste.
Every ingredient has a role to play, so choosing quality items will take your sauce from good to irresistible.
Step-by-Step Guide to Making Salted Caramel Sauce
Ready to make magic? Follow these steps closely, and you’ll have a luscious salted caramel sauce in no time.
Step 1: Measure Your Ingredients
Before you even turn on the heat, measure everything out. Once the sugar starts melting, things move quickly and you won’t have time to scramble for cream or butter. Have your butter cubed, cream in a cup, and salt nearby.
Step 2: Melting the Sugar
Place the sugar in your saucepan over medium heat. Stir constantly with a wooden spoon or heat-proof spatula as it begins to clump and then melt into a golden liquid. This is the most delicate part, so stay patient and keep it moving.
As the sugar melts, it may clump up before it becomes smooth. That’s normal! Keep stirring and watch it carefully. Don’t let it burn—aim for a deep amber color.
Step 3: Adding the Butter
Once the sugar is fully melted and amber-colored, carefully add the cubed butter. The mixture will bubble up aggressively—don’t worry, that’s expected. Stir continuously until the butter is completely melted and combined.
This step is where the magic begins. The fat from the butter gives your caramel that velvety texture and richness. Don’t rush it—if your caramel starts separating, just keep stirring until it smooths out.
Step 4: Incorporating Cream
Next, slowly pour in the room-temperature cream. Again, the sauce will bubble violently, but just keep stirring. The cold cream hitting the hot caramel causes that reaction.
Once the bubbling calms down, stir until everything is fully combined. Your sauce should now have a silky, glossy texture.
Step 5: Adding Salt
Now, stir in your sea salt. Start with 1 teaspoon, taste, and adjust if needed. You can even sprinkle a tiny bit of flaky sea salt on top later for a gourmet touch.
Step 6: Cooling and Storing
Remove the saucepan from heat and let it cool for 10–15 minutes before transferring it to a jar or glass container. The sauce will thicken as it cools. Once completely cooled, store it in the fridge for up to 2 weeks.
Pro Tips for Perfect Caramel Every Time
Making caramel might seem intimidating, but with a few pro tips up your sleeve, you can nail it every single time. Here’s what seasoned home bakers and chefs swear by:
- Use a heavy-bottomed saucepan: This ensures even heat distribution and prevents hot spots that can burn the sugar.
- Don’t walk away: Sugar can go from perfectly golden to burnt in a matter of seconds. Stay nearby and keep an eye on the color.
- Resist the urge to stir too much: Stirring constantly at the sugar-melting stage can lead to crystallization. Once the sugar is halfway melted, gentle swirling is usually enough.
- Add ingredients slowly: Dumping in the butter or cream too quickly can cause splashing and separation. Add gradually while stirring.
- Use room-temperature cream and butter: Cold ingredients hitting hot sugar can cause dramatic bubbling and even cause the caramel to seize.
- Check the color: The color should be a deep amber, like copper. If it’s too light, the flavor won’t develop fully; too dark, and it may taste bitter.
Bonus tip: If your caramel seizes (turns clumpy when you add cream), put it back on low heat and stir slowly. It should smooth out again with some patience.
Common Mistakes to Avoid
Even experienced cooks can run into issues with caramel. Here are some of the most common missteps—and how to steer clear of them:
- Overheating the sugar: Caramel burns easily once it reaches the amber stage. Use medium heat and take it slow.
- Stirring too early or too often: Let the sugar melt undisturbed at first. Stirring too much can cause crystallization, leaving your sauce grainy.
- Using cold ingredients: This causes bubbling, splashing, and can cause the caramel to seize up. Always use room-temperature butter and cream.
- Adding too much salt: Salt enhances the flavor but too much can make the sauce unpalatable. Start small and adjust to taste.
- Not working quickly: Caramel sets fast. Once everything is melted and combined, remove it from heat and transfer it before it hardens.
- Neglecting safety precautions: Hot caramel is like molten lava—it sticks and burns. Always keep kids and pets away while making it, and be cautious.
If you mess up, don’t panic. Scrape the burnt sugar into the trash and start again. It’s all part of learning!
How to Store Salted Caramel Sauce
Storing your homemade caramel sauce properly will ensure it stays fresh and ready to drizzle at a moment’s notice.
- Use a glass jar: Always store caramel in a clean, airtight glass jar or container. Mason jars work great.
- Refrigerate: Caramel sauce should be stored in the fridge where it can last up to 2 weeks.
- Label it: Add a label with the date you made it. You’ll thank yourself later.
- Expect thickening: Your sauce will thicken in the fridge. Don’t worry—it’s still good.
To make it pourable again, just reheat it (see next section), and you’re good to go.
How to Reheat Salted Caramel Sauce
Whether you’re drizzling it on a sundae or using it in a dessert, you’ll likely want to warm it up again. Here’s how:
Microwave Method:
- Transfer the desired amount into a microwave-safe bowl.
- Heat in 15-second intervals, stirring in between, until warm and smooth.
- Be careful not to overheat—it can burn quickly.
Stovetop Method:
- Place the caramel in a small saucepan over low heat.
- Stir constantly until it softens to your desired consistency.
- Don’t let it boil—gentle heat is all you need.
Once warm, the sauce becomes silky and pourable again. You can also add a splash of cream or milk if it’s too thick.
Creative Ways to Use Salted Caramel Sauce
Salted caramel sauce is like liquid gold—it makes just about anything better. Here are some irresistible ways to use it:
1. Drizzle Over Desserts
- Ice cream sundaes
- Apple pie
- Cheesecakes
- Brownies
2. Breakfast Boost
- Over pancakes or waffles
- Swirled into oatmeal
- On top of French toast
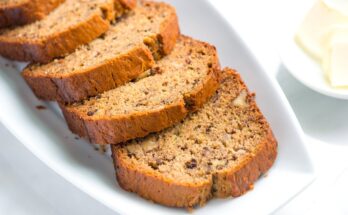
- Drizzled over banana bread
3. In Beverages
- Stir into hot coffee or lattes
- Mix into hot chocolate
- Blend into milkshakes or frappés
4. As a Filling or Topping
- Cupcake filling
- Macaron centers
- Cake drizzle
- Tart topping
You can even dip apple slices in it or add it to popcorn for a DIY caramel corn!
Vegan and Dairy-Free Options
Need a plant-based version of this classic? No worries! It’s surprisingly easy to make vegan salted caramel that still tastes amazing.
Substitutions:
- Butter: Use vegan butter or solid coconut oil
- Cream: Full-fat canned coconut milk or oat cream works best
Optional Add-ins:
- A splash of vanilla extract enhances the flavor
- A pinch of cinnamon or nutmeg adds warm spice
The method stays almost the same—just melt the sugar, then whisk in your vegan butter and coconut milk, followed by salt. The result? A luscious, creamy sauce you’d never guess is dairy-free.
Gluten-Free and Allergen-Friendly Tips
Good news—this recipe is naturally gluten-free and can easily be adapted for other dietary needs.
Tips:
- Always check labels on butter and cream to ensure no added gluten or cross-contamination.
- For nut allergies, avoid almond milk or nut-based creamers in dairy-free versions.
- When using vegan alternatives, opt for brands labeled allergen-free.
As always, if you’re serving this to someone with food allergies, be clear about the ingredients used.
Cost Comparison: Homemade vs. Store-Bought
Let’s break down the numbers. Making salted caramel sauce at home is way more affordable than buying it from the store.
| Source | Price | Quantity | Cost Per Serving |
|---|---|---|---|
| Store-Bought (Premium Brand) | $10 | 8 oz | $1.25 |
| Homemade (Same Quantity) | ~$2.50 | 8 oz | ~$0.31 |
Not only do you save money, but you also get to enjoy a fresher, healthier, and customizable sauce. That’s a win-win.
FAQs about Salted Caramel Sauce Recipe
Q1: Can I double the recipe?
Yes! Just make sure to use a larger saucepan, as the bubbling increases with more volume.
Q2: Why did my caramel sauce turn grainy?
This happens when sugar crystallizes. Avoid stirring too much early on and ensure your utensils are clean.
Q3: How long does salted caramel sauce last?
Stored in the fridge in an airtight container, it lasts up to 2 weeks.
Q4: Can I freeze caramel sauce?
Yes! Freeze in a freezer-safe container for up to 3 months. Thaw and reheat gently.
Q5: Can I make it less sweet?
You can reduce the sugar slightly, but it may affect texture. Add a bit more salt to balance sweetness instead.
Conclusion
Making your own salted caramel sauce might feel like a chef-level move, but as you’ve seen, it’s surprisingly simple and oh-so-worth-it. With just a few ingredients, a little patience, and a few tricks up your sleeve, you’ll have a glossy, buttery, flavor-packed sauce that you’ll want to drizzle on everything.
Don’t be afraid to experiment. Try different salts, swap sugars, or add flavorings like vanilla or cinnamon. And remember—practice makes perfect. The more you make it, the better it gets.
So go ahead, grab that saucepan and create something sweet and unforgettable.