Powdered Sugar Glaze Recipe: Who doesn’t love that shiny, sweet coating on top of donuts or the smooth drizzle on cinnamon rolls? That, my friend, is the magic of powdered sugar glaze. This kitchen essential might look fancy, but it’s one of the simplest recipes you’ll ever learn.
In this guide, we’ll walk you through everything you need to make a perfect powdered sugar glaze at home—step by step, without the fuss.
What is Powdered Sugar Glaze?
Powdered sugar glaze is a thin icing made primarily from powdered sugar (also known as confectioners’ sugar or icing sugar) and a liquid—usually milk or water. Sometimes it’s flavored with extracts or citrus juice to give it an extra zing. It hardens beautifully when it dries, giving that glossy finish that elevates baked goods both in flavor and looks.
Unlike thick buttercream frostings or fluffy whipped icings, glaze is much thinner and designed to coat rather than pile. It adds sweetness and a polished look without overpowering the dessert. Think of it like the finishing touch that pulls everything together.
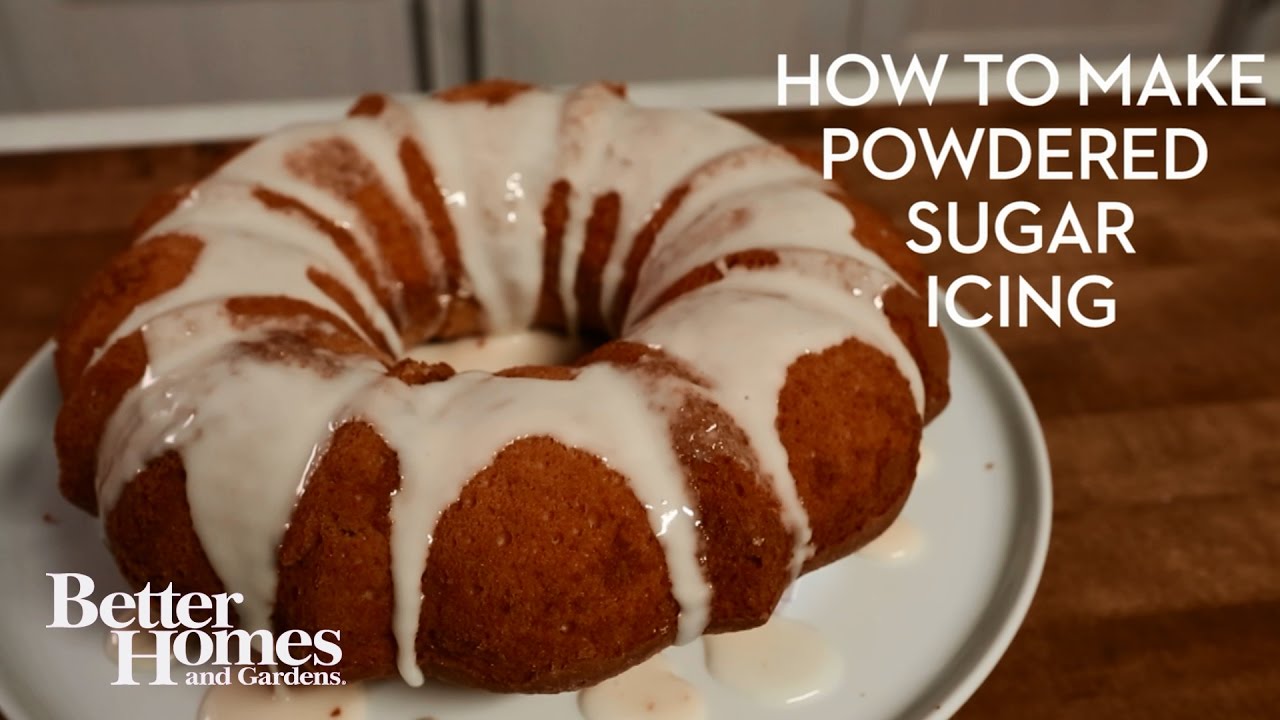
It’s also incredibly versatile. From donuts to bundt cakes, cookies, pastries, and even breakfast treats like scones and muffins—powdered sugar glaze is a winner across the board. And guess what? It only takes about 5 minutes to whip up. No fancy equipment, no cooking required.
Ingredients You’ll Need
Here’s the beauty of this glaze—you only need three basic ingredients:
- Powdered sugar (1 cup) – This is your base. It’s fine and mixes well, making your glaze super smooth.
- Milk or water (2–3 tablespoons) – The liquid helps thin out the sugar to your desired consistency. Milk adds a richer flavor, while water keeps it neutral.
- Vanilla extract (½ teaspoon, optional) – Adds depth and aroma. You can switch this with almond, maple, or any flavor extract you love.
Optional Add-ins:
- Citrus zest or juice (lemon, orange) – for a tangy twist
- Cocoa powder – for a chocolate version
- Spices (cinnamon, nutmeg) – great for fall desserts
- Food coloring – perfect for themed parties or holidays
Feel free to scale this up or down depending on how much glaze you need. The key is to maintain the right balance between sugar and liquid for that perfect drizzle.
Essential Kitchen Tools
Even though this recipe is simple, having the right tools can make a big difference. Here’s what you’ll need:
- Medium mixing bowl – Gives you enough space to mix without splashing.
- Whisk or spoon – Helps combine the sugar and liquid until smooth.
- Sifter or fine mesh strainer – To remove lumps from the powdered sugar for a velvety texture.
- Measuring cups and spoons – For accurate ingredient ratios.
- Spoon or piping bag – For controlled application of the glaze.
Trust me, you don’t need a stand mixer or fancy gadgets. Just basic kitchen tools and a few minutes of your time.
Choosing the Right Powdered Sugar
Not all powdered sugars are created equal. Here’s what you need to know:
Powdered sugar is basically granulated sugar that’s been finely ground and mixed with a small amount of cornstarch to prevent clumping. It’s super light and dissolves quickly, making it ideal for glazes.
You’ll typically find powdered sugar labeled as “10X” in stores—that’s a good sign. It means it’s been ground ten times finer than regular sugar.
Should you sift it? Absolutely. Even the best powdered sugar can have lumps, and those will ruin your glaze’s texture. Always sift it before mixing.
Can you make your own? Yes! Just blend granulated sugar in a high-speed blender until it’s powdery, and add a teaspoon of cornstarch per cup. But store-bought tends to give more consistent results.
Step-by-Step Guide to Making Powdered Sugar Glaze
Here’s where the magic happens. Let’s break it down step by step:
Step 1: Sift the Powdered Sugar
Start by sifting 1 cup of powdered sugar into a bowl. This removes any clumps and ensures a silky glaze.
Step 2: Add the Liquid
Add 2 tablespoons of milk or water to the sugar. If you want a richer glaze, go with milk or even heavy cream. For a lighter glaze, stick with water or citrus juice.
Step 3: Whisk Until Smooth
Using a whisk or spoon, stir the mixture until smooth. It should be fluid but not runny. If it’s too thick, add a few drops of liquid. If it’s too thin, add a little more powdered sugar.
Step 4: Add Flavor (Optional)
Mix in your extract—vanilla is classic, but almond, lemon, or maple work wonders depending on the dessert.
Step 5: Use Immediately
Glaze sets quickly, so don’t wait too long. Drizzle it over cooled desserts using a spoon, piping bag, or even dip smaller items directly into the bowl.
Tips for Perfect Consistency
Getting the perfect consistency is where most people slip up. Too runny? It slides right off your baked goods. Too thick? It clumps instead of gliding. But don’t worry—here are some real-world tips to help you nail it every time:
- Start thick, then thin it down. It’s always easier to add liquid than to fix an overly runny glaze. Begin with less liquid than you think you need, then slowly add more.
- Test before you commit. Dip a spoon in the glaze and drizzle it over a plate or parchment paper to see how it falls and sets. It should flow smoothly but stay where you put it.
- Warm it slightly if needed. A quick 5–10 seconds in the microwave can help loosen the glaze and make it easier to apply—especially helpful if you’re using cream or butter in your mix.
- Let baked goods cool before glazing. If your treats are too warm, the glaze will melt and soak in instead of forming that beautiful glossy coat.
Think of your glaze like paint. You don’t want it so watery that it runs all over the canvas (your dessert), but you also don’t want it so thick that it sticks to the brush. That sweet spot in between? That’s where the magic lives.
Flavor Variations You Can Try
Powdered sugar glaze is a blank canvas—and that means you can easily get creative with it. Here are some fun and delicious variations to try, depending on the dessert you’re making:
- Vanilla Glaze: Add ½ tsp vanilla extract. Great for almost anything—cookies, muffins, or cakes.
- Citrus Glaze: Swap the liquid with lemon, orange, or lime juice, and add a little zest for extra punch.
- Maple Glaze: Use maple syrup instead of milk for a rich fall flavor. Perfect on scones or apple cakes.
- Almond Glaze: Add almond extract—just a drop or two goes a long way. Ideal for cherry or berry-flavored treats.
- Chocolate Glaze: Add 1 tbsp unsweetened cocoa powder and a splash of milk. It’s like ganache but way simpler.
- Spiced Glaze: Stir in a pinch of cinnamon, nutmeg, or pumpkin spice. Think autumn and cozy vibes.
- Coffee Glaze: Replace the liquid with strong brewed coffee or espresso. Amazing on chocolate desserts.
Each of these tweaks takes only seconds but adds a ton of personality to your glaze. It’s like turning a basic outfit into a statement look with one accessory.
Different Liquids You Can Use
Choosing your liquid changes everything—the taste, the texture, even the finish. Here’s a breakdown of what you can use and how it affects your glaze:
| Liquid | Flavor Impact | Best For |
|---|---|---|
| Milk | Rich and creamy | Cakes, cinnamon rolls |
| Water | Neutral and light | When you don’t want added flavor |
| Heavy Cream | Ultra-rich and thick | Luxurious desserts, like pound cakes |
| Lemon/Lime Juice | Tangy and fresh | Fruit tarts, lemon cakes |
| Orange Juice | Sweet and citrusy | Muffins, scones |
| Coffee/Espresso | Bold and deep | Chocolate desserts |
| Maple Syrup | Sweet and earthy | Fall-inspired desserts |
No matter what liquid you use, remember to start small and adjust until you reach the right thickness. That’s the secret to a smooth, glossy glaze every time.
How to Color Your Glaze
Need your glaze to match a theme—birthday, holiday, or party vibes? Coloring it is super simple.
- Use gel food coloring for bold shades without watering down the glaze.
- Add the color slowly—a toothpick dip at a time is enough. Stir and build up to your desired hue.
- Separate batches if you want multiple colors. Divide the glaze into smaller bowls before coloring.
Want a pastel pink glaze for Valentine’s Day? Or bold blue for a birthday bash? It’s all possible—and super fun. Just don’t overdo it, or the color might overshadow the taste.
Best Ways to Apply the Glaze
There’s more than one way to apply a powdered sugar glaze. It depends on what look or texture you’re going for:
- Drizzle: Use a spoon or fork to gently drizzle glaze over your desserts. Best for cookies, muffins, and cakes.
- Dip: Dunk the top of donuts or cupcakes directly into the glaze. Let the excess drip off, then place them on a rack to set.
- Pour: Pour the glaze over bundt cakes or pound cakes for full coverage. Use a spouted cup or ladle for control.
- Brush: Use a pastry brush for a thin, even coating—great for fruit tarts or tea breads.
Pro tip: Always glaze over a wire rack with parchment underneath. That way, cleanup is a breeze and you catch the drips.
Ideal Uses for Powdered Sugar Glaze
This glaze isn’t picky. It works wonders on almost every baked treat. Here are just a few ideas to get you inspired:
- Donuts: Classic glazed donuts are always a hit.
- Cookies: Sugar cookies and shortbread get a pretty upgrade.
- Cakes: Pound cakes, bundt cakes, and loaf cakes love a drizzle.
- Scones and Muffins: Add a sweet finishing touch.
- Pastries: Danish, turnovers, pop tarts—yes, yes, and yes.
- Cinnamon Rolls: That final glaze makes them bakery-worthy.
Think of powdered sugar glaze as your go-to highlighter—it brings out the best in whatever it touches.
Storage Tips for Glaze
So, what happens if you make too much glaze? Good news: powdered sugar glaze stores pretty well if you follow a few simple rules.
- Short-Term Storage: If you’re using the glaze within a day or two, just cover the bowl tightly with plastic wrap and keep it at room temperature. Give it a good stir before using again.
- Refrigeration: Want to keep it a bit longer? Store the glaze in an airtight container in the refrigerator for up to 5–7 days. It may thicken slightly when cold, so let it come to room temp and whisk it again before applying.
- Freezing: Technically, you can freeze glaze, but it might separate or change texture after thawing. It’s usually better to make it fresh since it’s so quick and easy.
- Reusing Leftovers: Got leftover glaze? Drizzle it on pancakes, waffles, or toast the next morning! It’s sugar—get creative.
Also, be sure to label your container if you’ve added flavorings or color so you don’t get any surprises next time you open it.
Common Mistakes to Avoid
Even with such a simple recipe, there are a few things that can throw you off. Watch out for these common glaze mistakes:
- Skipping the sift: Lumpy glaze isn’t cute—and it’s totally avoidable by sifting your powdered sugar first.
- Adding too much liquid too fast: A little goes a long way. Pour slowly and mix after each addition.
- Glazing warm desserts: The glaze will melt, run off, or soak in. Always let baked goods cool before glazing.
- Overmixing: Stir until smooth, but don’t whip it like a frosting. Overmixing introduces air bubbles, which dulls the shine.
- Not using it immediately: Powdered sugar glaze starts to set fast. Once it’s ready, apply it right away.
- Forgetting to test: Always do a test drizzle to check thickness and flow before committing to your masterpiece.
Making the perfect glaze is a mix of technique and timing—but once you get the hang of it, it becomes second nature.
FAQs about Powdered Sugar Glaze Recipe
Let’s tackle the most common questions home bakers have when it comes to powdered sugar glaze:
1. Why is my glaze too runny?
You probably added too much liquid. Add more sifted powdered sugar gradually until it thickens up.
2. Why does my glaze look dull or cloudy?
It may be overmixed or applied to a hot surface. Also, using water instead of milk can make the glaze dry more matte than shiny.
3. Can I use honey or maple syrup as the liquid?
Yes, but keep in mind they’ll add their own flavor and a slightly stickier texture. Best for rustic or fall-themed desserts.
4. Can I use non-dairy milk?
Absolutely! Almond, oat, soy, and coconut milk all work well and make the glaze vegan-friendly.
5. Why is my glaze not sticking to my dessert?
The surface might be too slick or too warm. Make sure your baked goods are cool and have a slightly rough texture for the glaze to grip.
These questions pop up all the time, so don’t stress if your first try isn’t flawless. Glaze is forgiving and easy to fix.
Conclusion
There you have it—a complete guide to mastering the powdered sugar glaze. Whether you’re dressing up cookies for a birthday party or giving your Sunday morning scones a sweet finish, this simple glaze adds that extra something to any treat.
It’s quick. It’s customizable. It’s delicious. And once you try making it yourself, you’ll never reach for the store-bought stuff again.
So grab a bowl, whisk, and that bag of powdered sugar—and let your sweet creativity shine.


