Powder Sugar Icing Recipe: There’s something truly magical about a perfect glaze of powdered sugar icing. Whether it’s drizzled over warm cinnamon rolls, spread smoothly on cookies, or used to decorate a cake with stunning colors, this simple yet versatile icing transforms any baked good into a sweet masterpiece. If you’ve ever wondered how bakeries get that glossy, dreamy topping, you’re in luck—this step-by-step guide will walk you through making your own powdered sugar icing from scratch, even if you’re a total beginner.
This icing is one of those back-pocket recipes every home baker should know. It’s made with just a few ingredients, requires no fancy equipment, and comes together in under 10 minutes. Plus, you can customize it in endless ways with different flavors and colors. Sounds amazing, right?
Let’s dive into everything you need to know, from ingredients and tools to step-by-step instructions and pro tips to get that smooth, picture-perfect finish every time.
Ingredients You’ll Need
Before we start mixing, let’s gather everything. Here’s a breakdown of the classic powdered sugar icing ingredients, along with some optional add-ins to give your icing a personalized twist.
Basic Ingredients:
- Powdered Sugar (1 cup): Also known as confectioners’ sugar or icing sugar, this is the base of the icing. It’s finely ground, which gives your icing a smooth and silky texture.
- Milk (2–3 tablespoons): Helps to thin out the sugar and create the right consistency. You can use whole milk, 2%, or even plant-based milk.
- Vanilla Extract (½ teaspoon): Adds depth and a warm, sweet flavor.
Optional Additions:
- Salt (a pinch): Balances the sweetness and enhances flavor.
- Butter (1 tablespoon, melted): For a creamier finish and richer taste.
- Lemon juice or almond extract (½ teaspoon): For a flavor twist.
- Food coloring (a few drops): If you want colorful icing.
Substitutes:
- Milk Substitute: Use water, cream, or juice (like lemon or orange) for a different flavor.
- Vegan Version: Use plant-based milk and skip the butter.
Each ingredient plays a role. Powdered sugar gives structure. Liquid helps blend and thin the icing. Flavor extracts and colors help you make it your own. It’s that simple, but the magic comes from how you mix and use them.
Tools You’ll Need
You don’t need a fully stocked kitchen to make powdered sugar icing, which is one of the reasons it’s such a favorite among home bakers. But having the right tools on hand can make your job easier and your icing smoother.
Essential Tools:
- Mixing Bowl: Medium size is ideal. Glass or stainless steel works best.
- Whisk or Spoon: A whisk gives the smoothest texture, but a spoon works in a pinch.
- Measuring Cups and Spoons: Precision helps you get the right consistency.
- Sifter or Fine-Mesh Strainer: Helps remove any lumps from the powdered sugar.
Optional Tools:
- Electric Hand Mixer: Speeds up mixing, especially for larger batches.
- Food Coloring Set: For custom-colored icing.
- Icing Spatula or Spoon: For spreading icing on baked goods.
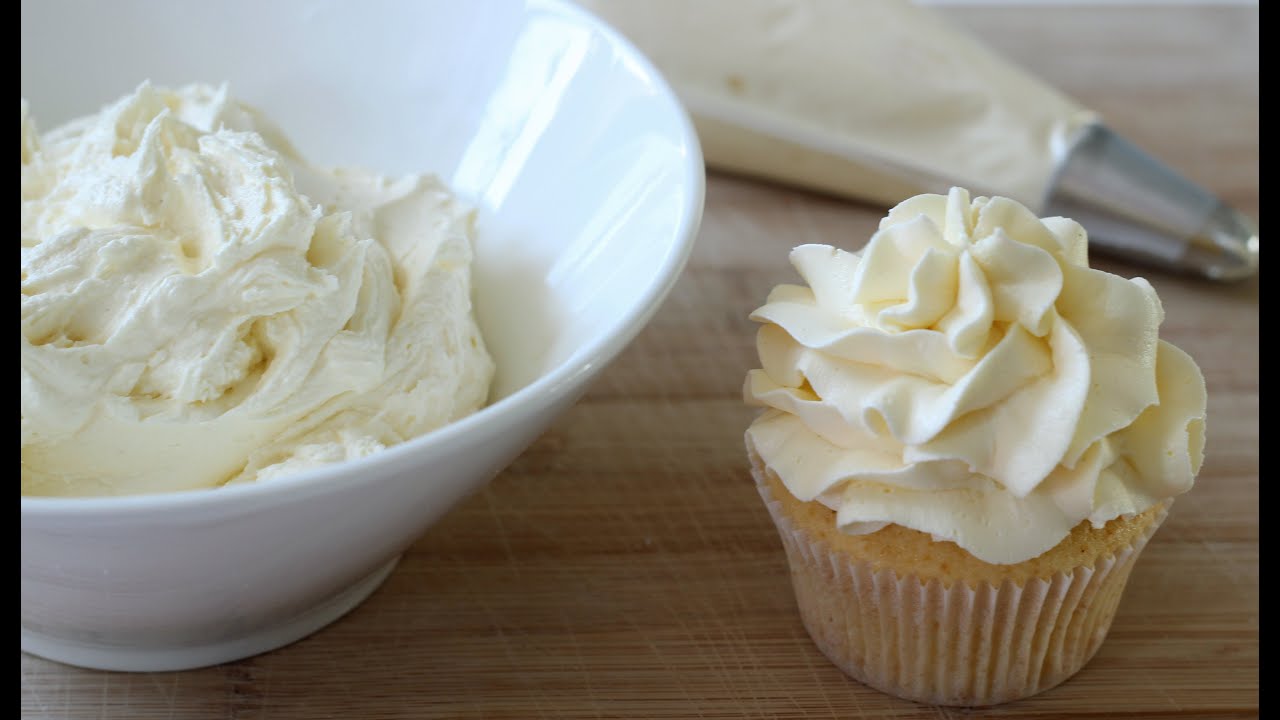
- Piping Bag (or Ziplock): Great for decorating cookies or writing with icing.
Think of these as your icing toolkit. The better your tools, the smoother your icing (and process) will be.
Understanding Powdered Sugar Icing
Before we get into the how-to, let’s talk about what powdered sugar icing actually is—and why it’s so different from other types of frosting.
What Is Powdered Sugar Icing?
Powdered sugar icing, often called icing glaze, is a simple mixture of powdered sugar and liquid (usually milk or water) that results in a pourable, glossy finish. It’s thinner than buttercream, firmer than whipped cream, and easier to make than royal icing. It hardens as it dries, forming a sweet crust that holds up well on cookies, cakes, and pastries.
Icing vs Frosting: What’s the Difference?
- Icing: Thin, pourable, sets with a shiny finish.
- Frosting: Thicker, creamy, used to coat and fill cakes.
- Glaze: A type of icing, usually more fluid.
Think of frosting like a cozy sweater—thick, fluffy, and soft. Icing is more like a light jacket—sleek, smooth, and perfect for layering on cookies or cinnamon rolls.
Step-by-Step Guide to Making Powder Sugar Icing
This is where the magic happens. Making powdered sugar icing is quick, but doing it right requires attention to detail. Follow these steps carefully for a perfect batch every time.
Step 1: Sifting the Powdered Sugar
Sift powdered sugar into a bowl to remove lumps. This creates a smooth icing with no grainy texture.
Step 2: Choosing the Liquid Base
Select a liquid such as milk for creaminess, water for a neutral glaze, or lemon juice for a bright, tangy flavor.
Step 3: Mixing Ingredients
Gradually add the liquid to the powdered sugar, starting with small amounts. Stir with a whisk or spoon until combined.
Step 4: Adjusting Consistency
Add more liquid for a thinner glaze or more powdered sugar to thicken. The icing should flow easily but not be runny.
Step 5: Adding Flavor
Mix in vanilla, almond extract, or citrus zest and juice. Use small amounts to avoid overpowering the icing.
Step 6: Coloring Your Icing
Add food coloring a drop at a time. Natural options include beet juice or turmeric, while gel colors give vibrant results without thinning.
Step 7: Using the Icing
Drizzle over cakes and pastries, spread with a spatula, or dip cookies directly into the icing.
Step 8: Letting It Set
Allow the icing to rest at room temperature for 15–30 minutes until set before serving or stacking.
Tips for Perfect Powder Sugar Icing
Even though it’s a simple recipe, powdered sugar icing can go wrong without a few tricks up your sleeve. Here’s how to keep it flawless:
- Sift the Sugar First: Prevents annoying lumps.
- Go Slow with Liquids: You can always add more, but you can’t take it out.
- Use Room Temperature Ingredients: Helps everything mix evenly.
- Don’t Overmix: Too much mixing can create air bubbles or make it too runny.
- Test First: Try your icing on one baked good before finishing the whole batch.
These small tips make a big difference, especially if you’re decorating cookies for an event or holiday. No one wants cracked icing or weird textures!
Flavor Variations
One of the best parts of powdered sugar icing is how easily it can be customized. A simple change in extract or ingredient can completely shift the flavor, making it ideal for different desserts, seasons, or personal preferences. Let’s explore a few tried-and-true variations you can try at home.
1. Classic Vanilla Icing
The most common and versatile version. It’s sweet, simple, and pairs well with nearly everything.
Ingredients:
- 1 cup powdered sugar
- 2–3 tbsp milk
- ½ tsp vanilla extract
This version is great on sugar cookies, pound cake, or cinnamon rolls.
2. Lemon Icing
Bright, tangy, and fresh, lemon icing is perfect for spring or summer bakes like lemon loaf, blueberry muffins, or shortbread cookies.
How to Make It:
- Swap milk with lemon juice
- Add a touch of lemon zest for extra flavor
This adds a zingy contrast to sweet baked goods and cuts through rich desserts nicely.
3. Almond Icing
A favorite in many bakeries. Almond extract has a bold, slightly cherry-like flavor that makes icing taste extra fancy.
How to Make It:
- Use ½ tsp almond extract instead of vanilla
- Optional: add a touch of milk for smoothness
It’s amazing on cherry thumbprint cookies or white cakes.
4. Chocolate Icing
Yes, you can turn powdered sugar icing into a chocolatey treat!
How to Make It:
- Add 1–2 tbsp unsweetened cocoa powder
- Increase milk slightly to keep consistency
This version is perfect for brownies, donuts, or drizzling over banana bread.
5. Maple Icing
Warm and cozy, maple icing adds an autumn vibe to cookies, scones, and pumpkin treats.
Ingredients:
- Replace milk with pure maple syrup
- Add a pinch of cinnamon for extra flavor
Flavor variations are where you can really let your creativity shine. Don’t be afraid to experiment. The base is always the same—it’s the little additions that create something magical.
Coloring Tips for Beautiful Icing
Want Instagram-worthy cookies or a stunning glaze on your cake? Adding color to your powdered sugar icing is the easiest way to make your desserts pop. But a few tricks will help you avoid turning your icing into a mess.
Types of Food Coloring:
Gel Food Coloring:
- Best for vibrant, bold shades
- Doesn’t water down the icing
- Great for detailed cookie decorating
Liquid Food Coloring:
- Easy to find and use
- Works for light tints
- Be careful—it can thin your icing too much
Powdered or Natural Colorings:
- Made from natural sources like beetroot, matcha, turmeric
- Subtle colors and health-friendly
- Requires more blending
Coloring Tips:
- Always add coloring gradually—a little goes a long way
- Use a toothpick to control how much gel you add
- Mix thoroughly to avoid streaks
- Let colors develop—they deepen slightly as the icing sets
For rainbow cookies, separate icing into small bowls and color each one differently. Or try an ombré effect by varying the shades of one color!
How to Store Powder Sugar Icing
Let’s say you made too much icing. No worries—it stores quite well if handled properly.
Short-Term Storage:
- Store in an airtight container at room temperature for up to 2 days
- Stir well before using, as it may thicken slightly
Long-Term Storage:
- For longer storage (3–4 days), keep it in the fridge
- When ready to use, let it come to room temperature and re-stir
- Add a splash of milk or water if it thickens too much
Freezing?
Not recommended. Powder sugar icing can become grainy and separate when thawed. Make fresh when possible!
How to Use the Icing on Different Baked Goods
Now that you’ve mastered the recipe, you’ll want to try it on everything. And honestly—you should! Powder sugar icing is super versatile.
Cookies:
- Use thicker icing for outlines or piping
- Thinner glaze for dipping or flooding sugar cookies
- Sets beautifully, so it’s ideal for decorated cookies
Cakes:
- Drizzle over bundt cakes for that shiny finish
- Add a thicker icing layer on pound cakes or loaf cakes
- Great for tea cakes or coffee cakes too
Donuts:
- Dunk the tops while still slightly warm
- Let the glaze drip and harden for that bakery look
Muffins and Scones:
- A light drizzle over lemon muffins or blueberry scones = perfection
- Adds a sweet finish without overpowering
Once you start using this icing, it becomes your go-to for giving even the simplest baked goods a professional touch.
Common Mistakes to Avoid
Even though it’s simple, powdered sugar icing can go wrong fast. Avoid these rookie mistakes to keep your icing game strong.
1. Adding Too Much Liquid
- This is the #1 mistake.
- Always add slowly—1 teaspoon at a time.
- If you go too far, your icing will become runny and hard to rescue.
2. Not Sifting the Sugar
- Lumpy sugar = lumpy icing
- Take the extra minute to sift
3. Using Hot Baked Goods
- If your cookies or cakes are too warm, the icing melts right off.
- Always cool completely before icing.
4. Overmixing
- Overmixing can add too much air, making the icing bubbly or too loose
- Stop mixing once it’s smooth
5. Not Testing First
- Try your icing on a test cookie or corner of a cake
- Adjust consistency or color before decorating everything
A little patience and a few checks can save you from messy results.
Powder Sugar Icing for Holidays and Special Events
This icing really shines during special occasions. Its easy customization makes it ideal for themed cookies, decorated treats, or DIY dessert stations.
Ideas for the Holidays:
- Christmas: Red and green iced sugar cookies, peppermint flavoring
- Easter: Pastel-colored cookies with lemon or almond icing
- Halloween: Orange and black icing for spooky designs
- Valentine’s Day: Heart cookies with pink-tinted glaze
Birthday Parties:
- Let kids decorate their own cookies
- Use bright colors and different flavors
- Personalize cakes with piped icing names
Weddings or Baby Showers:
- Elegant white glaze with edible gold dust
- Use icing as a base for decorated fondant or edible flowers
The possibilities are endless, and since the icing hardens, it’s great for treats that need to travel or stay fresh longer.
Powder Sugar Icing vs Buttercream: What’s the Difference?
A lot of people confuse powdered sugar icing with buttercream—but they’re totally different creatures in the baking world. Each has its own texture, flavor profile, and ideal uses. Let’s break it down so you know which to use and when.
1. Texture
- Powdered Sugar Icing: Thin, smooth, and glossy. Dries to a firm finish, which is great for stacking or packaging.
- Buttercream: Thick, creamy, and fluffy. Doesn’t harden completely and stays soft.
Buttercream is best when you need volume, like for cake layers or piping. Powder sugar icing is your go-to for a sleek finish or decoration that sets hard.
2. Taste
- Powdered Sugar Icing: Very sweet, light, and often flavored with extracts.
- Buttercream: Rich, buttery, and creamy—thanks to all that actual butter!
If you’re after something rich and indulgent, buttercream wins. But if you need something lighter, less greasy, or with a strong flavor punch, powdered sugar icing is perfect.
3. Ease of Use
- Powdered Sugar Icing: Just a few ingredients, no mixer needed.
- Buttercream: Requires butter, sometimes shortening, and an electric mixer for proper consistency.
So if you’re short on time or ingredients, powdered sugar icing is your best friend. It’s also easier to clean up and doesn’t require refrigeration in most cases.
4. Best Uses
- Powder Sugar Icing: Cookies, pastries, donuts, quick breads.
- Buttercream: Layer cakes, cupcakes, decorative piping.
Still confused? Think of powdered sugar icing as the glaze and buttercream as the frosting. Simple!
Quick Icing Fixes (Troubleshooting Guide)
Things not going as planned? Don’t worry—it happens to all of us. Here’s how to fix the most common powdered sugar icing issues in a flash:
Problem #1: Icing is Too Runny
Fix:
- Add more sifted powdered sugar, 1 tablespoon at a time.
- Stir well and let sit for a few minutes to thicken.
Problem #2: Icing is Too Thick
Fix:
- Add liquid (milk, water, etc.) ½ teaspoon at a time.
- Mix until you get a smooth, pourable consistency.
Problem #3: Icing Has Lumps
Fix:
- Sift powdered sugar before mixing.
- Whisk thoroughly or use a small blender to break clumps.
Problem #4: Icing Cracks After Drying
Fix:
- Icing may be too dry or applied too thinly.
- Add a touch more liquid next time and spread more evenly.
Problem #5: Icing Won’t Set
Fix:
- Add less liquid next time or let the icing sit longer in a dry place.
- Humidity can slow down setting—consider placing in front of a fan.
Learning to troubleshoot on the fly makes you a more confident baker. Once you’ve solved these common issues, you’ll be creating perfect icing every time.
FAQs about Powder Sugar Icing Recipe
1. Can I make powdered sugar icing without milk?
Yes! You can use water, lemon juice, orange juice, or even plant-based milks like almond or oat milk. Each option gives a slightly different taste and texture, but they all work.
2. How long does powdered sugar icing take to set?
It usually takes about 30 minutes to 1 hour at room temperature, depending on the thickness and humidity. For quicker results, let it dry in a cool, dry area or in front of a fan.
3. Is it safe to use powdered sugar icing on hot baked goods?
It’s not ideal. If your baked goods are too hot, the icing will melt and run off. Wait until items are fully cooled to ensure the icing sticks and sets properly.
4. Can I make powdered sugar icing in advance?
Yes. Store it in an airtight container at room temperature for 1–2 days or in the refrigerator for up to 4 days. Stir well and add a bit of liquid if it thickens before using.
5. What’s the best way to flavor powdered sugar icing?
Extracts like vanilla, almond, lemon, or even peppermint work wonderfully. You can also use citrus juice, flavored coffee creamers, or a touch of cocoa powder for creative twists.
Conclusion
There you have it—the ultimate guide to making and mastering powdered sugar icing. Whether you’re glazing cookies, drizzling donuts, or decorating a cake, this simple icing delivers flavor, beauty, and versatility. With just a few ingredients, you can create a glaze that hardens perfectly, shines beautifully, and adds that sweet finishing touch to any baked treat.
From choosing the right liquid to mixing in your favorite flavors, the possibilities are endless. And let’s not forget—once you’ve mastered the basics, you can get super creative with colors, textures, and designs.
So the next time you’re staring down a plain batch of cookies or a freshly baked cake, you’ll know exactly what to do. Grab that powdered sugar, mix up your glaze, and drizzle away. Happy baking!

