Potato Knish Recipe: Knishes are more than just a delicious snack—they’re a warm, flaky piece of culinary history wrapped in tradition and flavor. If you’ve ever walked past a Jewish deli and caught a whiff of buttery dough and savory filling, chances are it was a knish calling your name. These stuffed pastries, traditionally filled with mashed potatoes and onions, are crispy on the outside and soft, creamy inside—a perfect comfort food for any season.
In this step-by-step guide, I’ll show you exactly how to make homemade potato knishes from scratch. Whether you’re a beginner or someone who grew up eating knishes at family gatherings, this recipe is simple, satisfying, and worth every bite.
Ingredients You’ll Need
Before we dive into the steps, let’s gather everything you need. The best part about this recipe? It uses simple, pantry-friendly ingredients. Here’s a full list:
For the Dough:
- 2 cups all-purpose flour
- 1 teaspoon baking powder
- ½ teaspoon salt
- 1 large egg
- ¼ cup vegetable oil
- ⅓ cup cold water (add more if needed)
For the Filling:
- 4 medium russet potatoes (peeled and cubed)
- 1 large yellow onion (finely chopped)
- 2 tablespoons butter or oil (plus more for sautéing)
- Salt and black pepper to taste
- Optional: 1 garlic clove (minced), chives, or schmaltz (for an authentic touch)
For Finishing:
- 1 beaten egg (for egg wash) or olive oil for a vegan option
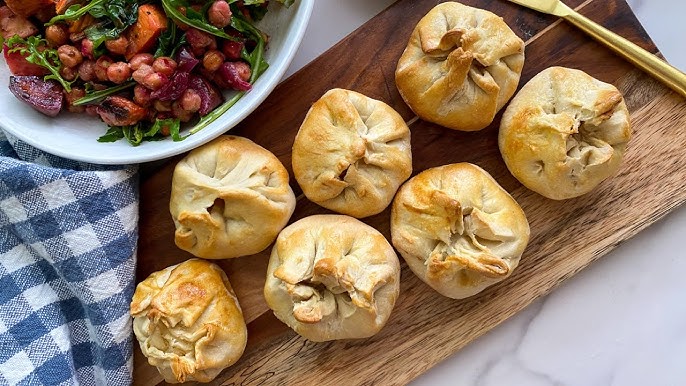
These ingredients yield around 8 medium knishes, depending on how you portion the dough. You can easily double the batch for a party or freeze extras for later.
Kitchen Equipment Checklist
A good recipe doesn’t just rely on ingredients—it also needs the right tools. Here’s what you’ll need to make your potato knishes:
- Mixing bowls (one large, one small)
- Wooden spoon or spatula
- Large pot (for boiling potatoes)
- Frying pan or skillet (for onions)
- Rolling pin
- Baking sheet
- Parchment paper or silicone baking mat
- Sharp knife or dough cutter
- Pastry brush (for egg wash)
Once you’ve gathered all your gear and ingredients, it’s time to get cooking!
Step-by-Step Guide for Potato Knish
Step 1: Prepare the Dough
In a bowl, mix flour, salt, oil, and warm water until a soft dough forms. Knead on a lightly floured surface for 5–7 minutes until smooth and elastic. Cover and let the dough rest for at least 30 minutes. Resting relaxes the gluten, making the dough easier to roll thin.
Step 2: Cook the Potatoes
Peel and cut potatoes into chunks. Boil in salted water until fork-tender. Drain thoroughly and let excess steam escape to avoid a watery filling.
Step 3: Make the Potato-Onion Filling
Sauté finely chopped onions in oil until soft and golden. Mash the potatoes until smooth, then mix in the onions, salt, pepper, and a little oil or butter. The filling should be creamy but firm enough to hold shape.
Step 4: Roll Out the Dough
Divide the dough into portions. Roll each piece on a floured surface, then gently stretch until thin but not tearing. Aim for a thickness similar to a thin flatbread.
Step 5: Fill and Shape the Knishes
Place filling in a line along the dough. Roll the dough over the filling into a log, then twist or pinch sections to seal. Cut into individual knishes and tuck the ends underneath.
Step 6: Bake the Knishes
Preheat the oven to 375°F (190°C). Arrange knishes on a lined baking sheet and brush with egg wash for a golden finish. Bake for 30–35 minutes until lightly browned.
Step 7: Let Them Cool
Allow knishes to cool for 10–15 minutes before serving. Cooling helps the filling set and improves texture.
Serving Suggestions
Potato knishes are crazy versatile—you can dress them up or down, serve them as a side or make them the star. Here are some delicious ways to enjoy them:
- With a dipping sauce: Classic yellow mustard, spicy brown mustard, sour cream, or garlic aioli.
- As a main dish: Pair with a simple green salad, coleslaw, or roasted vegetables.
- With soup: Try with matzo ball soup, borscht, or a hearty lentil stew for a cozy meal.
- On the go: They’re perfect for lunchboxes or road trip snacks.
Want to get really authentic? Try serving them alongside a pickle and a fizzy soda—just like they do in NYC delis.
Variations of Potato Knish
Once you’ve nailed the classic version, you can start exploring all kinds of knish creativity. Here are some fun and flavorful ideas:
1. Sweet Potato Knish
- Swap regular potatoes with roasted sweet potatoes.
- Add cinnamon, a pinch of brown sugar, and a touch of nutmeg for a sweet-savory combo.
2. Cheese and Potato Knish
- Mix in ½ cup of shredded cheddar or farmer’s cheese into the filling.
- Adds richness and a gooey texture.
3. Spinach and Potato Knish
- Fold in cooked spinach (well-drained) for a green twist.
- Sprinkle in some feta or ricotta if you like Mediterranean vibes.
4. Mushroom and Potato Knish
- Sauté chopped mushrooms with the onions.
- Boosts umami and adds a meaty texture—perfect for vegetarians.
5. Meat-Filled Knish
- A deli favorite—ground beef cooked with onions and spices can replace or supplement the potato.
The base dough and method stay the same, so once you’ve got that down, the sky’s the limit!
Tips for Perfect Knishes
Let’s face it—homemade pastry can be a bit intimidating. But don’t worry, I’ve got your back. Here are some pro tips to help your knishes come out perfect every time:
- Don’t overwork the dough – This makes it tough. Mix just until combined and smooth.
- Use cold water in the dough – Helps keep the dough tender.
- Taste your filling – Make sure it’s well-seasoned before you fill the dough.
- Seal edges tightly – Prevents filling from leaking during baking.
- Let the filling cool – Hot filling can make the dough soggy.
- Brush with egg wash or oil – This gives them that bakery-style golden finish.
Storage and Reheating Tips:
- Store cooled knishes in an airtight container in the fridge for up to 4 days.
- Reheat in the oven at 350°F (175°C) for 10–15 minutes for the best texture (skip the microwave if you want them crispy!).
Freezing Instructions:
- You can freeze both unbaked and baked knishes.
- Freeze on a tray until solid, then transfer to a freezer bag.
- To bake from frozen, add 10–15 extra minutes to your baking time.
Nutritional Information (Per Knish – Approximate)
| Component | Amount |
|---|---|
| Calories | 210–260 kcal |
| Carbohydrates | 30g |
| Protein | 5g |
| Fat | 10g |
| Fiber | 3g |
| Sodium | 220mg |
This will vary based on your fillings, dough thickness, and portion size, but this gives you a general idea.
Cultural Background
Knishes aren’t just food—they’re tradition, history, and a connection to generations past. Originating in Eastern Europe, knishes were a popular street food among Ashkenazi Jews. Immigrants brought them to America in the early 1900s, especially to New York City, where they became deli staples.
From pushcarts on the Lower East Side to gourmet bakeries today, knishes have never lost their charm. They’re often eaten during Jewish holidays or simply enjoyed as comfort food. Making them at home is a beautiful way to connect with that legacy—and they’re just plain delicious.
Vegan or Gluten-Free Modifications
Want to make your knishes fit special dietary needs? Totally doable!
For Vegan Knishes:
- Use oil instead of butter in the filling.
- Skip the egg in the dough and use a flax egg (1 tbsp flaxseed meal + 2.5 tbsp water).
- Brush with olive oil instead of egg wash.
For Gluten-Free Knishes:
- Use a gluten-free flour blend designed for baking (preferably one with xanthan gum).
- Roll out carefully, as gluten-free dough is more fragile.
- Consider using gluten-free puff pastry as a shortcut!
These swaps make it possible for almost anyone to enjoy knishes without sacrificing flavor or tradition.
FAQs about Potato Knish Recipe
1. Can I make knishes ahead of time?
Absolutely! Make and refrigerate them up to 2 days ahead. You can also freeze before or after baking.
2. What’s the best way to freeze knishes?
Place them on a baking sheet in the freezer until solid, then transfer to a freezer-safe bag. Bake from frozen or reheat in the oven.
3. Can I use puff pastry instead of homemade dough?
Yes! It’s a great shortcut, especially if you’re short on time. Just roll it out, fill, fold, and bake.
4. Why did my knishes turn out dry?
This usually means the dough was overbaked or the filling was too dry. Make sure your mashed potatoes are moist but not wet.
5. Are knishes served hot or cold?
They’re best warm, but they can be enjoyed at room temperature. Just avoid microwaving them—use the oven for reheating!
Conclusion
Homemade potato knishes might seem like a project, but they’re one of those recipes where every step is a labor of love—and totally worth it. From the soft, savory filling to the flaky, golden crust, every bite is a little taste of comfort and tradition.
So the next time you’re craving something warm, filling, and deeply satisfying, skip the store-bought snacks and try making these knishes at home. You might just start a new tradition of your own.

