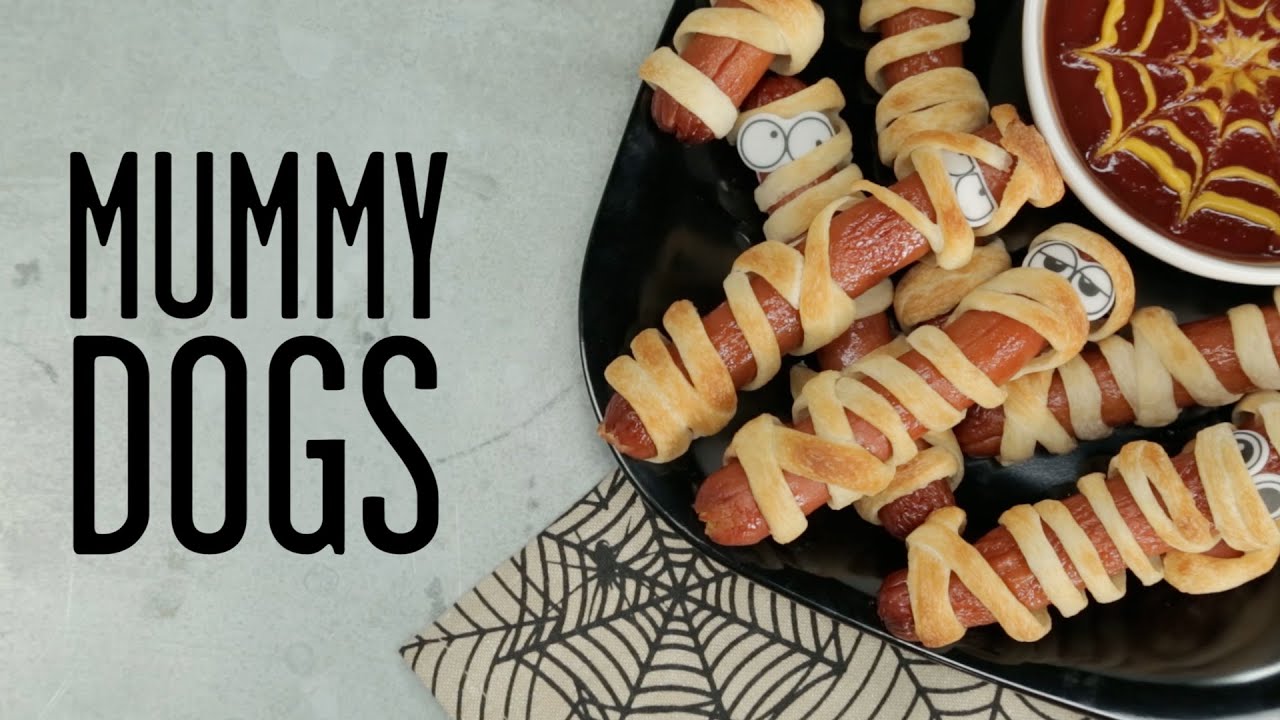
Mummy Dogs Recipe: Halloween is all about fun, spooky vibes, and of course—delicious, creative treats. And what could be better than a dish that combines both food and fun? Enter Mummy Dogs—the adorably creepy snack that’s become a favorite at Halloween parties and kids’ events. These cute, little hot dogs wrapped in dough to look like mummies are the perfect finger food that’s simple, quick, and always a crowd-pleaser.
The best part? You don’t need to be a pro chef to make them. In fact, they’re so easy, you can get the kids involved in every step of the process! Whether you’re planning a Halloween bash, packing a fun lunchbox surprise, or just craving a creative snack, this guide will walk you through everything you need to know about making mummy dogs—from ingredients to baking tips, creative add-ons, and more.
So grab your apron and let’s get cooking. You’re just a few steps away from making the ultimate spooky snack.
Ingredients You’ll Need
To make mummy dogs, you only need a few simple ingredients—most of which you probably already have in your kitchen. Here’s your grocery checklist:
Main Ingredients:
- 8 hot dogs or sausages – Choose your favorite: beef, turkey, chicken, or even plant-based.
- 1 can refrigerated crescent roll dough – You can also use puff pastry or pizza dough as an alternative.
- 2 tablespoons melted butter – For brushing the dough for a golden finish.
- Candy eyes or small dots of mustard/ketchup – For that signature mummy look.
Optional Ingredients:
- Cheese slices or string cheese – Add some inside the wrap for cheesy mummy dogs.
- Egg wash (1 egg + 1 tbsp water) – Alternative to butter for a shiny finish.
- Sesame seeds or poppy seeds – For a fun texture on the dough.
Ingredient Notes:
- Dough Options: Crescent roll dough is the most popular, but pizza dough gives a chewy texture, and puff pastry adds a flakier finish.
- Sausage Size: You can make full-size mummy dogs or use mini cocktail sausages for bite-sized versions.
You don’t have to stick to the basics either. Want to make them gluten-free or vegan? No problem—just swap in your favorite alternative dough and meatless dogs.
Kitchen Tools & Equipment
Before you dive in, gather all the tools you’ll need. Keeping things organized helps make the process smooth and fun.
Must-Have Tools:
- Baking sheet
- Parchment paper or silicone baking mat
- Sharp knife or pizza cutter
- Pastry brush (for butter or egg wash)
- Oven or toaster oven
Optional Tools:
- Kitchen scissors (helpful for shaping the dough)
- Cookie cutter (for fun shapes if using leftover dough)
- Toothpick or skewer (to adjust wrapped dough)
Don’t worry if you don’t have every single tool on hand. Mummy dogs are very forgiving—you can totally improvise and still get amazing results.
Preparation Tips Before You Start
Let’s set the stage before we start wrapping those hot dogs like tiny, edible monsters.
- Defrost Your Dough: If you’re using frozen dough, allow it to thaw in the fridge for a few hours or overnight. Cold dough cracks more easily when you’re wrapping.
- Preheat Your Oven: Set your oven to 375°F (190°C). You want it hot and ready by the time your mummies are prepped.
- Line Your Baking Tray: Use parchment paper or a silicone mat to prevent sticking and make cleanup easier.
- Get the Kids Involved: This is the perfect family kitchen project. Set up a safe workstation and let kids wrap, decorate, and even design spooky faces!
Safety tip: Always supervise closely when kids are helping, especially when using the oven or sharp tools.
Step-by-Step Guide to Making Mummy Dogs
Ready to wrap your mummies? Here’s your detailed, no-fail guide:
Step 1: Preheat the Oven
Set your oven to 375°F (190°C). This gives you just enough time to prep everything else while it heats up.
Step 2: Unroll and Cut Dough
Open your can of crescent roll dough and separate it into rectangles. Pinch the seams together if needed, then use a knife or pizza cutter to slice the dough into thin strips—about 1/4 inch wide.
Tip: The thinner the strips, the more “bandage-like” your mummy will look!
Step 3: Wrap the Hot Dogs
Take each hot dog and start wrapping with your dough strips. Leave small gaps here and there to make it look like a mummy, but be sure to leave a space at the top for the eyes. There’s no perfect way—just have fun with it!
Want to add cheese? Lay a slice or strip of cheese under the hot dog before wrapping.
Step 4: Bake Until Golden
Place your wrapped mummy dogs on the lined baking sheet. Brush them lightly with melted butter or egg wash. Bake for 12–15 minutes or until the dough is puffed and golden brown.
Step 5: Add the Eyes
Once slightly cooled, dot on mustard, ketchup, or mayo for eyes. Or press in candy eyes if you’ve got them. That’s the spooky magic touch!
How to Make Edible Eyes
The eyes really bring these little guys to life. Here’s how to make them fun and edible.
Option 1: Condiment Eyes
Use mustard, ketchup, or mayo. Just place two tiny dots near the top opening of the hot dog using a toothpick or the corner of a sandwich bag.
Option 2: Candy Eyes
You can find these at most grocery or craft stores in the baking section. Just press them gently into the dough after baking while still warm.
Option 3: Olive Slice Eyes
Use tiny round slices of black olives or cut tiny bits to mimic eye shapes. Healthy and fun!
Best Dipping Sauces for Mummy Dogs
Let’s be honest—dipping is half the fun! Mummy Dogs are delicious on their own, but pair them with the right sauces and you’ve got a next-level snack. Here are some of the best dipping sauce ideas that will take your spooky treats to the next level.
Classic Favorites
- Ketchup – You can never go wrong with this all-time classic.
- Yellow Mustard – A zesty contrast to the rich dough and hot dogs.
- Honey Mustard – Sweet and tangy—great for kids!
Cheesy Options
- Warm Cheese Sauce – Like nacho cheese or cheddar sauce. It melts perfectly and adds a creamy twist.
- Pimento Cheese Dip – If you want something rich and Southern-inspired.
Creative and Fun Dips
- Spicy Sriracha Mayo – For the adults who want a bit of a kick.
- BBQ Sauce – Adds smoky flavor and depth.
- Ranch Dressing – Perfect for kids and picky eaters alike.
You can even create a “Dipping Station” at your party—just pour your dips into small Halloween-themed bowls and let everyone choose their favorite combo.
Tips for Making Them Ahead of Time
Want to save time on the day of your party or prep them for school lunches? Here’s how you can make mummy dogs ahead of time without sacrificing flavor or texture.
Make-Ahead Instructions
- Wrap but Don’t Bake: You can prepare the mummy dogs up to a day in advance. Simply wrap your hot dogs with dough, place them on a tray, cover with plastic wrap, and store them in the fridge.
- Bake Before Serving: On the day you’re ready to serve, remove them from the fridge, let them sit at room temperature for 10–15 minutes, then bake as directed.
Storing Leftovers
- Store fully baked mummy dogs in an airtight container in the refrigerator for up to 3 days.
- Keep them separate from any condiments or sauces to prevent sogginess.
Reheating Tips
- Oven/Toaster Oven: Preheat to 350°F and warm for 8–10 minutes.
- Microwave: Heat for about 30 seconds, but note—the dough may lose some crispness.
They’re great cold in lunchboxes too if your kids don’t mind it. Just don’t add the eyes until right before serving!
How to Customize Mummy Dogs
If you love putting your own spin on recipes, mummy dogs are a perfect blank canvas. Here are some delicious customizations:
Cheese-Stuffed Mummy Dogs
- Before wrapping, cut a slit into the hot dog and insert a strip of cheddar or mozzarella.
- The cheese melts inside during baking, giving each bite a gooey surprise!
Spicy Mummy Dogs
- Use spicy sausages or jalapeño-stuffed hot dogs.
- Pair with a hot dipping sauce like chipotle mayo or spicy BBQ.
Mini Mummy Bites
- Use cocktail sausages and wrap them in thinner dough strips for bite-sized treats.
- Ideal for parties or finger food platters.
Vegetarian/Vegan Options
- Use plant-based sausages and vegan-friendly dough (like crescent roll dough made without butter).
- For eyes, try tiny black beans or vegan candy dots.
Get creative! You can even add “bandages” of two-toned dough for extra effect.
Serving Suggestions
Let’s be real—presentation matters, especially for themed events. If you want your mummy dogs to steal the show at your Halloween bash, try these fun serving ideas:
Spooky Platter Display
- Arrange the mummy dogs on a black or orange tray.
- Scatter candy eyeballs, fake cobwebs, or mini pumpkins around the tray.
- Add some plastic skeleton hands reaching toward the food for dramatic effect.
Graveyard Scene
- Use crushed crackers or cookie crumbs to mimic dirt.
- Stick in little tombstone signs labeled “RIP Sausage!”
- Add some edible worms (gummy worms) crawling out from the crumbs.
Themed Party Board
- Create a Halloween charcuterie board featuring mummy dogs, cheeses, olives, pretzels, and other snacks.
- Mix savory and sweet for a well-rounded spooky spread.
These setups aren’t just festive—they also make your photos totally Instagram-worthy.
How to Make Gluten-Free Mummy Dogs
Whether you’re gluten-sensitive or cooking for someone who is, you can still enjoy these delicious snacks with just a few swaps.
Best Dough Options
- Store-bought gluten-free pizza dough – Usually available at health food stores.
- Homemade GF crescent dough – Made with almond or oat flour.
- Rice paper wrappers (for a totally different but fun take)
Check Your Hot Dogs
- Not all sausages are gluten-free. Check the label or go with a certified GF brand.
Pro Tip: Gluten-free dough can be a bit crumbly. Keep it cool, use parchment paper, and handle it gently when wrapping.
Making Mummy Dogs Healthier
Want to enjoy mummy dogs without the guilt? No problem—just tweak a few ingredients to make a lighter version that still satisfies.
Lean Protein Options
- Swap beef hot dogs for chicken, turkey, or tofu dogs.
- Look for nitrate-free or organic sausage options.
Better Dough Choices
- Use whole wheat pizza dough for extra fiber.
- Try making your own dough with oat flour or almond flour for a low-carb option.
Low-Sodium Choices
- Pick sausages labeled “low sodium” to reduce salt intake.
- Skip the added cheese and salt-based condiments.
Healthy doesn’t have to mean boring—you’re still wrapping these bad boys like mummies, so the fun stays intact!
Common Mistakes and How to Avoid Them
Even though mummy dogs are easy to make, a few common hiccups can trip you up. Let’s troubleshoot them before they happen.
Mistake 1: Dough Tears While Wrapping
- Solution: Make sure your dough isn’t too cold. Let it warm slightly so it’s pliable, but not sticky.
Mistake 2: Hot Dogs Overcook
- Solution: Stick to the baking time (12–15 minutes) and don’t crank up the oven. Overcooked dogs can get rubbery and dry.
Mistake 3: Eyes Fall Off
- Solution: Let the dogs cool a bit before applying candy eyes or condiments. Too hot, and they’ll slide right off!
Mistake 4: Dough Doesn’t Brown
- Solution: Brush with butter or egg wash before baking for that golden finish.
A little preparation and patience go a long way in mummy-making. Once you nail it, it’s easy!
Fun Ideas for Kids’ Involvement
One of the best parts about making Mummy Dogs is how fun and kid-friendly the process is. This isn’t just a meal—it’s an activity! If you’re cooking with kids, this recipe offers a perfect hands-on experience that feels more like arts and crafts than kitchen work.
Let Them Wrap Their Own Mummies
- Give each child their own hot dog and a few dough strips.
- Let them design their own mummy face—some might go neat and tidy, others might wrap wild and crazy!
- Don’t stress about perfection. Messy wraps often make for the most fun-looking mummies.
Create a Mummy Dog Decorating Station
- Set up a “decoration bar” with all kinds of edible eye options, dipping sauces, and condiments.
- Let kids apply ketchup smiles, olive mustaches, or scary mustard fangs.
Make It a Game
- Have a contest: Who made the scariest mummy? The silliest? The most realistic?
- Let kids name their creations. “Frank the Frankfurter,” anyone?
Getting kids involved in cooking helps build their confidence, develops fine motor skills, and best of all—makes them more likely to eat what they’ve helped prepare. Plus, it turns your kitchen into a place of fun and creativity instead of stress and mess.
FAQs about Mummy Dogs Recipe
1. Can you freeze Mummy Dogs?
Yes! Wrap the uncooked mummy dogs and freeze them on a baking sheet until solid. Then store in a zip-top freezer bag for up to 2 months. Bake straight from frozen at 375°F, adding 2–3 minutes to the baking time.
2. How long do they last after baking?
Cooked mummy dogs last about 3 days in the fridge when stored in an airtight container. Reheat them in the oven for best texture.
3. Can I use crescent dough instead of puff pastry?
Absolutely. Crescent dough is actually the most commonly used option because it’s soft, easy to work with, and bakes to a golden finish. Puff pastry works too but will be flakier and slightly more delicate.
4. What’s the best way to reheat leftover mummy dogs?
Use a toaster oven or regular oven at 350°F for 8–10 minutes. Microwaving is faster but can make the dough soft instead of crisp.
5. Can I use cocktail sausages instead of full-sized hot dogs?
Yes! Mini mummy dogs are a fantastic bite-sized option for parties. Just reduce the baking time slightly (around 10–12 minutes) since they cook faster.
Conclusion
So there you have it—a complete, foolproof guide to making Mummy Dogs, the ultimate spooky snack that’s perfect for Halloween parties, kids’ birthdays, or even just a fun weeknight dinner with a twist. These adorable little snacks are more than just a gimmick—they’re tasty, customizable, and incredibly easy to make.
Whether you go classic with crescent dough and hot dogs or spice things up with plant-based sausages and unique dips, Mummy Dogs are one of those recipes you’ll find yourself returning to again and again. They’re fun to make, super interactive, and let’s face it—absolutely adorable.
The best part? You don’t need any fancy ingredients or professional baking skills. Just grab some dough, your favorite sausages, and let the creativity flow. So next time you’re hosting a Halloween bash, packing school lunches, or just want something fun to cook with the kids, give these spooky little guys a try.
Happy Mummy Making!


