Marshmallows Recipe: There’s something undeniably nostalgic about biting into a soft, fluffy marshmallow. Whether you love roasting them over a campfire, plopping them into a mug of hot chocolate, or just snacking on them right out of the bag, marshmallows are a treat that delights both kids and adults. But here’s a little secret—homemade marshmallows are miles ahead of the store-bought version. And the best part? They’re not as tricky to make as you might think.
This detailed guide will walk you through the entire process of making marshmallows from scratch, from gathering ingredients to mastering the techniques that yield perfect, pillowy results every time. Ready to dive into this sweet adventure? Let’s go!
What Are Marshmallows?
Marshmallows are a sweet confection made by whipping air into a mixture of sugar, water, and gelatin, then letting it set until it’s spongy and soft. They have a unique texture—light, fluffy, and slightly chewy. Originally derived from the marshmallow root (yes, it was once a plant-based remedy!), today’s version is more about dessert than medicine.
Modern marshmallows are a staple in many recipes and occasions—from s’mores and Rice Krispies treats to holiday baking and gourmet desserts. They’re versatile, fun to make, and even more fun to eat.
A Brief History of Marshmallows
Would you believe marshmallows were once used as medicine? Ancient Egyptians first made them by extracting sap from the mallow plant (which grows in marshes—hence the name) and mixing it with honey and nuts. Fast-forward a few centuries, and the French began whipping the sap with egg whites and sugar for a delicate treat.
As time passed, gelatin replaced the sap, making it easier to produce marshmallows commercially. Today, these sweet pillows have become a beloved snack around the globe.
Why Make Marshmallows at Home?
So, why bother making marshmallows from scratch when you can grab a bag at the store? For starters, homemade marshmallows taste way better—smoother, creamier, and fresher. Plus, you get to control the ingredients, meaning no preservatives, artificial flavors, or dyes (unless you want to add your own fun twist).
Homemade marshmallows also let you play with flavors—think vanilla bean, lavender, coffee, or even bourbon-infused! They’re a hit at parties, make fantastic edible gifts, and are just downright fun to make. It’s like a little science experiment with a delicious reward at the end.
Tools and Equipment You’ll Need
Before diving in, you’ll need to gear up with a few essential tools. Marshmallow making isn’t complicated, but having the right equipment makes all the difference.
Stand Mixer vs Hand Mixer
A stand mixer is your best friend here. Whipping the marshmallow mixture takes 10–15 minutes, and a stand mixer makes it hands-free. Don’t have one? A hand mixer can work in a pinch—just prepare for a bit of an arm workout.
Candy Thermometer
This is non-negotiable. Sugar syrup must hit the right temperature (usually 240°F, known as the “soft-ball” stage). Too low, and your marshmallows won’t set. Too high, and you’ll end up with a sticky mess. Get yourself a reliable candy thermometer—you won’t regret it.
Ingredients You’ll Need
You don’t need a ton of ingredients to make marshmallows, but quality matters. Here’s what you’ll want on hand:
Main Ingredients
- 3 packets unflavored gelatin (about 21g or 0.75 oz)
- 1 cup cold water, divided
- 1 ½ cups granulated sugar
- 1 cup light corn syrup
- ¼ tsp salt
- 1 tbsp pure vanilla extract
- Powdered sugar and cornstarch, for dusting
Optional Add-Ins for Flavor and Fun
- Cocoa powder or melted chocolate
- Peppermint extract
- Food coloring
- Sprinkles
- Freeze-dried fruit powders
- Espresso powder
Go wild with your creativity!
Understanding the Key Ingredients
Let’s break down what each key ingredient does so you can tweak the recipe like a pro.
Gelatin
This is what gives marshmallows their structure. When bloomed in water and later mixed with hot syrup, gelatin sets up into that signature bouncy texture.
Sugar
It sweetens the mixture and helps form the syrup that binds everything together. Don’t skimp here—it’s not the place for sugar substitutes if you want classic marshmallow consistency.
Corn Syrup
Corn syrup prevents crystallization and keeps the marshmallow texture smooth. Light corn syrup is best for a neutral flavor, but golden syrup can also work if you want a richer taste.
Vanilla Extract
This adds that classic marshmallow flavor. Use high-quality pure vanilla extract or scrape in real vanilla bean seeds for extra flavor.
Preparing Your Workspace
Before you turn on the stove, prep your workspace like a pro chef. Marshmallow-making moves fast once the sugar hits temperature.
- Line a 9×13-inch baking dish with parchment or foil. Grease it lightly with cooking spray or oil.
- Mix up your dusting powder: ½ cup powdered sugar + ½ cup cornstarch. This keeps marshmallows from sticking.
- Set up your mixer: Have the bowl ready with gelatin bloomed before you start cooking your syrup.
This step saves time—and sticky disasters.
Step-by-Step Marshmallow Recipe
Now for the good stuff. Follow these steps, and you’ll have fluffy, perfect marshmallows in no time.
Step 1: Blooming the Gelatin
Begin by sprinkling unflavored gelatin over cold water in a mixing bowl. Let it sit for several minutes until it absorbs the water and becomes thick and spongy. This blooming step is essential for giving your marshmallows their signature airy yet bouncy texture.
Step 2: Cooking the Sugar Syrup
In a saucepan, combine sugar, water, and corn syrup. Heat the mixture over medium heat, stirring gently until the sugar dissolves. Increase the heat and bring it to a boil without stirring. Cook until the syrup reaches about 240°F (soft-ball stage), which ensures the perfect marshmallow consistency.
Step 3: Whipping the Marshmallow Mixture
Carefully pour the hot syrup into the bloomed gelatin while mixing on low speed. Gradually increase to high speed and whip for 8–12 minutes until the mixture becomes thick, glossy, and triples in volume.
Step 4: Pouring and Setting
Spread the fluffy mixture into a greased or parchment-lined pan. Smooth the top with a spatula, then let it set at room temperature for several hours or overnight.
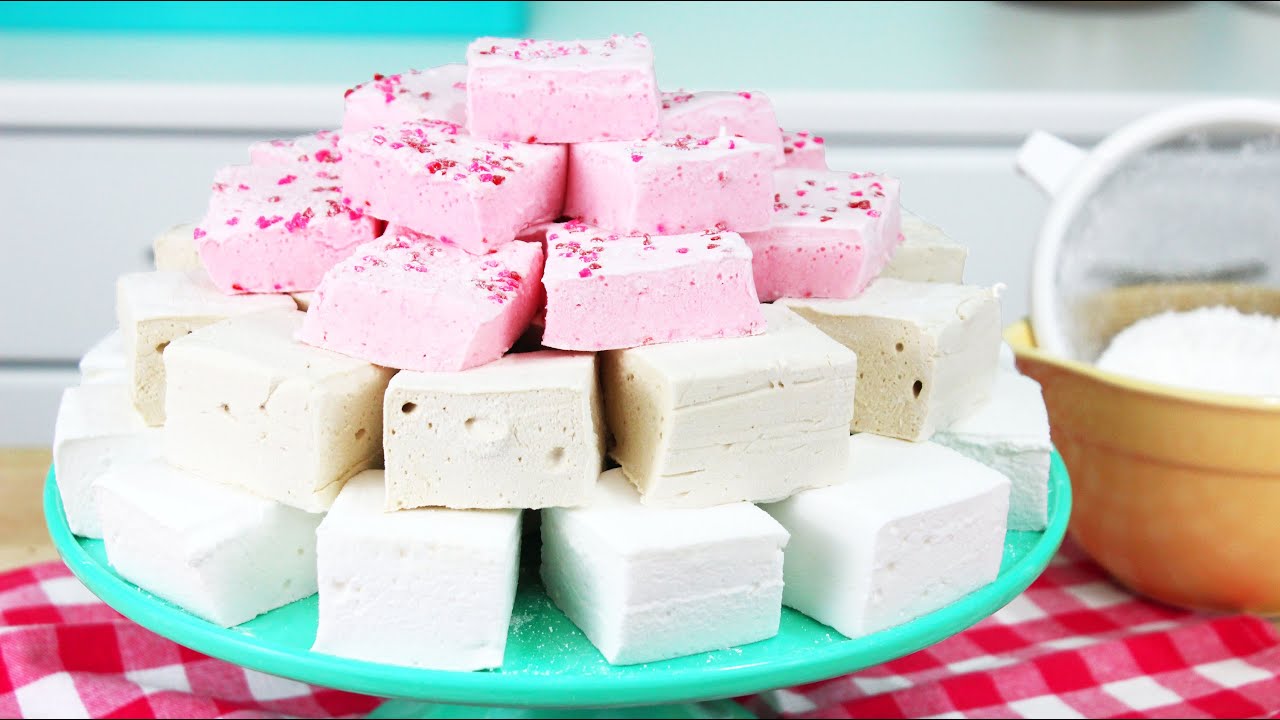
Step 5: Cutting and Dusting
Once firm, dust the surface with powdered sugar or cornstarch. Cut into squares and coat all sides to prevent sticking. Enjoy your homemade marshmallows!
Tips for Perfect Homemade Marshmallows
Making marshmallows at home may seem like a sweet science experiment—and honestly, it kind of is. Here are some tried-and-true tips that’ll take your marshmallow game from good to absolutely irresistible:
- Use a candy thermometer. This is your best friend for consistent results. Temperature control is everything.
- Don’t rush the whip. It might be tempting to stop after 7–8 minutes, but hold on. Whipping for the full 12–15 minutes gives you that fluffy, cloud-like texture you’re after.
- Work quickly when pouring. Once your marshmallow fluff is ready, move fast! It begins to set almost immediately, so have your pan greased and ready.
- Grease everything. From spatulas to knives to your hands, a light coat of oil helps keep stickiness at bay.
- Use fresh gelatin. Expired gelatin may not bloom properly, and that can ruin your entire batch.
Whether you’re new to candy-making or a seasoned pro, these little hacks can make a big difference in the final product.
Common Mistakes and How to Avoid Them
Even the most straightforward recipes can have a few tripwires. Let’s clear those up so your first batch doesn’t turn into a sticky disaster.
Mistake 1: Over- or Undercooking the Syrup
- If your syrup doesn’t reach 240°F (the soft-ball stage), your marshmallows may not set properly.
- If it goes too far past 245°F, you risk ending up with rubbery or rock-hard results.
Fix: Use a reliable candy thermometer and keep your eyes on the pot.
Mistake 2: Not Whipping Long Enough
- Undermixed marshmallow fluff will be thin and runny, not light and airy.
Fix: Set a timer for 12–15 minutes and go all the way. You’ll see it thicken gradually.
Mistake 3: Not Preparing Your Pan
- If your pan isn’t greased or dusted properly, your set marshmallows will cling to it like glue.
Fix: Line your pan with parchment paper, spray it, and dust with powdered sugar + cornstarch.
Mistake 4: Cutting Too Soon
- Cutting before your marshmallows fully set will turn them into a sticky mess.
Fix: Be patient. Let them sit uncovered overnight for best results.
Variations You Can Try
Once you master the basic recipe, it’s time to have some fun. Here are a few marshmallow makeovers to try:
Chocolate Swirl Marshmallows
- Swirl melted dark or milk chocolate into the whipped marshmallow mixture right before pouring it into the pan.
- Don’t mix completely—just a few ribbons of chocolate give it a marbled look and a rich twist.
Peppermint Marshmallows
- Add ½ tsp peppermint extract along with (or instead of) vanilla extract.
- Use red food coloring to create festive swirls. Perfect for Christmas!
Vegan Marshmallows
- Swap gelatin with agar agar powder (note: the process is slightly different as agar sets much faster).
- Use organic corn syrup or maple syrup and make sure your sugar is vegan-certified.
Each variation opens up a new world of flavor possibilities. From fruity to boozy, you can let your imagination run wild.
How to Store Homemade Marshmallows
Homemade marshmallows aren’t full of preservatives, so storing them right is key to maintaining their soft texture and flavor.
Room Temperature Storage
- Store in an airtight container at room temperature.
- Add a little extra dusting powder to prevent them from sticking together.
- Keep them away from moisture, heat, and direct sunlight.
They’ll stay fresh for about 2 to 3 weeks—if they last that long!
Can You Freeze Marshmallows?
Yes! While not commonly done, marshmallows can be frozen. Place them in a freezer-safe bag with plenty of cornstarch/powdered sugar to prevent sticking. They can last up to 3 months in the freezer. To use, thaw at room temperature.
Creative Ways to Use Marshmallows
So, you’ve got a batch (or five) of homemade marshmallows. Now what? Beyond snacking, here are some fun and delicious ways to use them:
- S’mores Bars: Layer graham crackers, chocolate, and homemade marshmallows in a pan. Bake and slice for easy indoor s’mores.
- Hot Chocolate Toppers: Cut into shapes (like stars or hearts) for a cute, gourmet touch.
- Dip in Chocolate: Coat half of each marshmallow in melted chocolate and roll in crushed nuts, sprinkles, or coconut.
- Stuff Cookies: Hide a chunk of marshmallow inside cookie dough before baking.
- Toast Them: Use a kitchen torch for instant roasted marshmallow flavor—no campfire needed.
These are just the beginning. Marshmallows are surprisingly versatile, so don’t be afraid to experiment!
FAQs about Marshmallows Recipe
1. Can I make marshmallows without a candy thermometer?
It’s technically possible, but not recommended. A thermometer ensures accuracy. Without it, you’re flying blind when it comes to hitting the right temperature.
2. Why are my marshmallows sticky?
If they’re not dusted properly or not set long enough, they’ll be tacky. Coat them generously in powdered sugar and cornstarch, and give them time to fully set.
3. Are homemade marshmallows healthier than store-bought?
They don’t have preservatives or artificial flavors, so yes—especially if you control the sugar levels or use natural flavorings.
4. Can I color homemade marshmallows?
Absolutely! Add a few drops of food coloring during the last minute of whipping. Gel food coloring works best for vibrant colors without affecting texture.
5. How do I make different shapes?
Use greased cookie cutters to cut out shapes once the marshmallow slab is fully set. Great for holidays or themed parties!
Conclusion
There you have it—a complete, step-by-step guide to making marshmallows from scratch. Whether you’re a first-timer looking to impress friends or a foodie on a mission to master homemade confections, marshmallows are a great place to start. They’re simple, fun, and infinitely customizable.
Best of all? That first bite of your fluffy, vanilla-kissed creation is incredibly satisfying—and knowing you made it makes it all the sweeter.
Ready to get started? Grab your mixer, your sugar, and a dash of patience, and dive into the delicious world of homemade marshmallows. Trust me, you’ll never want store-bought again.


