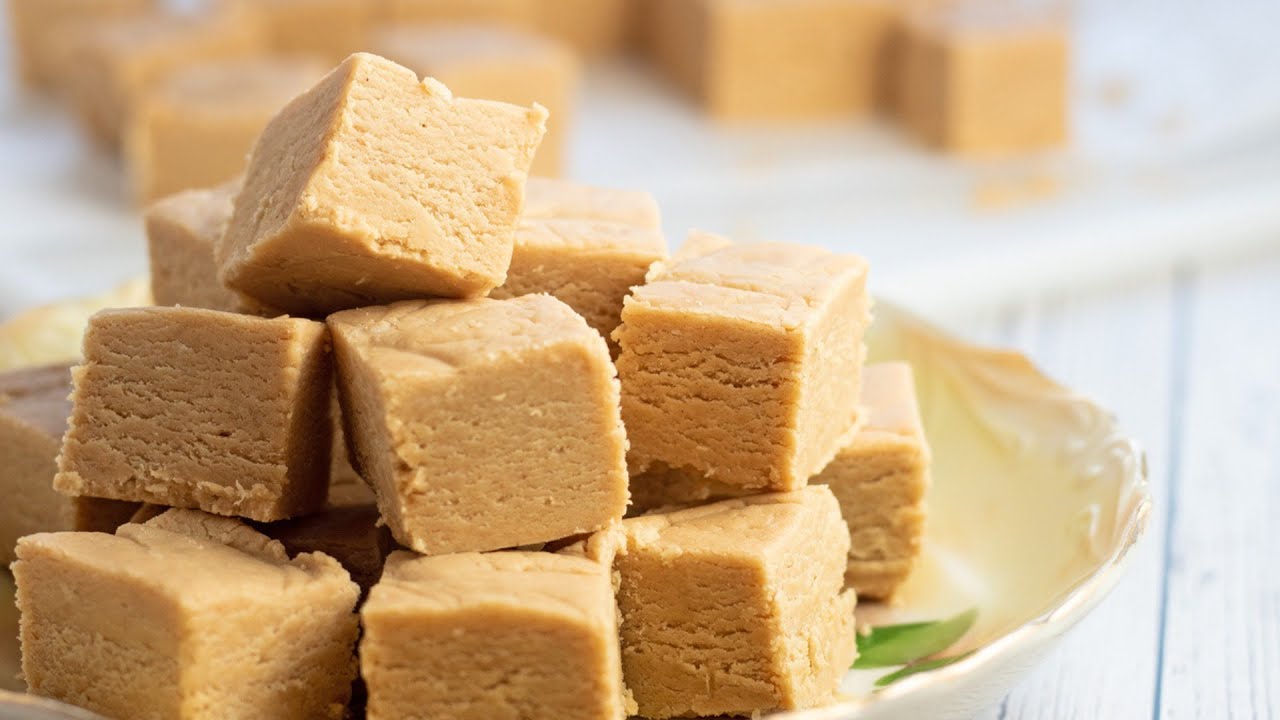
Marshmallow Fluff Fudge Recipe: There’s something magical about marshmallow fluff fudge—it’s smooth, creamy, melt-in-your-mouth delicious, and super easy to make. Whether you’re whipping up a batch for the holidays, gifting it to friends, or just craving something sweet and nostalgic, this recipe is going to become your new favorite go-to. If you’ve ever had your grandma’s fudge and thought, “How does she make it so perfect every time?”—the secret might just be marshmallow fluff.
This no-fail fudge recipe is ideal for beginners but impressive enough to wow a crowd. The texture? Dreamy. The flavor? Rich and chocolatey with just the right touch of sweetness. And the best part? You don’t need to be a pro baker or candy maker to get it right. Ready to dive into this gooey, chocolatey heaven? Let’s get started.
List of Ingredients You’ll Need
Alright, before we get cooking (or should I say candy-making?), let’s go over what you’ll need. The ingredients are simple, probably things you already have sitting in your pantry. But don’t let the simplicity fool you—the flavor is anything but basic.
Basic Ingredients:
- 3 cups granulated sugar – The sweet base of our fudge.
- ¾ cup unsalted butter – Adds richness and that silky smooth texture.
- ⅔ cup evaporated milk – Key to getting that creamy consistency.
- 1 jar (7 oz) marshmallow fluff – The magic that keeps the fudge soft and chewy.
- 2 cups semi-sweet chocolate chips – Classic chocolatey goodness.
- 1 teaspoon vanilla extract – Rounds out the flavor with a warm note.
Optional Add-ins & Variations:
- 1 cup chopped nuts (walnuts or pecans) – For crunch and depth.
- Sea salt flakes – Sprinkle on top for a sweet-salty combo.
- Mini marshmallows – Fold them in for texture and extra gooeyness.
- Peanut butter chips or swirl – For a Reese’s vibe.
- Peppermint extract or crushed candy canes – For a holiday twist.
Pro tip: Make sure to use high-quality chocolate for the best flavor. It makes a noticeable difference!
Essential Kitchen Tools
You don’t need any fancy gadgets, but having the right tools on hand will make the process smoother and safer. Here’s what you’ll need:
Must-Have Equipment:
- Heavy-bottomed saucepan – Prevents burning and distributes heat evenly.
- Candy thermometer (optional but super helpful) – Ensures you hit the right temperature for perfect fudge.
- Wooden spoon or heat-proof silicone spatula – For constant stirring.
- 8×8-inch or 9×9-inch square baking pan – To pour and set the fudge.
- Parchment paper or foil – For easy removal.
Optional Tools:
- Offset spatula – Helps smooth the top.
- Electric hand mixer – For easy stirring once the fluff is added.
- Measuring cups and spoons – Precision is key with candy-making.
Set up your station before you start—fudge comes together quickly once the sugar boils, and you don’t want to be scrambling mid-recipe.
Tips Before You Start
Before we dive into the cooking, here are a few golden tips that can mean the difference between dreamy fudge and a grainy disaster.
Importance of Timing
When making fudge, every second counts. Once the sugar mixture starts boiling, you need to stay focused. The window between perfect and overcooked is small, so give this recipe your full attention for just 15–20 minutes. Turn off distractions and go full fudge-mode.
Prepping the Ingredients
Have everything measured and laid out before you start. This is called mise en place, and it’s your best friend in candy-making. Trust me—you don’t want to be digging through your pantry for vanilla extract while your sugar’s bubbling over.
Also, line your pan with parchment or foil before you begin cooking. Once the fudge is ready, you’ll need to pour it in quickly.
Step-by-Step Guide to Making Marshmallow Fluff Fudge
Let’s break this down into manageable steps. Follow each carefully, and you’ll end up with rich, velvety fudge that tastes like heaven.
Step 1: Prepare Your Pan
Start by lining an 8×8 or 9×9-inch baking pan with parchment paper or lightly greasing it with butter. Make sure the paper hangs over the edges so you can easily lift the fudge out once it sets.
Step 2: Measure and Lay Out Ingredients
Fudge comes together quickly, so prepare all ingredients in advance. Measure your chocolate chips, marshmallow fluff, vanilla extract, and any optional items like nuts. Set everything within arm’s reach.
Step 3: Heat the Sugar, Butter, and Evaporated Milk
In a heavy-bottomed saucepan, combine sugar, butter, and evaporated milk. Cook over medium heat, stirring constantly to prevent burning. Continue stirring until the mixture melts and blends smoothly.
Step 4: Boil to the Right Temperature
Bring the mixture to a rolling boil and cook for about 4–5 minutes, or until it reaches 234°F (soft-ball stage) on a candy thermometer. Keep stirring to maintain even heating.
Step 5: Stir in Chocolate and Marshmallow Fluff
Remove from heat and immediately add chocolate chips. Stir until fully melted. Add marshmallow fluff and mix vigorously until the mixture becomes thick, smooth, and glossy.
Step 6: Add Vanilla and Optional Add-ins
Stir in vanilla extract to enhance the flavor. Fold in optional add-ins like chopped pecans, walnuts, or crushed candy for extra texture.
Step 7: Pour into Pan and Set
Quickly pour the fudge mixture into your prepared pan. Spread it evenly with a spatula, smoothing the top before it begins to firm.
Step 8: Cool, Slice, and Serve
Let the fudge cool at room temperature for several hours or chill in the refrigerator for faster setting. Once firm, lift it out using the parchment, slice into squares, and serve. Enjoy your rich, creamy marshmallow fluff fudge!
Flavor Variations You’ll Love
Want to get creative with your marshmallow fluff fudge? This base recipe is super versatile. Here are a few flavor twists that’ll make your fudge stand out:
Peanut Butter Fudge
- Replace half of the chocolate chips with peanut butter chips.
- Add ½ cup of creamy peanut butter to the mix after removing from heat.
- Swirl a little extra PB on top before setting.
Rocky Road Fudge
- Fold in 1 cup mini marshmallows and 1 cup chopped walnuts or almonds.
- The marshmallows add gooey bites, while the nuts give crunch.
Mint Chocolate Fudge
- Swap regular chocolate chips for mint chocolate chips or add ½ tsp peppermint extract.
- Sprinkle crushed candy canes on top before it sets for a festive finish.
Mix, match, and make it yours. The base is forgiving and fun—don’t be afraid to experiment.
Storage and Shelf Life
Fudge doesn’t just taste good—it stores beautifully. Here’s how to keep it fresh:
Room Temperature
- Store fudge in an airtight container with parchment paper between layers.
- Keep in a cool, dry spot (not next to the oven!).
- Good for up to 2 weeks.
Refrigeration
- Keeps it firmer and extends shelf life.
- Wrap tightly or store in an airtight container.
- Lasts 2–3 weeks in the fridge.
Freezing
- Yes, fudge freezes well!
- Wrap each square individually in wax paper, then store in a freezer-safe bag.
- Keeps for up to 3 months.
- To serve, let thaw at room temp for 30–60 minutes.
Troubleshooting Common Fudge Issues
Even though this is a foolproof recipe, fudge can be tricky if things go off-track. Here’s how to handle some common problems:
Why Is My Fudge Grainy?
- Overcooked sugar can cause crystallization.
- Stir constantly and watch the temperature carefully.
- Always use a clean spoon—leftover crystals can ruin texture.
Why Won’t My Fudge Set?
- Boiling time may have been too short.
- Fudge needs to reach 234°F (soft-ball stage).
- You can reheat the fudge gently, bring it back to temp, and reset.
Fudge-Making Safety Tips
Don’t forget—this is candy-making, and sugar gets hot. Burn-yourself-in-a-heartbeat hot. Stay safe with these tips:
- Use a long-handled spoon to avoid steam and splatter.
- Keep kids and pets out of the kitchen during boiling.
- Wear oven mitts when handling hot pots or pouring fudge.
- Always be mindful of the candy thermometer—it’s hot too!
Vegan and Dairy-Free Alternatives
Want to enjoy fudge without the dairy? You can totally make this recipe vegan-friendly!
Substitute Suggestions:
- Vegan butter for regular butter
- Coconut milk or oat milk (full-fat) for evaporated milk
- Dairy-free chocolate chips (like Enjoy Life brand)
- Vegan marshmallow creme (try Suzanne’s Ricemellow Creme)
Just make sure all your ingredients are labeled vegan—especially chocolate and marshmallow fluff.
Using Marshmallow Fluff vs. Marshmallows
A common question: can I use marshmallows instead of fluff? Technically yes, but here’s the difference:
Marshmallow Fluff Pros:
- Already smooth and meltable
- Easy to measure
- Provides consistent texture
Marshmallows:
- Need to be melted down
- Can create a stickier, gooier fudge
- Might require adjustment to sugar or liquid levels
Bottom line? Fluff is easier and more reliable for consistent results.
Perfect Occasions to Serve Fudge
Fudge is like the little black dress of the dessert world—classic, adaptable, and perfect for any event.
- Holiday gifting – Wrap in boxes or tins with wax paper
- Bake sales and fundraisers – Easy to cut and package
- Birthday parties – Add colorful sprinkles or flavors
- Picnics or potlucks – No refrigeration needed
- Dessert platters – A rich contrast to lighter cookies or fruit
And honestly? It’s also perfect for curling up on the couch with a cozy blanket and a hot drink.
Nutritional Info (Per Serving)
Let’s be honest—this is not diet food, but it’s worth every bite. Here’s an estimate for a 1-inch square:
| Nutrient | Amount |
|---|---|
| Calories | ~150 |
| Total Fat | ~6g |
| Saturated Fat | ~4g |
| Carbohydrates | ~24g |
| Sugar | ~22g |
| Protein | ~1g |
Numbers will vary based on the ingredients you use and the size of the fudge squares.
FAQs about Marshmallow Fluff Fudge Recipe
1. Can I double this recipe?
Absolutely! Just use a 9×13 pan instead of an 8×8, and make sure your pot is large enough to handle the increase in volume.
2. How long does fudge last?
Properly stored, it lasts about 2 weeks at room temp and up to 3 months in the freezer.
3. Can I use condensed milk instead of evaporated milk?
Nope. Condensed milk is sweetened and much thicker—it will throw off the sugar ratio. Stick with evaporated milk for this recipe.
4. What if I don’t have a candy thermometer?
Use the cold water test: drop a bit of the mixture into cold water. If it forms a soft ball that holds its shape, you’re at the right stage.
5. Can kids help make this?
They can help with measuring and stirring once it’s off the heat. But while boiling sugar, it’s best to keep little hands away—it gets dangerously hot.
Conclusion
Making marshmallow fluff fudge is one of those classic kitchen joys—easy, nostalgic, and wildly satisfying. It’s perfect for sharing (or not), customizing with your favorite flavors, and delivering that rich, chocolatey comfort we all crave from time to time.
Whether you’re a total beginner or a seasoned baker, this recipe is simple enough to master but impressive enough to show off. With a little attention to detail and a lot of love, your fudge will turn out melt-in-your-mouth amazing every time.
So grab your fluff, fire up the stove, and get ready to create a batch of the best fudge you’ve ever made. You’ve got this!


