Keema Recipe: Looking for a comforting, spicy, and flavor-packed dish that can be made in under an hour? Keema, a South Asian classic, checks all the boxes. Whether you’re making it with lamb, beef, or chicken, this dish is incredibly satisfying, versatile, and surprisingly easy to prepare. In this step-by-step guide, I’ll walk you through the entire process of making delicious keema from scratch—complete with ingredient tips, cooking secrets, and serving ideas that’ll make your meal unforgettable. Let’s dive in!
What is Keema?
Keema, also spelled as “qeema,” literally means minced meat in Urdu and Hindi. It’s a traditional South Asian dish made using minced meat—commonly lamb, beef, or chicken—sautéed with onions, tomatoes, garlic, ginger, and a beautiful blend of aromatic spices. It’s rich, flavorful, and deeply comforting. You can serve it with roti, naan, rice, or even stuff it in samosas, parathas, or wraps.
What makes keema truly special is how customizable it is. You can add peas, potatoes, spinach, or even paneer to make it your own. It’s equally delicious as a dry keema or with a little gravy. Perfect for a weeknight dinner or an impressive dish for guests, keema is a culinary gem that deserves a permanent spot in your recipe repertoire.
Why You’ll Love This Keema Recipe
So, why should you bother trying this keema recipe? Here are just a few reasons:
- Fast and Easy: This recipe takes about 30–40 minutes from start to finish.
- Incredibly Versatile: Eat it with bread, rice, or stuff it in sandwiches and wraps.
- Meal Prep Friendly: Make a big batch and store it for quick meals throughout the week.
- Protein-Packed: Whether you use chicken, lamb, or beef, it’s loaded with protein.
- One-Pan Wonder: Less mess, fewer dishes—what’s not to love?
Still not convinced? Once the aroma of sautéing onions and spices hits your kitchen, you’ll understand exactly why this dish is such a crowd-pleaser.
List of Ingredients You’ll Need
You don’t need any fancy ingredients to make keema, and most of these are probably already sitting in your pantry. Here’s a full list for the base version of the dish.
For the Keema Base
- 500g ground meat (lamb, beef, or chicken)
- 2 tablespoons oil (vegetable or ghee)
- 2 medium onions, finely chopped
- 2 tomatoes, finely chopped or blended
- 1 tablespoon ginger-garlic paste
- 2 green chilies, chopped (adjust to taste)
- Salt to taste
- Fresh coriander for garnish
Spices That Make a Difference
- 1 teaspoon cumin seeds
- 1 teaspoon turmeric powder
- 1.5 teaspoons coriander powder
- 1 teaspoon garam masala
- 1 teaspoon red chili powder (adjust to taste)
- 1/2 teaspoon black pepper
- 1/2 teaspoon ground cinnamon (optional for depth)
Optional Add-ins
- 1 cup green peas (frozen or fresh)
- 1 medium potato, cubed
- 1/2 cup yogurt (for a richer flavor)
- Juice of half a lemon
Having all your ingredients measured and prepped ahead of time can make the cooking process much smoother.
Choosing the Right Meat for Keema
The meat you use plays a huge role in both the flavor and texture of your keema. Here’s a quick guide to help you choose the best one:
- Lamb Keema: Rich and flavorful, this is the most traditional choice.
- Beef Keema: Hearty and affordable, great for larger batches.
- Chicken Keema: Leaner and lighter, cooks quickly, and perfect for a healthier take.
If you’re feeling adventurous, you can even use turkey or plant-based meat substitutes. Just remember, fattier meats like lamb or beef give you that melt-in-the-mouth richness, while lean meats will result in a drier texture unless you add a bit of yogurt or oil.
Essential Kitchen Tools for Making Keema
Don’t worry—you won’t need a high-end kitchen to make keema. Just a few basic tools will do the job perfectly:
- A large non-stick or stainless-steel pan with a lid
- A wooden spatula or cooking spoon
- Sharp knife for chopping
- Cutting board
- Small bowls for spice prep
- Grater or food processor for ginger and garlic (if not using paste)
Having these tools within reach makes the whole process smooth and enjoyable. If you’re cooking for a crowd, go for a larger wok-style pan to prevent overcrowding.
How to Prep Ingredients Before Cooking
One of the secrets to cooking faster and with less stress is prepping everything in advance. Here’s how to do it efficiently:
- Chop Onions and Tomatoes: The finer, the better—they’ll melt into the meat beautifully.
- Mince Garlic and Ginger: If using fresh, grate them or use a mortar and pestle.
- Measure Out Your Spices: Place each in a small bowl so you can toss them in quickly when needed.
- Defrost Peas (if using frozen): Rinse under warm water or leave them out while you prep.
- Cube the Potatoes (if using): Soak them in water to prevent browning.
Doing this mise en place ensures you’re not scrambling around the kitchen while the onions are burning in the pan.
Step-by-Step Keema Cooking Guide
Ready to bring everything together? Here’s how to make keema the authentic, flavorful way. Follow these simple steps to get restaurant-quality results right in your home kitchen.
Step 1: Heat the Oil
Start by heating 2 tablespoons of oil or ghee in a heavy-bottomed pan over medium heat. Ghee gives the dish a rich, nutty depth, but regular vegetable oil works just as well.
Once the oil is hot, add 1 teaspoon of cumin seeds. Let them sizzle for a few seconds—this brings out their earthy aroma and flavors the oil.
At this stage, if you’re using whole spices like bay leaf, cinnamon stick, or cloves, now’s the time to toss them in for that restaurant-style flavor base.
Step 2: Sauté the Aromatics
Add finely chopped onions to the pan. Stir and cook them until they’re golden brown—this might take around 10–12 minutes but don’t rush it. The slower the onions cook, the sweeter and more flavorful they become. It’s a key part of building flavor.
Add the ginger-garlic paste and cook for another 2 minutes until the raw smell fades. This step sets the flavor foundation for your keema.
Step 3: Add the Ground Meat
Now, it’s time to add your ground meat of choice. Break it up with a wooden spoon or spatula so there are no large lumps. Stir continuously to mix it evenly with the onion mixture.
Cook until the meat changes color completely—from pink to brown. This step usually takes about 8–10 minutes. You want to render out any excess moisture and start to develop some color.
Step 4: Cook Until Browned
Don’t just stop when the meat is cooked. Keep frying it until it starts to brown slightly on the edges. This browning process—called “bhuna” in South Asian cooking—is what intensifies the flavor and gives keema its signature depth.
You might see the oil start to separate from the meat. That’s your cue that you’ve done it right.
Step 5: Add Spices and Tomatoes
Once your meat is nicely browned, add all your ground spices: turmeric, chili powder, coriander, black pepper, and garam masala. Stir them in and cook for about 2 minutes to let the spices bloom.
Now, add your finely chopped or blended tomatoes. Stir well to coat the meat. Cover and cook for 10–12 minutes, stirring occasionally. The tomatoes should break down and create a rich, saucy base. If the mixture feels too dry, splash in a bit of water or broth.
The goal here is to let the meat absorb all the flavor from the spices and tomatoes. You’ll notice the aroma becoming irresistible around this point.
Step 6: Simmer for Maximum Flavor
Once the tomato and spice mixture has fully blended with the meat, reduce the heat to low. Let it simmer for 10–15 minutes. This slow simmer deepens the flavor and allows all the spices to infuse the meat fully.
If you like your keema with a little gravy, you can add 1/2 cup of water or a spoonful of yogurt at this point. Mix it in, cover, and let it cook gently. For dry keema, keep it uncovered and cook off any extra moisture.
Stir occasionally to avoid burning and check for salt—adjust if needed.
Step 7: Add Peas or Potatoes (Optional)
Want to take your keema to the next level? Now’s the time to add extras like green peas or cubed potatoes.
- Green Peas: Add 1 cup (fresh or frozen) during the last 10 minutes of cooking.
- Potatoes: Add them earlier, right after the meat starts to brown. Cut into small cubes so they cook through quickly.
These ingredients not only make the dish more filling but also add great texture and sweetness to balance the spices.
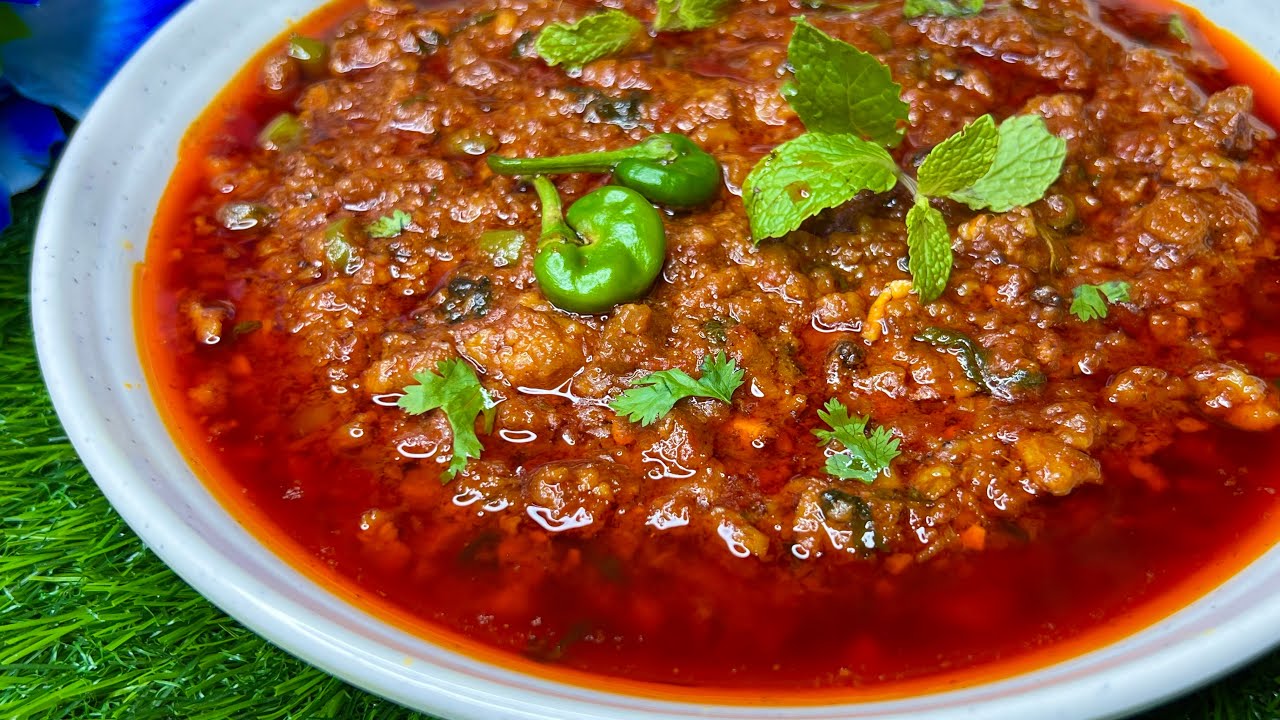
Step 8: Garnish and Serve
Turn off the heat and squeeze in the juice of half a lemon to brighten up the flavors. Top with a handful of chopped fresh coriander for a fresh, herbal finish.
That’s it—your keema is ready to serve! It should be rich, slightly spicy, and beautifully fragrant.
Tips for the Best Keema
Here are a few pro tips to take your keema from good to unforgettable:
- Use fresh spices: Ground spices lose their punch over time. If yours are more than 6 months old, replace them.
- Let the onions brown fully: This adds sweetness and depth. Undercooked onions can leave a harsh taste.
- Don’t rush the bhuna step: This is where the magic happens. Frying the meat until it browns develops the best flavor.
- Add yogurt for richness: Stirring in a spoon of plain yogurt adds creaminess and cuts the heat.
- Finish with lemon: That little burst of acidity at the end really makes the flavors pop.
Follow these tips and you’ll have everyone asking for seconds (and maybe even the recipe!).
Keema Variations You Can Try
The beauty of keema is its flexibility. Here are a few popular variations to try depending on your mood and dietary needs.
Chicken Keema
Light and protein-rich, chicken keema is a healthier take that cooks faster than lamb or beef. Great for weeknight dinners or meal prepping.
Lamb Keema
Bold and rich, lamb keema is ideal for special occasions. The natural fat content gives it a luxurious texture and flavor.
Vegetarian Keema
Don’t eat meat? No problem. Use crumbled tofu, soy granules, mushrooms, or plant-based mince for a fully veg-friendly keema that’s just as satisfying.
Each version can follow the same base recipe—just tweak the cooking times and add-ins to suit the ingredient.
Serving Suggestions for Keema
Now that your keema is piping hot and brimming with flavor, the next big question is: how should you serve it? The best part about keema is its versatility—you can pair it with just about anything, making it suitable for both casual dinners and special meals.
Serve with Indian Breads
- Naan or Roti: A classic pairing. Warm, soft naan or fresh roti is perfect for scooping up every flavorful bite.
- Paratha: If you’re feeling indulgent, serve keema with buttery parathas for a rich, satisfying combo.
- Pita Bread: In a pinch, even pita or flatbread can work wonderfully.
Keema with Rice
- Steamed Basmati Rice: Light, fluffy rice is the ideal base to soak up the spicy gravy of keema.
- Jeera Rice: Add some cumin seeds to your rice for extra aroma.
- Pilaf or Pulao: A lightly spiced rice pilaf balances the bold flavors of the meat.
Street-Style Keema Rolls and Wraps
Stuff leftover keema into warm tortillas or parathas with onions, chutney, and a squeeze of lime to make keema rolls—a street food favorite that’s absolutely addictive.
Topping Ideas
- Sprinkle some chopped red onions on top.
- Add a drizzle of mint chutney or yogurt.
- Garnish with lemon wedges for that zesty finish.
Whether you serve it in a bowl, wrap it up, or spoon it over rice, keema is a dish that adapts to your mood and your mealtime.
What to Do with Leftover Keema
Have leftovers? Lucky you! Keema tastes even better the next day, as the spices have more time to meld. Here are some delicious ways to reuse it:
Keema Samosas
Stuff the cooled keema into samosa pastry sheets, fry or bake them, and enjoy a crunchy, spicy snack.
Keema Pasta
Yes, seriously. Mix it with cooked pasta, a little cream or cheese, and you’ve got an Indo-Italian fusion meal in minutes.
Stuffed Paratha
Roll keema into a dough ball and flatten it to make stuffed parathas—a satisfying breakfast or lunch option.
Keema Quesadillas
Layer keema and cheese in a tortilla and toast it for a cheesy, spicy twist on a quesadilla.
Leftover keema is a goldmine of possibilities—so never let it go to waste!
How to Store and Reheat Keema
Proper storage is key to keeping your keema fresh and safe to eat. Here’s how to do it right:
Storing in the Fridge
- Let the keema cool completely before storing.
- Transfer to an airtight container.
- Store in the fridge for up to 3–4 days.
Freezing Keema
- Portion into freezer-safe containers or zip-lock bags.
- Label with the date.
- Freeze for up to 2 months.
- Thaw overnight in the fridge before reheating.
Reheating Tips
- Reheat on the stovetop with a splash of water to prevent drying.
- Microwave in 1-minute bursts, stirring between intervals.
- Avoid overcooking—it can toughen the meat.
By following these steps, your keema will taste just as fresh and delicious even after a few days.
Nutritional Value of Keema
Wondering how healthy this dish is? Let’s break it down. Here’s an approximate nutritional profile for a 1-cup serving of classic lamb or beef keema (without rice or bread):
| Nutrient | Approximate Value |
|---|---|
| Calories | 320–380 kcal |
| Protein | 22–26 g |
| Carbohydrates | 6–10 g |
| Fat | 24–28 g |
| Fiber | 2–3 g |
| Sodium | 400–500 mg |
Health Tips
- Use leaner meat for lower fat content.
- Add vegetables like peas, spinach, or mushrooms to boost fiber.
- Skip ghee and use olive oil for a healthier fat source.
Keema can absolutely be part of a balanced diet if you make mindful ingredient choices.
Common Mistakes to Avoid
Even experienced cooks can slip up when making keema. Here are a few common mistakes—and how to avoid them:
1. Using Low-Quality Meat
Cheap or overly fatty meat can ruin the dish. Go for fresh, high-quality minced meat with moderate fat for the best flavor and texture.
2. Not Browning the Onions Enough
Undercooked onions leave a raw, unpleasant taste. Always wait for that deep golden brown color.
3. Adding All Spices at Once
Bloom spices in oil or onion base for max aroma. Don’t dump everything in at once, especially salt—adjust as you go.
4. Skipping the Simmer
Keema needs time to develop its flavor. Rushing the simmer will result in a flat, underwhelming dish.
5. Overcooking
If you leave keema on high heat too long or don’t add moisture, it can turn dry and chewy.
Avoid these mistakes, and you’re guaranteed a delicious, aromatic keema every single time.
FAQs about Keema Recipe
1. Can I make keema without onions or garlic?
Yes, you can! While onions and garlic are traditional, you can skip them if needed and rely on tomatoes, ginger, and spices to build flavor.
2. Can keema be made in a pressure cooker or Instant Pot?
Absolutely. Sauté your onions and spices using the sauté mode, then add meat and pressure cook for 8–10 minutes. It saves time and retains flavor.
3. How do I reduce the spiciness if it turns out too hot?
Add a spoon of yogurt, cream, or coconut milk. These mellow down the heat. Serving it with plain rice or bread also helps balance the flavors.
4. Can I add vegetables to keema for a healthier version?
Definitely! Peas, carrots, spinach, mushrooms, and even bell peppers work great. They add texture and nutritional value.
5. What’s the difference between keema and keema curry?
Keema is typically drier, while keema curry has more gravy. The base ingredients are similar, but the amount of liquid and cooking time vary.
Conclusion
Keema is more than just a minced meat curry—it’s a celebration of bold spices, comforting textures, and rich flavors that come together in one skillet. Whether you enjoy it with naan, rice, in a wrap, or as a snack, it’s a meal that delivers every time.
This step-by-step guide gave you everything: the ingredients, prep work, tips, variations, and storage info to ensure your keema turns out perfect. So roll up your sleeves, grab your pan, and let the aroma of sizzling spices fill your kitchen.
Once you master this dish, you’ll realize that it’s not just food—it’s comfort, tradition, and a little taste of home all in one bite.


