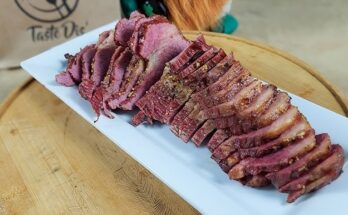
Italian Sliders Recipe: If you love a hearty, cheesy, and flavor-packed bite-sized sandwich, you’re about to fall in love with these Italian Sliders. Imagine layers of savory deli meats, gooey melted cheese, roasted red peppers, and herbs stacked between buttery slider buns and baked to golden, toasty perfection. Sound good? It gets better—it only takes about 30 minutes from start to finish.
Whether you’re prepping for game day, planning a potluck dish, or just want something special for dinner, this recipe delivers big flavor with minimal effort. Let’s dig into how to make the ultimate Italian Sliders—step by step.
What Makes Italian Sliders So Irresistible?
There’s something magical about Italian sliders. It’s the combination of bold, meaty flavors, creamy cheese, and garlicky, herby butter brushed over pillowy soft buns. Every bite delivers that rich Italian deli vibe, and the aroma? Mouthwatering. You don’t need to go to an Italian bistro when you can bring all that goodness home—straight from your oven.
What really sets them apart is the layering. From spicy salami to sweet roasted peppers, each ingredient complements the next. Plus, when they’re baked together, the flavors meld perfectly. It’s like a warm, melty hug from your taste buds.
Why You’ll Love This Recipe
- Quick & Easy – 30 minutes, no fuss.
- Great for a Crowd – Make a tray full and serve everyone.
- Family Favorite – Even picky eaters love these.
- Customizable – Add your favorite meats, cheeses, or veggies.
- Perfect Make-Ahead Dish – Reheat-friendly without losing flavor.
Once you make these, they’ll become a go-to recipe for parties, holidays, or lazy weekends when comfort food calls your name.
When to Serve Italian Sliders
- Game Day – A guaranteed touchdown.
- Movie Night – Skip the popcorn and serve sliders.
- Potlucks & Parties – They disappear fast.
- Picnic Lunches – Easy to pack and serve.
- Busy Weeknight Dinners – A family-friendly meal in minutes.
You really can’t go wrong with these. Wherever and whenever you need food that pleases a crowd, sliders are the answer.
List of Ingredients You’ll Need
Here’s everything you’ll need to whip up the perfect batch of Italian Sliders:
Slider Buns
- Choose soft Hawaiian rolls or any small dinner rolls that come attached in a sheet.
- Leave them connected for easier slicing and assembly.
Deli Meats
Use a variety of Italian-style cold cuts:
- Salami (spicy or mild)
- Ham (smoked or honey)
- Pepperoni
Layering different meats adds richness and complexity to every bite.
Cheese
- Provolone (classic)
- Mozzarella (melty and mild)
- Or a combo of both!
Roasted Red Peppers
- Adds sweetness and a bit of smokiness.
- You can use store-bought or roast your own.
Fresh Basil or Spinach
- Basil adds that signature Italian flavor.
- Spinach offers a mild, leafy freshness.
Italian Seasoning
- A mix of oregano, basil, thyme, rosemary, and marjoram.
- Sprinkle in the layers and in the butter topping.
Olive Oil or Melted Butter
- For brushing on top before baking.
- Helps buns get golden and crispy.
Garlic Powder
- Adds bold flavor to your butter mixture.
Parmesan Cheese
- Sprinkle a little on top for a cheesy crust.
Optional Add-ons
- Banana peppers for tang.
- Sliced olives for a salty bite.
- Red onion for a sharp crunch.
Essential Kitchen Tools
Before you dive into prep, make sure you’ve got:
- Baking dish or sheet pan (9×13 works great)
- Sharp bread knife
- Basting brush (for butter mixture)
- Aluminum foil (to cover while baking)
- Spatula (for serving)
Having the right tools makes the process smooth and stress-free.
How to Prep Your Ingredients Like a Pro
Start by laying everything out:
- Slice your buns in half horizontally, keeping them together.
- Lay out your meats and cheeses so you can layer efficiently.
- If using roasted peppers from a jar, pat them dry with a paper towel to avoid sogginess.
- Pre-mix your garlic butter topping: Melt butter, stir in garlic powder and Italian seasoning.
Prepping everything before assembling means less mess and more fun. Now let’s get to the good stuff—assembly and baking.
Step-by-Step Guide to Making Italian Sliders
Here’s how to assemble and bake your sliders like a sandwich boss:
Step 1: Preheat Your Oven
Begin by preheating your oven to 350°F (175°C). A properly heated oven ensures the sliders bake evenly and the cheese melts perfectly.
Step 2: Slice the Slider Rolls
Without separating the rolls, slice the entire sheet horizontally to create a top and bottom layer. Place the bottom half in a greased or parchment-lined baking dish.
Step 3: Layer the Meats
Add a generous layer of classic Italian deli meats such as salami, ham, prosciutto, or pepperoni. Overlap the slices to cover the entire surface evenly.
Step 4: Add Cheese and Toppings
Layer provolone or mozzarella cheese over the meats. Add optional extras like roasted red peppers, banana peppers, spinach, or pesto for more Italian flavor.
Step 5: Assemble and Brush with Garlic Butter
Place the top layer of rolls back on. Melt butter with garlic, Italian seasoning, and a little parmesan, then brush generously over the rolls.
Step 6: Bake to Golden Perfection
Cover with foil and bake for 15 minutes, then uncover and bake an additional 5–7 minutes until the tops are golden and the cheese is melted.
Step 7: Slice & Serve
Remove from the oven, let cool slightly, then slice into individual sliders. Serve warm and enjoy!
Chef’s Tips for Perfect Sliders
Want your Italian sliders to turn out like something from a gourmet kitchen? Here are some pro tips to take yours to the next level:
- Don’t skip the garlic butter topping – This is what gives the buns that irresistible golden crust and rich flavor. Be generous with it.
- Dry your roasted peppers – Moisture is the enemy of crisp buns. Always pat them dry before adding them to your layers.
- Layer wisely – Put sturdier meats (like ham) on the bottom and thinner ones (like salami) on top. This prevents sogginess and keeps the sliders sturdy.
- Let them rest a few minutes after baking – This helps the cheese settle and makes slicing much easier.
- Use fresh herbs if possible – Fresh basil adds a pop of flavor that dried just can’t replicate.
With just a little extra care, your sliders will be bursting with flavor and perfectly balanced in every bite.
Easy Customization Options
Italian sliders are super versatile. Here’s how you can make them your own:
- Go spicy – Use hot capicola, spicy salami, or add crushed red pepper flakes.
- Add veggies – Roasted zucchini, sautéed mushrooms, or caramelized onions can boost the flavor and texture.
- Swap cheeses – Try fontina, gouda, or pepper jack for a new twist.
- Use different breads – Brioche, pretzel slider buns, or even ciabatta work great.
- Make it vegetarian – Skip the meat and load it up with roasted veggies and cheese.
Think of this recipe as your base. You can tweak it to match your mood, your guests, or what’s hanging out in your fridge.
Make-Ahead and Storage Tips
Want to save time on the day of your party or event? Good news—these sliders are make-ahead friendly.
To Make Ahead:
- Assemble the sliders completely, cover tightly with foil, and refrigerate up to 24 hours in advance.
- When ready to bake, take them out 15 minutes before and bake as instructed.
To Store Leftovers:
- Wrap individual sliders or store in an airtight container.
- Refrigerate for up to 3 days.
To Reheat:
- Reheat in the oven at 350°F for about 10 minutes to crisp them up again.
- Avoid microwaving unless you’re okay with softer buns.
These sliders are just as tasty the next day—if there are any left!
What to Serve with Italian Sliders
These sliders are filling, but they pair beautifully with a few tasty sides. Here are some great options to round out your meal:
- Garlic Parmesan Fries
- Italian Pasta Salad
- Caprese Skewers
- Antipasto Platter
- Caesar Salad
- Tomato Basil Soup
Whether it’s a game day spread or a laid-back dinner, these sides balance the richness of the sliders and make the meal complete.
Pairing Drinks with Sliders
A perfect bite deserves a perfect sip. Here are a few drink ideas to go along with your Italian sliders:
- Red Wine – A medium-bodied Chianti or Pinot Noir pairs beautifully.
- Beer – Try an amber ale, pilsner, or Italian lager like Peroni.
- Sparkling Water – Add lemon or lime for a refreshing non-alcoholic option.
- Soda – Classic cola or root beer complements the salty, meaty flavors.
Whether you’re sipping wine at a gathering or popping open a soda during lunch, these sliders pair well with just about anything.
Common Mistakes to Avoid
Even simple recipes can go sideways without a little attention to detail. Here are the most common slider pitfalls and how to avoid them:
- Soggy buns – This usually happens from wet ingredients like peppers or too much sauce. Always pat veggies dry and go easy on moist toppings.
- Overbaking – Nobody likes dry sliders. Cover with foil and bake just until the cheese melts, then uncover to brown.
- Skimping on layers – Don’t be shy! The layers are what make these mini sandwiches so indulgent.
- Cutting too early – Let the sliders rest a few minutes before slicing. Otherwise, everything oozes out and they fall apart.
Being mindful of these little details will give you sliders that are melty, toasty, and perfectly balanced.
FAQs about Italian Sliders Recipe
1. Can I make Italian sliders in advance?
Absolutely! Assemble them ahead of time, cover with foil, and refrigerate for up to 24 hours. Bake when ready.
2. What type of cheese works best for these sliders?
Provolone and mozzarella are classic, but feel free to get creative with gouda, fontina, or even pepper jack for a spicy twist.
3. Can I freeze Italian sliders?
Yes, you can freeze them after baking. Wrap them individually, freeze, then reheat in the oven. They’re great for meal prep!
4. Do I have to use Hawaiian rolls?
Nope! You can use any soft dinner roll or even cut ciabatta into squares for a more rustic option.
5. How do I prevent the sliders from getting soggy?
Dry your toppings, especially roasted peppers, and avoid overloading sauces or moisture-heavy ingredients.
Conclusion
Italian sliders are the ultimate crowd-pleaser. They’re everything you want in a mini sandwich—melty cheese, layers of savory meats, a little bit of zing from peppers and herbs, all held together by warm, buttery buns. Whether you’re feeding a hungry crowd or just treating yourself, these sliders are a guaranteed win.
They’re quick to make, easy to customize, and just as good the next day. Plus, who doesn’t love a dish that looks like you spent hours on it but secretly came together in 30 minutes?
Try them once, and you’ll be hooked for life.