Italian Pizza Crust Dough Recipe: There’s something almost magical about biting into an authentic Italian pizza. That thin, crispy-yet-chewy crust. The soft center. The rich aroma of olive oil and fermented dough wafting from the oven. It’s the stuff of dreams—and good news, you don’t need to travel to Naples to experience it. You can make a proper Italian pizza crust right at home.
At the heart of any great pizza is its dough. Not the sauce. Not even the cheese. It’s the dough that makes or breaks your pie. And the Italians? They’ve perfected it. Their crust isn’t just a vessel for toppings—it’s the soul of the pizza. In this guide, we’re diving deep into crafting a traditional Italian pizza crust dough, step by step. Whether you’re a beginner or someone who’s kneaded a few loaves in your day, this guide has everything you need to master it from scratch.
What Makes Italian Pizza Dough Unique?
When we talk about Italian pizza dough, we’re talking about centuries of tradition. It’s not just any dough—it’s simple, pure, and made with minimal ingredients. What separates it from others is its focus on quality over quantity. Where American-style doughs often use sugar, oil, and dough conditioners, Italian dough sticks to the basics: flour, water, yeast, and salt.
The flavor comes from slow fermentation, not added ingredients. The texture? That comes from careful hydration and proper kneading. The result is a crust that’s crisp on the outside, airy in the middle, and has just enough chew to make every bite satisfying.
Italian dough also doesn’t rely on excessive toppings. Because the crust is so flavorful, it doesn’t need to be drowned in cheese or sauce. Less is more. And that’s the charm.
Types of Italian Pizza Crust
Italy isn’t a one-size-fits-all when it comes to pizza crusts. There are regional differences that give each style its own identity. Let’s break down the main types:
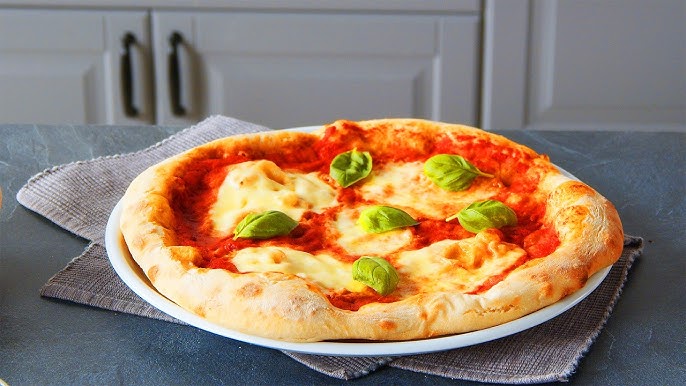
Neapolitan
This is the OG. Originating from Naples, Neapolitan pizza has a soft, pillowy crust that’s cooked at very high temperatures (900°F) for just 60-90 seconds. It’s lightly charred, chewy, and airy.
Roman
Roman-style pizza is thinner and crispier. It’s rolled out a bit more and often baked in electric ovens. Perfect if you like a crunchier bite.
Sicilian
Sicilian pizza crust is thick and soft, usually baked in rectangular pans. It’s more of a focaccia-style base, ideal for heavier toppings.
Each of these starts with a similar dough base but diverges in technique and baking method. In this guide, we’ll focus on the Neapolitan-style dough—it’s simple, pure, and iconic.
List of Ingredients You’ll Need
Let’s keep it straightforward. Here’s what you’ll need to make authentic Italian pizza dough:
Essential Ingredients:
- 500g (about 4 cups) 00 flour – or substitute with all-purpose if you must
- 325ml (about 1 1/3 cups) lukewarm water
- 10g (2 tsp) salt
- 3g (1 tsp) dry yeast or 6g fresh yeast
Optional (but nice to have):
- 1 tsp olive oil – enhances stretch and elasticity
- 1/2 tsp sugar – helps with yeast activation (especially in colder climates)
- Semolina flour – for dusting, helps prevent sticking
That’s it. No eggs. No milk. No butter. Just real, raw ingredients that let flavor develop naturally through time.
Why Using the Right Flour Matters
You might be tempted to grab any flour from your pantry, but hear me out: flour is the foundation of your dough. The Italians use “00” flour, and there’s a reason for it.
What is 00 Flour?
It’s a finely ground Italian flour with a lower protein content (around 11-12%). This creates a soft, stretchy dough that’s easy to work with and perfect for thin crusts.
Can You Use All-Purpose?
Yes, but it won’t be quite the same. All-purpose has slightly more protein, which can make the dough tougher or chewier if over-kneaded. If you want that authentic texture, go for 00.
Why Protein Content Matters
Protein turns into gluten when mixed with water. Gluten gives your dough structure, stretch, and bite. Too much protein, and your dough becomes tough. Too little, and it won’t hold shape. 00 flour hits the sweet spot for pizza.
Choosing the Right Yeast
Yeast brings life to your dough—literally. It ferments the sugars in the flour, producing gases that create that airy, bubbly structure.
Types of Yeast:
- Active Dry Yeast – Most common, needs activation in warm water.
- Instant Yeast – No need to proof, just mix it right in.
- Fresh Yeast – Traditional, used in pizzerias, short shelf life.
How to Activate Yeast
If using active dry yeast, mix it with a bit of lukewarm water (not hot—around 100°F) and a pinch of sugar. Let it sit for 5–10 minutes until it bubbles. That’s how you know it’s alive and ready to go.
Using expired or dead yeast? You’ll end up with a sad, flat crust.
Tools You’ll Need
You don’t need a commercial kitchen, but having the right tools makes the process smoother:
- Large mixing bowl
- Kitchen scale – precision matters
- Dough scraper
- Clean countertop or dough mat
- Cling film or damp towel
- Pizza stone or baking steel – optional, but amazing for crust
- Peel or flat tray – to transfer the pizza to the oven
Having these at hand makes you feel like a pro—and helps you act like one.
Step-by-Step Guide: How to Make Italian Pizza Crust Dough
Let’s get our hands dirty (literally). Here’s the full process from start to finish.
1. Combine the Ingredients
In a large mixing bowl, pour in your lukewarm water and sprinkle the yeast over it. Add sugar if you’re using it. Stir gently and let it sit for 5–10 minutes. Once it’s frothy, add in your flour and salt (and olive oil, if using).
2. Mix and Form the Dough
Use your hand or a wooden spoon to mix until a shaggy dough forms. Transfer it onto a floured surface and begin kneading.
3. Kneading the Dough
Knead the dough for 10–12 minutes. Use the fold-push-turn method: fold the dough over, push with the heel of your hand, turn 90°, and repeat. You’re looking for a smooth, elastic dough that springs back when poked.
Tip: If the dough is too sticky, add a little flour. If too dry, add a few drops of water.
4. First Rise (Bulk Fermentation)
Place the kneaded dough in a lightly oiled bowl and cover it with plastic wrap or a damp cloth. Let it sit at room temperature (around 70–75°F or 21–24°C) for 1.5 to 2 hours, or until it doubles in size. This stage is where the yeast starts working its magic—fermenting sugars and producing carbon dioxide, which makes your dough airy and light.
You might be tempted to rush this, but patience is key. A slow rise develops deeper flavors and a better texture. If your kitchen is cool, you can place the bowl in the oven (turned off!) with just the oven light on to create a warmer environment.
5. Punching Down and Dividing
Once your dough has doubled in size, gently punch it down to release excess gas. This isn’t about violence—just a gentle press in the center to deflate it slightly. Now, divide the dough into portions depending on the size of pizzas you want. For example:
- 250g per 10–12 inch pizza
- Makes about 2 medium pizzas from the recipe above
Shape each piece into a smooth ball by folding the edges underneath and rolling it slightly on your counter with your hands cupped.
6. Second Rise (Ball Proofing)
Place each dough ball onto a floured tray or in individual containers. Lightly cover with plastic wrap or a damp towel and let them proof for another 30–60 minutes at room temperature. This final rest makes the dough more relaxed and easier to stretch.
How Long Should You Ferment the Dough?
Want next-level flavor and texture? Go for a cold fermentation. After kneading and forming your dough balls, place them in airtight containers in the fridge for up to 48–72 hours. This slow fermentation enhances the taste with subtle sourdough-like notes and makes your crust even more digestible.
Before using cold-fermented dough, let it sit at room temperature for 1–2 hours so it becomes pliable again.
Troubleshooting Common Dough Problems
Making pizza dough isn’t always smooth sailing. Here’s how to tackle some common issues:
1. Dough Not Rising
- Yeast may be expired or water was too hot
- Kitchen too cold – try proofing near a warm appliance
- Forgot the sugar? It helps feed the yeast
2. Dough Too Sticky
- Too much water or not enough kneading
- Add small amounts of flour gradually
- Wet hands and use a bench scraper to work it easier
3. Dough Too Tough
- Over-kneading or using high-protein bread flour
- Not enough hydration
- Let it rest longer to relax the gluten
Remember, every batch of dough teaches you something. Don’t be discouraged!
How to Shape the Perfect Pizza Base
Here’s where the magic happens. Shaping the dough correctly makes all the difference.
Steps to Shape Your Pizza:
- Lightly flour your surface and hands.
- Gently flatten the dough ball with your fingertips, starting from the center and pushing outward.
- Rotate as you press to maintain a round shape.
- Use your knuckles or the back of your hands to stretch the dough, letting gravity help.
- Avoid rolling pins—they push out the air pockets you worked so hard to create.
You want a thin center with a slightly thicker rim. Think soft and elastic, not overworked and flat.
Tips for the Perfect Crust
Great pizza dough isn’t just about the recipe—it’s about technique and timing. Here are some golden rules:
- Let the dough rest often during shaping to prevent tearing
- Don’t overload your toppings, especially sauce and cheese
- Use semolina flour or cornmeal on your peel to help slide the pizza into the oven
- Preheat your oven and stone/steel for at least 45 minutes before baking
Good dough deserves a hot oven and some respect.
Baking Your Pizza
Now you’re ready to bake. Preheat your oven to its maximum temperature—ideally around 500–550°F (260–290°C). If using a pizza stone or baking steel, place it in the oven during the preheat.
Steps:
- Transfer your stretched dough to a peel or baking tray.
- Add sauce, cheese, and toppings sparingly.
- Slide the pizza onto the hot stone or baking tray.
- Bake for 7–10 minutes, or until the crust is golden and blistered.
Want that charred Neapolitan finish? Use your broiler for the last 1–2 minutes—but watch it like a hawk!
Storing and Freezing Extra Dough
No time to make dough from scratch every time? Good news: pizza dough stores beautifully.
Storing in the Fridge:
- Place dough balls in lightly oiled containers
- Seal and refrigerate for up to 72 hours
- Bring to room temp before shaping
Freezing Instructions:
- After the first rise and shaping into balls, freeze each dough ball in a ziplock bag
- Lasts up to 3 months
- Thaw overnight in the fridge, then rest at room temp for 1–2 hours before using
Always plan ahead—you’ll thank yourself later.
FAQs about Italian Pizza Crust Dough Recipe
1. How long can pizza dough sit out?
Pizza dough can sit out for about 2 hours at room temperature before it starts over-proofing. If you need more time, place it in the fridge to slow fermentation.
2. Can I freeze Italian pizza dough?
Absolutely. Just freeze the dough after the first rise and shaping into balls. Thaw in the fridge overnight, then bring to room temp before using.
3. What’s the best flour for Italian pizza?
Italian “00” flour is the gold standard for Neapolitan-style pizza. It’s finely milled and creates a soft, chewy crust. You can also use all-purpose flour as a substitute.
4. Is sugar necessary in the dough?
Nope! Traditional Italian pizza dough doesn’t use sugar. However, a small pinch can help activate the yeast faster, especially in cooler environments.
5. Can I make dough without yeast?
You can, but it won’t have the same airy texture. If you’re in a pinch, try a no-yeast recipe using baking powder, but it won’t be traditional Italian pizza.
Conclusion
Italian pizza dough is a craft worth mastering. With just a handful of ingredients and a bit of patience, you can bring the flavors of Italy right into your kitchen. The dough is the heart of the pizza—it tells the story of tradition, simplicity, and skill passed down through generations. Whether you’re hosting a pizza night or just craving something authentic, this guide gives you everything you need to rise (literally) to the occasion.
From flour to fermentation, from mixing to baking—it’s all about attention to detail and trusting the process. Once you get the hang of it, there’s no going back to store-bought crusts. So go ahead, roll up your sleeves and make a pizza crust that would make a nonna proud.


