Idli Batter Recipe: Who doesn’t love warm, fluffy idlis with a side of sambar and coconut chutney? This beloved South Indian delicacy isn’t just light on the stomach but also packed with nutrition. The real secret behind perfect idlis lies in its batter. Store-bought options are convenient but often lack the freshness and taste of a homemade batch. If you’ve ever wondered how to make idli batter at home, you’re in the right place. This guide walks you through everything—right from ingredients to storage—so you can master the art of making the perfect idli batter from scratch.
Let’s dive into the soul-satisfying world of idli batter making—step by step.
What is Idli and Why It’s Loved Across India
Idli is a traditional South Indian steamed rice cake that’s typically served for breakfast. But honestly, idli has no time constraints—it’s eaten for lunch, dinner, or whenever the craving strikes. Soft, spongy, and super light, idlis are made from a fermented batter of rice and urad dal (black gram). The fermentation gives it that slightly sour, unique flavor and makes it gut-friendly.
One of the biggest reasons idli is so widely loved across India (and even globally) is because it’s:
- Gluten-free
- Easy to digest
- Packed with protein and carbs
- Kid and elder-friendly
Plus, it acts as the perfect vehicle for various accompaniments—think tangy sambar, spicy chutney, or even a dollop of ghee.
Benefits of Homemade Idli Batter
Sure, grabbing a pack from the supermarket might save you time—but making idli batter at home? Totally worth it. Why?
- Freshness: No preservatives, additives, or weird aftertaste.
- Control: You control the texture, consistency, and fermentation.
- Customization: Add methi seeds for flavor or poha for softness—whatever suits your preference.
- Cost-effective: One batch can make dozens of idlis for a fraction of store-bought prices.
Besides, there’s something deeply satisfying about watching your own batter rise overnight like magic.
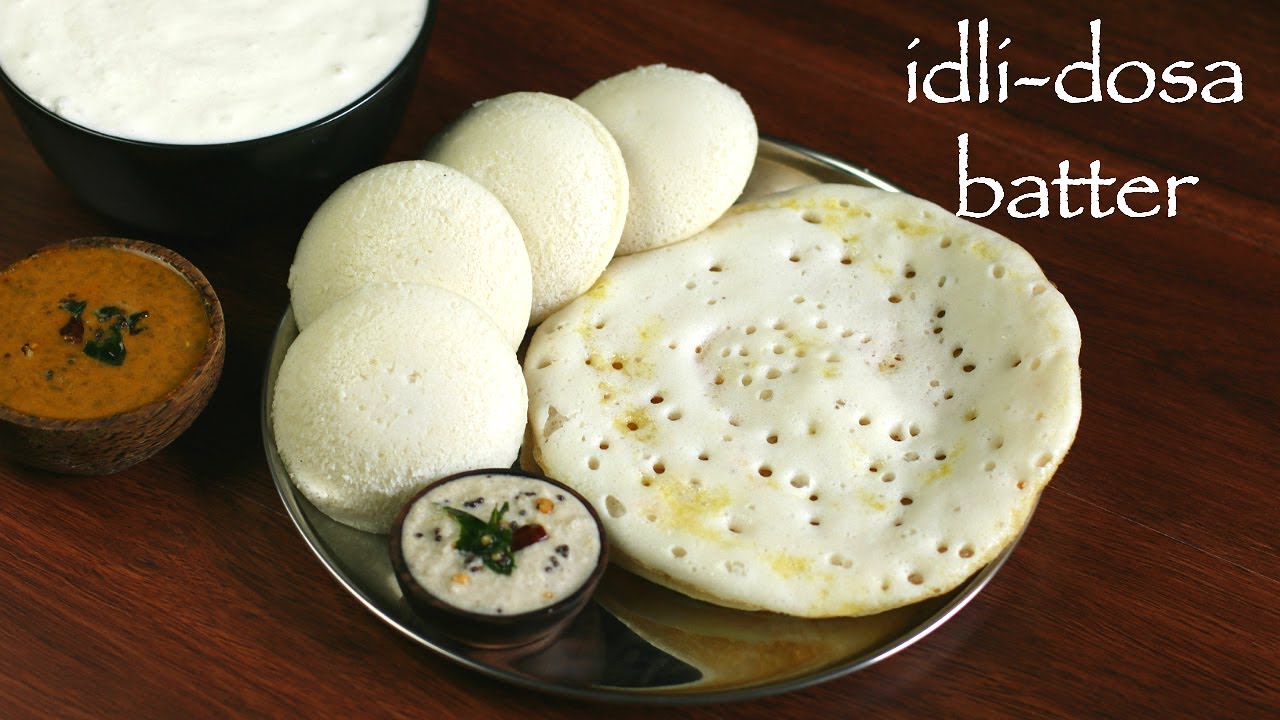
Difference Between Idli and Dosa Batter
Although idli and dosa batter use similar base ingredients—rice and urad dal—their textures and proportions vary slightly.
| Component | Idli Batter | Dosa Batter |
|---|---|---|
| Rice to Dal Ratio | 3:1 or 4:1 | 3:1 or 2.5:1 |
| Consistency | Thicker and fluffier | Slightly thinner for spreading |
| Fermentation | Needs to rise well | Needs a bit more sourness |
| Additives | Sometimes includes poha or methi | May include rice flakes or chana dal for crispiness |
So if you’re planning to use the same batter for both, you can. But minor tweaks in consistency will make all the difference.
Ingredients You’ll Need
Making idli batter needs just a few ingredients, but choosing them wisely can make or break your batter. Here’s what you’ll need:
Types of Rice You Can Use
- Parboiled Rice (Idli Rice) – Most commonly used, gives the best texture.
- Raw Rice – Like sona masoori or ponni rice, often used for lighter idlis.
- Combination – Some people mix both to balance softness and structure.
Types of Urad Dal (Black Gram)
- Whole Urad Dal (with skin) – Less common but adds earthy flavor.
- Split Urad Dal (skinless) – Most preferred for making soft idlis.
Optional Ingredients
- Fenugreek Seeds (Methi) – Helps in fermentation, adds slight bitterness.
- Poha (Flattened Rice) – Makes idlis softer.
- Sabudana (Tapioca Pearls) – Aids fermentation, adds fluffiness.
Water & Salt
- Filtered Water – Especially crucial if your tap water has chlorine.
- Salt – Preferably non-iodized rock salt; iodized salt can slow fermentation.
Choosing the Right Rice-to-Dal Ratio
Getting the perfect ratio of rice and dal is crucial. Here’s a good starting point:
- For Idli: 3 cups rice : 1 cup urad dal
- Add-ons: 2 tbsp methi seeds + ½ cup poha (optional)
This 3:1 ratio gives you soft idlis that still hold shape. If you’re in a colder region or using lower-quality dal, reduce the rice slightly or add a little extra urad dal.
Step-by-Step Guide to Make Idli Batter
Now comes the fun (and slightly messy) part—making the batter.
Step 1: Rinse and Soak the Ingredients
Rinse urad dal, idli rice (or parboiled rice), and fenugreek seeds separately until the water runs clear. Soak the dal and fenugreek together for 4–6 hours, and soak the rice for the same amount of time.
Step 2: Grinding the Dal – Achieving the Fluffy Texture
Drain the dal and grind it with a little water until it becomes light, airy, and smooth. The batter should be fluffy—this is key to soft, spongy idlis.
Step 3: Grinding the Rice – Right Consistency Matters
Drain the rice and grind it with minimal water until slightly coarse, like fine semolina. This texture helps idlis hold their shape.
Step 4: Mixing Everything Together
Combine both batters in a large bowl. Add salt and mix well using your hand—this helps fermentation.
Step 5: Fermentation – The Magic Step
Cover the bowl and let it ferment overnight or 8–12 hours until doubled and bubbly. Your idli batter is ready!
Tips to Get Perfect Fermentation Every Time
Fermentation can feel a bit tricky, especially if you’re dealing with seasonal changes. But once you understand how temperature and environment affect the batter, you’ll get consistent results every time. Here are some real-world tips that’ll ensure your idli batter ferments beautifully:
- Warmth is Key: The ideal fermentation temperature is around 30–32°C (86–90°F). If your kitchen is cold, place the batter in your oven with just the light turned on (don’t switch on the heat).
- Use a Fermentation Box or Instant Pot: These are especially helpful during winters. The “Yogurt” setting on the Instant Pot works wonders and usually ferments in 8–10 hours.
- Don’t Overcrowd the Batter Bowl: Always leave at least 1/3 of the bowl empty, so the batter has enough room to rise.
- Avoid Metal Bowls: Use glass or ceramic bowls if possible. Metal can react and inhibit the natural fermentation process.
- Keep It Undisturbed: Once set, don’t move or shake the batter while it’s fermenting. Let the natural yeast do its job.
- Mix with Hands Before Fermenting: The natural bacteria and warmth from your hands help speed up the fermentation process. Sounds old school, but it works!
If you nail the fermentation, you’re 80% of the way to perfect idlis!
How to Store Idli Batter for Freshness
So, your batter is now fermented, fluffy, and full of life. But what’s next?
Here’s how to store it properly and maintain its freshness:
- Refrigerate Immediately After Fermentation: This stops further souring. The batter can stay fresh for up to 5–7 days when stored in an airtight container.
- Divide into Portions: If you make large batches, divide the batter into smaller containers. This helps in preventing contamination when you scoop out only what you need.
- Don’t Stir Too Much Before Use: Just gently mix before using. Overmixing can deflate all the air bubbles and affect the fluffiness of your idlis.
- Add Salt Before Refrigeration (if you haven’t already): Salt helps in preservation and balances the flavor.
Want a pro tip? Label your containers with the date, so you know how old the batter is. Nothing worse than discovering a funky-smelling mystery batter in the back of your fridge, right?
Making Soft and Fluffy Idlis from the Batter
Now that you have your fermented batter ready, it’s time for the grand finale—steaming those soft, pillow-like idlis.
Here’s how to do it right:
- Grease the Idli Moulds: Use a few drops of oil or ghee to prevent sticking.
- Spoon the Batter Gently: Don’t overfill. Fill only about 3/4th of each mould.
- Use a Steamer or Pressure Cooker:
- If using a pressure cooker, remove the whistle/weight.
- Steam on high for 10–12 minutes.
- Let it rest for 2–3 minutes before removing the idlis.
- Check with a Toothpick: Insert one in the center. If it comes out clean, your idlis are done.
Serve them hot with coconut chutney, tomato chutney, or sambar. Don’t forget to top them with a bit of ghee—because why not?
What If Your Batter Doesn’t Ferment?
Don’t panic if your batter looks like a flat pancake instead of a fluffy cloud. It happens. Here’s how to troubleshoot it:
- Try Re-fermenting: Leave it out for a few more hours, maybe in a slightly warmer place.
- Add a Starter: A tablespoon of previously fermented batter, a pinch of yeast, or even a spoon of sour curd can kickstart the process.
- Use Baking Soda as a Last Resort: If fermentation fails completely and you still want idlis, add a pinch of baking soda right before steaming. It won’t give you that fermented flavor, but it’ll puff them up.
Still having trouble? Check your ingredients. Old urad dal or overly chlorinated water can kill natural fermentation.
Idli Variations You Can Make from the Same Batter
Once you’ve nailed the basic batter, the sky’s the limit. You can whip up so many variations to keep things exciting.
- Mini Idlis: Great for kids and perfect for sambar soaking.
- Masala Idlis: Toss chopped idlis with curry leaves, mustard seeds, onions, and spices.
- Fried Idli: Leftover idlis? Fry them with some garlic and chili powder.
- Stuffed Idli: Add a surprise center of spiced mashed potato or chutney.
- Rava Idli Style with the Same Batter: Add a few tempered spices and veggies to the batter for a twist.
It’s like remixing your favorite song—same tune, new vibe!
Common Mistakes to Avoid While Preparing Idli Batter
Even seasoned cooks mess up sometimes. Here are some frequent slip-ups and how to dodge them:
- Using Too Much Water During Grinding: This makes the batter runny, and your idlis turn flat.
- Adding Salt Before Fermentation in Cold Climates: Salt slows fermentation. In cooler regions, wait until after the batter rises.
- Overmixing After Fermentation: This knocks out all the air bubbles.
- Not Soaking Long Enough: Under-soaked rice or dal will not grind smoothly and can ruin fermentation.
- Using Tap Water with Chlorine: Chlorine kills the natural bacteria required for fermentation. Always use filtered water.
Small tweaks make a big difference. Every mistake is just a step closer to perfection!
Expert Tips to Level Up Your Idli Game
You’ve got the basics down, now let’s turn you into an idli master:
- Use Ice-Cold Water While Grinding: Keeps the batter from overheating and preserves nutrients.
- Add a Handful of Cooked Rice or Poha: Game changer for super-soft idlis.
- Ferment in Clay or Stone Pots: These retain warmth and give a traditional flavor.
- Stir with Wooden Spoons: Less reactive and better for maintaining the structure.
- Use the First Batch for Idlis, Second for Dosas: Dosa needs slightly sour batter—using it on Day 2 or 3 gives the best results.
You’ll never look at idlis the same way again.
FAQs about Idli Batter Recipe
1. How long should I soak rice and dal?
Both rice and dal should be soaked for at least 6 hours. If you’re short on time, soak in warm water to speed up the process, but longer soaking yields better fermentation.
2. Can I use a blender instead of a wet grinder?
Yes, but the results may vary. Wet grinders produce fluffier batter due to slow grinding. If using a blender, grind in short bursts and use ice-cold water to avoid overheating.
3. Why does my idli batter smell bad?
Over-fermentation or using stale ingredients can cause a sour or funky smell. Make sure to refrigerate batter after fermentation and use fresh dal and rice.
4. Can I make the batter in winter?
Absolutely! Just provide a warm environment. Use your oven light, Instant Pot, or even wrap the bowl in a blanket. It may take longer, but fermentation will still happen.
5. How do I fix runny batter?
If your batter is too thin, try adding a bit of rice flour or semolina (rava) to thicken it. Let it rest for 30 minutes before using.
Conclusion
There you have it—a complete, foolproof, step-by-step guide to making perfect idli batter at home. From soaking to fermentation, from storage to steaming, you’re now equipped with all the knowledge to create soft, fluffy, and delicious idlis every single time. And the best part? You didn’t need any store-bought mix or packet nonsense—just the age-old wisdom of home cooking and a bit of patience.
Go ahead, fire up that steamer, and let your kitchen smell like comfort. Because homemade idlis aren’t just food—they’re a feeling.