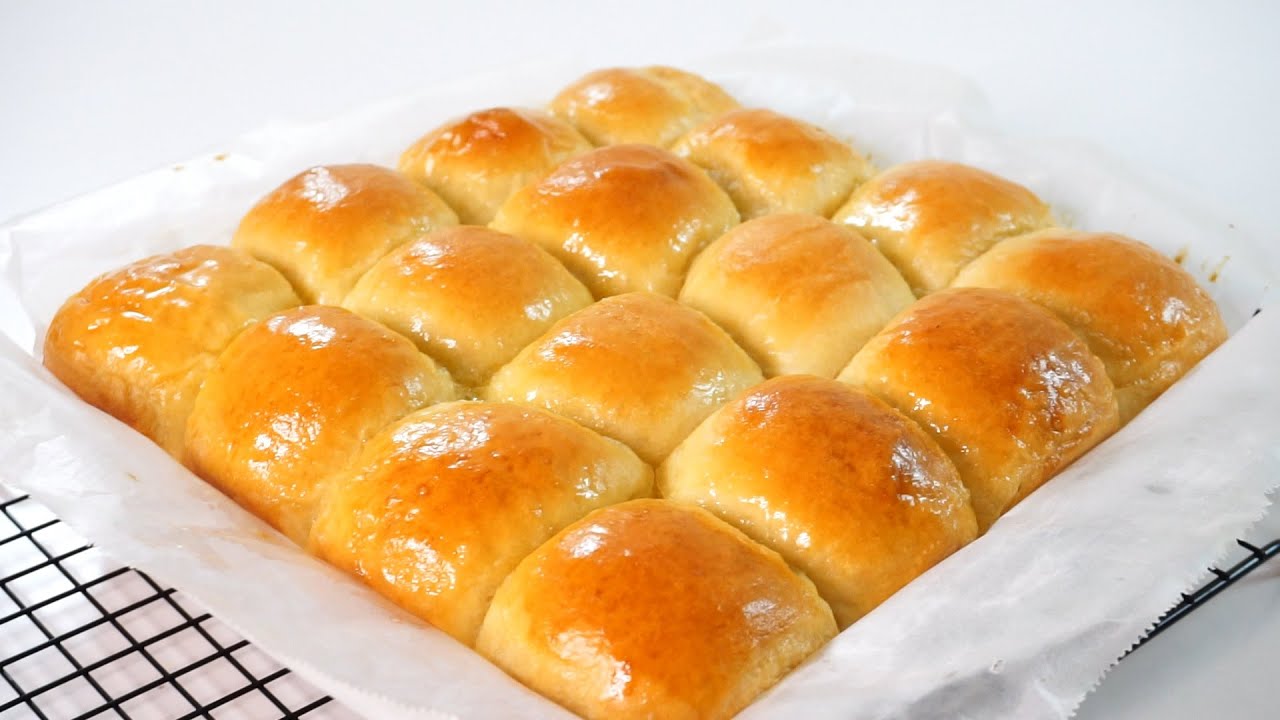
Hawaiian Dinner Rolls Recipe: You know those soft, sweet, golden rolls that practically melt in your mouth at family dinners or holiday gatherings? Yep, we’re talking about Hawaiian dinner rolls. If you’ve ever had the store-bought ones, you know they’re dangerously good. But guess what? The homemade version? Ten times better.
Hawaiian rolls are known for their unique combination of fluffiness and subtle sweetness. They’re slightly richer than your typical dinner roll, thanks to ingredients like pineapple juice, butter, and eggs. Whether you’re planning a festive feast, a potluck, or just a cozy weeknight meal, these rolls make the perfect sidekick.
So, are you ready to fill your kitchen with the irresistible aroma of freshly baked, pillowy Hawaiian dinner rolls? Let’s roll up our sleeves and dive right into the most detailed, beginner-friendly, foolproof guide you’ll ever read.
Ingredients You’ll Need
Here’s the magic: Hawaiian rolls are simple to make, but the secret lies in the combination of just the right ingredients. Each one adds to the signature soft texture and slight sweetness that sets these rolls apart from your average dinner bun.
Basic Ingredients:
- 4 cups all-purpose flour (plus extra for kneading)
- 2¼ teaspoons active dry yeast (1 packet)
- ½ cup pineapple juice (unsweetened, canned or fresh)
- ½ cup whole milk (warm, about 110°F)
- ¼ cup granulated sugar
- 1 teaspoon salt
- 2 large eggs
- ¼ cup unsalted butter (melted and slightly cooled)
Optional Add-Ins for Extra Flavor:
- 1 tablespoon honey (for a sweeter flavor)
- ½ teaspoon vanilla extract (adds a bakery-style aroma)
- 1 teaspoon grated orange zest (adds citrus depth)
- 2 tablespoons dry milk powder (for an extra soft crumb)
Don’t worry—if you’re missing a few of these add-ins, the basic version is still a winner. But if you want to elevate your rolls to restaurant-quality, try throwing in one or two of the optional ingredients!
Kitchen Tools and Equipment
While you don’t need a fancy kitchen setup, having the right tools can make the process smoother and more enjoyable.
Must-Have Tools:
- Large mixing bowls – for combining ingredients and proofing dough
- Measuring cups and spoons – precision matters in baking
- Wooden spoon or dough hook – for mixing
- 9×13-inch baking pan – the perfect size for soft pull-apart rolls
- Plastic wrap or clean towel – to cover dough while rising
- Oven thermometer – optional, but helpful
Helpful Extras:
- Stand mixer – saves time when kneading
- Pastry brush – for brushing butter on top
- Kitchen scale – for consistent dough portions
Before You Begin: Baking Tips
Before we get elbow-deep in flour, let’s set you up for success. These tips will help you get bakery-style rolls from your home oven—no guesswork, just golden perfection.
Use Room Temperature Ingredients
Don’t rush by using cold milk or eggs straight from the fridge. Let them sit out for 30 minutes before baking. Warm ingredients mix better and help the yeast activate more efficiently.
Measure Accurately
Flour is the most common source of error. Don’t scoop it directly from the bag. Instead, spoon it into a measuring cup and level it off with a knife. Better yet, use a kitchen scale for precision.
Check Yeast Freshness
Expired yeast = sad, flat rolls. Dissolve a little yeast in warm water with sugar. If it doesn’t foam within 10 minutes, toss it and use fresh yeast.
Step-by-Step Guide to Making Hawaiian Dinner Rolls
This is where the magic begins. We’re going to walk through each part of the process slowly and clearly so you can bake with confidence. Ready? Let’s do this.
Step 1: Preparing the Yeast Mixture
Warm milk or water to 105–110°F (40–43°C). Add a little sugar and sprinkle the yeast on top. Let it sit for 5–10 minutes until bubbly and foamy. This confirms the yeast is active and ready for baking.
Step 2: Mixing Wet Ingredients
In a large bowl, whisk together melted butter, pineapple juice, eggs, sugar, and salt. These ingredients give Hawaiian rolls their signature sweetness and soft texture.
Step 3: Combining the Dry Ingredients
Add flour gradually into the wet mixture, starting with 2 cups and adding more as needed. Mix until a slightly sticky dough forms. Avoid adding too much flour—Hawaiian rolls should remain tender.
Step 4: Kneading the Dough
Turn the dough onto a floured surface and knead for 8–10 minutes until smooth, elastic, and slightly tacky. A well-kneaded dough traps air and helps create soft, fluffy rolls.
Step 5: First Rise (Proofing)
Place the dough in a greased bowl, cover, and let rise in a warm area for 1–2 hours, or until doubled in size. The enriched dough may take slightly longer to proof than regular bread.
Step 6: Shaping the Rolls
Punch down the risen dough and divide it into 12–15 equal pieces. Roll each piece into a smooth, tight ball and arrange them in a greased baking dish.
Step 7: Second Rise (Final Proof)
Cover again and let the rolls rise for 30–45 minutes until puffy. This contributes to their cloud-like texture.
Step 8: Baking to Perfection
Bake in a preheated oven at 350°F (175°C) for 18–22 minutes until golden brown on top and lightly springy to the touch.
Step 9: Brushing with Butter
Brush warm rolls with melted butter for a glossy, delicious finish. Serve soft and warm—perfect for dinner or sliders!
How to Know When They’re Done
Let’s be honest: nothing ruins a roll faster than underbaking it. So how can you be sure your Hawaiian rolls are perfectly baked?
Visual Cues:
- The tops should be a deep golden brown.
- The rolls should be puffed and slightly pulling away from the edges of the pan.
Internal Temperature:
If you want to be 100% certain, use a food thermometer. The internal temp should read about 190°F (88°C) when inserted into the center of a roll.
Also, tap the top—if it sounds hollow, they’re good to go!
Serving Suggestions
Hawaiian dinner rolls are versatile. Their sweet flavor makes them pair perfectly with both savory and sweet dishes.
Pair With:
- Pulled pork or BBQ meats (like sliders)
- Thanksgiving turkey and gravy
- Fried chicken
- Soup or chili (for dipping!)
Other Creative Ideas:
- Slice and toast them with a pat of honey butter.
- Use them for breakfast sandwiches.
- Serve with whipped cinnamon butter or garlic herb butter.
The options are endless. You might just find yourself baking these weekly!
How to Store Hawaiian Rolls
So, you made a big batch—nice! Here’s how to keep them fresh:
Room Temperature:
Let them cool completely. Store in an airtight container or zip-top bag at room temp for up to 4–5 days. Keep them away from direct sunlight or heat.
Freezing Instructions:
Wrap rolls tightly in plastic wrap, then place in a freezer bag. Freeze for up to 2 months.
To thaw, let them sit at room temp for 2–3 hours, or warm in the oven at 300°F for 10 minutes.
How to Reheat for Best Flavor
Let’s face it—nothing beats a warm roll. Whether you’ve stored them overnight or frozen them, here’s how to bring them back to life.
Oven Method:
- Preheat oven to 300°F (150°C).
- Wrap rolls in foil to keep them from drying out.
- Heat for 10–15 minutes.
Microwave Method:
- Place a damp paper towel over the rolls.
- Microwave on medium for 15–20 seconds per roll.
They’ll be soft, fluffy, and just like fresh-baked!
Common Mistakes to Avoid
Making rolls isn’t rocket science, but a few missteps can sabotage your batch. Let’s avoid that.
1. Not Letting the Dough Rise Enough
If your dough doesn’t double in size, your rolls will be dense. Be patient—let the yeast do its job.
2. Using Cold Ingredients
Cold milk or eggs can shock the yeast and prevent a good rise. Always use room-temperature ingredients.
3. Over-Flouring the Dough
Too much flour makes the rolls dry. The dough should be soft and slightly sticky, not stiff.
4. Skipping the Butter Brush
That glossy, buttery top? It’s not just for looks—it adds flavor. Don’t forget to brush on that melted butter after baking.
Customization Ideas
Once you master the classic Hawaiian dinner roll recipe, it’s time to have some fun. Think of this dough as your blank canvas—you can easily tweak it to suit your taste or the occasion.
Sweet Variations:
- Honey Butter Rolls: Add 1–2 tablespoons of honey to the dough mixture and brush the baked rolls with a mixture of melted butter and honey for extra sweetness.
- Coconut Rolls: Mix in shredded coconut and a splash of coconut milk to give your rolls an island-style twist.
- Pineapple Chunks: Add small bits of finely chopped pineapple to the dough for bursts of fruity sweetness in every bite.
Savory Variations:
- Garlic Herb Rolls: Add a teaspoon of dried Italian herbs or minced fresh rosemary to the dough, and brush the tops with garlic butter before and after baking.
- Cheesy Rolls: Fold in shredded cheddar or mozzarella before shaping the rolls. You can also sprinkle cheese on top before baking for a melty crust.
- Jalapeño & Cheddar: Want a kick? Dice a jalapeño and mix it in with shredded cheese—perfect for a spicy dinner side.
Experiment with flavors that match your meals. You can even make half the batch sweet and the other half savory if you’re feeling adventurous!
Gluten-Free or Vegan Alternatives
Whether you’re gluten-sensitive or plant-based, you can still enjoy the fluffy goodness of Hawaiian rolls with a few smart substitutions.
For Gluten-Free Hawaiian Rolls:
- Use a high-quality gluten-free all-purpose flour blend that contains xanthan gum.
- Add an extra egg or a tablespoon of psyllium husk to help bind the dough since gluten-free flours lack elasticity.
- Expect a stickier dough—use oiled hands when shaping.
For Vegan Hawaiian Rolls:
- Milk: Use plant-based alternatives like almond milk or oat milk (unsweetened).
- Butter: Swap for vegan butter or coconut oil.
- Eggs: Replace each egg with ¼ cup unsweetened applesauce, chia eggs, or store-bought egg replacers.
The result? Still soft, fluffy, and bursting with flavor—minus the allergens.
Nutrition Facts (Per Roll – Approximate)
Here’s a quick breakdown of what you’re getting in each delicious bite:
| Nutrient | Amount |
|---|---|
| Calories | 180 kcal |
| Total Fat | 6g |
| Saturated Fat | 3.5g |
| Carbohydrates | 28g |
| Sugar | 5g |
| Protein | 4g |
| Fiber | 1g |
| Sodium | 140mg |
Note: Values may vary based on ingredient substitutions or portion sizes.
Even with their slightly sweet profile, these rolls are lighter than many other baked goods. You can enjoy one—or three—without guilt!
Why Homemade Is Better Than Store-Bought
Sure, those shiny packs of store-bought Hawaiian rolls are convenient. But once you make them yourself, there’s no going back.
Here’s Why:
- Flavor Explosion: Homemade rolls have richer flavor from real butter, eggs, and pineapple juice. No artificial preservatives needed.
- Customization: You control the sweetness, texture, and size. Want mini rolls? Make mini rolls.
- Freshness: No plastic packaging or long shelf life. Just warm, pillowy bread fresh from your oven.
- Cost-Effective: A single batch makes 15 rolls at a fraction of the store price. Better ingredients, lower cost? Win-win.
The process is simple, fun, and the reward is unmatched. Nothing beats the pride of pulling a tray of golden, fluffy rolls from your own oven.
FAQs about Hawaiian Dinner Rolls Recipe
1. Can I use instant yeast instead of active dry yeast?
Yes! Instant yeast works great. Just skip the proofing step—add it directly with the dry ingredients. Your dough may rise slightly faster, so keep an eye on it.
2. Why is pineapple juice used in Hawaiian rolls?
Pineapple juice adds a subtle sweetness and acidity that enhances the flavor and helps tenderize the dough. It’s the key to that signature “Hawaiian” taste.
3. Can I make the dough ahead of time?
Absolutely. After the first rise, cover the shaped rolls and refrigerate overnight. Let them come to room temp and rise for 30–45 minutes before baking.
4. What’s the best flour to use?
All-purpose flour works great, but for extra softness, you can mix half all-purpose with bread flour. Just avoid using only bread flour—it can make the rolls too chewy.
5. Can I make these rolls without a stand mixer?
Totally. While a stand mixer saves time, kneading by hand works just as well. It’s actually a great way to connect with your dough and perfect your baking skills.
Conclusion
Hawaiian dinner rolls aren’t just bread—they’re a mood. Soft, sweet, and buttery, they elevate any meal and make your table feel special. Whether you’re serving them at a holiday dinner, a summer BBQ, or a casual weeknight feast, they always steal the spotlight.
From mixing and kneading to shaping and baking, this step-by-step guide has walked you through everything you need to bake bakery-worthy rolls right in your kitchen. And once you master the basic recipe, the customization possibilities are endless—think garlic herb, cheesy, or even coconut-pineapple rolls.
So what are you waiting for? Grab your flour, fire up that oven, and let’s bake the fluffiest Hawaiian rolls ever.