Fish and Chip Recipe: There’s something magical about a plate of fish and chips—golden, crispy, flaky fish nestled beside thick, fluffy-on-the-inside chips. It’s one of those dishes that brings comfort with every bite. Whether you’re reliving a trip to the UK or just craving a cozy dinner, this homemade fish and chip recipe is your go-to guide.
What makes fish and chips so irresistible? Maybe it’s the crunch of the batter, or the way the chips soak up just the right amount of salt and vinegar. Whatever it is, the good news is—you don’t need to head to your local takeaway shop to enjoy it. With a few simple ingredients and this detailed guide, you can recreate this classic right in your own kitchen.
Grab your apron, heat up your oil, and let’s dive into this iconic meal that never goes out of style.
History of Fish and Chips
Fish and chips have humble beginnings, but they’ve made a massive impact on the culinary world—especially in the UK. The dish first appeared in Britain in the mid-1800s, with fried fish introduced by Jewish immigrants and chips already being a popular food among the working class. When the two came together, it was culinary magic.
By the late 19th century, fish and chip shops—or “chippies”—started popping up everywhere. These affordable, filling meals became a staple, especially during the Industrial Revolution when workers needed a quick, hearty lunch.
Interestingly, during both World Wars, fish and chips were one of the few foods not rationed, cementing their status as a national treasure. Today, you’ll find this dish in pubs, at seaside towns, and in upscale restaurants, often with a modern twist—but the classic version still reigns supreme.
Why Homemade Fish and Chips are Better
Let’s be honest: there’s something satisfying about walking into a chippy and walking out with a paper-wrapped parcel of hot fish and chips. But nothing beats the freshness and control you get from making them at home.
Here’s why homemade is better:
- Freshness: You control the quality of ingredients—no mystery oil or day-old fish.
- Customizable: Want gluten-free? Less salt? A different type of fish? You got it.
- Healthier: Use clean oil, adjust frying time, or even bake for a lighter version.
- Cost-effective: Feed the whole family without burning a hole in your wallet.
Plus, it’s just plain fun to fry up golden, bubbling fish in your own kitchen. Trust me, once you nail it, your family will be requesting it on repeat.
Ingredients You’ll Need
Getting your ingredients right is half the battle. Here’s everything you’ll need for this ultimate fish and chips recipe:
For the Fish:
- 4 white fish fillets (cod or haddock recommended)
- Salt and pepper (to season)
- 1 cup all-purpose flour (for dusting and batter)
- 1 tsp baking powder
- 1 cup cold sparkling water or beer (for batter)
- Optional: pinch of paprika or garlic powder for seasoning
For the Chips:
- 4 large russet potatoes (peeled and cut into thick fries)
- Cold water (for soaking)
- Salt (for seasoning)
- Oil for frying (vegetable, sunflower, or peanut oil)
Optional Sides and Condiments:
- Malt vinegar
- Tartar sauce
- Lemon wedges
- Mushy peas or garden peas
With these ingredients ready, you’re set up for success. Make sure your oil is fresh and your ingredients are cold—especially the batter. Now, let’s get into the real action: cooking.
Best Types of Fish for Fish and Chips
Not all fish are created equal when it comes to this dish. You want something firm, flaky, and mild in flavor. Here’s a breakdown of your best options:
Top Choices:
- Cod: The gold standard. Flaky, moist, and mild.
- Haddock: Slightly sweeter and firmer than cod. Preferred by many in the UK.
- Pollock: A more affordable alternative that still gets the job done.
- Tilapia or Basa: Not traditional but suitable if you’re on a budget.
Fresh vs. Frozen:
Fresh is always best, but frozen can work in a pinch—just make sure it’s fully thawed and dried. Wet fish will ruin your batter and make it soggy.
Choose skinless, boneless fillets, and pat them dry before you even think about dipping them in batter.
Choosing the Right Potatoes
Good chips start with good spuds. You need a potato that can get crispy on the outside while staying fluffy inside.
Best Varieties:
- Russet (Idaho) potatoes: High in starch, low in moisture. Perfect combo for crispiness.
- Maris Piper (UK): The classic British choice. If you can find them, use them!
Preparation Tips:
- Peel and cut them thick: About ½ to ¾ inch thick for that classic “chippy” look.
- Soak in cold water: At least 30 minutes to remove starch, which helps them fry up golden and crispy.
- Dry them thoroughly: Water and hot oil don’t mix. Use a clean towel or paper towels to pat them dry before frying.
Now, your chips are ready to take the plunge into hot oil.
Equipment You’ll Need
Before diving into hot oil and sizzling batter, make sure you’re fully equipped. Having the right tools on hand not only makes the process smoother but also safer.
Kitchen Tools Checklist:
- Deep fryer or large, heavy-bottomed pot: A deep fryer is ideal, but a Dutch oven or heavy pot works well too.
- Cooking thermometer: Crucial for keeping your oil at the right temperature (aim for 350°F / 175°C).
- Slotted spoon or frying basket: Helps you lift your fish and chips out safely.
- Tongs: For handling hot food without burning yourself.
- Paper towels or wire rack: For draining excess oil post-fry.
- Mixing bowls: One for the batter, one for flouring the fish, and one for soaking potatoes.
- Whisk: For combining the batter until smooth.
Safety Tips:
- Never overcrowd your frying pot—it drops the temperature and causes sogginess.
- Keep a lid or baking tray nearby in case of oil flare-ups.
- Always dry your ingredients well to prevent oil splatter.
With everything set up, you’re ready to create some deep-fried perfection!
Step-by-Step Guide to Making Perfect Chips
Chips, or fries depending on where you’re from, are more than just a side dish—they’re half of the magic. Getting them right is key to the ultimate fish and chips experience.
Step 1: Soak the Potatoes
After peeling and cutting your potatoes into thick slices, soak them in cold water for at least 30 minutes. This pulls out the excess starch, helping them fry up crispier. You can even soak them for a few hours or overnight in the fridge for best results.
Step 2: First Fry (Blanching)
- Heat your oil to 300°F (150°C).
- Fry the chips in small batches for about 4–5 minutes until they are soft but not colored.
- Remove and drain on paper towels or a wire rack.
This step cooks the inside of the chip, giving it that fluffy interior.
Step 3: Second Fry (Crisping)
- Turn the oil up to 375°F (190°C).
- Fry the blanched chips again, in batches, for 2–3 minutes or until golden brown and crispy.
- Drain well and season with salt immediately.
Bonus Tips:
- Always fry in batches—crowding the fryer will steam the chips instead of crisping them.
- If you like extra crispy chips, leave them in a bit longer on the second fry.
- Want them healthier? You can bake them, but be warned—they’ll lack that authentic deep-fried texture.
Once your chips are golden, it’s time to move on to the star of the show: the fish.
Step-by-Step Guide to Preparing the Fish
Fish needs some TLC before you batter it. The key is in the prep. If you skip this step, you risk soggy batter or under-seasoned fillets.
Step 1: Pat Dry
Use paper towels to thoroughly pat each fillet dry. Moisture is your enemy when frying—especially with batter involved.
Step 2: Season the Fish
Sprinkle both sides of the fillets generously with:
- Salt
- Pepper
- Optional: a light dusting of paprika, lemon pepper, or garlic powder for a flavor twist.
Step 3: Dust with Flour
Lightly coat each fillet in all-purpose flour before dipping it into the batter. This step helps the batter adhere better and gives the fish a crispier finish.
Make sure not to skip it—it’s one of the key secrets for that pub-style crunch!
Making the Perfect Batter
Now, let’s make the star of the show—the crispy, golden batter. When done right, it puffs up around the fish like a crunchy shell and locks in all the juicy flavor.
Ingredients for the Batter:
- 1 cup all-purpose flour
- 1 tsp baking powder
- 1 cup cold sparkling water or beer (lager is ideal)
- Optional: pinch of salt and pepper, paprika, or garlic powder for extra flavor
Batter-Making Tips:
- Keep it cold! Cold batter meets hot oil = ultimate crunch.
- Don’t over-mix. A few lumps are okay. Over-mixing can make the batter dense.
- Use it immediately. The carbonation starts to fade fast, so make the batter just before frying.
Pro Tip: Beer vs. Sparkling Water
Beer gives the batter a richer flavor and darker color, while sparkling water keeps it light and airy. Choose based on your taste preference.
Now that your batter is ready and your fish is prepped, let’s get frying!
Frying the Fish
This is the moment you’ve been waiting for. Time to create that beautiful, golden coating that shatters with every bite.
Step-by-Step Frying:
- Heat the oil to 350–375°F (175–190°C).
- Dip each floured fish fillet into the cold batter, letting the excess drip off.
- Gently place the fish in the hot oil, one at a time. Don’t overcrowd the pan.
- Fry for 6–8 minutes, turning once, until the batter is golden and the fish flakes easily with a fork.
- Remove with a slotted spoon and drain on paper towels or a wire rack.
How to Know It’s Done:
- The batter should be golden and crisp.
- The fish should flake easily and be opaque in the middle.
- If using a thermometer, the internal temp should hit 145°F (63°C).
You’ve just created pub-worthy fried fish at home. Let’s finish strong with how to serve it right.
Draining and Serving
Once your fish and chips are out of the oil, don’t let them sit in a greasy pile. The way you drain and serve them matters!
Draining Tips:
- Use a wire rack set over a baking sheet to let excess oil drip off.
- Paper towels work too, but racks prevent the food from steaming underneath.
- Salt the chips and fish immediately while hot for the best flavor absorption.
Serving Suggestions:
- Serve immediately! Freshly fried fish and chips are best enjoyed hot and crisp.
- Use newspaper for a traditional look (wrap it over a food-safe liner).
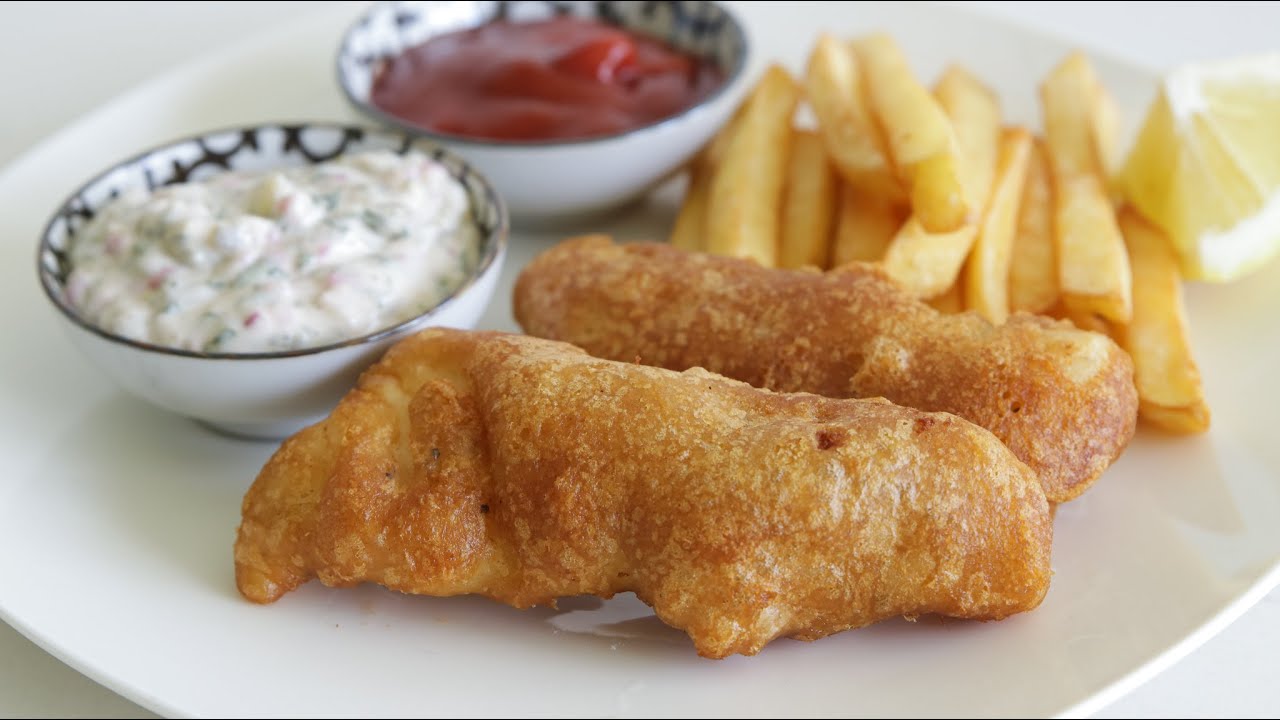
- Add a lemon wedge, a dollop of tartar sauce, or a splash of malt vinegar.
Now that your meal looks and smells irresistible, let’s talk about the extras.
Classic Sides and Toppings
What’s fish and chips without the extras? A good side dish or condiment takes your meal from great to unforgettable. Let’s break down the classic accompaniments and some fun twists to elevate your plate.
Must-Have Condiments:
- Malt Vinegar: Sharp, tangy, and a staple in the UK. Splash a bit on your chips or fish just before eating.
- Tartar Sauce: Creamy and tangy, made from mayo, pickles, capers, and herbs. You can make your own or buy a quality jar.
- Lemon Wedges: A squeeze of lemon over the hot fish brightens up the flavors and adds a zesty punch.
Traditional Sides:
- Mushy Peas: A UK favorite! These are made by simmering marrowfat peas until soft, then mashing them with butter, salt, and a little mint. They’re sweet, salty, and go beautifully with salty fish.
- Pickled Onions: Tangy and crunchy, they balance the richness of fried foods.
- Curry Sauce: Another chippy staple, this slightly spicy, thick sauce is often poured over chips or used for dipping.
Modern Variations:
- Coleslaw: Adds crunch and a cool, creamy element to contrast the hot, crispy fish.
- Garlic Aioli: A gourmet dip that adds richness with a garlicky twist.
- Sweet Potato Fries: A fun variation if you want a little sweetness.
Pair your dish with a cold beer, cider, or lemonade, and you’ve got a meal worthy of any seaside town.
Fish and Chips Around the World
Fish and chips may be British at heart, but this beloved combo has made its way across the globe—and each place has added its own twist.
United Kingdom:
- The original. Often served with malt vinegar, mushy peas, and wrapped in newspaper.
- Cod or haddock is the fish of choice.
Australia & New Zealand:
- Often uses shark (flake) or snapper.
- Commonly served with tartar sauce and lemon.
- Sometimes includes deep-fried pineapple rings or potato scallops.
United States:
- Popular in seafood shacks and Irish pubs.
- Served with coleslaw, ketchup, and fries (thinner than British chips).
- Cod and haddock still popular, but catfish or tilapia may be used.
South Africa:
- Known for generous portions and served with slap chips (soft, vinegar-soaked fries).
- Often includes peri-peri seasoning for spice.
Japan (Fusion):
- You might find tempura-style fish and chips, combining British influence with Japanese frying techniques.
No matter where you go, the appeal of crispy fish and hot fried potatoes remains universal. It’s a dish that connects cultures through comfort food.
Storage and Reheating Tips
Made too much? No worries. Leftover fish and chips can be saved—if you store and reheat them the right way.
How to Store:
- Cool first: Let everything come to room temperature before storing.
- Wrap separately: Wrap fish and chips in paper towels or parchment, then place them in an airtight container.
- Refrigerate: Store in the fridge for up to 2 days.
How to Reheat:
- Fish: Preheat your oven to 375°F (190°C). Place the fish on a wire rack over a baking sheet. Bake for 10–15 minutes until heated through and crispy.
- Chips: Reheat in a hot oven or air fryer to bring back crispness. Avoid microwaving—unless you like soggy fries (which I hope you don’t!).
Freezing Tips:
- Cooked fish can be frozen, but chips usually don’t freeze well.
- Wrap the fish in foil and plastic wrap, then freeze for up to a month. Reheat from frozen in a 400°F (200°C) oven for best results.
With a little care, you can stretch your delicious meal to the next day.
Common Mistakes to Avoid
Even the best cooks can mess up a fish and chip night. Here’s how to avoid the most common pitfalls:
1. Wet Fish = Soggy Batter
Always pat your fish dry. Excess moisture ruins your batter’s crispiness.
2. Batter Too Thick or Thin
If your batter is too thick, it’ll be doughy and heavy. Too thin, and it won’t coat properly. Aim for pancake batter consistency.
3. Frying at the Wrong Temperature
Too cold = greasy, soggy food. Too hot = burnt outside, raw inside.
- Ideal range: 350–375°F (175–190°C).
4. Overcrowding the Fryer
Crowding drops the oil temperature and leads to uneven cooking. Fry in small batches for best results.
5. Not Seasoning Immediately
Salt sticks best when the food is hot and oily. Don’t wait!
Master these points, and you’re halfway to becoming a fish and chip pro.
Gluten-Free and Healthier Alternatives
Craving fish and chips but following a special diet? You can absolutely still enjoy this classic meal with a few tweaks.
Gluten-Free Batter Options:
- Rice flour or chickpea flour (besan) are great alternatives to wheat flour.
- Use gluten-free beer or sparkling water in the batter.
- Cornstarch or potato starch can be added for extra crunch.
Baked or Air-Fried Chips:
- Baked Chips: Toss cut potatoes in oil and bake at 425°F (220°C) until golden, flipping halfway through.
- Air-Fryer Chips: Crisp up beautifully with little oil and less mess.
Alternative Fish:
- Opt for wild-caught fish or sustainable choices to make it environmentally friendly.
Healthier Dips:
- Use Greek yogurt instead of mayo in tartar sauce.
- Make avocado mash or hummus as alternative dips.
You can enjoy this meal guilt-free with these simple swaps, and it still hits the spot!
FAQs about Fish and Chip Recipe
1. Can I make fish and chips without a deep fryer?
Absolutely! A heavy pot like a Dutch oven works great. Just monitor the oil temperature with a thermometer to keep it steady.
2. What’s the best oil for frying fish and chips?
Use oils with high smoke points like vegetable, canola, sunflower, or peanut oil. They give a clean taste and help achieve that perfect golden color.
3. Can I use frozen fish for this recipe?
Yes, but make sure it’s fully thawed and patted dry. Excess moisture from frozen fish can ruin the batter.
4. How do I keep my fish and chips warm while cooking in batches?
Place cooked fish and chips on a wire rack in a low oven (200°F/90°C) to keep them warm and crisp until ready to serve.
5. Can I reuse the frying oil?
Yes, but strain it after cooling and store it in a sealed container. Reuse it only 2–3 times, and avoid mixing with different food flavors.
Conclusion
So, there you have it—a complete, step-by-step guide to making the ultimate homemade fish and chips. Whether you’re reliving your favorite seaside vacation, creating a cozy family dinner, or just satisfying a comfort food craving, this recipe brings the taste of the UK right to your kitchen.
By using fresh ingredients, mastering a light and crispy batter, and frying everything to golden perfection, you’ll elevate your cooking game and impress your guests—or just treat yourself.
Don’t forget to serve it hot, season generously, and pair it with your favorite sides. And most importantly—enjoy every crunchy, flaky, delicious bite.


