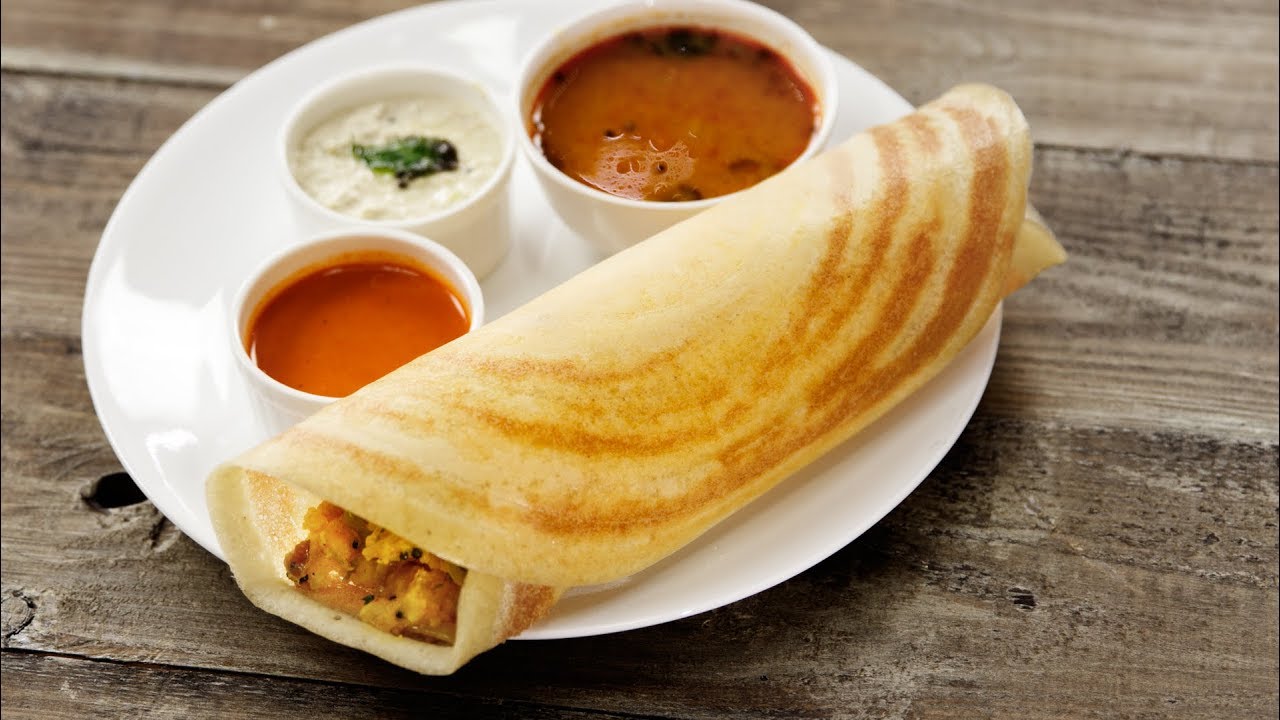
Dosa Dosa Recipe: Dosa is more than just a South Indian delicacy—it’s a lifestyle for many. If you’ve ever been to an Indian restaurant or a South Indian household, chances are high that you’ve been offered a crispy, golden brown, paper-thin dosa rolled or folded like a blanket, often stuffed with spicy potato filling or served plain with chutneys and sambar. But wait—what’s “Dosa Dosa”? It’s not a typo; it’s a fun way to emphasize the magic of this double-delight recipe. Some food lovers call it “Dosa Dosa” when they’re referring to back-to-back dosas made hot off the tawa—served sizzling, one after another. It’s how dosa is often eaten: not just one, but two, three, or more in a row!
Dosa is believed to have originated from Tamil Nadu or Karnataka (the debate still rages on!), but now it has fans all over India and across the globe. Light, crispy, and naturally fermented, dosa is a dream breakfast item that also doubles as a lunch or dinner. Whether you enjoy it with a fiery chutney or a cooling coconut dip, the combo of a well-made dosa with sides is unforgettable.
The beauty of dosa lies in its simplicity and the science of fermentation. Made primarily with just rice and lentils, dosa offers a perfect blend of carbs and protein—making it healthy, filling, and tasty all at once. Let’s break it down step by step.
Health Benefits of Dosa
You might think dosa is just delicious, but guess what—it’s incredibly good for you too. The fermentation process used in dosa batter does wonders for your gut. That tangy flavor? It’s the result of natural fermentation, which increases the bioavailability of nutrients and introduces beneficial probiotics into your system.
Here are some surprising health benefits of eating dosa:
- Rich in Carbohydrates and Protein: The combination of urad dal (split black gram) and rice offers a balanced nutritional profile.
- Low in Fat: Dosa uses minimal oil, especially when cooked on a non-stick or cast iron pan.
- Naturally Gluten-Free: It’s an excellent option for those who are gluten-sensitive.
- Great for Digestion: The fermentation process makes dosa batter easier to digest.
- High in Iron: Especially if cooked on a traditional iron tawa.
And because it’s so versatile, you can sneak in veggies, greens, even millets into the batter to make it even healthier. Dosa can be adapted for weight loss diets, diabetic-friendly meals, or high-protein vegetarian plans.
Types of Dosa
One dosa recipe? Try dozens. From plain to stuffed, crispy to soft, here are the popular varieties:
Plain Dosa
Just the batter, spread thin, crisped to perfection. Served with chutneys and sambar.
Masala Dosa
The OG favorite! Filled with a mildly spiced potato-onion mash.
Rava Dosa
Made from semolina, not fermented. Quick to prepare, lacy and crunchy.
Cheese/Paneer Dosa
Loaded with grated cheese or spiced paneer—loved by kids and fusion food fans.
Mysore Dosa
Spicy red chutney is spread inside before adding the masala. Zingy and flavorful.
Each type has its unique appeal, and once you master the base dosa batter, the variations are endless.
List of Ingredients You’ll Need
Here’s what you need to make the perfect dosa at home. This list is for traditional dosa batter.
Main Ingredients:
- Rice – 2 cups (preferably parboiled rice or dosa rice)
- Urad dal (split black gram) – 1/2 cup
- Fenugreek seeds (methi) – 1 tsp (aids in fermentation)
- Water – as needed for soaking and grinding
- Salt – to taste
- Oil or ghee – for cooking the dosa
Optional Add-ons:
- Chana dal – 1 tbsp (adds crunch and flavor)
- Flattened rice (poha) – 2 tbsp (helps soften dosa and improve fermentation)
- Cooked rice – 2 tbsp (optional, used in some homes to soften dosa)
Substitutes and Variations:
- Brown rice can be used for a healthier version.
- Moong dal or masoor dal for a protein boost.
- For instant dosa, you can use rava (semolina) instead of soaking and fermenting.
Essential Kitchen Tools
If you’ve ever struggled with getting that perfectly thin and golden dosa, your tools might be to blame. Making dosa isn’t just about the batter—your equipment plays a HUGE role in the outcome. Here’s what you need to make restaurant-style dosa at home:
Non-Stick vs. Cast Iron Tawa:
- Non-Stick Tawa: Great for beginners. Requires very little oil and prevents sticking. But it doesn’t give that authentic crispy texture like cast iron.
- Cast Iron Tawa: The traditional way. It gives your dosa that rustic crispiness. It needs seasoning and some practice, but the flavor payoff is worth it.
Wet Grinder vs. Blender:
- Wet Grinder: If you’re serious about making dosa regularly, invest in a wet grinder. It produces smooth batter with the perfect consistency and texture.
- Blender: Works for small batches. Make sure to grind in small portions and use cold water to avoid heating the batter.
Other Useful Tools:
- Flat spatula – to spread and flip dosa.
- Oil brush or spoon – to apply oil/ghee evenly on the tawa.
- Ladle (rounded spoon) – to pour and spread the batter evenly.
Pro Tip: Always clean the tawa after every dosa using a damp cloth or onion slice dipped in oil. It keeps your tawa cool and prevents sticking.
Preparation Time & Serving Info
Making dosa is a bit of a time investment, especially because of the soaking and fermenting stages. But once the batter is ready, cooking dosas is a breeze.
| Process | Time |
|---|---|
| Soaking Ingredients | 6 hours |
| Grinding Batter | 30-40 minutes |
| Fermentation | 8–12 hours (overnight) |
| Cooking Each Dosa | 2–3 minutes |
- Total Time (Prep + Fermenting + Cooking): Approx. 16–18 hours
- Serving Size: This recipe makes about 12–15 medium dosas
- Best Time to Serve: Breakfast, lunch, or light dinner
Keep in mind: The actual dosa-making process (on the pan) is super quick. So, make extra batter and refrigerate it for the week.
Step-by-Step Guide to Make Dosa
Let’s dive into the real deal. Here’s how to make dosa from scratch, step-by-step.
Step 1: Soaking the Ingredients
Start by rinsing 1 cup of rice and ¼ cup of urad dal (black gram) separately. Soak the rice in one bowl and the dal in another for at least 4–6 hours. Add 1 tablespoon of fenugreek seeds to the dal bowl for extra softness and better fermentation. Soaking allows the grains to soften, which helps create a smooth and airy batter later.
Step 2: Grinding the Batter
Drain the soaked dal and blend it into a smooth, fluffy paste using a little water. Do the same with the rice, but keep its texture slightly coarse. Combine both mixtures in a large bowl, add salt, and mix well. The consistency should be similar to pancake batter—pourable but not watery.
Step 3: Fermenting the Batter
Cover the bowl and let it ferment overnight or for 8–12 hours. The batter will rise and turn airy with tiny bubbles, giving dosa its signature flavor and crispiness.
Step 4: Preparing the Tawa
Heat a non-stick or cast-iron tawa. Sprinkle a few drops of water; if it sizzles, it’s ready. Lightly grease the surface with oil.
Step 5: Spreading the Dosa
Pour a ladle of batter onto the center and spread it outward in a circular motion to form a thin layer.
Step 6: Cooking and Flipping
Drizzle oil around the edges. Cook until golden and crisp. Flip only if making a softer dosa.
Step 7: Serving Suggestions
Serve hot with coconut chutney, sambar, tomato chutney, or potato masala. For variety, pair with peanut chutney, mint chutney, or ghee podi. Enjoy it crispy or soft depending on your preference!
How to Make Perfect Crispy Dosa
Crispy dosa isn’t a myth—it’s all about the right techniques.
Tips for Crispy Dosa:
- Use parboiled rice or a mix of rice varieties.
- Add a little chana dal or poha to your batter to enhance texture.
- Ferment well – the batter should be airy.
- Don’t use too much water – thin batter = lacy dosa, but too thin = it won’t hold.
- Use a well-seasoned cast iron tawa.
- Tawa should be hot but not smoking – high heat will burn the dosa before it cooks through.
- Apply oil/ghee generously for restaurant-style texture.
Common Mistakes:
- Tawa too cold/hot
- Batter too runny or too thick
- Not fermenting properly
Masala Filling for Dosa (Optional)
Want to turn your dosa into a masala dosa? Add this delicious potato filling!
Ingredients:
- 3 medium potatoes (boiled and mashed)
- 1 onion, thinly sliced
- 1 green chili, chopped
- ½ tsp mustard seeds
- 1 tsp chana dal
- Curry leaves
- ½ tsp turmeric
- Salt to taste
- 1 tbsp oil
- Fresh coriander
Steps:
- Heat oil in a pan.
- Add mustard seeds, chana dal, curry leaves.
- Add onions and green chili; sauté till soft.
- Add turmeric and mashed potatoes.
- Mix well, season with salt.
- Garnish with coriander.
Spoon the masala inside your dosa before folding for that classic restaurant-style bite.
Chutneys and Sambar to Serve With Dosa
A dosa without chutney is like a sandwich without filling—it just feels incomplete. These side dishes not only enhance the taste of dosa but also bring balance to your meal with tangy, spicy, and savory notes.
Coconut Chutney
This is the classic companion to dosa. It’s creamy, cool, and perfectly balances the warm, crispy dosa.
Ingredients:
- 1 cup grated fresh coconut
- 2 tbsp roasted chana dal
- 1 green chili
- Small piece of ginger
- Salt to taste
- Water (as needed)
Tempering:
- Mustard seeds, curry leaves, dried red chili, a pinch of hing
How to Make:
- Blend all ingredients until smooth.
- Temper with hot oil and spices, pour over the chutney.
Tomato Chutney
If you like it spicy and tangy, tomato chutney is the one for you.
Ingredients:
- 2 ripe tomatoes
- 1 onion
- 2 garlic cloves
- 2 dried red chilies
- Salt, oil
Sauté everything until soft and blend. Temper with mustard seeds and curry leaves for extra flavor.
Sambar
A warm, spicy lentil stew with vegetables that makes dosa more filling.
Basic Ingredients:
- Toor dal (pigeon peas)
- Tamarind extract
- Sambar powder
- Assorted vegetables (carrot, drumstick, brinjal)
- Curry leaves, mustard seeds
Sambar is a bit of effort, but it transforms dosa into a full meal. Make it in bulk—it’s freezer-friendly!
Storing and Reusing Dosa Batter
Don’t want to make fresh batter every time? You don’t have to. Dosa batter stores beautifully when done right.
Refrigeration:
- Store in an airtight container.
- Keeps well for 4–5 days.
- Stir the batter before each use. It may thicken slightly, so add a splash of water if needed.
Freezing Tips:
- Store batter in freezer-safe containers.
- Divide into smaller portions for easy use.
- Thaw in the fridge overnight before using.
Pro Tip: Add a little salt only after fermenting. Salt can slow down fermentation if added before.
Want quick dosa during busy mornings? Store some pre-made batter, and you’ll have hot dosas in under 10 minutes.
Dosa for Kids – Healthier Variations
If you’re making dosa for kids, why not sneak in some extra nutrition?
Healthy Add-Ins:
- Grated carrots or beets
- Finely chopped spinach or methi
- Paneer or cheese for protein
Why It Works:
- Kids love the crispy texture.
- It’s finger food—no mess, no fuss.
- Add natural flavors to avoid processed stuff.
Use ghee instead of oil for younger kids. It enhances flavor and adds healthy fats.
Common Mistakes and How to Fix Them
Even seasoned cooks mess up a dosa once in a while. If your dosas are turning out too thick, too soft, or just sticking to the pan—don’t worry. Let’s troubleshoot:
Mistake 1: Batter Doesn’t Ferment
Fix:
- Use warm water to grind.
- Mix with your hands before fermenting.
- Keep it in a warm place. Try oven with light on or a closed microwave.
Mistake 2: Dosa Sticks to the Pan
Fix:
- Make sure the tawa is properly seasoned.
- Clean with onion or wet cloth between dosas.
- Heat the pan properly before pouring batter.
Mistake 3: Dosas Not Crispy
Fix:
- Add poha or chana dal for crispiness.
- Don’t make batter too runny.
- Use cast iron tawa and cook on medium-high heat.
FAQs about Dosa Dosa Recipe
1. Can I make dosa without fermenting the batter?
Yes, but you won’t get the same texture or taste. You can try instant rava dosa, which needs no fermentation.
2. How long does dosa batter last in the fridge?
Typically 4–5 days. Always check for smell and texture before using.
3. Can I use basmati rice for dosa?
Basmati is not ideal. Use parboiled rice or dosa rice for better texture and fermentation.
4. What’s the best oil for dosa?
Refined oil works fine, but for more flavor and health, use sesame oil or ghee.
5. Can I freeze cooked dosas?
It’s better to freeze the batter. Cooked dosas don’t reheat well—they lose crispiness and can become rubbery.
Conclusion
Dosa Dosa isn’t just a recipe—it’s a tradition, a weekend ritual, and a breakfast that brings joy across Indian homes. The joy of hearing that sizzle when batter hits the hot tawa, the aroma of ghee, and the crunch as you take your first bite—it’s pure magic. While the process might seem a bit involved, once you make it a couple of times, it becomes second nature.
Whether you’re serving it up plain, with spicy potato masala, or loading it with cheese and paneer for your little ones, dosa adapts to every taste and occasion. With some patience and love, your home kitchen can turn into your favorite dosa corner. So roll up your sleeves, soak that rice, and get ready for crispy, golden perfection.


