Dog Cupcake Recipe: Making homemade dog cupcakes is one of the sweetest things you can do for your furry friend. Whether you’re celebrating a birthday, a “gotcha day,” or simply want to treat your pup for being the best dog ever, these cupcakes are tail-waggingly delicious—and safe too!
Why bother making your own when there are countless treats on the shelves? Because you control the ingredients. No preservatives, no weird chemicals, and most importantly—no unsafe sweeteners like xylitol. In this guide, I’ll walk you through a simple but foolproof dog cupcake recipe, ingredient by ingredient, step by step.
You don’t need to be a pro baker. If you can mix batter and preheat an oven, you’re more than ready to get baking. Ready to see your dog light up with joy? Let’s get started!
Ingredients You’ll Need
Making dog cupcakes doesn’t require anything fancy. In fact, most of the ingredients are pantry staples—just make sure everything you use is safe for your pup. Here’s a list to guide you:
Essential Ingredients for the Cupcake Base
These make up the main body of your dog cupcakes:
- 1 cup whole wheat flour or oat flour – These are dog-friendly and easier on sensitive tummies than all-purpose flour.
- 1 tsp baking powder – Optional, helps give your cupcakes a little lift.
- 1/4 cup peanut butter – Make sure it’s xylitol-free. Look for natural, unsweetened peanut butter.
- 1/2 cup pumpkin puree – High in fiber and great for digestion. Can substitute with mashed ripe banana.
- 1 egg – For binding and added protein.
- 1/4 cup water or low-sodium chicken broth – Helps smooth the batter.
Frosting Ingredients (Dog-Safe)
Forget sugary buttercream—your pup will love this healthier topping.
- 1/2 cup Greek yogurt – Thick, creamy, and packed with probiotics.
- 2 tbsp peanut butter or pumpkin – To add flavor and texture.
- Optional toppings:
- Small dog biscuits
- Finely shredded carrots
- Crushed freeze-dried liver treats
Want to switch it up? You can also add grated apples (no seeds), blueberries, or even a sprinkle of cinnamon to the batter. Just avoid anything toxic like chocolate, raisins, or nutmeg.
Tools and Equipment
Before you start mixing, let’s gather everything you’ll need to keep things smooth and mess-free.
- Mixing bowls (one for wet, one for dry ingredients)
- Measuring cups and spoons
- Cupcake pan
- Cupcake liners (optional but helpful for easy cleanup)
- Whisk or electric mixer
- Spatula for scooping and folding
- Toothpick (to test doneness)
Using silicone cupcake molds? Great! They’re reusable and non-stick, which makes cleanup even easier.
Step-by-Step Guide to Make Dog Cupcakes
Now the fun part: baking! Follow this easy walkthrough to make a batch of dog-friendly cupcakes your pup will beg for.
Step 1: Preheat Your Oven
Begin by preheating your oven to 350°F (175°C). Line a muffin tin with cupcake liners or lightly grease each cup. Preparing your pan early ensures the batter can go straight into the oven right after mixing.
Step 2: Mix the Wet Ingredients
In a large bowl, whisk together dog-safe ingredients such as unsweetened applesauce, mashed banana, peanut butter (xylitol-free), eggs, and a splash of water. Mix until smooth and well combined. These ingredients add natural sweetness and moisture.
Step 3: Combine Dry Ingredients Separately
In another bowl, stir together whole wheat flour, baking powder, and a pinch of cinnamon. Keeping dry ingredients separate helps distribute the leavening evenly.
Step 4: Fold Wet and Dry Together
Pour the dry mixture into the wet mixture. Gently fold everything together using a spatula. Avoid overmixing—this keeps the cupcakes soft and fluffy for your pup.
Step 5: Pour Batter Into Cupcake Liners
Spoon the batter into each cupcake liner, filling them about two-thirds full. This gives the cupcakes room to rise without spilling over.
Step 6: Bake and Cool Completely
Place the tin in the oven and bake for 18–22 minutes, or until a toothpick inserted into the center comes out clean. Let the cupcakes cool in the pan for a few minutes before transferring them to a wire rack. Make sure they’re fully cooled before frosting—this is important for safe serving.
Step 7: Make the Dog-Friendly Frosting
Mix together plain Greek yogurt and peanut butter to create a creamy, dog-safe frosting. You can adjust the thickness by adding more yogurt or peanut butter.
Step 8: Decorate and Serve
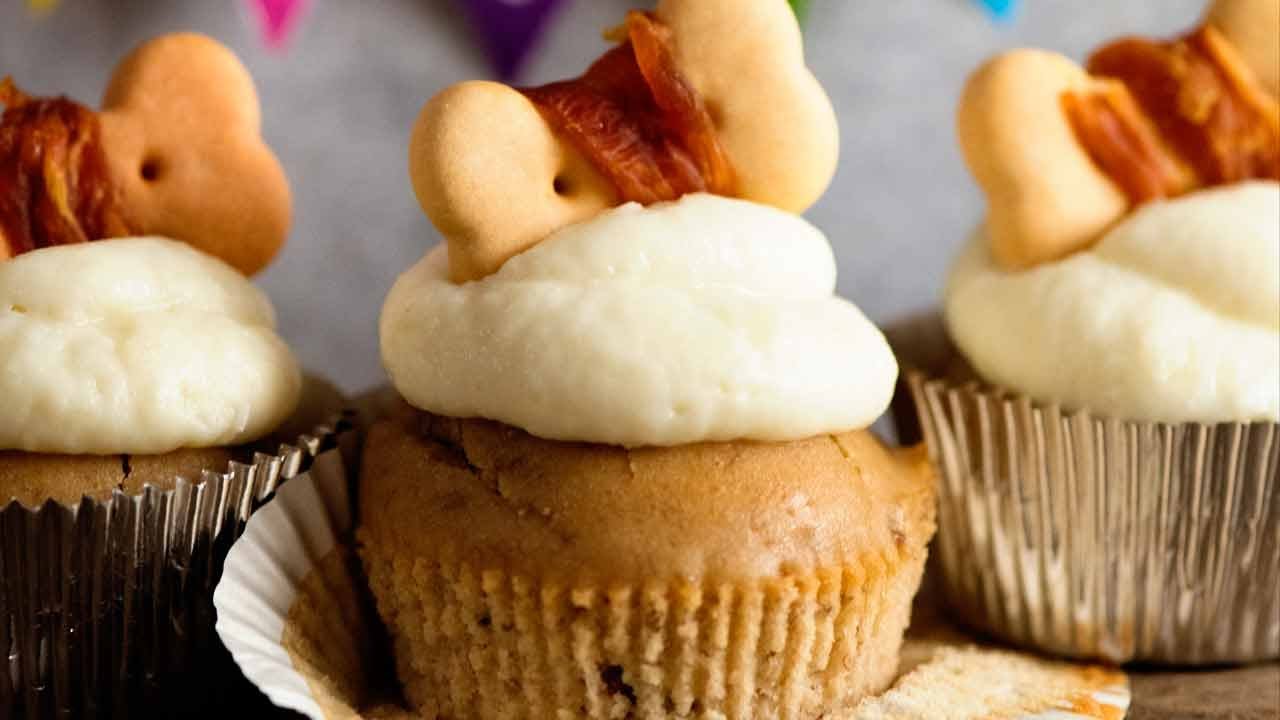
Pipe or spread the frosting onto the cooled cupcakes. Add dog treats, banana slices, or small apple pieces on top for decoration. Serve immediately and watch your pup enjoy their special treat!
Storage Tips for Dog Cupcakes
So you made a batch—awesome! But what do you do with leftovers? These dog cupcakes store really well if you do it right.
In the Fridge
Place the cupcakes (frosted or unfrosted) in an airtight container and store them in the refrigerator for up to 5–7 days. They stay fresh, moist, and ready for snack time.
In the Freezer
Want to save some for later? Freeze them!
- Unfrosted cupcakes freeze best. Wrap them individually in plastic wrap and place them in a zip-top freezer bag.
- Frozen cupcakes will last up to 2 months.
- When ready to serve, thaw one cupcake overnight in the fridge or microwave it for 10–15 seconds (no frosting).
For frosted cupcakes, flash freeze them uncovered first, then store in a container. Be gentle—the frosting can get messy if not handled with care.
Custom Cupcake Variations
Looking to change things up? Try one of these tasty dog-approved twists on the classic recipe:
Carrot & Apple Cupcakes
- Replace pumpkin with 1/2 cup grated carrot and 1/4 cup finely chopped apple.
- Add a sprinkle of cinnamon.
- Your pup will love the natural sweetness.
Chicken & Sweet Potato Cupcakes
- Use mashed sweet potato instead of pumpkin.
- Stir in shredded cooked chicken.
- Top with a tiny piece of jerky—perfect for meat lovers.
Grain-Free Version
- Replace flour with coconut flour or chickpea flour.
- Add an extra egg to maintain structure (grain-free flours absorb more liquid).
Every dog is different, so experiment and find their favorite!
Nutritional Considerations
Just like humans, dogs need balanced treats. Here’s why this recipe works so well nutritionally:
Healthy Ingredients
- Pumpkin/Banana: High in fiber, helps digestion.
- Peanut Butter: Protein-rich, but always use unsweetened and xylitol-free.
- Whole Wheat or Oat Flour: More fiber than all-purpose.
- Eggs: Provide protein and help hold everything together.
What to Avoid
- Artificial sweeteners (especially xylitol – highly toxic to dogs!)
- Excess salt
- Chocolate, raisins, or grapes
- Dairy-heavy ingredients
Serving Sizes
- Small dogs: 1/2 cupcake
- Medium dogs: 1 cupcake
- Large dogs: 1–2 cupcakes max
Remember—treats should only make up 10% of your dog’s daily calories. So go easy on the extras.
Common Mistakes to Avoid
Even though this recipe is easy, a few common slip-ups can ruin your pup’s snack. Watch out for these:
1. Using Sweetened or Xylitol-Containing Peanut Butter
Xylitol is deadly for dogs—even in tiny amounts. Always read the label and stick to plain, natural peanut butter.
2. Overbaking or Undercooking
Always check with a toothpick. If it comes out clean, they’re done. If it’s sticky, give it a few more minutes.
3. Using the Wrong Frosting
Avoid sugary frostings, whipped cream, and cream cheese if your dog is lactose intolerant. Stick to yogurt, pumpkin, or coconut-based options.
4. Adding Unsafe “Human” Toppings
Sprinkles, chocolate chips, or icing may look cute but can be harmful. Keep it all dog-safe.
Tips to Make Cupcake Time Fun for Your Pup
Dog cupcakes aren’t just treats—they’re memories waiting to happen.
- Use them as training rewards (just cut them into pieces).
- Celebrate your dog’s birthday with a decorated cupcake and a party hat.
- Include your kids in baking—they’ll love mixing and decorating.
- Host a dog party at the park or backyard and hand out cupcakes to canine guests.
Don’t forget the camera! That “cupcake face” is one you’ll want to remember forever.
Signs Your Dog Loves It!
You’ll know your pup is a fan when they:
- Lick the frosting off first
- Wag their tail while devouring it
- Look at you with those “more please” eyes
- Guard the treat like it’s treasure
Just make sure they don’t gobble it too fast or eat too many at once. Even healthy treats should be given in moderation.
Dog Cupcakes vs. Store-Bought Treats
You might be wondering—why not just buy a dog cupcake from the store?
Homemade Wins Because:
| Feature | Homemade Cupcakes | Store-Bought Treats |
|---|---|---|
| Ingredients | All-natural, dog-safe | Often contain preservatives |
| Freshness | Freshly baked | Shelf-stable, less fresh |
| Customization | Fully customizable | One-size-fits-all |
| Cost per serving | Cheaper in bulk | More expensive per treat |
| Safety | You control everything | Hidden ingredients possible |
Your dog deserves the best—and with homemade cupcakes, that’s exactly what they’re getting.
Is It Safe to Feed Dogs Cupcakes Often?
This question comes up a lot: “Can I give my dog cupcakes regularly?” While your pup may beg for these tasty treats every day, moderation is key—even with the healthiest recipes.
How Often is Okay?
Dog cupcakes are treats, not everyday meals. Think of them like cookies for humans—delicious, fun, but best in moderation.
Here’s a general guideline:
- Small dogs (under 20 lbs) – 1 mini cupcake or half a standard one, once or twice a week
- Medium dogs (20–50 lbs) – 1 standard cupcake up to 2–3 times a week
- Large dogs (50+ lbs) – Up to 2 cupcakes per serving, but still only a couple times weekly
Keep in mind, calories from treats should never exceed 10% of your dog’s daily intake. If you’re already giving other snacks, adjust accordingly.
Balance is Everything
Dog cupcakes, even the healthy ones, are still treats. They should complement your dog’s diet, not replace real meals. If you’re concerned about your dog’s weight, diabetes, or allergies, consult your vet before adding new recipes.
Also, watch for signs of overindulgence:
- Soft or runny stool
- Lethargy
- Gas or bloating
- Excessive thirst
These could signal your dog is having trouble digesting a certain ingredient—or just had too many treats.
Fun Occasions for Dog Cupcakes
You don’t need a reason to spoil your pup—but here are some of the best occasions to whip up a batch of dog cupcakes:
1. Dog Birthdays
Yes, pup parties are a real thing! Throw a celebration with decorations, party hats, and a cupcake topped with a mini bone.
2. Gotcha Days
Celebrate the anniversary of the day you brought your furry friend home. It’s like a birthday, but even more special.
3. Holidays
Make festive versions of your dog cupcakes for:
- Christmas – Add pumpkin and cinnamon
- Thanksgiving – Mix in some sweet potato and turkey
- Halloween – Use carrot “pumpkin” toppers
4. Puppy Playdates
Hosting friends and their dogs? Cupcakes make the perfect party favors.
5. Training Milestones
Did your dog finally master “stay”? Celebrate with a cupcake instead of a regular treat.
Life is better with dogs—and even better with cupcakes.
Dog Cupcake Recipe Printable Card
Here’s a quick summary of the full recipe so you can print, save, or screenshot it for later.
Homemade Dog Cupcakes (Peanut Butter & Pumpkin)
Ingredients:
- 1 cup whole wheat or oat flour
- 1 tsp baking powder (optional)
- 1/4 cup peanut butter (unsweetened)
- 1/2 cup pumpkin puree or mashed banana
- 1 egg
- 1/4 cup water or low-sodium broth
Frosting:
- 1/2 cup Greek yogurt
- 2 tbsp peanut butter or pumpkin
- Dog-safe toppings (optional)
Instructions:
- Preheat oven to 350°F (175°C) and line cupcake pan.
- Mix wet ingredients in one bowl.
- Combine dry ingredients in another bowl.
- Fold dry mix into the wet mix until just combined.
- Scoop into cupcake liners 3/4 full.
- Bake 20–25 minutes or until a toothpick comes out clean.
- Cool completely before frosting.
- Mix frosting ingredients and decorate as desired.
Yields: 6–8 standard cupcakes
Store: 5–7 days in fridge, up to 2 months in freezer
FAQs about Dog Cupcake Recipe
1. Can I use almond flour instead of whole wheat?
Yes, but use it carefully. Almond flour is denser and higher in fat. Start with less, and keep the batch small to see how your dog reacts.
2. How long can I store these dog cupcakes?
Store them in an airtight container in the fridge for up to 7 days. For longer storage, freeze them (unfrosted) for up to 2 months.
3. Is it safe to add honey?
Yes, a small amount of raw honey is safe for most dogs. However, avoid it for puppies under 1 year old or dogs with diabetes.
4. Can I make this recipe vegan?
Absolutely. Replace the egg with a flaxseed egg (1 tbsp flax + 3 tbsp water) and use coconut yogurt for frosting.
5. What’s the best frosting substitute if my dog can’t have yogurt?
Try pureed pumpkin, mashed sweet potato, or whipped coconut cream. All are dog-safe and make great frosting alternatives.
Conclusion
Making dog cupcakes from scratch is more than just baking—it’s a labor of love. You’re giving your pup something made with care, packed with wholesome ingredients, and completely free from harmful stuff you often find in store-bought treats. Whether it’s for a special occasion or a random Tuesday, your dog will appreciate the effort (even if they inhale it in one bite!).
With this detailed step-by-step guide, you now have everything you need to whip up a batch of delicious, healthy, tail-wagging cupcakes your pup will adore. So, preheat that oven, grab your mixing bowls, and let the baking (and tail wagging) begin!


