Ding Dong Cake Recipe: If you’ve ever craved a rich, chocolatey dessert that feels like it came straight from your childhood lunchbox—but better—this Ding Dong Cake is about to become your new favorite.
Inspired by the classic Hostess Ding Dongs, this layered chocolate cake with a fluffy cream filling and glossy ganache is the ultimate treat.
Whether you’re baking it for a birthday, potluck, or just because your sweet tooth demands it, this recipe will walk you through the whole process, step-by-step.
What is a Ding Dong Cake?
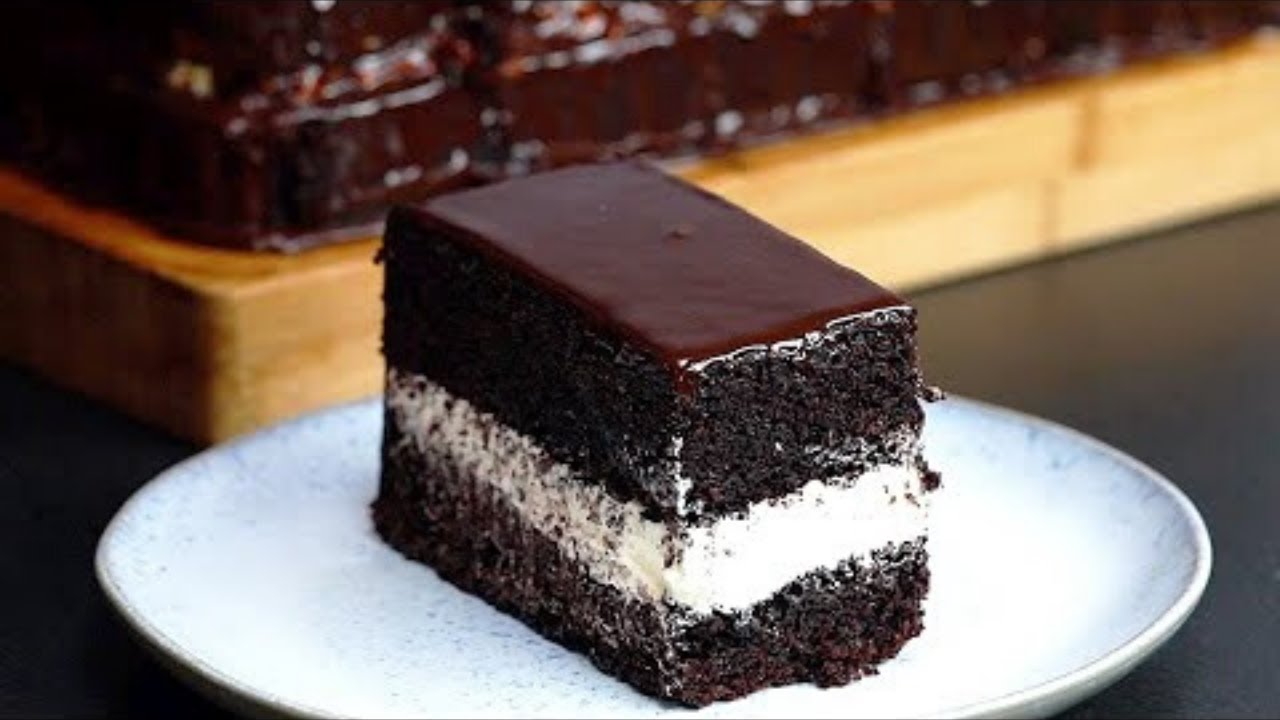
A Ding Dong Cake is a homemade, gourmet version of the iconic snack cake. It’s essentially a rich, moist chocolate cake, sandwiched with a thick layer of fluffy vanilla cream filling, and coated in a silky chocolate ganache. Imagine a cake-sized version of a Hostess Ding Dong—but 10 times more indulgent, made with real ingredients, and bursting with flavor in every bite.
Unlike cupcakes or boxed mixes, this cake is made from scratch, giving you control over the texture, sweetness, and richness. It’s perfect for chocoholics and nostalgia lovers alike. Every forkful delivers that satisfying combo of moist chocolate and creamy filling that melts in your mouth.
Why You’ll Love This Recipe
There are plenty of reasons to fall in love with this cake, but here are a few that stand out:
- Decadent Flavor: Rich chocolate cake, real vanilla cream, and luscious ganache.
- Great for Celebrations: This cake looks impressive and tastes like heaven, making it perfect for parties and events.
- Nostalgia Factor: It brings back memories of childhood treats—with a grown-up twist.
- Make-Ahead Friendly: You can prepare it in stages, which makes your life easier.
- Customizable: Add flavorings, swap fillings, or decorate to match any occasion.
You don’t need to be a professional baker to pull it off either. With the step-by-step instructions below, you’ll feel confident from start to finish.
Ingredients You’ll Need
Let’s break this down into three parts: the cake, the filling, and the ganache. Use high-quality ingredients for the best results.
For the Chocolate Cake:
- 2 cups granulated sugar
- 1 ¾ cups all-purpose flour
- ¾ cup unsweetened cocoa powder
- 1 ½ tsp baking powder
- 1 ½ tsp baking soda
- 1 tsp salt
- 2 large eggs
- 1 cup whole milk
- ½ cup vegetable oil
- 2 tsp pure vanilla extract
- 1 cup boiling water (yes—boiling!)
For the Cream Filling:
- ½ cup (1 stick) unsalted butter, softened
- ½ cup vegetable shortening
- 1 cup granulated sugar
- 3 tbsp all-purpose flour
- ½ cup whole milk
- 1 tsp vanilla extract
- Pinch of salt
For the Chocolate Ganache:
- 1 cup heavy cream
- 8 oz semi-sweet or dark chocolate, chopped
- 1 tbsp butter (optional, for shine)
Essential Equipment
Before we begin, make sure you have the following tools:
- Two 9-inch round cake pans
- Electric mixer or stand mixer
- Mixing bowls
- Saucepan
- Rubber spatula
- Cake leveler or serrated knife
- Cooling racks
- Offset spatula (for smooth ganache)
How to Make Ding Dong Cake – Step-by-Step Instructions
This might look long, but don’t worry—each step is easy and totally worth the effort.
Step 1: Prepare Your Pans and Preheat Oven
Grease and flour two 9-inch round cake pans or line them with parchment paper. Preheat your oven to 350°F (175°C). This step ensures your cakes don’t stick and come out clean, which is crucial for layering.
Step 2: Make the Chocolate Cake Batter
In a large bowl, sift together the flour, cocoa powder, sugar, baking powder, baking soda, and salt. In another bowl, whisk together the eggs, milk, oil, and vanilla extract until smooth. Gradually add the wet ingredients into the dry mix, and stir until fully combined.
Finally, add the boiling water slowly, stirring constantly. The batter will be thin—don’t panic, that’s how it should be. The hot water intensifies the cocoa flavor and makes the cake moist.
Step 3: Bake the Cake Layers
Pour the batter evenly into the two prepared pans. Tap them gently on the counter to remove any air bubbles. Bake for 30-35 minutes, or until a toothpick inserted into the center comes out clean.
Once baked, let the cakes cool in the pans for about 10 minutes, then transfer to wire racks to cool completely. Don’t skip this! Warm cake is too fragile to slice or frost.
Step 4: Cool and Level the Cake Layers
After your cakes are fully cooled, use a serrated knife or cake leveler to trim off the domed tops. You want flat, even layers for stacking. Don’t throw away the scraps—snack on them or use them for cake pops later!
Step 5: Make the Cream Filling
In a medium saucepan over medium heat, combine the milk and flour. Stir continuously until thick like pudding (about 5-7 minutes). Remove from heat and let it cool to room temperature.
In a mixing bowl, beat the butter and shortening until fluffy. Add sugar, vanilla, and a pinch of salt. Once the milk mixture is cool, beat it into the sugar mixture until it’s light and fluffy. This is your creamy, dreamy filling!
Step 6: Fill the Cake with Cream
Place one cake layer on your serving plate. Spread a generous amount of cream filling over the top—don’t go all the way to the edges. Top with the second cake layer and gently press down. Smooth any excess filling around the sides.
If you want that dramatic “ding dong” look, pile the cream a little higher in the center so it peeks out when sliced.
Step 7: Prepare the Chocolate Ganache
Heat the cream in a saucepan until it just starts to simmer—don’t boil. Pour it over the chopped chocolate and let it sit for 1-2 minutes. Stir until smooth and glossy. Add a bit of butter for shine if desired.
Let it cool for 10 minutes so it thickens slightly before pouring.
Step 8: Ganache the Cake
Place your cake on a wire rack with a tray underneath (to catch drips). Pour the ganache over the center of the cake and use an offset spatula to gently push it toward the edges, letting it drip down naturally.
Let the ganache set at room temperature or pop the cake into the fridge for a glossy finish.
Step 9: Chill and Set the Cake
For best results, refrigerate the cake for at least 1 hour before serving. This helps the layers firm up and makes slicing cleaner. But remember to bring it to room temp before eating—chocolate always tastes better that way.
Tips for Perfect Ding Dong Cake
Making a Ding Dong Cake from scratch can feel like a big task, but these tried-and-true tips will ensure your cake turns out bakery-quality every single time.
- Use Room Temperature Ingredients: This helps everything blend better—especially the eggs, milk, and butter. Cold ingredients can cause the batter to curdle or bake unevenly.
- Don’t Skip the Boiling Water: It may sound odd, but the boiling water in the chocolate cake batter makes a HUGE difference. It “blooms” the cocoa powder and results in a super moist, deep chocolate flavor.
- Cool Everything Thoroughly: You don’t want the cream filling to melt or the ganache to slide off. Let the cakes cool completely before filling and frosting.
- Level Your Layers: An uneven cake can shift or collapse. Use a serrated knife or cake leveler to get a flat surface.
- Let Ganache Cool Before Pouring: Hot ganache is too runny. Let it cool slightly so it’s thick but still pourable for that dreamy, slow drip.
- Chill for Easy Slicing: Refrigerating the cake helps the layers set, making it easier to cut clean slices—especially if you’re serving this for guests.
These small details make all the difference between a good cake and a truly unforgettable one.
Variations and Customizations
Want to get a little creative? This Ding Dong Cake is incredibly versatile, and you can easily make it your own.
- Peanut Butter Ding Dong Cake: Add a swirl of peanut butter to the cream filling or a layer of peanut butter between the cake and filling. It’s like a chocolate peanut butter cup in cake form.
- Mint Chocolate Version: Add ½ teaspoon peppermint extract to the ganache and filling for a holiday twist.
- Gluten-Free Option: Substitute the flour for a high-quality gluten-free baking blend. Just make sure your cocoa powder is gluten-free too.
- Coffee Kick: Add a shot of espresso or 1 teaspoon instant coffee to the boiling water. It intensifies the chocolate flavor without making the cake taste like coffee.
- Mini Ding Dong Cakes: Use cupcake tins to create personal-sized treats. Just slice and fill each one like a tiny layer cake.
Have fun with it! The base recipe is so solid, it can handle just about any twist you throw at it.
Serving Suggestions
This cake is rich—seriously rich—so you might want to keep the sides simple. But if you’re feeling fancy, here are some great ways to serve it up:
- With Fresh Berries: Strawberries, raspberries, or even a few pomegranate seeds can balance the chocolatey sweetness.
- A Scoop of Ice Cream: Vanilla, mint chip, or salted caramel pairs beautifully with the deep chocolate flavor.
- Whipped Cream: A dollop on top of each slice adds an extra light texture.
- Espresso or Black Coffee: The bitterness of coffee pairs perfectly with the sweetness of the cake.
- Dusting of Cocoa or Powdered Sugar: For a final touch, a light dusting adds a professional finish.
Don’t forget to warm your knife under hot water and wipe between slices for the cleanest cuts. This cake deserves to look as good as it tastes!
How to Store Ding Dong Cake
This cake stores surprisingly well if you wrap it properly. Here’s how to keep it fresh and delicious for days:
- In the Fridge: Store it in an airtight cake container or cover with plastic wrap. It will last up to 5 days in the refrigerator.
- Room Temperature: If your kitchen is cool, you can leave it out for up to 24 hours, but the cream filling means refrigeration is safer.
- In the Freezer: Yes, it freezes beautifully! Wrap individual slices or the whole cake in plastic wrap and then aluminum foil. Freeze for up to 2 months. Thaw overnight in the fridge before serving.
Pro tip: Wrap slices separately so you can pull one out when those chocolate cravings hit!
Make-Ahead Instructions
Planning ahead? Great idea! This cake works well when prepared in stages.
- Bake the Cake Layers: Bake, cool, and wrap tightly in plastic. Store at room temperature for 1 day or freeze up to 2 weeks.
- Make the Filling Ahead: Store in the fridge up to 3 days in an airtight container. Whip it briefly before using.
- Assemble Ahead of Time: You can assemble and ganache the cake, then refrigerate overnight. Just bring it to room temperature before serving for best texture and flavor.
This kind of prep helps cut down on stress—especially if you’re serving this for a party or event.
Troubleshooting Common Issues
Baking a layered cake can come with hiccups, but don’t worry—we’ve got solutions for the most common problems.
| Issue | What Went Wrong | Fix It Like This |
|---|---|---|
| Cake too dry | Overbaked or wrong flour | Reduce bake time or use cake flour |
| Ganache too runny | Poured while too hot | Let it cool longer before pouring |
| Filling too runny | Didn’t cool milk/flour mix | Let it chill completely and beat longer |
| Cake layers slid | Filling too high or soft | Chill filling first, use less between layers |
| Cake cracked | Oven too hot or overmixed | Lower oven temp and mix gently |
These quick fixes will help you troubleshoot and improve your bake the next time around.
Nutritional Information (Approximate)
Let’s be real—this cake isn’t health food. But hey, we all deserve a treat! Here’s a general idea of the nutritional breakdown per slice (assuming 12 slices):
- Calories: 550
- Fat: 32g
- Carbohydrates: 62g
- Sugar: 44g
- Protein: 5g
- Fiber: 3g
These values can vary based on the exact ingredients you use. Want to lighten it up? Swap out the shortening in the filling or use a lower-fat milk.
FAQs about Ding Dong Cake Recipe
1. Can I make Ding Dong Cake without shortening?
Yes, you can use all butter in the cream filling, but it may be softer and less stable. Shortening helps it hold shape better.
2. Can I use a boxed cake mix?
Absolutely. If you’re short on time, use your favorite chocolate cake mix for the base. Just make the filling and ganache from scratch for that homemade flavor.
3. How long does Ding Dong Cake last?
Up to 5 days in the fridge, or 2 months in the freezer if wrapped well.
4. What’s the best chocolate for ganache?
Use high-quality semi-sweet or dark chocolate bars—not chocolate chips, which contain stabilizers.
5. Can I make it gluten-free or dairy-free?
Yes! Use gluten-free flour blends and swap dairy for almond or oat milk, and vegan butter for a dairy-free version.
Final Thoughts
Making a Ding Dong Cake from scratch might take a little more time than tearing open a snack cake wrapper—but the payoff? Oh, it’s worth it. This cake is rich, creamy, chocolatey, nostalgic, and completely drool-worthy. It’s the perfect dessert for celebrations or anytime you want to treat yourself (and impress everyone around you).
Whether you follow the recipe to a T or add your own creative twist, one thing’s for sure: you’re going to want to save a second slice for later—because this cake disappears fast.


