Chicken Curry Recipe: Craving a soul-satisfying dish that’s bursting with flavor, warmth, and a little spice? Chicken curry is the answer. It’s one of those dishes that instantly brings comfort, whether you’re enjoying it on a lazy weekend afternoon or serving it up for dinner with loved ones. The best part? You don’t need to be a culinary expert to make it from scratch.
In this step-by-step guide, you’ll learn exactly how to make a rich, aromatic chicken curry at home that rivals your favorite takeout—but without the added oils and preservatives. We’re going to walk through each step slowly, from prepping your ingredients to layering in spices and simmering everything to perfection.
Whether you’re new to cooking or someone looking to upgrade their curry game, this guide will make sure your chicken curry turns out delicious, every single time.
List of Ingredients You’ll Need
Before we jump into the cooking, let’s get organized. Having all your ingredients ready makes the entire process smooth and enjoyable.
Main Ingredients
Here’s what you’ll need for the star of the dish:
- Chicken: Bone-in pieces like thighs and drumsticks work best for flavor. If you prefer boneless, go for chicken breast or boneless thighs.
- Onions: Two large onions, finely chopped.
- Garlic: 4–5 cloves, minced or crushed.
- Ginger: About 1 tablespoon, freshly grated.
- Tomatoes or Yogurt: Either 2 medium ripe tomatoes (pureed or finely chopped) or ½ cup plain yogurt. Tomatoes give it a tangy touch, while yogurt adds creaminess.
Spices & Seasonings
Spices are the soul of a great chicken curry. Here’s what you’ll need:
- Curry Powder or Masala Mix: 1 tablespoon (or make your own with the spices below).
- Turmeric Powder: 1 teaspoon.
- Cumin Powder: 1 teaspoon.
- Coriander Powder: 2 teaspoons.
- Red Chili Powder: ½ to 1 teaspoon (adjust based on heat preference).
- Salt: To taste.
- Black Pepper: Optional, for extra heat.
- Garam Masala: ½ teaspoon (added at the end for aroma).
Liquids
- Water: About 1 to 1½ cups for the curry base.
- Chicken Stock: Optional for deeper flavor.
- Coconut Milk (Optional): Use if you want a creamy South Indian-style curry.
Optional Add-ins
Want to customize your curry? Try adding:
- Potatoes: Cut into small cubes.
- Green Peas or Bell Peppers
- Curry Leaves: If available, for an authentic aroma.
- Fresh Cilantro (Coriander Leaves): For garnish.
Tools You’ll Need
Make sure your kitchen is prepped too:
- Large heavy-bottomed pan or Dutch oven
- Cutting board and sharp knife
- Blender (if making a smooth tomato or onion paste)
- Wooden spoon or spatula
- Measuring spoons
Having everything ready before you start ensures a smooth and stress-free cooking session.
Step-by-Step Guide to Cooking Chicken Curry
Now the fun part begins. Let’s break it down, step by step.
Step 1: Prep the Ingredients
Preparation is half the battle won. Begin by cleaning and cutting your chicken into bite-sized pieces if using boneless. If you’re going with bone-in pieces, make sure they’re evenly sized for uniform cooking.
Marination (Optional but Recommended):
Marinate your chicken for 30 minutes in:
- ½ teaspoon turmeric
- ½ teaspoon chili powder
- Salt
- 1 tablespoon yogurt or lemon juice
This step tenderizes the chicken and infuses it with early flavor.
Chop your onions finely, crush or mince the garlic, and grate the ginger. If using tomatoes, puree them or chop them small.
Pro tip: If you prefer a smoother curry, you can blend the onions after sautéing for a silky texture.
Step 2: Sauté Onions, Garlic & Ginger
Heat 2–3 tablespoons of oil in your pan on medium heat. Add the onions and a pinch of salt (it helps them cook faster). Stir occasionally until they turn golden brown. This usually takes 10–15 minutes.
Next, add your garlic and ginger. Keep sautéing for another 2–3 minutes. Don’t rush this part—the longer you cook them without burning, the more flavorful your base will be.
That rich, savory aroma you’re starting to smell? That’s the flavor base developing.
Step 3: Add Spices and Toast
Once your onions, garlic, and ginger are well-cooked, it’s time to bring in the magic—the spices.
Add the following:
- Turmeric
- Cumin
- Coriander
- Chili powder
- Curry powder or your custom blend
Stir them well into the onion mix and toast the spices for about a minute. You’re not just mixing them—you’re unlocking their aroma and oils. This process is known as “blooming” the spices and it makes all the difference in the final taste.
Be careful not to burn them. If the mixture is too dry, add a tablespoon of water to deglaze the pan.
Step 4: Add Tomatoes or Yogurt
Now, pour in your pureed tomatoes or yogurt and mix well. This is where your curry base really comes alive.
Let it cook for 5–7 minutes until the tomatoes break down and the oil begins to separate from the masala. If using yogurt, stir continuously to avoid curdling. The mixture should thicken and deepen in color.
If you want a smoother sauce, blend this mixture before adding the chicken. Otherwise, keep it rustic.
Step 5: Cook the Chicken
Add your marinated chicken pieces to the pan. Turn up the heat slightly and sear them for 5–7 minutes. This helps lock in the juices and get a bit of browning on the meat.
Stir to coat every piece with the flavorful base. You want the chicken to be fully covered in the masala paste so it absorbs all the spices while cooking.
Keep stirring occasionally so nothing sticks to the pan.
Step 6: Simmer with Liquids
Once the chicken has browned nicely and is coated in that rich masala paste, it’s time to introduce your liquid. Depending on your preferred curry consistency, add 1 to 1½ cups of water or chicken stock. If you’re going for a creamier version, you can replace part of the water with coconut milk.
Bring the mixture to a gentle boil, then immediately reduce the heat to low and cover the pan with a lid. Let it simmer for about 20–25 minutes, or until the chicken is cooked through and tender.
As it simmers, the curry thickens and deepens in flavor. Keep checking every 5–10 minutes. If the curry looks too dry, feel free to add a splash of water. On the other hand, if it’s too watery, cook uncovered for the last 5–7 minutes to reduce and thicken the sauce.
You’ll know it’s done when the oil rises to the top and the chicken is juicy, tender, and packed with flavor.
Step 7: Adjust Seasoning & Add Fresh Herbs
You’re nearly there! This is the final flavor check.
Taste your curry. Need more salt? Want more heat? This is your chance to tweak it before serving. Add a little garam masala for warmth and complexity—it gives the curry a finishing kick that’s irresistible.
Now, throw in a handful of fresh chopped cilantro or curry leaves if you have them. Stir gently, turn off the heat, and let the curry sit covered for 5 minutes to let all the flavors settle in.
And just like that, you’ve made an incredibly flavorful, homemade chicken curry. Time to plate up!
Pro Tips for Making the Best Chicken Curry
Want your chicken curry to go from “good” to “mind-blowing”? Here are a few tricks the pros use:
- Always marinate your chicken: Even 20–30 minutes makes a huge difference in flavor and tenderness.
- Don’t rush the onions: Slow-cooked, golden onions create a deep, sweet base. Rushing this step can make your curry taste raw.
- Toast your spices: Don’t just dump them in—let them bloom in oil to unlock their full aroma.
- Deglaze your pan: Add a splash of water, stock, or coconut milk to lift all the browned bits stuck to the bottom. That’s pure flavor gold.
- Let it rest: Always let your curry sit for a few minutes before serving. It allows everything to meld beautifully.
Serving Suggestions
So now you have your mouthwatering chicken curry ready—what do you serve it with?
With Rice
- Basmati Rice: A fragrant long-grain rice that’s perfect for soaking up the curry.
- Jeera (Cumin) Rice: Lightly spiced and pairs beautifully.
- Steamed White or Brown Rice: A simpler, healthier option.
With Bread
- Naan: Soft, buttery Indian flatbread ideal for scooping up curry.
- Paratha: Flaky and slightly crispy, perfect for a heartier meal.
- Chapati/Roti: Lighter and healthier, great for daily meals.
On the Side
- Raita: A cooling yogurt dip that balances the spice.
- Pickles & Chutney: Add tang and extra flavor layers.
- Salad: A simple cucumber-onion-tomato mix works well.
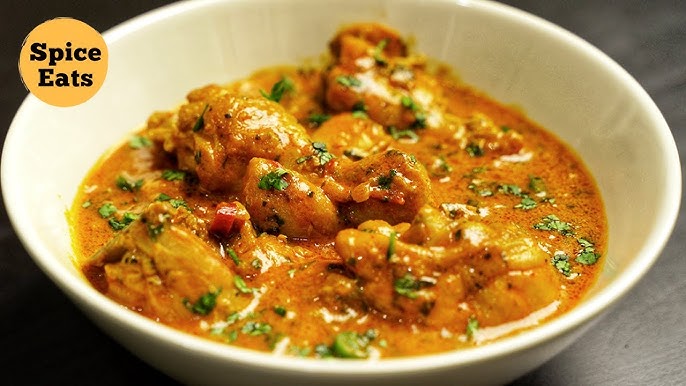
Presentation tip: serve your curry in a deep dish with a swirl of cream or a few fresh cilantro leaves on top for that restaurant-style look.
How to Store and Reheat Leftovers
Made a big batch? No worries—chicken curry stores beautifully.
Refrigeration
- Cool the curry completely before transferring it to an airtight container.
- Store in the fridge for up to 3–4 days.
- Reheat gently on the stove or in the microwave with a splash of water to loosen it up.
Freezing
- Freeze in portion-sized containers.
- Will last up to 2–3 months.
- Thaw overnight in the fridge before reheating.
Reheating Tips
- Heat slowly on low to medium heat so the chicken doesn’t dry out.
- Stir occasionally and add a bit of water or milk if it thickens too much.
Chicken curry often tastes even better the next day as the flavors have more time to mingle. So don’t be afraid to make extra!
Nutritional Breakdown (Approximate Per Serving)
Here’s a rough idea of what one serving of traditional chicken curry (with oil and without cream) contains:
| Nutrient | Amount (approx.) |
|---|---|
| Calories | 350–400 kcal |
| Protein | 28–32 g |
| Carbohydrates | 8–12 g |
| Fat | 20–25 g |
| Fiber | 2–3 g |
Note: These values vary based on ingredients used, especially if you add coconut milk, cream, or ghee.
If you’re watching calories or fat, you can:
- Use less oil
- Choose skinless chicken breast
- Skip cream or coconut milk
- Serve with brown rice or quinoa
Popular Variations of Chicken Curry
Chicken curry is a canvas with endless possibilities. Here are some beloved versions from around the world:
Butter Chicken (Murgh Makhani)
- Creamy, tomato-based, mildly spiced
- Often includes cream and butter
- A restaurant favorite worldwide
Coconut Chicken Curry
- South Indian or Sri Lankan style
- Uses coconut milk for a creamy, tropical twist
- Often includes curry leaves and mustard seeds
Thai Red or Green Chicken Curry
- Uses Thai curry paste and coconut milk
- Sweet, spicy, and fragrant
- Includes bamboo shoots, Thai basil, and fish sauce
South Indian Chicken Curry
- Uses fresh coconut, curry leaves, and whole spices
- Spicier and more aromatic
- Often served with dosa or appam
Try experimenting with these once you master the basic version!
Vegan or Vegetarian Alternatives
Not a fan of meat? Or maybe you’re cooking for someone who’s vegetarian or vegan? Don’t worry—chicken curry may be the classic, but there are plenty of plant-based alternatives that are just as satisfying.
Chickpea Curry (Chana Masala Inspired)
Chickpeas are hearty, protein-packed, and absorb flavors beautifully.
- Use canned or cooked chickpeas.
- Follow the same base method: sauté onions, garlic, ginger, and spices.
- Add tomatoes or coconut milk and simmer with chickpeas until thick and flavorful.
- Add spinach or kale for extra nutrition.
This version is budget-friendly, super healthy, and great for meal prep.
Paneer or Tofu Curry
Paneer (Indian cottage cheese) or tofu can easily stand in for chicken.
- Cut into cubes and lightly fry or grill for texture.
- Add after your curry base is cooked so they don’t fall apart.
- Great with a creamier sauce like tomato-cashew or coconut-based.
Both versions are rich, satisfying, and deliver the same comforting feel as chicken curry—without the meat.
Common Mistakes to Avoid
Even seasoned cooks can slip up with curry. Here’s how to avoid the most common pitfalls:
1. Overcooking the Chicken
Chicken gets rubbery if you cook it too long or too hard.
Fix: Simmer gently, and don’t go over 25–30 minutes.
2. Using Raw Spices Incorrectly
Dumping raw spices into liquid won’t release their flavors.
Fix: Always sauté your spices in oil or fat before adding liquids—this is called “tempering.”
3. Adding Too Much Water
Too much liquid will make the curry soupy and bland.
Fix: Add water slowly. You can always add more, but it’s hard to take it out once it’s in.
4. Skipping the Marination
If you’re using lean meat like chicken breast, marination is non-negotiable for flavor and moisture.
Fix: Even a quick 20-minute yogurt-based marinade does wonders.
5. Not Letting It Rest
The curry needs time to settle after cooking.
Fix: Let it rest with the lid on for 5–10 minutes before serving. It makes a big difference in taste and texture.
FAQs about Chicken Curry Recipe
1. Can I use boneless chicken instead of bone-in?
Absolutely! Boneless chicken breast or thighs cook faster and are easier to eat. However, bone-in pieces typically offer a richer flavor to the curry. If using boneless, reduce simmering time by about 5–7 minutes.
2. What’s the best substitute for garam masala?
If you don’t have garam masala, you can use a mix of cinnamon, cardamom, and cloves. Or just skip it—your curry will still be delicious, especially if you’ve used other spices.
3. How long can I store chicken curry in the fridge?
It stays fresh in the refrigerator for 3 to 4 days. Always store it in an airtight container and reheat only the portion you need to maintain quality.
4. Can I freeze chicken curry?
Yes! Chicken curry freezes well for up to 3 months. Cool it completely before freezing. When ready to eat, thaw overnight in the fridge and reheat gently on the stove or microwave.
5. Is it better to use yogurt or coconut milk in curry?
It depends on your flavor preference:
- Yogurt: Gives a tangy, slightly creamy base. More common in North Indian curries.
- Coconut Milk: Makes the curry creamy and slightly sweet. Used often in South Indian or Thai-style curries.
Try both and see which you like better!
Conclusion
There you have it—a full, foolproof guide to making the ultimate chicken curry at home. From chopping your first onion to tasting that first, rich, spoonful of curry, it’s all about layering flavors, cooking with love, and not being afraid to experiment.
The beauty of chicken curry is its versatility. You can make it spicy or mild, creamy or tomato-based, with or without add-ins like potatoes or peas. It’s a canvas, and once you master the base recipe, you can start creating your own signature versions.
So, what are you waiting for? Get in the kitchen, follow the steps, and enjoy the smell of curry wafting through your home. Trust me—once you make this from scratch, there’s no going back to bland store-bought sauces.
Happy cooking and curry on!


