Crab Apple Jelly Recipe: Nothing screams autumn more than the sweet-tart zing of homemade crab apple jelly. Whether you’re an experienced preserver or just getting started with canning, this step-by-step guide will walk you through making this vibrant, jewel-toned spread right in your own kitchen. If you’ve got crab apples hanging heavy on the tree or piling up in baskets, this is the ultimate way to put them to delicious use.
Introduction to Crab Apple Jelly
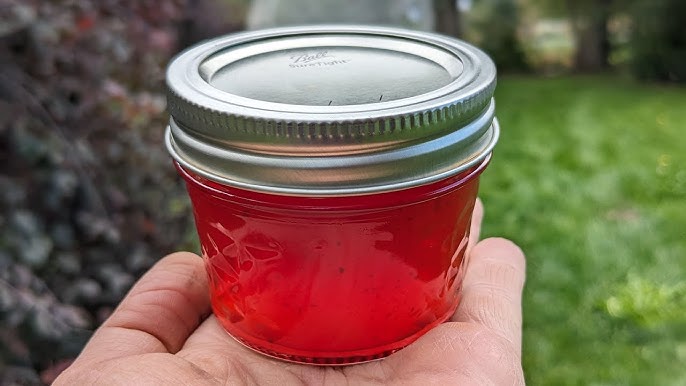
Crab apple jelly isn’t just a nod to traditional homesteading; it’s an elegant preserve that combines nature’s bounty with your kitchen creativity. This jelly has a gorgeous rosy color, a bright flavor, and a perfect balance between tart and sweet. It spreads like a dream on toast, perks up cheese boards, and even adds a gourmet touch to glazes and marinades. The best part? It only takes a few basic ingredients and a bit of time to make a batch that will have your family asking for more.
Why Make Crab Apple Jelly at Home?
You might be wondering: why not just grab a jar off the grocery store shelf? Here’s the deal—store-bought jellies often contain preservatives, artificial pectin, and extra additives. Making your own crab apple jelly at home not only lets you skip all that, but it also gives you complete control over flavor and sweetness. Plus, crab apples are often overlooked in commercial products, so making your own jelly is a unique treat that you just can’t buy.
Homemade jelly has that rustic, hand-crafted charm that elevates even the simplest breakfast or charcuterie board. It also makes a stunning gift during the holidays or any special occasion. If you’ve never tried homemade crab apple jelly, you’re in for something really special.
Health Benefits of Crab Apples
Crab apples may be small, but they pack a nutritious punch. They’re full of vitamin C, antioxidants, and dietary fiber, all of which support immune function, gut health, and overall wellness. Their natural pectin content is especially valuable for jelly-making, as it helps your jelly set without the need for store-bought pectin.
In addition, crab apples have been used in traditional remedies for centuries. They’re believed to aid digestion, reduce inflammation, and even lower cholesterol levels. Making jelly from them means you’re preserving some of those benefits in a sweet, tangy form that’s easy to enjoy.
What Does Crab Apple Jelly Taste Like?
If you’ve never tasted crab apple jelly before, you’re in for a delightful surprise. The flavor is tangy, a little tart, and gently sweet—like a cross between apple and cranberry, but smoother. It has a complexity that makes it more than just a breakfast spread. Think of it as apple jelly with attitude.
It pairs beautifully with everything from warm buttered toast to sharp cheeses and roast meats. That tartness also means it holds its own in savory dishes, making it incredibly versatile in the kitchen.
Best Time to Harvest Crab Apples
Timing is everything when it comes to picking crab apples for jelly. The ideal moment is when the fruit has fully ripened on the tree, usually between late summer and early fall, depending on your region and variety. Look for fruit that’s firm, slightly soft to the touch, and shows rich color—often red, pink, or yellow, sometimes with a hint of blush.
Avoid any crab apples that are brown, shriveled, or insect-damaged. You’re aiming for peak ripeness because that’s when the fruit has the best flavor and pectin content, which is crucial for a good jelly set.
How to Pick the Right Crab Apples
Not all crab apples are created equal when it comes to jelly. Some varieties are sweeter, others more tart. Ideally, you want a mix of both for a well-rounded jelly. Heirloom varieties and wild crab apples are often higher in pectin and flavor, which makes them excellent for preserving.
If you’re foraging, make sure the trees haven’t been sprayed with pesticides and are located away from high-traffic roads to avoid pollution. Taste a few to test sweetness levels before committing to a large harvest.
Tools & Equipment You’ll Need
Here’s a quick list of the tools you’ll need to make your jelly-making session go smoothly:
- Large stock pot
- Fine mesh strainer or jelly bag
- Large bowl (for collecting juice)
- Measuring cups
- Candy thermometer (optional but helpful)
- Large wooden spoon
- Sterilized glass jars with lids
- Funnel
- Ladle
- Tongs or jar lifter
- Cheesecloth or muslin (if using instead of a jelly bag)
These basic tools will help ensure your jelly comes out perfectly clear and safely preserved.
List of Ingredients You’ll Need
You won’t need a ton of ingredients to make crab apple jelly, but the quality of what you use makes all the difference.
Fresh Crab Apples
- About 4 pounds (1.8 kg) of ripe crab apples
- Washed and chopped (no need to peel or core)
Sugar
- 3 to 4 cups (adjust based on how much juice you extract)
- Typically, a 1:1 juice-to-sugar ratio works well
Water
- Enough to just cover the apples while simmering
Optional Add-ins
- Lemon juice (enhances flavor and helps setting)
- Cinnamon stick or cloves (for a spiced jelly twist)
- Fresh ginger (for a zesty undertone)
Make sure everything is fresh, clean, and measured out before you begin. Prepping in advance saves you a lot of stress once things start bubbling on the stove.
Prepping Your Crab Apples
Once you’ve gathered your crab apples, the first step is to wash them thoroughly. Remove any stems, leaves, or blemishes. There’s no need to peel or core the fruit—that’s the beauty of this recipe. The seeds and peels actually help the jelly set, thanks to their high pectin content.
Next, cut the apples into halves or quarters. This increases the surface area and helps them break down faster during cooking, releasing more juice. Don’t worry about making them look pretty—you’re just trying to get to the good stuff inside.
How to Extract Juice from Crab Apples
This is the heart of the crab apple jelly-making process. To get a clear, flavorful jelly, you need to properly extract the juice from your prepared crab apples.
Step 1: Simmer the Fruit
Place the chopped crab apples into a large stock pot and add just enough water to cover the fruit. Don’t overdo it—too much water can dilute the juice. Bring the mixture to a boil over medium heat, then reduce to a simmer. Let it cook for about 30 to 45 minutes, or until the apples are completely soft and falling apart. Stir occasionally to prevent sticking.
Step 2: Let the Juice Drain
Once the fruit has softened, it’s time to extract the juice. Pour the mixture through a jelly bag, cheesecloth, or a fine-mesh strainer into a large bowl or pot. Let it drain for several hours—or overnight—for the clearest juice. Avoid squeezing the bag, even if you’re tempted. Squeezing forces pulp through and will make your jelly cloudy.
Step 3: Measure the Juice
Once drained, measure the juice you’ve collected. You’ll need this measurement to determine how much sugar to use in the next step. Generally, for every 1 cup of juice, you’ll need 1 cup of sugar, though you can adjust to taste.
Step-by-Step Guide to Making Crab Apple Jelly
Now comes the fun part—turning that beautiful juice into rich, shimmering jelly. This process is where the magic (and science) happens.
Cooking the Juice
Pour the crab apple juice into a clean stock pot. If you’re adding lemon juice or spices, this is the time. Bring the juice to a boil over medium-high heat.
Adding the Sugar
Once the juice starts to boil, slowly stir in the measured sugar. Keep stirring until the sugar has completely dissolved. You don’t want any grainy texture in your final jelly.
If you’re using a candy thermometer, aim for the mixture to reach 220°F (104°C)—this is the setting point for jelly.
Boiling to Setting Point
Boil the mixture rapidly. This is called a “rolling boil”—you’ll know it’s right when the bubbles can’t be stirred down. Continue boiling until the jelly reaches the setting point. This could take 10 to 20 minutes, depending on your batch size and juice content.
Skimming the Foam
As your jelly boils, foam may form on the top. Skim it off with a spoon. While this foam is harmless, removing it helps your jelly look clear and professional once jarred.
How to Test for Jelly Set
Worried your jelly might not set? Here’s how to make sure it’s ready before you jar it up.
The Spoon Test
Dip a clean spoon into the boiling mixture. Let it cool slightly, then let the liquid run off. If it forms slow, thick droplets or sheets rather than running like syrup, it’s ready.
The Plate Test
Place a small plate in the freezer while your jelly is cooking. When you think the jelly is ready, drop a spoonful onto the cold plate. Let it sit for a minute, then run your finger through it. If the jelly wrinkles and holds its shape, you’ve hit the sweet spot.
Still not set? Boil for a few more minutes and test again.
How to Sterilize Jars for Jelly Storage
Sterilizing jars is crucial to prevent bacteria and mold. Here’s the simplest way to do it:
Boiling Method
- Place clean jars in a large pot of boiling water.
- Boil for 10 minutes.
- Keep them in hot water until ready to fill.
Oven Method
- Preheat your oven to 225°F (107°C).
- Place jars (not lids) on a baking tray.
- Heat for 20 minutes.
Lids
Simmer the lids in hot (not boiling) water for a few minutes to soften the rubber seal.
Sterilized jars mean your jelly will last longer and stay safe to eat.
Filling and Sealing the Jars
With your jelly still hot and jars sterilized, it’s time to fill them.
Filling the Jars
- Use a funnel and ladle to pour jelly into jars, leaving about 1/4 inch of headspace.
- Wipe the rims with a clean cloth to remove any spills or stickiness.
Sealing the Jars
- Place the lid on each jar and screw on the band until it’s fingertip-tight.
- For longer storage, process the jars in a boiling water bath for 5–10 minutes.
- Remove and let cool. You’ll hear that satisfying “pop” as the lids seal.
Once sealed, your jelly is shelf-stable for up to a year in a cool, dark place.
Storing Your Jelly
Proper storage ensures your hard work lasts. Once cooled, check each lid—if it doesn’t pop or flex when pressed, it’s sealed. Store your sealed jars in a pantry, cupboard, or basement.
Unsealed jars? Pop them in the fridge and eat within a few weeks.
Shelf Life:
- Sealed jars: 12–18 months
- Opened jars: 2–3 weeks (refrigerated)
Label your jars with the date and contents. Trust me, you’ll thank yourself later when you’re trying to remember which batch was which.
Common Mistakes to Avoid
Even pros can mess up a batch. Here’s what to watch out for:
- Cloudy jelly? You probably squeezed the jelly bag.
- Didn’t set? Boiled too little or too much. Always test before jarring.
- Too sweet or too tart? Adjust sugar next time. Taste as you go.
- Mold on top? Jar wasn’t sealed properly or wasn’t sterilized.
- Runny jelly? Don’t panic. Re-boil with added pectin or lemon juice.
Mistakes happen. Keep notes and improve with every batch.
Creative Uses for Crab Apple Jelly
Don’t just spread it on toast—here’s how to get creative:
- Glaze roasted meats (especially pork and chicken)
- Stir into yogurt or oatmeal
- Serve with cheese (sharp cheddar or brie = heaven)
- Add to salad dressings for a sweet-tart twist
- Layer in cakes and pastries
- Mix into cocktails (try a crab apple jelly gin fizz)
This jelly isn’t just a spread—it’s a secret weapon in your kitchen arsenal.
FAQs about Crab Apple Jelly Recipe
1. Can I make crab apple jelly without added pectin?
Yes! Crab apples are naturally high in pectin, so there’s usually no need to add commercial pectin.
2. Why didn’t my jelly set?
You may not have boiled it long enough, or your apples lacked enough natural pectin. Try re-boiling with lemon juice or added pectin.
3. Can I freeze crab apple juice and make jelly later?
Absolutely! Just freeze the strained juice in airtight containers and defrost when ready to make jelly.
4. Is crab apple jelly safe for canning?
Yes. As long as you properly sterilize your jars and use a water bath canning process, it’s shelf-stable.
5. Can I mix crab apples with other fruits?
Definitely. Try blending with pears, plums, or berries for a unique flavor twist.
Conclusion
Making crab apple jelly from scratch might seem like an old-fashioned process, but there’s something incredibly rewarding about transforming wild or homegrown fruit into jars of sweet, ruby-red perfection. With this step-by-step guide, you’ve got all the tools, tips, and techniques to nail it the first time—and every time after.
Whether you’re making it as a gift, a pantry staple, or a weekend project, this jelly is a celebration of simplicity, flavor, and tradition. Grab your apron, gather those crab apples, and let’s get jamming!


