Cookie Monster Cookie Recipe: Who doesn’t love Cookie Monster from Sesame Street? That lovable blue monster is all about cookies, and let’s be honest — so are we. Cookie Monster Cookies are more than just your typical chocolate chip treat; they’re a fun, colorful, and mouth-watering dessert perfect for all ages. Whether you’re baking for your kids, prepping for a birthday bash, or just want something sweet and playful, these cookies are guaranteed to make everyone smile.
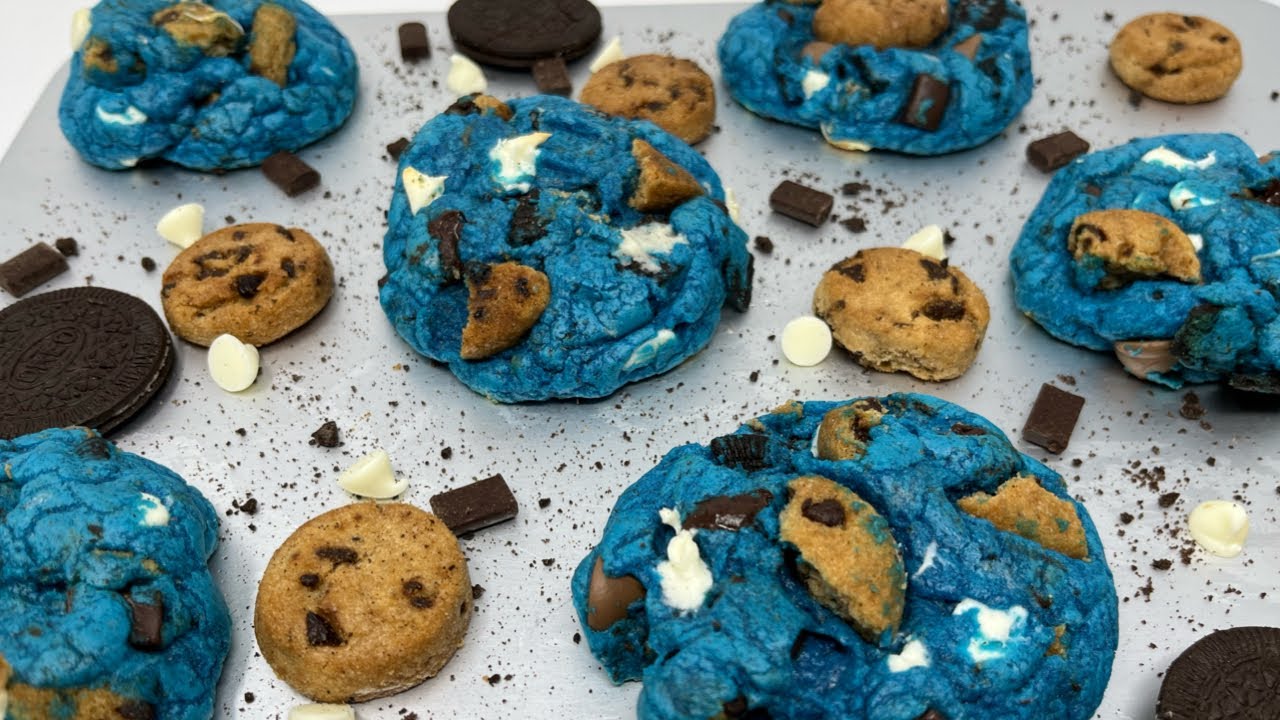
What makes Cookie Monster Cookies stand out? Well, it’s the vibrant blue hue, the generous mix of chocolate chips, Oreo chunks, and sometimes even mini cookies baked right in. They’re thick, chewy, and packed with so much flavor and texture, it’s like a cookie party in every bite.
So, grab your apron and a mixing bowl because we’re diving deep into the ultimate step-by-step Cookie Monster Cookie recipe. You’ll not only learn how to bake these Instagram-worthy treats, but also get all the tips, tricks, and variations to make them uniquely yours.
List of Ingredients You’ll Need
Let’s start by gathering everything you need. The beauty of this recipe lies in its simplicity — but trust us, the flavor is next-level. Here’s what you’ll need for one batch (makes about 18–20 large cookies).
Dry Ingredients:
- 2 ½ cups all-purpose flour
- 1 tsp baking soda
- ½ tsp baking powder
- ½ tsp salt
Wet Ingredients:
- 1 cup unsalted butter (softened)
- ¾ cup brown sugar
- ½ cup granulated white sugar
- 2 large eggs
- 2 tsp vanilla extract
- Blue gel food coloring (as vibrant as you like it)
Add-Ins (The Good Stuff!):
- 1 cup semi-sweet chocolate chips
- 1 cup mini Oreos (chopped or whole)
- ½ cup Chips Ahoy or any crunchy cookie chunks
- Optional: White chocolate chips, mini cookies for topping
These ingredients combine to create a soft, chewy, sweet, and slightly crunchy cookie. The blue coloring and cookie mix-ins give them that “Cookie Monster” vibe that’s totally eye-catching and delicious.
Baking Tools You’ll Need
No need for anything fancy here, but a few kitchen essentials will make your baking process smooth.
Essential Equipment:
- Large mixing bowls
- Hand mixer or stand mixer
- Measuring cups and spoons
- Silicone spatula
- Cookie scoop (optional, but helps for even sizing)
- Baking sheet(s)
- Parchment paper or silicone baking mat
- Cooling rack
Having these on hand will keep your workflow clean and help you achieve bakery-style results.
Prep Time, Bake Time, and Yields
Time is money, right? Here’s a breakdown so you know what to expect.
| Step | Time |
|---|---|
| Prep Time | 20 minutes |
| Chill Time (recommended) | 30–60 minutes |
| Bake Time | 10–12 minutes |
| Cool Time | 10 minutes |
| Total Time | ~1.5 hours |
Yields: 18–20 cookies (depending on size)
These cookies are generously sized, so if you prefer smaller ones, you can stretch the dough further.
Step-by-Step Guide to Making Cookie Monster Cookies
Here comes the fun part! Follow these steps exactly for perfect results.
Step 1: Prepare Your Workspace
Clean your counter, line your baking sheets with parchment paper, and set out all your ingredients. Preheat your oven to 350°F (175°C). Trust us, prepping ahead will make everything easier.
Step 2: Mix the Dry Ingredients
In a medium bowl, whisk together:
- Flour
- Baking soda
- Baking powder
- Salt
Set aside. This mix forms the base of your cookie dough and keeps everything fluffy and soft.
Step 3: Cream Butter and Sugars
In a large mixing bowl, cream:
- 1 cup softened butter
- ¾ cup brown sugar
- ½ cup white sugar
Use a mixer and beat for 3–4 minutes until the mixture is light and fluffy. This step is crucial. The air you whip in here helps make your cookies soft and chewy later.
Step 4: Add Eggs and Vanilla
Crack in 2 large eggs and pour in 2 tsp vanilla extract. Beat on medium speed until everything is fully combined. The mixture should be creamy and slightly thick.
Step 5: Combine Dry and Wet Mixtures
Slowly add the dry ingredients into your wet mixture. Don’t dump it all at once — go in thirds and mix gently to avoid overmixing. The dough should now be firm but still scoopable.
Step 6: Add Blue Food Coloring
Here’s where the magic happens.
Add a few drops of blue gel food coloring. Start small — about ¼ tsp — and increase until you get that perfect Cookie Monster blue. Use a spatula or mixer to blend the color evenly.
Want a more intense color? Use gel, not liquid — it’s more concentrated and won’t alter the dough texture.
Step 7: Fold in Chocolates and Cookie Chunks
Time to make things chunky!
Gently fold in:
- 1 cup chocolate chips
- 1 cup chopped Oreos
- ½ cup Chips Ahoy or other cookie chunks
Don’t overmix. You want those delicious add-ins to remain whole and visible for maximum texture and presentation.
Step 8: Chill the Dough
Pop that dough into the fridge for 30 minutes to an hour. This helps solidify the fat, so your cookies don’t spread too much during baking. Trust us — chilling = thick, bakery-style cookies.
Step 9: Scoop and Shape the Cookies
Using a cookie scoop (or spoon), scoop out dough balls and place them on your lined baking sheet about 2 inches apart. You can gently flatten them, but keep them thick for that bakery-style puff.
Want extra flair? Press a few extra chocolate chips and cookie pieces on top of each dough ball before baking.
Step 10: Bake to Perfection
Bake in your preheated oven at 350°F for 10–12 minutes. The edges should look set but the centers will still be slightly soft — that’s exactly what you want.
They’ll continue to cook slightly as they cool on the pan.
Step 11: Cool and Enjoy
Let the cookies rest on the baking sheet for about 5 minutes before transferring them to a cooling rack. Then dig in while they’re still warm and gooey.
Add a mini cookie on top for that classic Cookie Monster look if you’re feeling extra creative!
Tips for Perfect Cookie Monster Cookies
Want your Cookie Monster Cookies to look like they came straight out of a bakery (or Cookie Monster’s dream)? Here are some practical tips to make sure your cookies are picture-perfect and irresistibly tasty:
1. Use Gel Food Coloring for Vibrancy
Gel food coloring gives you that deep, rich blue color without adding extra liquid to your dough. Start with a little and build up — a vibrant blue is part of the Cookie Monster charm!
2. Don’t Skip the Chill
Chilling the dough is non-negotiable if you want thick, chewy cookies. It prevents the cookies from spreading too much and gives them that nice round, puffy shape. Plus, it allows the flavors to really develop in the dough.
3. Add Toppings Before Baking
After scooping the dough, press a few extra chocolate chips, Oreo pieces, or mini cookies into the tops. It makes them look way more professional and gives you that Instagram-worthy finish.
4. Use High-Quality Chocolate
You’ll really taste the difference. Go for semi-sweet or dark chocolate chunks instead of just regular chips for a rich contrast to the sweet dough.
5. Don’t Overbake
Take them out when the edges are just set and the centers still look a little soft. They’ll continue to cook a bit on the baking sheet, resulting in a gooey, chewy center.
Common Mistakes to Avoid
Even simple cookies can go wrong if you’re not careful. Let’s make sure your Cookie Monster Cookies turn out perfectly every time by avoiding these common slip-ups:
1. Overmixing the Dough
Once you add the dry ingredients to the wet mixture, mix just until combined. Overmixing develops too much gluten and can make your cookies tough instead of soft.
2. Using Too Much Food Coloring
While you want that vibrant blue, too much food coloring can leave a weird taste. Always use gel coloring and start small. A little goes a long way.
3. Not Measuring Flour Properly
Too much flour will dry out your cookies. Always spoon the flour into the measuring cup and level it off with a knife — don’t scoop directly from the bag.
4. Forgetting to Chill the Dough
We’ve said it before, but it’s worth repeating — cold dough = thick, chewy cookies. Don’t skip it unless you want pancake-style cookies.
5. Placing Dough on a Hot Tray
Make sure your baking sheet is cool before placing the next batch. A hot tray can start melting the butter before baking, causing your cookies to spread too much.
How to Store Your Cookie Monster Cookies
Don’t let all your hard work go to waste! Here’s how to keep your cookies fresh and tasty:
Room Temperature Storage
- Store cooled cookies in an airtight container.
- They’ll stay fresh for 3–5 days.
- Place a slice of bread in the container to help keep them soft.
Freezer Storage
- You can freeze baked cookies for up to 2 months. Just let them cool completely first.
- Wrap them individually in plastic wrap, then store them in a freezer bag or airtight container.
- To reheat, microwave for 10–15 seconds for that fresh-out-the-oven feel.
Freezing Cookie Dough
- Roll the dough into balls and freeze on a tray.
- Once frozen, store in a ziplock bag.
- Bake straight from frozen — just add 2 minutes to the baking time.
Fun Variations to Try
Looking to switch things up? Here are some delicious twists to the classic Cookie Monster Cookie recipe:
1. Stuffed Cookie Monster Cookies
Want to go full indulgence mode? Stuff each cookie dough ball with a mini Oreo or a square of chocolate before baking. When you break it open… surprise!
2. White Chocolate and Macadamia Twist
Swap out some of the semi-sweet chips with white chocolate and throw in some chopped macadamia nuts for a deluxe version.
3. Peanut Butter Version
Add ½ cup of peanut butter to the wet ingredients and reduce the butter slightly. The flavor combo of PB, chocolate, and cookie chunks is out of this world.
4. Cookie Monster Ice Cream Sandwiches
Bake your cookies a little smaller, then sandwich some vanilla (or Cookie Monster-themed blue) ice cream between two cookies. Roll the sides in mini chocolate chips or cookie crumbs. A summer party favorite!
5. Gluten-Free Option
Use a 1-to-1 gluten-free baking flour blend and gluten-free cookies for the mix-ins. Make sure your chocolate chips are certified gluten-free too.
Are These Cookies Kid-Friendly?
Absolutely! In fact, Cookie Monster Cookies might just be the perfect treat for kids. Their bold color, fun cookie chunks, and soft texture make them a hit at:
- Birthday parties
- School bake sales
- Sleepovers
- Holiday cookie exchanges
Plus, this recipe is super fun for kids to help with. Let them mix the blue coloring, add the cookie bits, and of course — sneak a few chocolate chips while you’re baking.
Want to go all-out? Serve the cookies on a blue-themed platter with little googly eyes on top for a Cookie Monster face!
Nutrition Information (Estimates)
While these cookies are definitely a treat (and worth every bite), here’s a rough breakdown for one large cookie:
| Nutrient | Amount |
|---|---|
| Calories | 290–330 |
| Total Fat | 15g |
| Saturated Fat | 9g |
| Carbohydrates | 38g |
| Sugars | 22g |
| Protein | 3–4g |
| Fiber | 1g |
| Sodium | 160mg |
Note: These numbers are approximate and can vary depending on the size of the cookie and specific brands used.
Cookie Monster Cookies for Events and Gifts
These cookies aren’t just tasty — they’re a conversation piece. With their eye-popping blue color and chunky toppings, they make great additions to:
- Kids’ birthday party dessert tables
- Bake sale items
- Party favors
- Holiday gifts
Gift Wrapping Ideas:
- Wrap 2–3 cookies in clear cellophane with a blue ribbon.
- Use blue bakery boxes with a Cookie Monster sticker.
- Include a mini card with the ingredients or a fun Cookie Monster quote!
These cookies make people smile before they even take a bite.
FAQs about Cookie Monster Cookie Recipe
1. Can I make Cookie Monster Cookies without food coloring?
Yes! They’ll still taste amazing, but they won’t have that signature blue color. If you’re trying to avoid artificial dyes, skip it or use a natural blue powder like spirulina or butterfly pea flower.
2. How do I keep my cookies from going flat?
Make sure to chill your dough for at least 30 minutes and avoid placing it on a hot baking sheet. Properly measured flour also helps maintain structure.
3. Can I make this recipe without eggs?
Yes, substitute each egg with ¼ cup unsweetened applesauce or 1 tbsp of ground flaxseed mixed with 3 tbsp water (let sit for 5 minutes). Texture will be slightly different but still tasty.
4. What’s the best way to get vibrant blue cookies?
Use gel food coloring instead of liquid. It’s more concentrated and won’t water down the dough. Add gradually until you reach your desired shade.
5. Can I freeze the cookie dough for later use?
Absolutely! Roll dough into balls, freeze them on a tray, and store in a ziplock bag. You can bake straight from frozen — just add 2 minutes to the baking time.
Conclusion
Cookie Monster Cookies are more than just a playful twist on classic chocolate chip cookies — they’re bold, fun, and downright addictive. With a soft, chewy texture, a vibrant blue hue, and chunks of chocolate and cookies mixed in, they deliver flavor and flair in every bite.
Whether you’re baking them for kids, parties, or just to satisfy your own cookie cravings, following this step-by-step guide ensures they turn out perfect every single time. Don’t be afraid to get creative with mix-ins or customize them for special occasions. After all, if Cookie Monster taught us anything, it’s that there’s no such thing as too many cookies!
Now go on — preheat that oven and bring your inner Cookie Monster to life!


