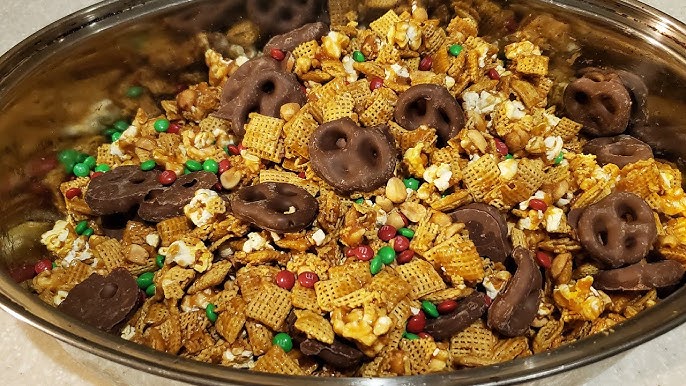
Christmas Chex Mix Recipe: The holidays are all about cozy vibes, heartwarming memories, and, of course, delicious snacks that bring everyone together. And when it comes to festive, irresistible treats, few recipes hit the sweet and salty spot quite like a classic Christmas Chex Mix.
Whether you’re hosting a party, prepping homemade gifts, or just looking to munch on something while watching your favorite Christmas movies, this treat is the perfect go-to. Easy to make, endlessly customizable, and downright addictive—let’s dive into this holiday snack masterpiece.
Why Christmas Chex Mix Is the Ultimate Holiday Snack
Let’s face it: the holidays can get hectic. Between shopping, decorating, and endless social events, we all need a snack that’s low-maintenance but high-reward. That’s exactly where Christmas Chex Mix shines. It’s crunchy, sweet, salty, and satisfying—all in one handful. Plus, it’s kid-approved and adult-loved. You can whip it up in bulk, make it ahead of time, and even dress it up in cute packaging to give as a holiday treat.
And here’s the best part—it’s ridiculously flexible. Don’t like pretzels? Skip them. Want more chocolate? Pile it on. You control the flavor, texture, and holiday flair. Add red and green M&Ms, drizzle white chocolate over the top, or throw in some crushed peppermint for that wintery twist. It’s a party in every bite!
What Makes This Recipe So Special?
Sure, there are hundreds of snack mix recipes out there, but this one? This one is the real deal. The magic is in the balance. The perfect mix of cereal, pretzels, chocolate, and candy all coated with a buttery, sweet mixture that turns ordinary ingredients into a festive masterpiece.
What makes this one stand out is the rich flavor from real butter, the flexibility to go baked or no-bake, and the holiday-themed ingredients that make it scream “Christmas!” This version also avoids artificial flavors and unnecessary additives. You’re getting pure, comforting goodness in every crunchy bite.
When Should You Make Christmas Chex Mix?
Honestly? Anytime from Thanksgiving through New Year’s is fair game. It’s perfect for:
- Christmas parties or potlucks
- Holiday movie nights
- Edible gifts for friends, teachers, or coworkers
- Stocking stuffers (yep, just wrap it!)
- Road trips or travel snacks during the season
Make a batch in early December, and you’ll probably find yourself whipping up more before the month’s over—it disappears fast!
List of Ingredients You’ll Need
Dry Ingredients
These are the base of your mix—crunchy, hearty, and ready to be coated in sweet magic.
- 3 cups Rice Chex
- 3 cups Corn Chex
- 3 cups Wheat Chex (optional for a richer crunch)
- 2 cups mini pretzel twists
- 1 cup Cheerios (adds a different texture)
- 1 cup salted peanuts or cashews
Sweet and Sticky Coating Ingredients
This mixture is the glue that holds all that deliciousness together.
- 1/2 cup (1 stick) unsalted butter
- 3/4 cup light brown sugar (packed)
- 1/4 cup light corn syrup or honey
- 1 teaspoon vanilla extract
- 1/2 teaspoon baking soda (helps puff the coating a bit)
Optional Add-ins for Extra Festive Fun
Want to take it up a notch? These additions make it festive and flavorful:
- 1 to 1.5 cups holiday M&Ms (red & green)
- 1 cup white chocolate chips or melting wafers
- 1/2 cup crushed peppermint candies
- Holiday sprinkles for extra cheer
- Dried cranberries for a tangy twist
Tools You’ll Need in Your Kitchen
You don’t need anything fancy here—just the basics:
- Large mixing bowl
- Saucepan (or microwave-safe bowl)
- Baking sheet(s) lined with parchment or wax paper
- Spatula or wooden spoon
- Airtight containers or holiday gift bags (for storage or gifting)
Step-by-Step Instructions to Make Christmas Chex Mix
Let’s break it down into easy, foolproof steps so your kitchen turns into Santa’s snack shop in no time.
Step 1: Prep Your Workspace and Ingredients
Start by clearing some counter space—things are going to get a little sticky. Pre-measure your ingredients and line your baking sheets with parchment paper for a clean, easy setup. Trust me, you’ll thank yourself later when cleanup takes five minutes flat.
Step 2: Mix the Dry Base
In a huge bowl (the biggest one you have), toss together your cereals, pretzels, Cheerios, and nuts. Use your hands or a big spoon to gently mix everything so it’s evenly combined. You’re setting the stage for the coating to work its magic.
Step 3: Melt the Coating
In a saucepan over medium heat, melt the butter. Add the brown sugar and corn syrup, stirring constantly. Let it come to a gentle boil, and then let it bubble for about 2 minutes while stirring to avoid burning. Remove it from the heat, stir in vanilla and baking soda. It’ll foam up a little—that’s normal! That foamy texture helps it spread evenly when you pour it.
Step 4: Combine the Mix and Coating
Quickly (but carefully) pour the hot coating over your dry mix. Use a spatula to gently fold everything together until all pieces are coated. Don’t rush this—make sure each bite gets that sticky-sweet love. If you’re adding M&Ms or chocolate chips, wait until after baking or the heat will melt them.
Step 5: Bake to Perfection (Or Not – No-Bake Option)
Baked Version: Preheat oven to 250°F (120°C). Spread the mixture evenly over two large baking sheets. Bake for 1 hour, stirring every 15 minutes. This step makes it crispy and locks in flavor.
No-Bake Version: Spread the coated mix out on wax paper or parchment-lined counters or trays. Let it cool for about 1 hour, then break apart and enjoy.
Step 6: Cool and Let It Set
This step is key—cooling allows everything to firm up, lock in flavor, and become that perfect munchable mix. Avoid storing or bagging while it’s still warm, or it’ll get soggy.
Step 7: Package or Serve
Once cooled, it’s time to enjoy—or package! Scoop your Chex Mix into cellophane bags, mason jars, or tins for gifting. Tie a ribbon, slap on a label, and you’re officially winning Christmas.
Tips for the Perfect Christmas Chex Mix
Getting that golden, crunchy, sweet-salty perfection isn’t just luck—it’s strategy. Here are some tried-and-true tips to help you nail your mix every single time:
- Use fresh ingredients: This might sound obvious, but stale cereal or old nuts can ruin the flavor and texture.
- Don’t skimp on stirring: If you’re baking the mix, stirring every 15 minutes is crucial. It prevents clumping and helps everything cook evenly.
- Let it cool completely: Patience, friend. Letting it cool before storing ensures it keeps that satisfying crunch.
- Make it in batches: Trying to make too much at once can lead to uneven coating. If you’re feeding a crowd or making gifts, split the batch into manageable portions.
- Use parchment or wax paper: This makes cleanup way easier and prevents sticking while the mix is cooling.
- Be gentle when mixing: Cereal can crush easily. Use a folding motion with a rubber spatula rather than aggressive stirring.
- Double the recipe: It disappears faster than you think. You’ll wish you made more.
These little things may not seem like a big deal, but together they make all the difference between “pretty good” and “HOLY MOLY WHAT IS THIS DELICIOUSNESS?!”
How to Customize the Recipe for Different Tastes
One of the best things about Christmas Chex Mix is how customizable it is. No two batches need to be the same! Here are some ideas to tailor it to your vibe:
Sweet Tooth Version
- Add mini marshmallows
- Toss in chopped dried fruits like cranberries or apricots
- Drizzle white or milk chocolate over the cooled mix
Chocolate Lovers’ Edition
- Add chocolate Chex
- Mix in chunks of your favorite chocolate bars
- Use chocolate-covered pretzels instead of plain
Nut-Free Option
- Replace nuts with sunflower seeds or extra cereal
- Use allergy-safe candies like Skittles instead of M&Ms
Spiced Holiday Mix
- Add a pinch of cinnamon or nutmeg to the coating
- Try gingerbread spice mix for a festive twist
Peppermint Holiday Mix
- Add crushed candy canes
- Use peppermint bark pieces
- Drizzle with peppermint white chocolate
Want to make it adult-friendly? A sprinkle of espresso powder or sea salt caramel drizzle adds a gourmet touch.
You’re not just making Chex Mix—you’re making your Chex Mix.
Storing Your Chex Mix – Keep It Fresh!
You did all that work—don’t let your snack go stale. Here’s how to store it like a pro:
- Airtight containers are your best friend: Whether it’s a Ziploc bag, mason jar, or plastic container, keep it sealed tight.
- Room temperature is fine: Unless you’ve added fresh fruits or ingredients that need chilling, your mix will be fine on the counter.
- Avoid humid environments: Moisture is the enemy of crunch. Keep it in a dry, cool spot.
How Long Does It Last?
- At room temperature: About 1 to 2 weeks
- In the fridge: Up to 3 weeks (helps maintain texture if you live in a humid climate)
- In the freezer: Up to 3 months—yep, you read that right!
Can You Freeze Chex Mix? Yes, Here’s How
Freezing Chex Mix might sound strange at first, but it’s a total game-changer if you want to make it ahead for parties or gift prep. Here’s how to do it:
- Cool the mix completely – Warm mix in the freezer = disaster.
- Use freezer-safe bags or containers – Squeeze out as much air as possible.
- Label it with the date and flavor (if you’re making multiple kinds).
- Thaw at room temperature for a few hours before serving.
And guess what? Some people even like eating it straight from the freezer—especially the chocolatey ones!
Christmas Chex Mix as a Homemade Gift Idea
Forget store-bought tins or boring gift cards—this is the kind of treat that makes people genuinely happy. It’s thoughtful, easy, and totally customizable.
Packaging Ideas:
- Mason jars with holiday ribbons and tags
- Cellophane bags sealed with a twist tie or festive string
- Small holiday tins lined with parchment
- Mini takeout boxes with holiday stickers
Pair it with a handwritten note or a hot cocoa packet, and you’ve got the kind of gift people will actually look forward to receiving every year.
Fun Variations of Holiday Chex Mix
You don’t have to stick to the original flavor—here are some fun variations to explore:
Reindeer Chow (Christmas Puppy Chow)
- Uses powdered sugar, chocolate, and peanut butter
- Super rich and decadent
- Toss in red and green sprinkles for a Christmas twist
Gingerbread Chex Mix
- Includes molasses, ginger, and cinnamon in the coating
- Add ginger snap crumbs for extra crunch
Salted Caramel Mix
- Swap corn syrup for caramel sauce
- Use sea salt for that sweet-savory balance
Hot Cocoa Chex Mix
- Cocoa powder and melted chocolate in the coating
- Mini marshmallows and chocolate chips tossed in after cooling
These aren’t just variations—they’re whole new experiences.
Common Mistakes and How to Avoid Them
Let’s help you dodge the holiday snack disasters before they happen.
1. Not Stirring During Baking
Result: Uneven coating and burnt bits. Fix: Stir every 15 minutes like clockwork.
2. Adding Chocolate Too Early
Result: A melty mess. Fix: Wait until it cools before mixing in M&Ms or chocolate chips.
3. Skipping the Cooling Step
Result: Sticky, soggy mix. Fix: Spread it out and give it time to firm up.
4. Overbaking
Result: Bitter, burnt sugar. Fix: Keep an eye on it and don’t go over an hour.
5. Using Too Much Coating
Result: Gummy, soggy texture. Fix: Stick to the recipe ratios. More isn’t always better.
Avoid these traps, and your mix will come out delicious every time.
FAQs about Christmas Chex Mix Recipe
1. Can I make Christmas Chex Mix in advance?
Absolutely! In fact, it gets better after a day as the flavors meld. Make it 2–3 days ahead and store in an airtight container.
2. Is this recipe gluten-free?
It can be! Just use gluten-free cereals and pretzels, and double-check your candy and other add-ins.
3. Can I use margarine instead of butter?
You can, but butter gives a richer, more flavorful coating. Margarine may change the texture slightly.
4. What’s the best way to gift this Chex Mix?
Use festive tins, mason jars, or treat bags. Add a holiday label or ribbon for extra flair.
5. How do I keep it from getting soggy?
Let it cool completely before storing, and keep it in a dry place. Don’t seal it while it’s still warm.
Conclusion
Christmas Chex Mix isn’t just a snack—it’s a tradition. It’s what you eat while decorating the tree, what you gift to coworkers and neighbors, and what everyone keeps reaching for long after the party’s over.
This simple, customizable recipe is the kind of thing that brings people together—because everyone loves a handful of sweet, salty, crunchy joy during the holidays. Once you try it, it might just become your signature holiday treat.
So, preheat your oven (or don’t), gather your ingredients, and get ready to be the snack hero of the season. Your tastebuds—and your friends—will thank you.