Almond Flour Recipe: Ever thought about switching up your baking game with something healthier, grain-free, and incredibly versatile? If so, almond flour might just become your new best friend in the kitchen. Whether you’re cutting carbs, going gluten-free, or just looking for a rich, nutty flavor to elevate your recipes, almond flour delivers on all fronts.
This guide is your one-stop-shop for learning everything about almond flour—from what it is, to how to make it at home, store it, and use it in a wide variety of recipes. We’ll also break down the key differences between almond flour and almond meal, and share insider tips to make sure you get perfect results every time.
Ready to dive into the world of almond flour? Let’s get cracking!
Ingredients You’ll Need
Making almond flour at home is surprisingly simple, and you only need one key ingredient: almonds. That’s it! But before you rush into your kitchen, let’s break down exactly what you need and why each item matters.
Main Ingredient:
- Raw Almonds – These are the base of almond flour. Always opt for raw, unsalted almonds. Roasted or salted almonds won’t give you the light texture or neutral flavor needed for flour.
Optional Ingredients:
- Blanched Almonds – If you want extra-fine, white almond flour (like the kind used in macarons or cakes), you can buy already blanched almonds, or blanch them yourself.
Essential Tools:
- High-Speed Blender or Food Processor – This is key. A good-quality machine ensures your almonds are finely ground without turning them into almond butter.
- Fine Mesh Sieve – To sift the almond flour and remove any coarse bits.
- Baking Sheet – For drying your almonds after blanching.
- Clean Kitchen Towel or Paper Towels – For drying off the blanched almonds.
Optional Tools:
- Nut Grinder – If you have one, this can make things faster and more uniform.
- Dehydrator – Ideal if you’re blanching almonds and want them dried perfectly before grinding.
You don’t need a gourmet kitchen setup—just the basics will do. But trust me, the tools you use will make a difference in texture and quality.
Benefits of Using Almond Flour
Let’s be honest—almond flour isn’t just a trendy ingredient; it’s a powerhouse in the health and baking world. And once you start using it, you might not want to go back to regular flour.
Why You’ll Love Almond Flour:
- Gluten-Free: Naturally free from wheat and gluten, almond flour is perfect for people with celiac disease or gluten sensitivity.
- Low-Carb and Keto-Friendly: Almond flour is a staple in the keto and low-carb communities because of its low net carb content. Great for those cutting back on sugar and carbs.
- High in Nutrients: Loaded with vitamin E, magnesium, and healthy fats, almonds pack a nutritional punch.
- Great Texture and Flavor: Almond flour gives baked goods a soft, moist texture with a subtly sweet, nutty flavor. It’s amazing in cookies, cakes, and pancakes.
Did You Know?
1/4 cup of almond flour has about 6g of protein and 3g of fiber. That’s way more than traditional white flour!
Types of Almond Flour
Understanding the types of almond flour available is key to baking success. One mix-up can ruin a recipe’s texture or flavor.
Blanched Almond Flour
- Made from almonds with skins removed.
- Fine, soft, and light in color.
- Ideal for baking delicate treats like cakes, macarons, and muffins.
Almond Meal
- Made from whole almonds with skins.
- Coarser texture and darker in color.
- Best for rustic bakes like breads, crusts, or savory dishes.
Main Differences:
| Feature | Blanched Almond Flour | Almond Meal |
|---|---|---|
| Skin Removed? | Yes | No |
| Texture | Fine | Coarse |
| Best For | Cakes, cookies | Bread, crusts, energy balls |
| Appearance | Light | Speckled |
So when a recipe specifically calls for almond flour, don’t use almond meal unless you’re going for a more textured, dense result.
Choosing the Right Almonds
If you want top-notch almond flour, it all starts with the almonds. It might sound simple, but your almond choice affects everything from texture to shelf life.
Raw vs Roasted:
- Always go for raw almonds. Roasted almonds are already heated and might create a pasty, buttery consistency when ground.
Organic vs Non-Organic:
- Organic almonds are free from pesticides and usually fresher.
- Non-organic almonds are fine for most uses but may have been treated with chemicals.
Where to Buy:
- Local grocery stores (in bulk bins for savings)
- Online (Amazon, Thrive Market, etc.)
- Health food stores (Sprouts, Whole Foods)
Pro Tip: Buy almonds in bulk and store them in the freezer to keep them fresh for months.
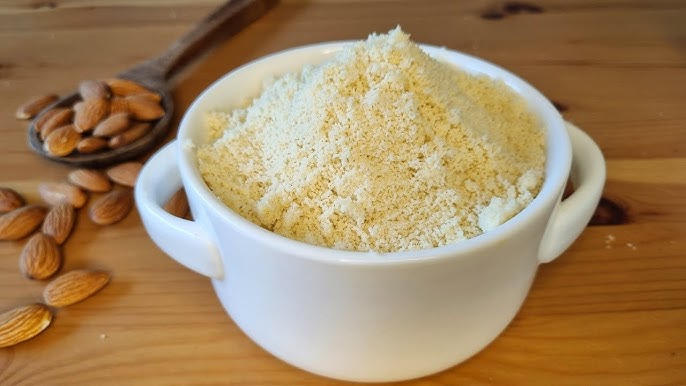
How to Make Almond Flour at Home (Step-by-Step Guide)
You don’t need to be a professional chef to make almond flour at home. In fact, it’s incredibly simple and only takes about 10–15 minutes from start to finish. Plus, making it yourself ensures maximum freshness and gives you control over texture and quality.
Here’s the ultimate step-by-step guide to making almond flour like a pro.
Step 1: Choose and Measure Your Almonds
Start with high-quality raw almonds—preferably unsalted and unroasted. Measure the amount you need, usually one cup of almonds yields about one cup of almond flour. Fresh, plump almonds give the best texture and flavor.
Step 2: Blanch Your Almonds (Optional)
If you prefer a fine, light-colored flour, blanch the almonds. Boil them for one minute, then quickly transfer them into cold water to loosen the skins.
Step 3: Peel the Skin Off (If Blanched)
Once cooled, pinch each almond between your fingers to slip off the skin. It’s a bit tedious but worth it for a smoother flour.
Step 4: Dry the Almonds Completely
Spread the almonds on a baking tray and let them air-dry or place them in a low oven (about 200°F/90°C) for 10–15 minutes. Moisture can make your flour clumpy.
Step 5: Blend or Process Into Flour
Transfer the dry almonds into a food processor or blender. Pulse in short bursts until you get a fine, powdery consistency. Don’t over-blend, or you’ll end up with almond butter.
Step 6: Sift for Best Consistency
Pass the ground almonds through a fine sieve. Re-blend any larger pieces for a consistent texture that resembles store-bought almond flour.
Step 7: Store Your Almond Flour Properly
Place the finished flour in an airtight container and store it in the refrigerator for up to two months or the freezer for longer freshness. Now you’ve got fresh, fragrant almond flour ready for baking, pancakes, or gluten-free treats!
Pro Tips for Perfect Almond Flour
Making almond flour is easy, but doing it right takes a few extra tricks. These pro tips will help you avoid common mistakes and get the perfect texture every time.
Avoid Over-Blending
The biggest mistake? Turning your almonds into almond butter. Once almonds release their oils, the texture turns from powdery to pasty. Always pulse instead of blending continuously.
Use Small Batches
Processing too many almonds at once can cause uneven grinding. Stick to 1 cup or less per batch to get a consistent flour.
Use a Dry Blender or Processor
Even small drops of water in your machine can cause clumping. Make sure your tools are completely dry before starting.
Cool Almonds Before Blending
If you heated the almonds in the oven or from blanching, let them cool fully before grinding. Heat releases oils faster, and that’s a shortcut to almond butter.
Sift for Uniform Texture
Always sift your flour to remove chunky bits. Re-blend or use those bits elsewhere—don’t toss them!
Invest in a Good Blender
A high-speed blender like a Vitamix or a solid food processor will make the job quicker and yield better results.
Storing Homemade Almond Flour
Once you’ve made your almond flour, the next big step is storing it correctly. Almonds are full of healthy fats, but those fats can go rancid if not stored well.
Short-Term Storage (1–2 Weeks):
- Keep in an airtight container in your pantry.
- Store in a cool, dark place away from sunlight and heat.
Refrigeration (1–2 Months):
- Almond flour keeps longer in the fridge.
- Always seal tightly to avoid moisture and odors from other foods.
Freezer Storage (Up to 6 Months):
- Freeze in a zip-top freezer bag or airtight container.
- Label with the date.
- Thaw at room temperature before using—do not microwave.
Signs It’s Gone Bad:
- Sour smell or bitter taste
- Yellow or dark discoloration
- Oily or sticky texture
When stored properly, almond flour stays fresh and ready for your next baking adventure!
How to Use Almond Flour in Baking
Using almond flour in recipes isn’t always a 1:1 swap for regular flour. It behaves differently, so knowing how to work with it is key to great results.
Substitution Ratio
- Almond flour is not a direct substitute for all-purpose flour.
- Most of the time, you’ll use 1 cup almond flour for 1 cup wheat flour, but you must adjust other ingredients—especially eggs and moisture.
Tips for Baking with Almond Flour:
- Almond flour retains more moisture, so reduce liquids slightly in your recipes.
- You might need to add an extra egg for structure, especially in cakes and muffins.
- Expect denser, moister textures—don’t overbake!
- Combine with coconut flour or tapioca starch for lighter, fluffier results.
What It’s Best For:
- Cookies
- Pancakes
- Muffins
- Brownies
- Pie crusts
- Gluten-free cakes
Because almond flour adds a slight sweetness, it works beautifully in desserts and breakfast items.
Best Recipes Using Almond Flour
Once you’ve got your almond flour ready, you’ll be amazed at how many dishes you can make with it. Whether you’re craving something sweet or savory, almond flour brings flavor, texture, and nutrition to your table. Let’s dive into some crowd-favorite recipes you can whip up with homemade (or store-bought) almond flour.
1. Almond Flour Pancakes
Light, fluffy, and naturally gluten-free, these pancakes are a weekend breakfast must.
Ingredients:
- 1 cup almond flour
- 2 eggs
- 1 tbsp maple syrup or honey
- 1 tsp vanilla extract
- 1/4 tsp baking soda
- A pinch of salt
- 2–4 tbsp milk (dairy or plant-based)
Instructions:
- Mix everything into a smooth batter.
- Pour onto a hot, greased skillet.
- Cook until bubbles form, flip, and serve with fruit or syrup.
2. Almond Flour Banana Bread
Moist, sweet, and full of flavor, this banana bread is perfect for a healthy snack.
Tips:
- Use overripe bananas for best flavor.
- Add nuts or chocolate chips for extra texture.
- Bake at 350°F for about 50–60 minutes.
3. Almond Flour Chocolate Chip Cookies
Chewy, soft, and just the right amount of sweet.
Why almond flour works: It keeps cookies moist and tender, with a delicious nutty undertone.
4. Savory Recipes Using Almond Flour
- Pizza crust: Combine almond flour with eggs, cheese, and seasoning to make a low-carb crust.
- Crackers: Mix almond flour with herbs and a bit of oil, roll thin, and bake.
- Breading for meats: Use almond flour instead of breadcrumbs for a gluten-free coating.
Bottom line? You can use almond flour for way more than just sweets. It’s incredibly versatile and adds a gourmet touch to everyday dishes.
Common Mistakes to Avoid
Even though almond flour is simple to work with, a few common missteps can throw off your recipe. Let’s save you from those baking fails with this handy list.
1. Over-processing the Almonds
Too much time in the blender or processor = almond butter, not almond flour. Always pulse and keep a close eye on the texture.
2. Using Wet Almonds
After blanching, if you don’t dry the almonds properly, you’ll end up with clumpy flour. Moisture is your enemy here—fully dry your almonds before grinding.
3. Not Sifting the Flour
Skipping the sifting step leads to coarse flour and uneven texture in baked goods. Sifting also helps you spot any large chunks that didn’t grind properly.
4. Swapping Almond Flour 1:1 in All Recipes
Almond flour doesn’t behave like wheat flour. If you swap it cup-for-cup without adjusting the recipe, you might get dense or greasy results. Follow almond flour-specific recipes when in doubt.
5. Using Almond Meal Instead of Almond Flour
They are not the same. Almond meal contains skins and has a rougher texture. This can make your final product heavier and gritty.
6. Poor Storage
If you leave almond flour out in a warm place or exposed to air, it will go rancid quickly. Always store it in airtight containers, preferably in the fridge or freezer.
Avoid these mistakes, and your almond flour creations will be bakery-worthy every time.
Almond Flour vs Coconut Flour
Both are popular gluten-free flours, but they’re very different in taste, texture, and baking behavior. Here’s how they compare:
| Feature | Almond Flour | Coconut Flour |
|---|---|---|
| Texture | Moist, slightly coarse | Dry, very fine |
| Flavor | Nutty, mild | Sweet, coconut-like |
| Absorbency | Low – retains moisture | High – absorbs LOTS of liquid |
| Substitution Ratio | Can sometimes sub 1:1 | Use 1/4 to 1/3 cup per cup flour |
| Common Uses | Cookies, cakes, pancakes | Muffins, brownies, gluten-free bread |
Important note: You cannot directly substitute coconut flour for almond flour or vice versa without altering other ingredients (especially liquid and eggs).
So, if you’re baking with almond flour, stick with almond flour recipes—unless you enjoy recipe disasters!
Buying vs Making Almond Flour
You might be wondering—is it better to make almond flour at home or just buy it? Both options have pros and cons.
Making Almond Flour at Home
Pros:
- Cheaper (especially if you buy almonds in bulk)
- Fresher
- No additives or preservatives
- You control the texture
Cons:
- Takes time and effort
- Requires a good blender or processor
- Slightly more cleanup
Buying Almond Flour
Pros:
- Convenient
- Available in finely milled texture
- Shelf-stable, especially sealed varieties
Cons:
- Can be expensive (up to 3x more than raw almonds)
- Some brands add preservatives or are not as fresh
- Quality varies by brand
If you’re baking often, try making your own. If you need it in a pinch, store-bought is just fine—just look for blanched, finely ground almond flour with no added ingredients.
FAQs about Almond Flour Recipe
1. Can I use almond flour for all baking?
Not all baking recipes adapt well to almond flour. It’s great for cakes, cookies, and muffins but not ideal for yeasted breads or flaky pastries without significant adjustments.
2. Is almond flour keto?
Yes! Almond flour is naturally low in carbs and high in fat, making it perfect for ketogenic diets. One 1/4 cup serving has only about 2–3g net carbs.
3. How many carbs in almond flour?
Roughly 6g total carbs and 3g fiber per 1/4 cup, which equals 3g net carbs.
4. Is almond flour safe for nut allergies?
No. Almond flour is made from almonds and is not safe for people with tree nut allergies. Look into alternatives like oat flour or sunflower seed flour if you’re allergic.
5. Can I make almond flour without a food processor?
Yes! You can use a high-speed blender. Just make sure to pulse and not overdo it. If you’re doing it often, a food processor may be a better long-term investment.
Conclusion
Almond flour is one of those magical ingredients that makes healthy baking not only possible but downright delicious. From its gluten-free benefits to its rich, nutty taste and versatility in both sweet and savory dishes, almond flour deserves a spot in every kitchen.
Whether you’re baking pancakes on a lazy Sunday, whipping up cookies for a party, or just trying to keep your diet low-carb, almond flour can be your go-to alternative. And now that you know how to make it at home step-by-step, there’s no excuse not to try it!
Give it a shot—you might just ditch regular flour for good.