Tortellini Recipe: Tortellini—those tiny, belly-button-shaped bundles of deliciousness—are an absolute staple in Italian cuisine. Whether you’re making them from scratch or just learning the ropes, crafting homemade tortellini is both a rewarding and mouthwatering experience. Originating from the Emilia-Romagna region in Italy, tortellini has won hearts across the globe for its rich fillings, tender pasta, and ability to absorb the flavor of whatever sauce it’s paired with.
Let’s be honest: making tortellini from scratch can feel intimidating. But once you understand the process, it becomes incredibly manageable—and even meditative. You control the ingredients, the freshness, and the flavor profiles, resulting in a dish that’s not only tastier than store-bought but also custom-made to your preferences.
So, grab your rolling pin and your favorite apron because we’re diving deep into this hands-on culinary journey. By the end of this step-by-step guide, you’ll not only have a plate full of fresh tortellini ready to devour but also the confidence to make it again and again.
Ingredients You’ll Need
For the Pasta Dough
Creating that perfect, smooth, elastic pasta dough is the foundation of your tortellini. You only need a few simple ingredients, but their quality makes a difference:
- 2 cups (250g) all-purpose flour (plus more for dusting)
- 3 large eggs
- ½ tsp salt
- 1 tsp olive oil (optional for elasticity)
These basic ingredients form the golden trio of traditional Italian pasta. Some chefs swear by using 00 flour for a finer texture, but all-purpose flour will still yield excellent results for beginners and pros alike.
For the Filling
Here’s where you can get creative, but for a traditional meat and cheese filling, you’ll need:
- ½ cup ricotta cheese
- ½ cup grated Parmesan cheese
- ½ cup finely minced cooked prosciutto or mortadella
- ¼ tsp ground nutmeg
- Salt and black pepper to taste
- 1 egg yolk (to bind the filling)
You can also experiment with spinach and ricotta, mushrooms, or even a butternut squash filling. The possibilities are endless once you master the basics.
Optional Add-ins for Extra Flavor
If you’re the kind of cook who likes a flavor boost, consider these:
- A pinch of lemon zest
- A sprinkle of chili flakes
- A dash of truffle oil (for gourmet flair)
- Fresh herbs like parsley, basil, or thyme
These extras aren’t required, but they do offer a depth of flavor that can elevate your tortellini from good to unforgettable.
Tools and Equipment Needed
You don’t need fancy gear to make tortellini, but a few kitchen essentials will make the job easier:
- Rolling pin or pasta machine
- Sharp knife or pasta cutter
- Mixing bowl
- Fork and spoon
- Damp cloth (to prevent dough from drying)
- Large pot for boiling
- Slotted spoon (for removing cooked tortellini)
Optional but helpful: a ravioli stamp or cutter for uniform shapes and sizes.
Step-by-Step Guide to Making Tortellini
Step 1: Preparing the Pasta Dough
On a clean surface, combine 2 cups of flour and a pinch of salt. Make a well in the center and add 3 large eggs. Gently whisk with a fork, gradually pulling in flour until a dough forms.
Step 2: Letting the Dough Rest
Knead for 8–10 minutes until smooth and elastic. Wrap it in plastic wrap and let it rest for 30 minutes—this helps relax the gluten for easier rolling.
Step 3: Rolling Out the Dough
Divide the dough into smaller portions. Using a pasta machine or rolling pin, roll out thin sheets, about 1 mm thick.
Step 4: Making the Filling
Mix ricotta, Parmesan, salt, pepper, and a touch of nutmeg (optional) until creamy.
Step 5: Cutting and Shaping Tortellini
Cut the dough into 2-inch squares, add a small dollop of filling, fold diagonally into triangles, seal edges, and wrap corners together.
Step 6: Cooking the Tortellini
Boil in salted water for 3–4 minutes until they float. Drain, toss with butter and herbs, and serve hot—delicate, cheesy, and irresistibly fresh!
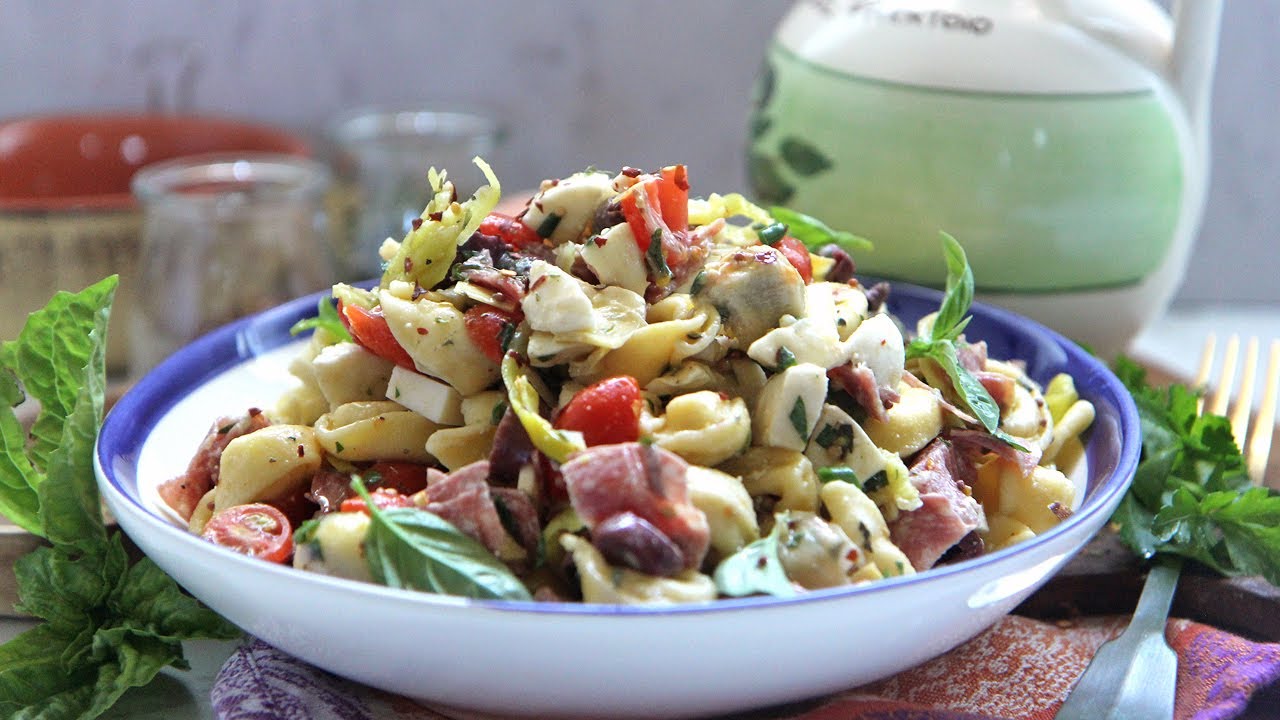
Serving Suggestions
Sauces That Pair Well with Tortellini
Tortellini is like a blank canvas—it pairs beautifully with a variety of sauces. Here are some classics and crowd-pleasers:
- Cream Sauce: Think Alfredo or a rich garlic cream sauce.
- Tomato-Based Sauce: Marinara or arrabbiata works beautifully, especially for cheese or veggie-filled tortellini.
- Broth: Serve tortellini in a light chicken or beef broth for a traditional “tortellini in brodo.”
- Butter & Sage: Simple and elegant, perfect for when the filling is already rich.
Drizzle, toss, or bathe your tortellini in your chosen sauce. Add a sprinkle of Parmesan and a few cracks of black pepper to finish it off.
Side Dishes to Complement the Meal
A bowl of freshly cooked tortellini is fantastic on its own, but pairing it with the right side dish can turn a simple meal into a full Italian feast. Here are some stellar options:
- Garlic Bread or Focaccia: Nothing beats warm, buttery garlic bread for soaking up extra sauce. A slice of olive oil-brushed focaccia is equally delightful.
- Simple Green Salad: A crisp salad with arugula, cherry tomatoes, and a balsamic vinaigrette can balance out the richness of tortellini.
- Grilled Vegetables: Zucchini, bell peppers, and asparagus roasted or grilled with olive oil and herbs add freshness and color to the plate.
- Antipasto Platter: Start your meal with some marinated olives, artichoke hearts, and cured meats for a true Italian touch.
- Soup: A light minestrone or a broth-based vegetable soup makes a great starter to prepare the palate.
Each of these options offers a contrast in texture and flavor, giving your tortellini meal variety and balance without stealing the spotlight from the main dish.
Storing and Reheating
How to Store Fresh or Cooked Tortellini
Fresh tortellini can be stored in the fridge, but timing is everything. Here’s what to keep in mind:
- Place freshly made tortellini on a floured tray and refrigerate uncovered for up to 12 hours. After that, cover loosely with plastic wrap.
- For cooked tortellini, toss them with a bit of olive oil to prevent sticking and store in an airtight container in the fridge for up to 3 days.
Avoid stacking tortellini on top of each other when storing. They’re delicate and can lose their shape or stick together if compressed.
Freezing Tips
Want to make a big batch? Tortellini freezes beautifully:
- Lay uncooked tortellini on a baking sheet in a single layer.
- Freeze for about 1 hour or until solid.
- Transfer to a freezer bag or airtight container. They’ll keep for up to 2 months.
To cook frozen tortellini, just drop them directly into boiling water—no need to thaw. Add 1–2 extra minutes to the cooking time, and they’ll come out perfectly.
Best Way to Reheat Without Losing Flavor
When reheating cooked tortellini, your goal is to preserve texture without overcooking. Here’s how:
- Stovetop: Toss them into a skillet with a little sauce or broth and warm over low heat.
- Microwave: Use a microwave-safe bowl, add a splash of water or sauce, and cover. Microwave in 30-second intervals, stirring in between.
- Oven: Place in a baking dish, cover with foil, and heat at 350°F (175°C) for about 15–20 minutes.
Avoid boiling cooked tortellini again—they’ll turn mushy. Always reheat gently to maintain that perfect, al dente bite.
Common Mistakes to Avoid
Dough Too Dry or Sticky
The biggest culprit of dough issues is poor hydration. If your dough is too dry, it’ll crack while rolling or shaping. If it’s too wet, it becomes impossible to work with.
Fixes:
- Add water one drop at a time to dry dough until it comes together.
- Dust with flour in small amounts to fix sticky dough.
Always knead thoroughly and let it rest before you judge its final texture.
Overfilling or Underfilling Tortellini
Stuffing tortellini is an art form. Too much filling and they’ll burst open while cooking. Too little and your hard work goes unnoticed in every bite.
Tips:
- Use about ½ teaspoon of filling for a 2-inch square of dough.
- Don’t press the filling flat—keep it domed for easy folding.
Take your time during the shaping step, especially if you’re new to the process. It’s better to be precise than fast.
Cooking Time Issues
Overcooked tortellini lose their structure and can become gummy. Undercooked ones are chewy and doughy—not the ideal bite.
Watch for:
- Floating tortellini—this usually means they’re done.
- 2–4 minutes cook time for fresh tortellini.
- 4–6 minutes for frozen tortellini.
Always taste one before serving. A perfectly cooked tortellini should be tender but still hold its shape.
Nutritional Information
Calories and Macronutrient Breakdown
Here’s an estimate for one serving (about 1 cup or 6–8 tortellini):
| Nutrient | Amount |
|---|---|
| Calories | ~300–350 kcal |
| Protein | 12–15g |
| Carbohydrates | 30–35g |
| Fat | 12–18g |
| Fiber | 2–3g |
| Sodium | 400–600mg |
Values vary based on filling and sauces used. Meat and cheese fillings are more calorie-dense than veggie versions, and cream-based sauces add more fat than tomato or broth-based alternatives.
Tips for Making It Healthier
- Use whole wheat flour for added fiber.
- Choose low-fat ricotta and cheese options.
- Add more veggies to the filling like spinach, kale, or mushrooms.
- Serve with a light broth or tomato-based sauce instead of cream.
Homemade tortellini lets you control every ingredient—so tailor it to fit your dietary needs without sacrificing taste.
FAQs about Tortellini Recipe
Can I use store-bought pasta dough?
Yes, you can! If you’re short on time or new to pasta-making, high-quality store-bought pasta dough is a solid substitute. Just make sure it’s fresh and not too thick.
How do I keep tortellini from opening while cooking?
Seal the edges well and press out any air pockets when folding. Also, don’t overfill. A firm press on the edges helps keep everything secure during boiling.
What’s the difference between tortellini and ravioli?
Tortellini are ring-shaped and usually smaller, while ravioli are square or rectangular with sealed edges. Both can be filled with similar ingredients, but the shaping and texture differ.
Can I make gluten-free tortellini?
Absolutely! Use a 1:1 gluten-free flour blend that’s meant for pasta. The dough will be more delicate, so handle gently and use extra flour to prevent sticking.
How long does homemade tortellini last in the fridge?
Fresh tortellini can last up to 2–3 days in the fridge. Be sure to dust with flour, keep them uncovered for a few hours, then loosely wrap to avoid moisture buildup.
Conclusion
There’s something undeniably magical about creating tortellini from scratch. From mixing and kneading the dough to shaping each little parcel by hand, it’s a process that connects you with centuries of Italian culinary tradition. And the best part? You’re rewarded with a plate full of tender, flavorful, and completely personalized pasta.
Whether you’re feeding family, impressing guests, or simply treating yourself, this tortellini recipe delivers satisfaction on every level. Don’t be intimidated by the steps—it’s all about enjoying the process and learning along the way.
So, roll up your sleeves, dust your counter with flour, and dive into the wonderful world of homemade tortellini. You’ll never look at store-bought pasta the same way again.


