Strawberry Pie Filling Recipe: There’s something magical about the aroma of fresh strawberries simmering on the stove. While store-bought fillings might offer convenience, they rarely come close to the flavor, texture, or quality of a homemade version. Making strawberry pie filling from scratch allows you full control over the sweetness, thickness, and even the color of the final result. You get to avoid all the artificial preservatives, colorings, and additives that come with canned versions.
Beyond health benefits, homemade strawberry pie filling offers a taste of real, ripe strawberries, not just overly sweet syrup. Plus, it’s surprisingly easy to make—even for beginners. A few simple ingredients, a little patience, and you’ve got a filling that will elevate any pie, tart, cake, or even pancake topping.
Think about it: when was the last time you dipped a spoon into a strawberry pie and thought, “This tastes exactly like summer”? That’s the power of homemade. It’s nostalgic, comforting, and deeply satisfying. You get to experience strawberries the way they were meant to be enjoyed—fresh, juicy, and full of natural flavor.
Perfect for Any Dessert
Strawberry pie filling is incredibly versatile. Sure, it shines in a classic strawberry pie, but it’s also a star in cheesecakes, parfaits, crepes, ice cream sundaes, turnovers, and more. You can even swirl it into your morning oatmeal or yogurt for a fruity boost.
Having a jar of this filling in your fridge means dessert is never far away. Got guests coming over? Grab a pre-made tart shell, fill it up, top with whipped cream—and you’ve got a showstopper. Want to make your waffles extra special? Spoon some over the top with a dollop of cream. It’s a delicious way to add flair to even the simplest treats.
List of Ingredients You’ll Need
Fresh vs. Frozen Strawberries
The star of this show is, of course, strawberries. But not all strawberries are created equal. Fresh strawberries are ideal when they’re in season—plump, vibrant, and naturally sweet. They bring an unmatched flavor to your filling. If you’re lucky enough to get your hands on local or organic berries, even better. They tend to be juicier and less watery, which helps with consistency.
But don’t worry if it’s not strawberry season. Frozen strawberries are a fantastic alternative. They’re usually picked at peak ripeness and flash-frozen, preserving their flavor. Just make sure to thaw them completely and drain any excess liquid to avoid a watery filling.
Sweeteners and Thickeners
Every great strawberry pie filling needs the perfect balance of sweet and thick. Here’s what you’ll need:
- Granulated sugar: Classic and easy, sugar enhances the strawberries’ natural sweetness. You can adjust the quantity depending on how sweet your berries are.
- Cornstarch: This is the go-to thickener. It helps turn the mixture into a glossy, jelly-like consistency that holds its shape in pies and tarts.
- Lemon juice: Just a splash brightens the flavor and adds a hint of tang that balances out the sweetness. It also helps preserve the vibrant red color.
Optional, but worth considering:
- Salt: A pinch enhances the overall flavor.
- Butter: Adds a silky texture and depth to the filling once cooked.
Optional Flavor Enhancers
Want to take things up a notch? Try these optional add-ins:
- Vanilla extract: A teaspoon adds warmth and richness to the mix.
- Almond extract: Just a drop can complement the fruity flavor with a nutty twist.
- Cinnamon or nutmeg: Perfect for giving your filling a cozy, spiced note—especially during the colder months.
- Orange zest: Adds brightness and a subtle citrusy punch.
Play around with the flavors and see what you love best. The beauty of homemade filling is that you can tailor it to your taste.
Tools and Equipment Required
Kitchen Essentials
You don’t need a fancy kitchen setup to whip up a great strawberry pie filling. Just a few basic tools will do:
- Medium saucepan: A good-quality pan with a heavy bottom helps distribute heat evenly and prevents burning.
- Wooden spoon or heat-safe spatula: Perfect for stirring the mixture as it thickens.
- Measuring cups and spoons: Precision matters when it comes to baking and cooking.
- Knife and cutting board: For prepping the strawberries.
- Mixing bowl: Useful if you’re combining the sugar and cornstarch before cooking.
Special Tools for Best Results
While not strictly necessary, these tools can make the process even smoother:
- Strainer or colander: To rinse and drain strawberries, especially if using frozen ones.
- Zester: If you’re adding lemon or orange zest, this tool makes it effortless.
- Jar or container with lid: For storing your finished pie filling in the fridge or freezer.
- Pastry brush: If you plan to glaze a tart or turnover, this tool helps apply an even layer of filling or egg wash.
Investing in a few solid kitchen tools can really improve the outcome of your recipes, and make cooking more enjoyable.
Preparing the Strawberries
Washing and Hulling Tips
Clean strawberries are happy strawberries. First things first: give your berries a good rinse under cold running water. Don’t soak them—strawberries are like little sponges and they’ll absorb too much water, making your filling runny.
Next, hull the strawberries. That means removing the green leafy tops and the white core just underneath. A small paring knife or a strawberry huller does the job well. Gently twist and pull out the core to keep as much of the fruit intact as possible.
If you’re using frozen strawberries, thaw them in a colander over a bowl to catch the excess liquid. Let them sit at room temperature for about 30-60 minutes, then pat them dry with paper towels.
Slicing Techniques for Uniformity
Uniform slices ensure that your filling cooks evenly and looks beautiful when served. For pies, slice the strawberries lengthwise into halves or quarters, depending on their size. If they’re small, you can leave them whole.
Want a chunkier filling? Go with halved berries. Prefer a smoother texture? Slice them thinly. The key is consistency in size so they cook at the same rate and give you that perfect texture—soft, not mushy.
Now that your strawberries are ready, it’s time to bring everything together on the stove.
Step-by-Step Guide to Making Strawberry Pie Filling
Step 1: Mixing the Ingredients
In a medium saucepan, combine your prepared strawberries, sugar, and lemon juice. If using any optional flavor enhancers like vanilla or zest, add them now. Separately, whisk the cornstarch with a few tablespoons of cold water to form a smooth slurry. This helps prevent lumps when you add it to the hot mixture.
Now you’re ready to cook—get ready to transform simple ingredients into something truly delicious.
Step 2: Cooking the Mixture
Place your saucepan over medium heat and gently stir the strawberry mixture. As the mixture heats up, the strawberries will begin to release their juices, and the sugar will dissolve. Keep stirring occasionally to prevent anything from sticking to the bottom or burning.
Once the mixture starts bubbling, stir in the cornstarch slurry slowly and consistently. You’ll want to keep stirring the mixture constantly at this point. Within a few minutes, you’ll notice the liquid thickening up beautifully. The sauce should begin to look glossy and rich. This process usually takes about 5–8 minutes, depending on the moisture content of your strawberries and the heat of your stove.
Pay close attention to the consistency. You want the filling to coat the back of your spoon—thick but still slightly pourable. Remember, it will continue to thicken slightly as it cools.
If the mixture becomes too thick, add a splash of water or lemon juice. If it’s too thin, let it simmer for a bit longer. Taste it—adjust the sugar or acid to your liking. Some strawberries are naturally tart; others are sugary sweet. Make it your own.
Once the texture and taste are just right, remove the pan from heat. Add a tablespoon of butter if you want that silky, melt-in-your-mouth texture. Stir until fully combined. That final bit of richness adds a subtle depth to the flavor.
Step 3: Cooling and Storing
Let the filling cool in the pan for about 10 minutes, then transfer it to a glass jar or airtight container. If you’re in a hurry, you can spread it on a baking sheet to cool faster—just cover it with plastic wrap to prevent a skin from forming.
Once at room temperature, seal and store it in the fridge. Homemade strawberry pie filling can be kept refrigerated for up to 5–7 days. For longer storage, freeze it in a freezer-safe bag or container for up to 3 months. Just thaw in the fridge overnight before using.
This filling isn’t just a one-time wonder. You can make a double batch, freeze half, and always have delicious strawberry filling ready when inspiration (or a sweet tooth) strikes.
Tips for the Best Strawberry Pie Filling
Common Mistakes to Avoid
Even with a simple recipe like this, there are a few pitfalls to watch for. Avoid these mistakes to ensure your strawberry pie filling comes out perfect every time:
- Overcooking the strawberries: Cook them too long, and they’ll break down too much, resulting in a mushy texture. Aim for soft but still slightly firm berries.
- Skipping the cornstarch slurry step: Dumping cornstarch directly into the hot mixture causes clumps. Always dissolve it in cold water first.
- Adding sugar too early with frozen strawberries: Sugar draws out moisture. If your strawberries are frozen and you add sugar too early, they’ll become watery and hard to thicken.
- Using too much lemon juice: A little goes a long way. Too much acid can overpower the flavor of your strawberries.
How to Fix Runny Filling
So your filling came out more like strawberry soup? Don’t worry—it’s fixable. Here’s what you can do:
- Simmer longer: Return the pan to medium heat and simmer until more liquid evaporates.
- Add more thickener: Whisk 1 tsp of cornstarch with 2 tbsp of cold water and stir it in. Let it simmer until thickened.
- Cool completely: Remember that pie filling thickens as it cools. Give it time.
Still too thin? It may be better suited as a sauce or topping instead of a filling—and that’s totally okay. Use it for waffles, pancakes, or even ice cream!
Variations of the Recipe
Sugar-Free or Low-Sugar Options
Watching your sugar intake? You don’t have to miss out on homemade strawberry filling. Here are a few swaps and tips:
- Use a sugar substitute: Try erythritol, monk fruit, or stevia. Be sure to follow conversion guidelines, as these sweeteners are often more potent than sugar.
- Rely on natural sweetness: Very ripe strawberries can often carry the filling on their own with minimal sweetening.
- Add natural enhancers: A touch of cinnamon or vanilla can trick your palate into thinking something is sweeter than it is.
A low-sugar version won’t store as long as the traditional one, so plan to use it within a few days or freeze for later.
Using Cornstarch Alternatives
Cornstarch is a reliable thickener, but not everyone can or wants to use it. Here are a few alternatives:
- Arrowroot powder: A great natural thickener and gluten-free option. Use it similarly to cornstarch—make a slurry before adding.
- Tapioca starch: Adds a glossy finish and works well in pie fillings.
- Flour: You can use all-purpose flour, but it may dull the flavor and color slightly. Use about double the amount of cornstarch.
- Gelatin: Not ideal for baking pies but great for chilled desserts or layered parfaits.
Each thickener behaves a bit differently, so test small batches until you find your favorite.
Storage and Shelf Life
Refrigeration and Freezing Guidelines
One of the best things about homemade strawberry pie filling is its ability to store well. Once you’ve finished making your batch, you can store it in a clean, airtight container or mason jar and keep it in the refrigerator for up to 7 days. Make sure it’s completely cooled before sealing it. Warm filling sealed in a container can create condensation and excess moisture, which might lead to spoilage or make it too runny later on.
For longer storage, freezing is a fantastic option. Transfer your cooled filling into a freezer-safe container or a heavy-duty zip-top bag. Lay the bag flat in the freezer to save space and allow for quicker thawing. When stored properly, your strawberry pie filling will last for up to 3 months in the freezer without losing its texture or flavor.
To use, simply thaw the filling overnight in the refrigerator. Avoid microwaving the frozen filling as it can ruin the texture, making it watery or rubbery depending on the thickener used.
A little tip? If you’re freezing the filling, label the container with the date and any special notes like “low sugar” or “with cinnamon” so you know what’s inside when you reach for it.
How to Know If It’s Gone Bad
Like all foods, strawberry pie filling can spoil. Here’s how to tell if it’s past its prime:
- Off smell: If it smells sour, fermented, or just “off,” toss it.
- Mold growth: Any signs of white, green, or fuzzy mold means it needs to go.
- Change in color or texture: A drastic change in color, or separation of liquid from solids after refrigeration, can signal spoilage.
- Taste: If you’re unsure and it passes all other checks, a tiny taste can confirm—but don’t risk it if you have any doubts.
Proper storage, clean utensils, and airtight containers can help your homemade filling stay fresher for longer.
Using the Filling in Different Recipes
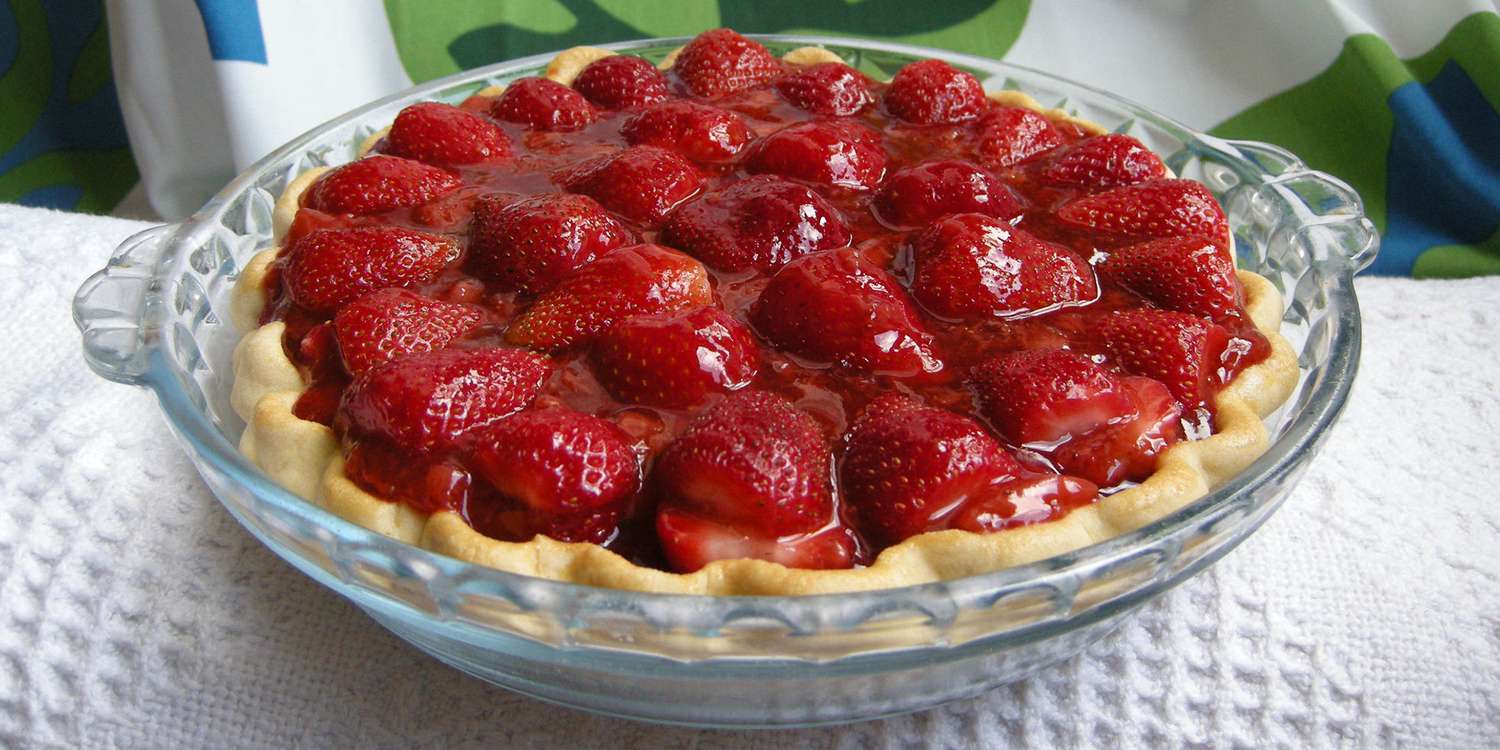
Classic Strawberry Pie
There’s nothing quite like a traditional strawberry pie. Once your filling is cooled and thickened, spoon it into a pre-baked pie shell. You can top it with fresh whipped cream, a lattice crust, or even a buttery crumble topping. Let it chill in the fridge for a few hours to set perfectly.
Here’s a quick serving idea:
- Use a graham cracker crust for a no-bake version.
- Add sliced fresh strawberries on top of the filling before serving for extra texture and flavor.
- Serve it cold with a scoop of vanilla ice cream or warm with a drizzle of cream.
It’s the kind of dessert that brings people together—rustic, nostalgic, and always a crowd-pleaser.
Strawberry Tarts and Turnovers
Strawberry pie filling is a dream ingredient for mini tarts, turnovers, and puff pastry treats. Just spoon a bit into tart shells or onto a square of puff pastry, fold and seal, and bake until golden.
Here are a few fun ideas:
- Mini tartlets: Line muffin tins with shortcrust pastry, add filling, and bake for 20–25 minutes.
- Turnovers: Cut puff pastry into squares, add a spoonful of filling, fold diagonally, seal with a fork, and bake.
- Hand pies: Great for kids’ lunches or picnics, hand pies are portable and fun to eat.
Sprinkle powdered sugar or brush with a glaze for that bakery-style finish.
Nutrition Facts and Dietary Info
Calories and Macronutrients
The nutritional value of your strawberry pie filling will vary depending on the ingredients used, especially the type and amount of sugar and thickener. Here’s a rough breakdown for 1/4 cup (about 60g) of standard strawberry pie filling made with sugar and cornstarch:
| Nutrient | Amount |
|---|---|
| Calories | 100–120 kcal |
| Total Fat | 0g |
| Saturated Fat | 0g |
| Cholesterol | 0mg |
| Sodium | <5mg |
| Total Carbohydrates | 27g–30g |
| Dietary Fiber | 1g |
| Sugars | 20g–24g |
| Protein | <1g |
Keep in mind that fresh strawberries are naturally low in calories and high in vitamin C and antioxidants. Most of the sugar and calorie content comes from added sweeteners.
Gluten-Free and Vegan Notes
The good news is that homemade strawberry pie filling is naturally gluten-free and vegan—as long as you choose your thickeners and sweeteners carefully.
- Gluten-free: Cornstarch, arrowroot, and tapioca starch are all gluten-free options. Just double-check labels for cross-contamination if you’re cooking for someone with celiac disease.
- Vegan: Avoid adding butter or gelatin. Use plant-based alternatives if needed.
You can also make the filling completely refined sugar-free by swapping in natural alternatives like maple syrup or agave nectar. That way, it fits into a wider range of diets without sacrificing flavor.
Kids in the Kitchen: Fun with Strawberries
Safe Tasks for Kids
Want to turn your strawberry pie filling session into a family activity? It’s a great way to teach kids about cooking and seasonal fruits. Here are some fun and safe tasks they can do:
- Washing strawberries: Let them rinse the berries in a colander.
- Removing stems: Older kids can safely use a plastic knife or strawberry huller.
- Measuring ingredients: Kids love pouring sugar or cornstarch into bowls.
- Stirring (with supervision): Let them mix ingredients before cooking begins.
- Tasting and adjusting: They’ll enjoy taste-testing to decide if it’s sweet enough.
Making pie filling together not only teaches valuable kitchen skills but also creates lasting memories.
Making It a Family Activity
Consider turning this into a weekend tradition. Go strawberry picking as a family, come home, and whip up a batch of homemade filling together. You can even let each child customize a mini tart or hand pie with their own favorite add-ins—chocolate chips, blueberries, a sprinkle of cinnamon.
Cooking with kids teaches patience, planning, and the joy of homemade treats. Plus, they’re more likely to eat what they help create!
Troubleshooting Guide
Too Thick, Too Thin, Too Tart
Even seasoned home cooks run into issues now and then. The good news is most problems with strawberry pie filling can be fixed with a few quick tricks. Let’s look at some common problems and how to solve them.
1. Too Thick?
This usually happens if you added too much cornstarch or cooked the mixture a bit too long. But don’t worry—it’s easy to fix.
- Stir in a tablespoon or two of water or lemon juice (if you want a slight flavor boost).
- Warm it gently while stirring to blend the liquid in smoothly.
2. Too Thin?
If your filling is more like syrup than a rich, spreadable mixture:
- Return it to the stovetop over medium heat.
- Stir in more thickener: Mix 1 teaspoon of cornstarch with 2 tablespoons of cold water and whisk it into the mixture.
- Simmer for another 3–5 minutes until thickened.
Remember: The filling thickens even more as it cools, so don’t panic right away if it seems a little runny while hot.
3. Too Tart?
This often happens with underripe or out-of-season strawberries.
- Add a bit more sugar or a drizzle of honey or maple syrup to round out the tartness.
- A small pinch of salt can actually mellow the acidity, enhancing sweetness without making it overly sugary.
Color and Texture Adjustments
A perfect pie filling isn’t just about flavor—it’s also about look and feel. Want a brighter red color like store-bought fillings? You can boost the hue naturally or artificially:
- Natural boost: Add a few raspberries or a splash of beet juice during cooking.
- Artificial coloring: A single drop of red food coloring can enhance vibrancy, though it’s optional.
For a smoother texture:
- Mash a portion of the strawberries while cooking.
- Use an immersion blender to lightly puree the mixture before thickening.
If you prefer chunkier filling:
- Reserve some sliced strawberries and stir them in at the end after cooking, just before cooling.
Customizing the look and texture is the final touch that makes the recipe truly yours.
FAQs about Strawberry Pie Filling Recipe
1. Can I use this filling for cakes and cupcakes?
Absolutely! Spoon it between cake layers, swirl it into cupcake batter before baking, or use it as a cupcake filling. It also makes an amazing topping for cheesecakes.
2. How can I make this filling last longer without freezing?
For long-term storage without freezing, consider canning your filling. Use proper sterilization techniques and seal in sterilized jars. Process in a water bath canner and store in a cool, dark place.
3. Can I substitute strawberries with other fruits?
Yes, this recipe works wonderfully with blueberries, raspberries, cherries, or even peaches. Just adjust sugar and cook time based on the fruit’s sweetness and juiciness.
4. Is it okay to double the recipe?
Definitely. You can double or even triple the batch—just be sure your pot is large enough to prevent overflow, and stir constantly to ensure even cooking.
5. Why does my filling turn cloudy or dull?
This may happen if you use flour as a thickener or cook it too long. Stick with cornstarch or arrowroot for a glossy finish, and avoid overcooking to preserve color and texture.
Conclusion
From its vibrant color to its rich texture and juicy bursts of real fruit, this filling transforms everyday desserts into something truly special. And with the tips and tricks you’ve learned today—how to choose your strawberries, tweak sweetness, thicken to perfection, and store it safely—you’re fully equipped to make your own signature version.
So next time you’re craving something sweet, skip the can and make your strawberry pie filling from scratch. Trust me, your taste buds (and your family) will thank you.


