Steak Chili Recipe: Nothing hits the spot quite like a bowl of hearty, smoky, and spicy steak chili. Imagine rich, tender chunks of beef simmered in a robust blend of spices, tomatoes, and peppers—comfort food at its finest. This isn’t your typical ground beef chili. We’re talking elevated flavor, more satisfying texture, and that homemade taste that turns any weeknight dinner or game day party into a feast.
Whether you’re new to chili-making or a seasoned pro looking to switch things up, this steak chili recipe brings everything you love about classic chili—but levels it up with juicy steak bites that melt in your mouth. You won’t just impress your guests—you’ll convert chili purists into steak chili believers.
This step-by-step guide walks you through every detail, from selecting the perfect cut of steak to the final simmer. You’ll learn insider tips for flavor, timing, and texture, and we’ll cover storage and reheating for leftovers. Let’s dive right into making this unforgettable dish.
What Makes Steak Chili Unique?
Steak chili stands out from traditional chili because of its main protein—steak, not ground beef. This small switch makes a world of difference. The chunks of steak add a luxurious, meaty texture that holds up well during the long simmering process. They absorb flavors beautifully, turning each bite into a savory explosion of smoky spice.
What else sets it apart? Well, steak chili often includes a slightly bolder blend of spices. That’s because steak can handle strong flavors without getting lost. You’ll find earthy cumin, smoky paprika, deep chili powder, and sometimes even a hint of cinnamon or cocoa for added depth. It’s bold but balanced—never boring.
This chili also invites creativity. Want to toss in some dark beer? Go for it. Add roasted poblanos or fire-roasted tomatoes? Perfect. The versatility is a huge part of its appeal. You can tailor it to your taste and still stay true to its soul-warming essence.
Lastly, steak chili just feels special. It turns a regular night into a comfort-filled celebration, perfect for sharing with family and friends or keeping all to yourself on a cozy weekend.
Why Choose Steak Over Ground Beef?
Why make the switch? The texture is reason number one. Ground beef breaks down and blends in—it’s great, but not as satisfying as those tender steak chunks that soak up all the chili goodness. Steak brings a meaty chew and richness that ground beef just can’t touch.
Flavor comes next. Steak has more depth, especially cuts like chuck or sirloin. These cuts are marbled with fat, which renders down during cooking and flavors the whole pot. Plus, when you sear the steak before adding it to the chili, you create a browned crust that adds an umami-rich base you simply can’t replicate with ground meat.
And let’s not forget the nutritional edge. Depending on the cut, steak can be leaner and higher in protein than some ground beef blends. It’s also less greasy, which means a cleaner-tasting chili with less oil floating on top.
So, if you’re aiming for a next-level chili experience—steak is the way to go.
Ingredients You’ll Need
Creating an unforgettable steak chili starts with getting the ingredients just right. Freshness and quality matter here, and every item plays a role in building deep, complex flavor. Let’s break down everything you’ll need for this epic recipe.
High-Quality Steak Cuts
The star of the show is, of course, the steak. You’ll want a cut that balances flavor, tenderness, and affordability—since it’s going to simmer for a while. Here are the best options:
- Chuck Steak: Rich in flavor and fat, chuck becomes incredibly tender when slow-cooked. It’s a top pick for chili.
- Sirloin: Leaner than chuck but still flavorful. It holds up well and doesn’t break apart too easily.
- Brisket: A bit pricier but worth it for its deep beefy flavor and buttery finish when cooked low and slow.
Pro Tip: Avoid thin or quick-cooking cuts like ribeye or tenderloin. They’re too delicate and can become tough after simmering.
Fresh Vegetables and Aromatics
These bring freshness, sweetness, and balance to your chili:
- Onions (1 large, chopped) – Build the flavor base.
- Garlic (4–5 cloves, minced) – Adds aromatic richness.
- Bell Peppers (1 red and 1 green, diced) – For sweetness and crunch.
- Jalapeño or Serrano Pepper (optional) – For heat.
Want more depth? Roast the peppers beforehand for an extra smoky layer.
Essential Spices and Seasonings
The soul of any chili lies in its spice blend. For a bold, smoky flavor:
- Chili Powder (2 tbsp)
- Smoked Paprika (1 tsp)
- Ground Cumin (2 tsp)
- Oregano (1 tsp)
- Cocoa Powder (1 tsp, optional but great)
- Salt & Pepper to taste
You can also add cayenne for more heat or cinnamon for warmth.
Pantry Staples and Add-ons
These round out your chili and add body:
- Canned Crushed Tomatoes (28 oz)
- Tomato Paste (2 tbsp)
- Beef Broth (2 cups) – Or use beer for extra depth.
- Kidney or Black Beans (optional, 1 can drained)
- Olive Oil or Butter (2 tbsp) – For searing
Optional additions:
- A splash of apple cider vinegar for acidity
- Dark chocolate or a spoon of molasses for richness
Tools & Equipment Needed
Cooking Tools for Perfect Chili
You don’t need a fancy kitchen setup—just the right tools that make cooking smooth and enjoyable. Here’s your chili-making toolkit:
- Heavy-bottomed Dutch Oven or Large Pot: Retains heat evenly and is ideal for browning and simmering.
- Sharp Chef’s Knife: For cleanly slicing steak and veggies.
- Wooden Spoon or Heatproof Spatula: For stirring without scraping your pot.
- Measuring Spoons and Cups: Precision matters in seasoning.
- Cutting Board: Keep one for meat and one for veggies to avoid cross-contamination.
Optional Tools That Make a Difference
If you have these, they’ll elevate your chili game:
- Slow Cooker: Great for low-and-slow cooking with minimal fuss.
- Immersion Blender: If you like your chili with a smoother texture.
- Ladle: Makes serving easier and less messy.
- Food Scale: For perfectly portioning your steak.
Having your tools ready ahead of time makes the process stress-free and fun.
Preparing Your Ingredients
How to Cut the Steak for Chili
Getting the right cut is important—but how you cut it matters just as much. Uniform cubes ensure your steak cooks evenly and soaks up all that flavor.
Here’s how to do it right:
- Trim the fat: Leave some for flavor, but remove any excess.
- Chill the steak: Pop it in the freezer for 15 minutes—it makes slicing easier.
- Cut against the grain: Look at the muscle fibers and slice perpendicular to them.
- Cube it up: Aim for 1-inch cubes. Too small and they’ll dry out; too large and they might stay tough.
This small detail makes a huge difference in your chili’s final texture.
Prepping Vegetables and Spices
Next, prep your veggies. Dice the onions, bell peppers, and jalapeños into small, even pieces. This ensures they cook evenly and blend into the chili without overpowering it.
Tips:
- Garlic: Mince it finely or use a garlic press.
- Spices: Measure them out beforehand and mix them in a small bowl. This way, you can dump them in all at once when it’s time to bloom the spices in the pot.
Step-by-Step Cooking Instructions
Step 1 – Searing the Steak
Begin by heating 2 tablespoons of oil in a heavy-bottomed pot over medium-high heat. Add the steak cubes in batches and sear until each side forms a deep brown crust. This step locks in flavor and gives your chili a rich, smoky base. Remove the meat and set aside.
Step 2 – Building the Flavor Base
In the same pot, sauté chopped onions, garlic, and bell peppers until soft and fragrant. Stir in tomato paste, chili powder, cumin, and smoked paprika, cooking for 1–2 minutes to deepen the flavor.
Step 3 – Simmering to Perfection
Return the steak to the pot, add crushed tomatoes and beef broth, and bring to a gentle simmer. Cover partially and cook for 1½–2 hours until the steak turns fork-tender.
Step 4 – Adjusting Seasonings
Taste your chili and fine-tune it—add salt, pepper, or a splash of lime for brightness. For more heat, toss in a dash of cayenne or chopped jalapeños.
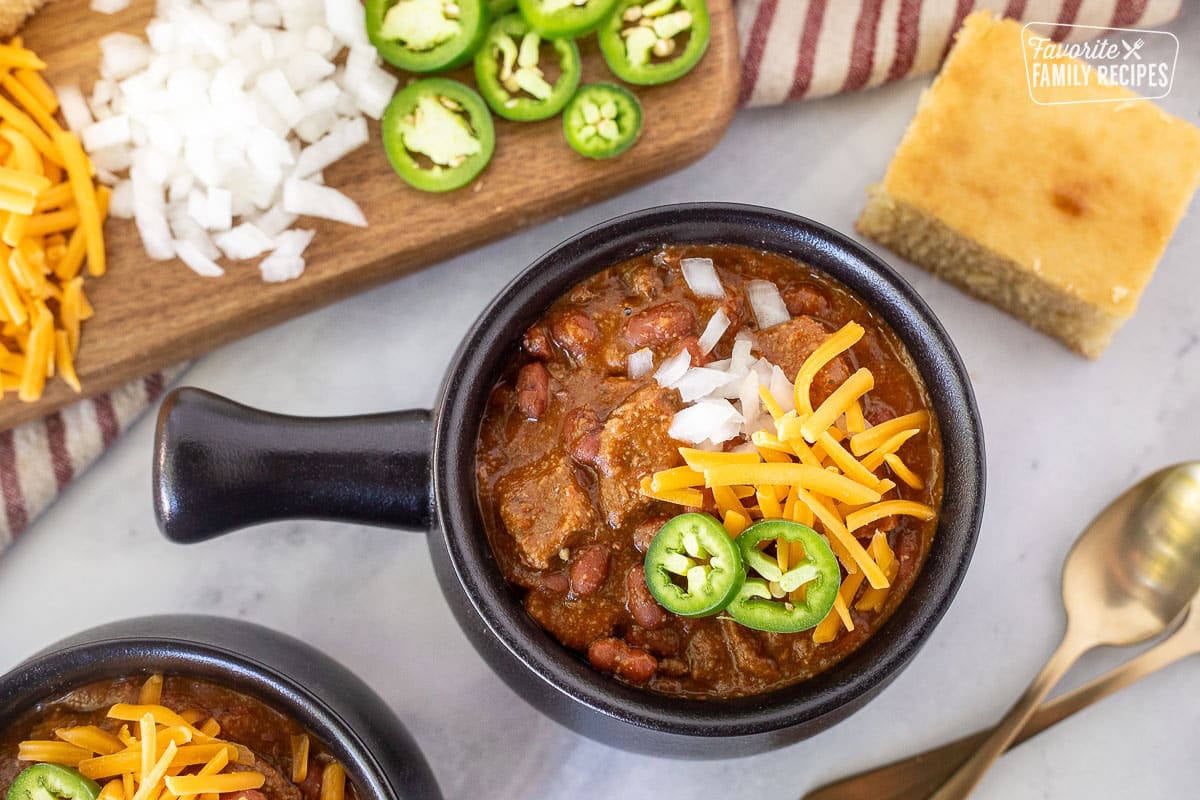
Step 5 – Finishing Touches and Resting Time
Turn off the heat and let the chili rest for 10 minutes to meld the flavors. Serve with shredded cheese, sour cream, and cornbread for that perfect, hearty finish.
Tips for the Best Steak Chili
Choosing the Right Cut of Steak
Not all steaks are created equal—especially for chili. The best cuts strike a balance between flavor, fat, and how well they hold up to a long simmer.
Top choices:
- Chuck roast: Affordable and flavorful with good marbling.
- Beef brisket: Incredibly rich but needs a long cook time.
- Sirloin tip or tri-tip: Leaner but still flavorful when seared properly.
Avoid tender cuts like filet mignon or ribeye—they’re better for quick-cooking dishes and can turn rubbery in chili.
Bonus Tip: Ask your butcher for “chili meat” or stew beef. They’ll often recommend a mix of cuts that are already trimmed and cubed.
Spice Adjustments for Taste
Your spice blend sets the tone, but don’t treat it like a locked formula.
Here’s how to make it yours:
- More heat: Add jalapeños, chipotle powder, or cayenne.
- Smoky flavor: Smoked paprika and fire-roasted tomatoes are your friends.
- Richness: A square of dark chocolate or a tablespoon of espresso powder adds deep flavor.
- Herbal notes: Fresh thyme or bay leaves give subtle dimension.
Make small adjustments, taste, then tweak again. The secret to killer chili is layering flavor at every stage.
Cooking Time and Texture
Steak chili needs time. Don’t rush it.
Letting it simmer slowly:
- Breaks down the connective tissue in the meat.
- Deepens the spice profile.
- Melds everything together beautifully.
Rule of thumb: Minimum 60 minutes, but up to 90 is ideal. You want the meat to be tender but not falling apart like shredded beef.
Don’t forget to stir every 20 minutes to avoid scorching the bottom.
Common Mistakes to Avoid
Overcooking or Undercooking the Steak
When it comes to steak chili, timing is everything. Overcook your steak and it becomes dry and stringy. Undercook it, and you’re chewing through tough cubes instead of enjoying melt-in-your-mouth bites.
To avoid this:
- Use tougher cuts like chuck or brisket, which become tender with long, slow cooking.
- Simmer gently—not a rolling boil. A low and slow cook is the key.
- Check tenderness after about an hour. If the steak isn’t soft yet, keep cooking and check every 15 minutes.
Avoid shortcuts like high heat or short cook times—they don’t allow the meat fibers to break down properly, leaving you with chewy chili.
Skipping the Sear
Searing is a non-negotiable. It’s the secret behind that deep, complex chili flavor. Skipping this step robs you of the rich, umami-packed crust that develops during the Maillard reaction (science-speak for caramelizing meat).
Even if you’re short on time, sear in batches and build that browned goodness on the bottom of your pot. Trust us, it’s worth every minute.
Not Letting Flavors Meld
Chili always tastes better after it sits. Why? The spices and ingredients need time to blend and deepen.
Tips for perfect flavor melding:
- Let your chili rest for at least 10–15 minutes before serving.
- Make it a day ahead for even better results. Flavors will be more developed and balanced after an overnight rest.
- Reheat gently the next day and stir well.
Avoid rushing to serve it immediately. Give your chili the time it needs to become unforgettable.
Variations and Customizations
Adding Beans or No Beans
Ah, the great chili debate—beans or no beans?
Traditional Texas-style chili skips them entirely. But many people love the heartiness and texture they add.
Best beans to use:
- Kidney beans (classic)
- Black beans (earthy flavor)
- Pinto beans (creamy texture)
If you’re adding beans, stir them in during the last 30–45 minutes so they don’t break down.
No beans? Then boost the meat, tomatoes, and even throw in some chopped mushrooms for more bulk.
Keto or Low-Carb Version
Want to keep it low-carb? No problem.
Here’s how:
- Skip the beans and high-sugar ingredients like beer or sugar.
- Use low-sugar tomato products or make your own from fresh tomatoes.
- Thicken with cauliflower rice or almond flour instead of cornmeal.
- Go heavy on fatty steak cuts and serve with avocado or sour cream for extra richness.
With these swaps, you’ll keep the carbs low while packing in all the chili flavor.
Spicy vs Mild Options
Spice level is a personal choice, and chili can accommodate both ends of the spectrum.
For more heat:
- Add extra jalapeños or serranos.
- Use chipotle peppers in adobo sauce.
- Add crushed red pepper flakes or cayenne powder.
For a milder version:
- Stick with sweet bell peppers.
- Use mild chili powder and skip the hot ones.
- Add a splash of cream or yogurt at the end to mellow the spice.
Always taste as you go. It’s easier to add heat than to take it away.
Serving Suggestions
Topping Ideas
Toppings can turn a good bowl of chili into a masterpiece. Get creative and pile it high with your favorites.
Top picks:
- Shredded cheddar or Monterey Jack
- Sour cream or Greek yogurt
- Sliced avocado
- Fresh cilantro
- Diced red onion
- Lime wedges
- Crushed tortilla chips or cornbread crumbles
- Hot sauce drizzle
Set up a chili bar and let everyone customize their bowl. It’s fun, interactive, and perfect for parties.
Perfect Side Dishes
Steak chili is filling on its own, but some sides take it to the next level.
Best sides to serve:
- Cornbread (classic, sweet or savory)
- Garlic bread or cheddar biscuits
- White rice or cauliflower rice
- Baked potatoes or sweet potatoes
- Grilled cheese sandwiches
- Simple green salad for balance
These pairings add texture and contrast while rounding out the meal. Whether you go hearty or light, you’ll have a plate everyone can enjoy.
Storing and Reheating Leftovers
Best Storage Methods
Got leftovers? Great—chili tastes even better the next day.
Storage tips:
- Refrigerate in an airtight container for up to 4 days.
- Freeze for longer storage—up to 3 months. Let it cool completely before sealing in freezer bags or containers.
Pro Tip: Store in portioned containers so you can thaw only what you need.
Reheating Without Drying Out
When reheating steak chili, don’t blast it with heat or you risk drying out the steak.
Best reheating methods:
- Stovetop: Add a splash of broth or water, cover, and heat over medium-low.
- Microwave: Use medium heat in 1-minute intervals, stirring each time.
- Slow cooker: Great for larger portions—heat on low until warmed through.
Stir well and taste before serving. Add a pinch of salt or squeeze of lime to refresh the flavor.
Steak Chili for Meal Prep
Freezing and Thawing Instructions
Steak chili isn’t just a one-time meal—it’s meal prep gold. Whether you’re planning lunches for the week or freezing a batch for a busy night, this dish keeps like a dream.
How to freeze it right:
- Let the chili cool completely before storing.
- Portion it into freezer-safe containers or resealable bags. Press out the air if using bags to prevent freezer burn.
- Label with the date and contents.
- Freeze flat if using bags for easier stacking.
It stays fresh for up to 3 months in the freezer without losing flavor or texture.
Thawing Tips:
- Move from freezer to fridge overnight.
- In a hurry? Place the sealed container or bag in warm water for quicker thawing.
- Reheat gently on the stovetop or in the microwave, stirring frequently.
The steak retains its tenderness, and the flavors are often even better after freezing and reheating.
Portioning for Weekly Meals
Meal prepping with steak chili is super practical—and tasty. Here’s how to do it efficiently:
- Portion out individual servings into containers with tight-fitting lids.
- Pair with sides like rice, roasted veggies, or cornbread muffins to build complete meals.
- Store in the fridge for up to 4 days, or freeze for longer storage.
This makes lunch and dinner a no-brainer all week. You save time, money, and avoid food waste—all while enjoying restaurant-quality meals at home.
Nutritional Information
Calories and Macronutrients
Nutrition will vary based on your ingredients and serving size, but here’s an average estimate per serving (about 1.5 cups of chili, without toppings or sides):
- Calories: 350–450 kcal
- Protein: 30–35g
- Carbs: 15–20g (more if you add beans)
- Fat: 20–25g
- Fiber: 4–6g
- Sugar: 5–8g
If you’re counting macros or watching your intake, you can:
- Go bean-free for low-carb versions.
- Use leaner cuts of steak to reduce fat.
- Serve with low-carb sides or greens.
Health Benefits of Ingredients
This chili isn’t just comforting—it’s packed with nutrients too.
- Steak is rich in protein, iron, zinc, and B vitamins, all essential for energy and muscle repair.
- Tomatoes provide antioxidants like lycopene, which support heart health.
- Garlic and onions have anti-inflammatory and immune-boosting properties.
- Spices like cumin and chili powder may aid digestion and metabolism.
By using fresh ingredients and avoiding processed sauces, you create a hearty, homemade dish that fuels your body and satisfies your taste buds.
FAQs about Steak Chili Recipe
Can I Use Any Type of Steak?
Technically yes, but tougher, fattier cuts like chuck roast, brisket, or sirloin are best. Avoid tender cuts like ribeye—they break down too quickly in chili.
How Long Does It Take to Make Steak Chili?
From start to finish, expect around 2 hours—including prep, searing, simmering, and resting. It’s worth every minute.
Is Steak Chili Spicy?
It can be! But you control the heat. Use mild spices for a kid-friendly version, or crank up the heat with jalapeños and cayenne if you like it fiery.
Can I Make It in a Slow Cooker?
Absolutely. Sear the steak and sauté the veggies first, then transfer everything to the slow cooker and cook on low for 6–8 hours or high for 3–4 hours.
What Are the Best Toppings for Steak Chili?
Cheddar cheese, sour cream, green onions, avocado, crushed chips, hot sauce, and fresh cilantro all make excellent toppings. Mix and match to your heart’s content.
Conclusion
There you have it—a complete, foolproof guide to making the ultimate steak chili. From selecting the perfect cut of steak to simmering it into rich, bold perfection, you now have everything you need to master this comforting classic.
Whether you’re preparing for a cozy night in, meal prepping for the week, or hosting a game-day feast, steak chili delivers every time. The flavors are deep and satisfying, the texture is unmatched, and the whole process is easier than you think.
So grab your pot, get those ingredients ready, and make this your go-to chili recipe. Trust me, once you’ve had steak chili, there’s no going back.


