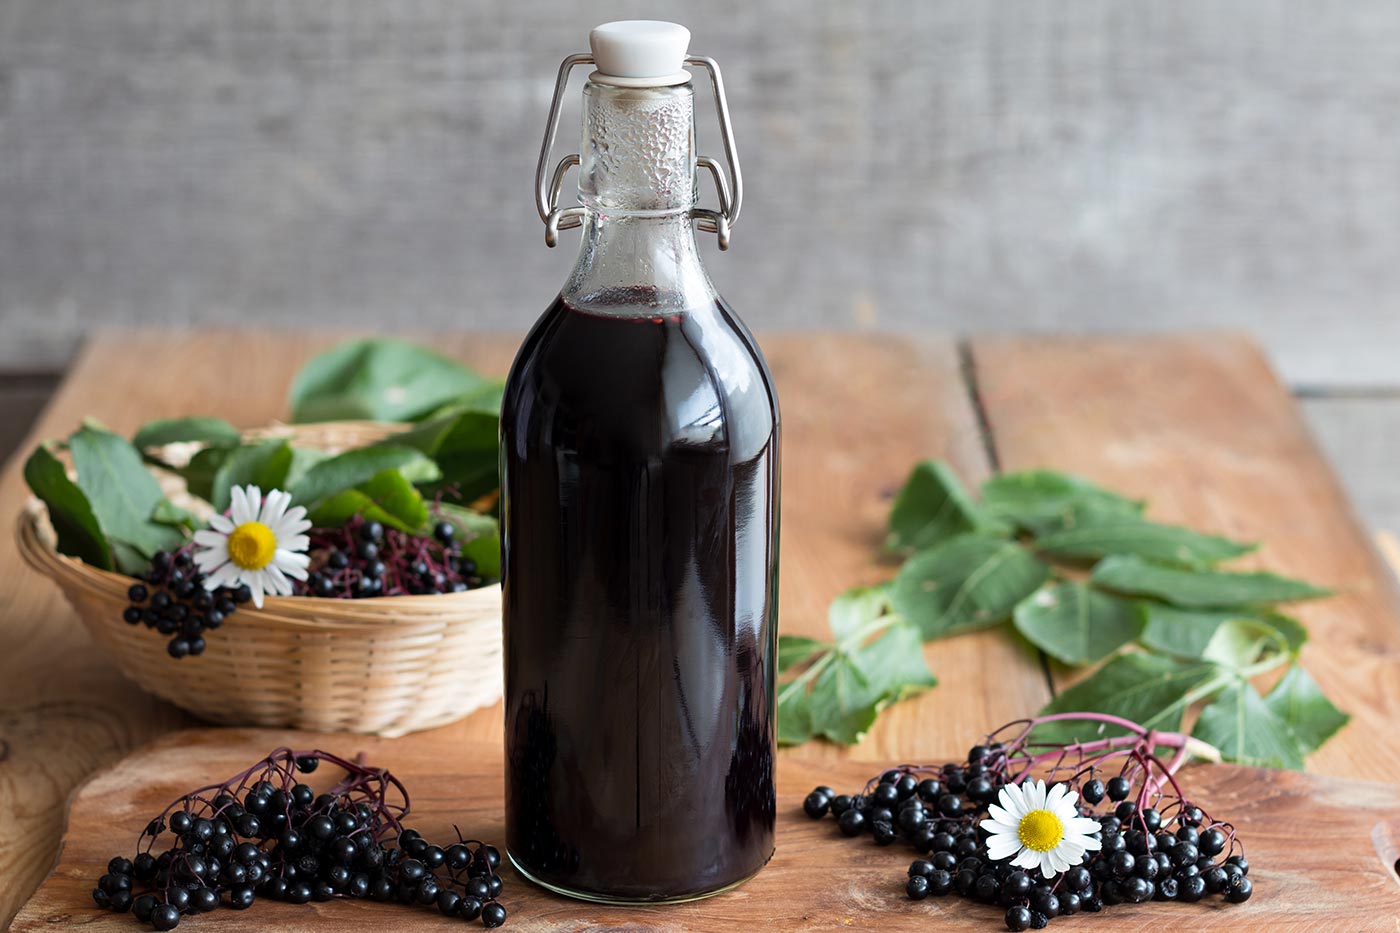
Sambucus Syrup Recipe: Sambucus, more commonly known as elderberry, is a genus of flowering plants that has been used in traditional medicine for centuries. Elderberries are small, dark purple berries that grow on the Sambucus nigra shrub, native to Europe but now found in many parts of the world. These berries have long been prized for their immune-boosting properties and are commonly used in herbal remedies to help combat colds, flu, and other respiratory conditions.
What makes elderberries so powerful? They are rich in antioxidants, particularly flavonoids, which support the immune system by neutralizing free radicals. In addition to antioxidants, elderberries contain vitamins A, B, and C, which help the body fend off illness more effectively. Their deep color is a visual indicator of their high anthocyanin content—compounds known to reduce inflammation and support heart health.
Despite their numerous health benefits, elderberries should never be consumed raw. Raw elderberries and other parts of the elderberry plant (like leaves and stems) contain toxic compounds that can cause nausea or vomiting. When cooked properly, however, elderberries become safe and incredibly beneficial.
Health Benefits of Elderberry Syrup
Elderberry syrup isn’t just tasty—it’s also incredibly potent as a natural health remedy. It’s particularly popular during the winter months when flu season is in full swing. Here are a few reasons why elderberry syrup is a staple in many holistic medicine cabinets:
- Boosts Immune Function: Elderberries have been shown to increase the production of cytokines, the immune system’s messengers that help fight off infections.
- Fights Cold and Flu Symptoms: Multiple studies have found that elderberry syrup can reduce the duration and severity of cold and flu symptoms if taken early.
- Rich in Antioxidants: The anthocyanins found in elderberries help reduce oxidative stress and inflammation, protecting the body at the cellular level.
- Supports Respiratory Health: Elderberry syrup can help soothe sore throats, reduce coughing, and relieve sinus pressure due to its anti-inflammatory properties.
- Promotes Skin Health: Thanks to its high vitamin C content, elderberry syrup may also improve skin tone and reduce signs of aging.
With all these benefits packed into one simple syrup, it’s no wonder elderberry syrup has gained a loyal following.
Why Make Your Own Sambucus Syrup at Home?
Homemade vs. Store-Bought
There’s a good reason why more people are ditching store-bought elderberry syrup and making their own at home. First off, the homemade version is significantly more affordable. Store-bought elderberry syrups can be quite expensive, often ranging from $15 to $30 for just an 8 oz bottle. Making it yourself can cost a fraction of that—sometimes less than $5 per batch.
Beyond cost savings, making elderberry syrup at home allows you to fully control what goes into your body. Many commercial syrups contain preservatives, artificial flavors, or high amounts of added sugar. When you DIY it, you choose the ingredients, the sweetness level, and any extra boosters like cinnamon, ginger, or cloves.
Most importantly, homemade elderberry syrup is often more effective. Why? Because it’s fresh. The potency of natural remedies like elderberries diminishes over time, especially when bottled and shelved for months. Making a fresh batch every few weeks ensures maximum effectiveness.
Cost Comparison and Freshness
Let’s break down the cost for a basic homemade recipe:
- 1 cup dried elderberries: ~$10
- Raw honey (local or organic): ~$8 for 12 oz
- Spices (cinnamon, ginger, cloves): ~$1–$2
- Yield: About 2 cups of syrup (16 oz)
That’s roughly $10–$12 for 16 ounces—about half the price of what you’d pay in a health food store. Not to mention, you’re getting a fresher, more potent product made with love and care in your own kitchen.
Control Over Ingredients
One of the best perks of making your own elderberry syrup is the full control you have over the recipe. Want to make it vegan? Swap out honey for maple syrup or agave. Making it for kids under one year old? Use unsweetened apple juice instead of honey. Sensitive to spices? Leave out the cinnamon or cloves. Prefer stronger immune boosters? Add echinacea or turmeric.
You’re in the driver’s seat with homemade syrup, and that freedom can’t be overstated. It’s also a great opportunity to tailor the recipe to your family’s specific needs or preferences—creating a truly customized wellness solution.
List of Ingredients You’ll Need
Core Ingredients Explained
To make a simple yet potent elderberry syrup, you’ll need just a handful of ingredients. Here’s a breakdown of what you’ll need and why each ingredient matters:
- Dried Elderberries (Sambucus nigra) – These are the star of the show. Choose organic, food-grade elderberries. Avoid any that appear moldy or have stems mixed in.
- Water – Acts as the base for simmering the berries and extracting their medicinal properties.
- Raw Honey – Adds sweetness, acts as a natural preservative, and brings its own antibacterial and soothing qualities. Always add honey after cooling the mixture to preserve its enzymes.
- Cinnamon Stick – A warming spice that helps balance blood sugar and supports circulation.
- Ginger Root – Aids digestion and has anti-inflammatory effects, boosting the immune system.
- Whole Cloves – Adds depth of flavor and has antimicrobial properties.
Optional Additions for Boosted Benefits
Want to level up your syrup? Consider adding these:
- Echinacea Root – Known for its powerful immune-stimulating properties.
- Star Anise – Adds a unique flavor and additional antiviral benefits.
- Lemon Peel or Juice – Adds vitamin C and a bright, fresh flavor.
- Apple Cider Vinegar – Acts as a preservative and supports gut health.
- Maple Syrup or Agave – Vegan alternatives to honey.
Each optional ingredient can be used to customize your syrup to better suit your family’s taste and health needs.
Equipment You’ll Need
Kitchen Tools for a Smooth Process
Before you start cooking, make sure you have these items on hand:
- Medium to Large Saucepan – For simmering the berries and spices.
- Fine Mesh Strainer or Cheesecloth – To remove solids from the liquid.
- Wooden Spoon – For stirring the mixture during the cooking process.
- Measuring Cups & Spoons – Precision matters!
- Mixing Bowl – To catch the liquid while straining.
- Funnel – Makes pouring into bottles less messy.
Storage Options: Bottles, Jars & Labels
Once your syrup is ready, proper storage is key:
- Glass Bottles or Mason Jars – Amber-colored bottles are best for preserving the syrup’s potency.
- Lids – Choose tight-sealing lids to keep air and moisture out.
- Labels and Date Tags – Always label your syrup with the date it was made. It’ll help you keep track of freshness and avoid waste.
Step‑by‑Step Guide to Making Sambucus Syrup
Step 1: Preparing Your Ingredients
Gather your essentials before starting: 1 cup of dried elderberries (Sambucus nigra) or 2 cups of fresh ones, 4 cups of water, 1–2 tablespoons of fresh ginger (grated), 1 teaspoon of cinnamon, and 1 cup of raw honey. If you’re using fresh elderberries, make sure to remove all stems and unripe berries — only ripe, dark purple ones are safe to use. Have a medium saucepan, fine mesh strainer, and glass bottles ready.
Step 2: Simmering the Elderberries
Combine the elderberries, water, ginger, and cinnamon in a saucepan. Bring the mixture to a boil over medium heat, then reduce to a simmer. Let it cook gently for 45–60 minutes, stirring occasionally, until the liquid has reduced by about half. This slow simmer extracts all the immune-boosting goodness and flavor from the berries.
Step 3: Straining the Mixture
Once the mixture has finished simmering, remove it from heat and allow it to cool slightly. Pour it through a fine mesh strainer or cheesecloth into a clean bowl or measuring jug. Press down on the berries with the back of a spoon to extract every drop of syrupy goodness, then discard the pulp — it’s done its job.
Step 4: Adding Honey and Mixing
When the liquid is warm but not hot (around 100°F or 38°C), stir in the raw honey. Mixing it while warm helps the honey dissolve smoothly without destroying its natural enzymes. Adjust sweetness to your liking — more honey makes it thicker and sweeter, less keeps it tangy. Stir until completely blended into a silky, deep purple syrup.
Step 5: Bottling and Storage Tips
Pour the finished syrup into sterilized glass bottles or jars using a funnel. Seal tightly and store in the refrigerator for up to 2 months. For long-term storage, you can freeze small portions in ice cube trays.
Take 1 tablespoon daily as an immune booster or mix into tea, sparkling water, or even cocktails. Rich, fruity, and soothing — Sambucus syrup is nature’s way of keeping you strong, one spoonful at a time.
How to Store and Preserve Your Syrup
Refrigeration and Shelf Life
Refrigeration is the most straightforward method. Because the syrup is rich in natural preservatives (honey, herbs, low water activity), it tends to last about 2 to 3 months in a well-sealed, clean jar. Always use a clean spoon or dropper to dispense, and avoid contaminating the jar (don’t double-dip, keep utensils clean).
If you notice any off smell, cloudiness, or mold, discard it immediately. The darker color may deepen over time—that’s normal oxidation—but any signs of spoilage are a red flag.
Can You Freeze Elderberry Syrup?
Absolutely. Freezing is a great way to extend shelf life without additives. Here’s how:
- Portion the syrup into ice cube trays (e.g. 1–2 tablespoon portions). Once frozen solid, pop them out and store in a freezer-safe bag or jar.
- Or use freezer-safe glass jars (leave extra headspace to allow expansion).
- Frozen elderberry syrup can last 6 to 12 months. Thaw in the fridge before using.
When thawed, stir well because separation or slight settling can occur.
Dosage and Usage Guidelines
Daily Use for Immune Support
A general recommendation (for healthy adults) is:
- 1 tablespoon (15 mL), twice daily during cold and flu season (or when feeling under the weather).
- In maintenance mode (prevention), many people take 1 teaspoon to 1 tablespoon daily.
Always start with a smaller dose to check for individual tolerance.
Adjusting for Children and Adults
For children, a common guideline is:
- Ages 1 to 5: ½ teaspoon to 1 teaspoon, 1–2 times a day
- Ages 6 to 12: 1 teaspoon, up to twice a day
Cautions & tips:
- Infants under 1 year shouldn’t have honey (risk of infant botulism) — substitute apple juice concentrate or skip the sweetener and use within days.
- Pregnant or breastfeeding women should consult a healthcare professional.
- If the child or adult has autoimmune conditions or is on immune‑modulating medications, check with a clinician first.
- Discontinue use immediately if there’s any allergic reaction (skin rash, throat swelling, difficulty breathing).
Tips for Success and Common Mistakes to Avoid
Avoid Overheating
One of the most common mistakes in elderberry syrup making is cooking too vigorously or too long. Excessive heat can destroy the beneficial compounds (enzymes, vitamins). A gentle simmer is ideal — not a rolling boil. Also, don’t add honey while the mixture is still hot; high temperatures kill its probiotic enzymes.
Importance of Quality Ingredients
Your syrup is only as good as what goes into it. Use organic or food‑grade dried elderberries, raw (unpasteurized) honey, and fresh spices. Avoid elderberries from unknown or uncertified sources, particularly if harvested in the wild without knowledge of surrounding pollution or contamination. If your spices are stale or your ginger has gone bad, the flavor and potency suffer.
Other common slip-ups:
- Not sterilizing jars (risk of contamination)
- Using too much water (results in weak syrup)
- Rinsing or washing elderberries (you lose some beneficial compounds)
- Storing in plastic (light and heat degrade potency)
Creative Ways to Use Sambucus Syrup
Mix into Drinks and Teas
Elderberry syrup isn’t just for taking by the spoonful—get creative with how you use it! One of the easiest and tastiest ways is to stir it into your favorite beverages.
- Add to Herbal Teas: Just a teaspoon or two in a warm chamomile, mint, or ginger tea not only sweetens your drink naturally but also boosts its immune-boosting power.
- In Lemon Water: Mix with warm water and lemon juice in the morning for a daily immunity tonic.
- Smoothies & Juices: Elderberry syrup blends beautifully into fruit smoothies, orange juice, or green drinks for a hidden health boost.
- Mocktails: Combine with sparkling water, lemon juice, and fresh herbs like rosemary or mint for a sophisticated non-alcoholic drink.
You can even swirl it into iced tea or hot cider for an autumnal twist. Just keep in mind that while heating is okay, excessive boiling or microwaving may reduce its health benefits.
Use as a Natural Sweetener
Skip the sugar or artificial syrups and use elderberry syrup in recipes and everyday foods as a flavorful, healthier alternative:
- Drizzle on Pancakes or Waffles – Swap out maple syrup for a rich, berry-infused topping.
- Oatmeal or Porridge – A spoonful of elderberry syrup adds flavor and nutrients to your breakfast bowl.
- Yogurt & Parfaits – Layer it with Greek yogurt, granola, and fresh fruit.
- Baking Substitute – Add to muffins, energy bites, or fruit bars. It’s especially good in recipes that call for honey or agave.
It works well as a sweetener in salad dressings and marinades, too—just blend it with olive oil, vinegar, and herbs for a tangy immune-boosting vinaigrette.
DIY Wellness Gummies and More
Looking to level up your elderberry syrup experience? You can make your own elderberry gummies at home—a hit with kids and adults alike.
Here’s how:
- Warm 1 cup of elderberry syrup on low (don’t boil).
- Whisk in ¼ cup grass-fed gelatin (or vegan gelatin substitute).
- Pour into silicone molds and refrigerate until set.
These elderberry gummies are perfect for daily immune support, easy to portion, and fun to make. Store them in the fridge and use within 2–3 weeks.
Other DIY ideas:
- Popsicles – Mix syrup with fruit juice and freeze in molds.
- Homemade lozenges – Combine with herbal tea and thickener.
- Tinctures or vinegar oxymels – Use syrup as the base for more complex herbal remedies.
With creativity, elderberry syrup becomes far more than just a wellness supplement—it’s a versatile ingredient for your kitchen and medicine cabinet alike.
Where to Find Quality Elderberries
Trusted Online Sources
If you’re not foraging your own, sourcing high-quality elderberries is crucial. Look for organic, non-GMO, and food-grade dried elderberries from trusted retailers. Here are some reputable options:
- Mountain Rose Herbs – Known for premium organic herbs and spices.
- Frontier Co-op – Offers bulk organic elderberries with consistent quality.
- Amazon (with caution) – Stick to highly rated, certified organic brands.
- Etsy herbalists – Many small-scale sellers offer hand-harvested elderberries, often wildcrafted.
Before purchasing, read reviews, check the source country (prefer European or U.S.-grown), and avoid listings with crushed berries or visible stems, which indicate poor processing.
Foraging and Drying Your Own
If you’re adventurous and live in a region where elderberries grow wild, you can forage your own—but caution is key.
Foraging tips:
- Only harvest Sambucus nigra or Sambucus canadensis varieties—others may be toxic.
- Avoid roadside or polluted areas.
- Pick fully ripe, deep-purple berries (never green or red).
- Use gloves and scissors to harvest cleanly.
Drying instructions:
- Gently remove berries from stems (stems are toxic).
- Spread on a mesh screen or dehydrator tray.
- Dry at low heat (110–120°F) until shriveled and no moisture remains (can take 12–24 hours).
- Store in airtight containers in a cool, dark place.
Never consume raw elderberries—they can cause stomach upset. Cooking or drying properly makes them safe and effective.
FAQs about Sambucus Syrup Recipe
1. Can I take elderberry syrup every day?
Yes, many people take elderberry syrup daily during high-risk seasons for immune support. A typical dosage is 1 tablespoon daily for adults and 1 teaspoon for children. Just be sure to take breaks periodically and consult your doctor if you have any medical conditions.
2. How can I make elderberry syrup without honey?
You can replace honey with maple syrup, agave, or even stevia. If you’re giving it to babies under 12 months old, use unsweetened apple juice or make an unsweetened version and use it within a few days.
3. How long should I simmer the elderberries?
Simmer the berries gently for 30 to 45 minutes. This allows the berries to fully release their beneficial compounds without degrading from high heat. Avoid boiling too hard, which can break down the nutrients.
4. What does elderberry syrup taste like?
It has a rich, tart berry flavor with earthy undertones. When blended with honey, cinnamon, ginger, and cloves, it becomes a sweet, spiced syrup that’s both delicious and soothing.
5. Can I double or triple the recipe?
Absolutely. Elderberry syrup scales up easily. Just maintain the same ingredient ratios and extend your simmering time slightly to ensure full extraction. Be sure to store it in sterilized jars and refrigerate or freeze extras.
Conclusion
By preparing it yourself, you gain full control over ingredients, flavor, and potency. Whether you’re mixing it into morning tea, drizzling it over pancakes, or crafting your own gummies, elderberry syrup proves incredibly versatile. Plus, with the ability to customize your recipe—adding ginger for extra heat, cinnamon for warming spice, or echinacea for added immune support—you make it your own.
Beyond its effectiveness, elderberry syrup also embodies the beauty of traditional herbalism—connecting you to ancient wisdom in a very modern way. And the satisfaction of creating your own homemade remedy? Priceless.
So, gather your ingredients, clear a little counter space, and enjoy the rich aroma of berries and spices simmering in your kitchen. Your future self—and your immune system—will thank you.


