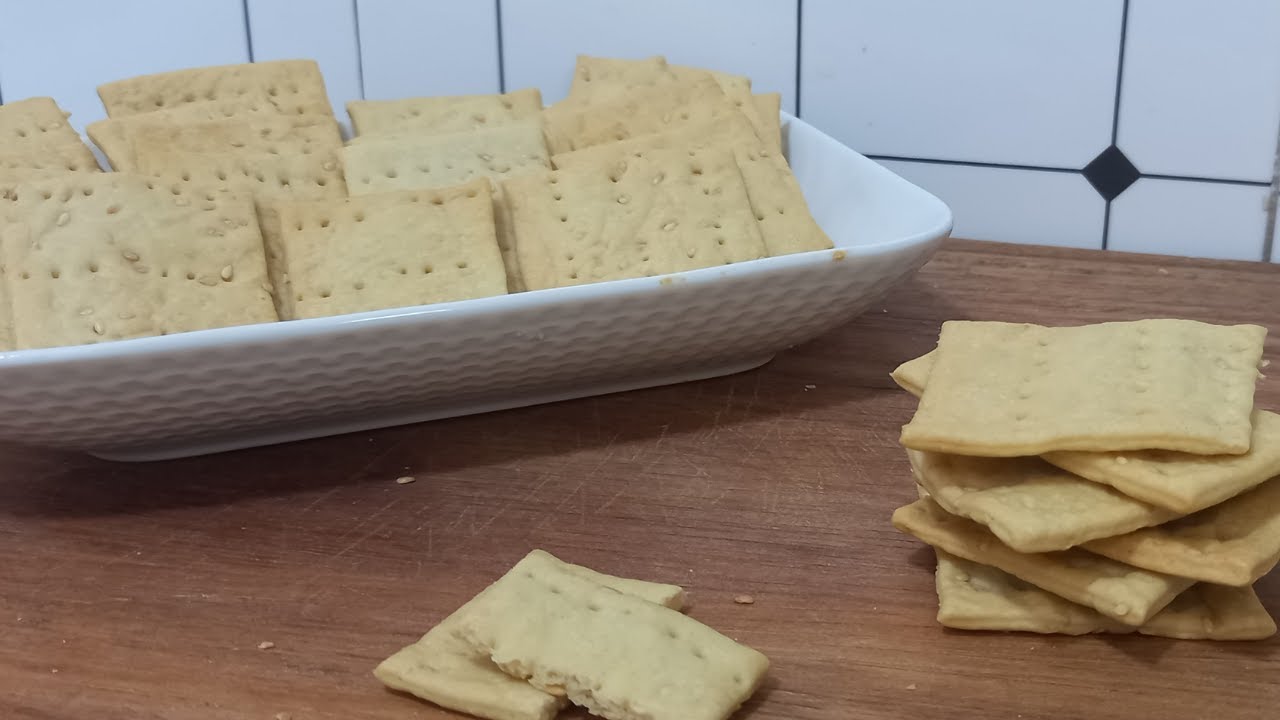
Saltine Cracker Recipe: Saltine crackers—also known simply as saltines—are a beloved pantry staple. These square, lightly salted, and incredibly crispy crackers are known for their signature puffed texture and subtle flavor that pairs beautifully with soups, cheese, dips, or even a simple smear of butter. They’re especially popular in North America and often accompany chili or are crumbled into tomato soup for an extra crunch.
But have you ever stopped to think about what goes into making them? These seemingly simple snacks are created from a dough that’s rolled thin, pricked with holes (called docking), and baked until perfectly crisp. Though store-bought versions are readily available, homemade saltine crackers taste far fresher, are free of preservatives, and can be customized to your liking.
The beauty of saltine crackers lies in their simplicity. Just a handful of pantry staples and a little time in the kitchen, and you’ll have a batch of delicious crackers that beat store-bought ones hands down. Whether you’re making them as a wholesome snack for your family, an accompaniment for your favorite cheese platter, or just for fun, this guide is going to walk you through every detail.
Why Make Saltine Crackers at Home?
So, why go through the trouble of making saltine crackers from scratch when you could easily grab a box off the shelf? For one, homemade crackers are fresher and free from unnecessary additives and preservatives. They also offer you complete control over the ingredients, making them a healthier alternative.
Additionally, baking saltine crackers is a fun and rewarding kitchen project. It’s surprisingly simple and requires no special skills—just a bit of patience and the right method. Want a gluten-free version? Go for it. Need to cut down on salt? You can control that too. Fancy a little rosemary or garlic powder for an extra kick? No problem.
Homemade saltines are also more economical. With basic ingredients like flour, baking soda, butter, salt, and water, you’ll spend pennies on the dollar compared to store-bought versions. And the taste? Crispier, lighter, and absolutely fresh from the oven—once you try making them at home, you might never go back.
Ingredients You’ll Need
Essential Ingredients
Let’s start with the basics. The core ingredients for saltine crackers are likely already in your kitchen. Here’s what you’ll need:
- All-Purpose Flour – This forms the base of the dough. It provides structure and gives the crackers their body. For a lighter version, you can mix in a bit of pastry flour.
- Butter (or Vegetable Shortening) – Butter adds flavor and helps create that flaky texture. Vegetable shortening can also be used for an even crispier finish.
- Baking Soda – The key to puffiness in saltines. It creates air pockets that give the cracker its characteristic texture.
- Salt – Both in the dough and sprinkled on top for that signature saltine taste.
- Warm Water – Helps bind everything together and activate the baking soda.
This is the most stripped-down version of the ingredient list. It’s simple, but it yields excellent results when executed properly. Each component plays a vital role in texture, taste, and appearance.
Optional Add-Ins for Extra Flavor
While classic saltines are plain and simple, there’s absolutely no reason why you can’t add your own twist. Here are some flavor-enhancing add-ins you can try:
- Garlic Powder – Adds a savory depth.
- Onion Powder – For a sweet, aromatic finish.
- Dried Herbs – Rosemary, thyme, oregano, or basil can make your crackers gourmet.
- Cracked Black Pepper – Gives the crackers a spicy kick.
- Grated Cheese – A small amount of Parmesan or cheddar baked into the dough creates irresistible cheesy crackers.
Get creative! Think of your crackers as a blank canvas—dress them up as much or as little as you like.
Ingredient Substitutions and Variations
One of the best parts of homemade cooking is the flexibility. Can’t use one of the ingredients listed above? Here are some substitutions:
- Butter Substitution: Use coconut oil, ghee, or vegetable shortening.
- Gluten-Free Option: Use a gluten-free flour blend with xanthan gum.
- Low-Sodium Version: Reduce or skip the salt sprinkled on top.
- Vegan Alternative: Use plant-based butter or shortening.
By tweaking a few ingredients, you can make saltines that cater to nearly any dietary preference without sacrificing flavor or texture.
Tools and Equipment Required
Basic Kitchen Tools
Before you dive into the mixing and baking, make sure you’ve got the right tools on hand. Fortunately, this recipe is beginner-friendly and doesn’t require any high-end gadgets.
Here’s what you’ll need:
- Mixing Bowl – For combining your ingredients.
- Rolling Pin – To roll the dough out to the perfect thinness.
- Baking Sheet – A flat sheet to place your cut crackers on for baking.
- Parchment Paper – To prevent sticking and make cleanup easier.
- Fork or Docking Tool – To prick the dough and prevent puffing up unevenly.
- Knife or Pizza Cutter – To cut the dough into cracker shapes.
That’s it! Most of these are standard kitchen tools, so you likely already have everything you need.
Optional Tools for Precision
Want to take your cracker game to the next level? Consider using the following:
- Pastry Cutter or Bench Scraper – For clean, uniform cuts.
- Pastry Brush – To brush butter or oil on top before baking.
- Silicone Baking Mat – An alternative to parchment paper for an eco-friendly option.
- Kitchen Scale – For precise measurement, especially if you’re baking in large batches.
These extras aren’t necessary, but they’ll make the process smoother and might improve your final product’s consistency.
Step-by-Step Guide to Making Saltine Crackers
Step 1 – Preparing the Dough
In a large mixing bowl, combine 2 cups of all-purpose flour, 1 teaspoon of salt, and 1 teaspoon of baking soda. Cut in 2 tablespoons of butter or shortening using a pastry cutter or your fingers until the mixture becomes crumbly. Gradually add ½ cup of water (or slightly more if needed), mixing until a smooth, firm dough forms. Knead for a few minutes until elastic, then cover and let it rest for about 10–15 minutes. Resting relaxes the gluten, making the dough easier to roll out later.
Step 2 – Rolling Out the Dough
Preheat your oven to 400°F (200°C). Lightly flour your work surface and roll out the dough as thin as possible — around 1/8 inch or thinner for that classic crisp saltine texture. The thinner the dough, the lighter and crunchier your crackers will be. Try to keep the thickness even so they bake uniformly.
Step 3 – Cutting and Docking
Using a pizza cutter or sharp knife, cut the dough into small squares — about 2 inches by 2 inches. Transfer the squares onto a parchment-lined baking sheet. Use a fork to dock (prick) each piece several times; this prevents them from puffing up too much while baking. For that signature saltine finish, lightly brush the tops with melted butter or water and sprinkle with sea salt.
Step 4 – Baking the Crackers
Place the baking sheet in the preheated oven and bake for 10–12 minutes, or until the crackers turn light golden brown and crisp. Keep an eye on them — they can go from perfectly done to overbaked in a minute. For extra crunch, flip them halfway through baking.
Step 5 – Cooling and Storing
Remove the crackers from the oven and transfer them to a wire rack to cool completely. They’ll crisp up even more as they cool. Once cooled, store in an airtight container at room temperature for up to a week.
Enjoy your homemade saltine crackers with soups, cheese, dips, or just as a satisfying snack. Light, flaky, and perfectly salty — they’re proof that the simplest recipes often taste the best.
Tips and Tricks for Perfect Saltine Crackers
Common Mistakes to Avoid
Even though this recipe is simple, a few missteps can throw off your results. Here’s what to watch out for:
- Too Thick Dough: This is the #1 mistake. Thick dough = soft crackers. You want thin, almost transparent dough.
- Overbaking: Burnt edges and bitter flavors happen fast. Watch them closely in the last few minutes.
- Underdocking: Forgetting to poke holes can result in puffed-up, uneven crackers. Be generous with your docking.
- Skipping the Resting Time: Don’t rush it. Resting allows the gluten to relax, making the dough easier to handle.
- Wrong Oven Temp: If your oven is too low, the crackers won’t crisp up properly. Too high, and they’ll burn before they’re dry inside.
How to Keep Crackers Crisp
Crackers are all about that snap, so here’s how to maintain it:
- Cool Completely before storing—any heat = moisture.
- Use Airtight Containers—glass jars with tight lids work best.
- Don’t Store with Other Moist Foods—they’ll absorb humidity.
- Refresh in Oven—if they lose crispness, a few minutes in a low oven (300°F) brings them back to life.
Flavor Enhancement Tips
Want to elevate your crackers? Try these:
- Add spices to the dough like chili flakes, curry powder, or za’atar.
- Brush with olive oil post-bake and sprinkle with parmesan or herbs.
- Top with seeds like sesame, poppy, or chia for texture and nutrition.
- Try sweet saltines by brushing with honey and cinnamon sugar before baking.
The beauty of this recipe lies in its flexibility—you can go classic or get crazy with flavors.
Serving Suggestions
Pairing Ideas
Homemade saltine crackers are versatile little squares that can turn into an all-star snack or an elegant appetizer with just a little creativity. You’ve nailed the recipe—now let’s talk about what to serve them with.
Here are some classic and delicious pairings:
- Cheese Boards: Saltines pair beautifully with hard cheeses like cheddar or gouda, or soft varieties like brie and camembert. Their mild flavor lets the cheese shine.
- Soups and Stews: Crumble them over tomato soup, chicken noodle, or chili. They absorb broth while still giving that satisfying crunch.
- Charcuterie Plates: Match them with sliced meats, olives, pickles, and spreads for a homemade party platter.
- Egg Salad or Tuna Salad: Use your saltines as a base for savory spreads instead
Serving Suggestions
Pairing Ideas
Homemade saltine crackers are incredibly versatile. Their mild, crisp flavor makes them a perfect backdrop to both simple and more elaborate pairings. Here are some tried‑and‑true ideas to enjoy them:
- Cheese and Charcuterie Boards
Use crackers as a neutral, crisp base for a variety of cheeses (sharp cheddar, gouda, goat cheese, or blue) paired with cured meats (prosciutto, salami), fruit jams, olives, nuts, and fresh fruit. The crispness contrasts beautifully with creamy cheeses. - Soups and Stews
Crumble or serve whole alongside tomato soup, chicken noodle, minestrone, or chili. They soak up broth just enough to soften slightly while still retaining a pleasant crunch. - Dips and Spreads
Use saltines as vehicles for hummus, guacamole, artichoke dip, spinach dip, pate, or any creamy or savory spread. Their crisp texture makes them ideal for scooping. - Toppings and Crumbs
Grind or crush a few crackers to use as a crunchy topping for casseroles, mac and cheese, or baked fish/vegetables. They add texture without overpowering flavor. - Sweet Variations
For a dessert twist, brush crackers with melted butter, sprinkle with cinnamon sugar or cocoa powder, and bake briefly for sweet crisps to accompany tea or coffee.
Creative Topping Combinations
- Herbed Cream Cheese & Smoked Salmon
A thin layer of herbed cream cheese, smoked salmon, capers, and a sprig of dill. - Avocado Smash & Sea Salt
Crushed avocado, a squeeze of lime, pinch of sea salt, and maybe a few chili flakes. - Fig Jam & Goat Cheese
Spread goat cheese and top with a dollop of fig or berry jam. - Roasted Red Pepper Hummus & Microgreens
A smear of hummus and a scattering of microgreens or sprouts for freshness. - Nut Butter & Berry Jam
Almond or peanut butter plus a thin layer of jam for a sweet‑savory snack.
Nutritional Information
Health Benefits
Saltine crackers, when made at home, are relatively simple in their ingredient profile, giving you clarity about what you’re consuming. Here are some benefits:
- Low in Fat (Depending on Recipe): Because the recipe uses only a modest amount of butter or shortening, homemade crackers are generally lower in fat than many commercial snack crackers which often include additional oils or hydrogenated fats.
- Simple, Recognizable Ingredients: You control what goes in — no mystery additives, artificial flavors, or preservatives.
- Carbohydrate Source: They act as a quick energy source thanks to the flour, which can be helpful when paired with protein or fats to moderate blood sugar response.
- Versatility for Health Upgrades: You can incorporate whole-grain flours, seeds, or fiber enhancers to make a more nutritious version.
- Portion Control: Because they’re thin and crisp, it’s easy to gauge serving sizes and avoid overeating.
Calories and Macronutrient Breakdown
Here’s a rough estimate (per serving, ~5–6 crackers, depending on size):
| Nutrient | Amount (approx.) |
|---|---|
| Calories | ~ 70 – 90 kcal |
| Carbohydrates | ~ 10 – 12 g |
| Protein | ~ 1 – 1.5 g |
| Fat | ~ 3 – 4 g |
| Fiber | ~ 0.5 – 1 g |
| Sodium | Depends heavily on added salt (in dough + topping) |
Note: These are approximate values. If you make changes (e.g. whole wheat flour, extra seeds, less salt), your nutrition values will shift.
Storing and Shelf Life
Best Storage Methods
To keep your saltine crackers fresh and crisp, follow these storage practices:
- Cool Fully: Always ensure crackers are completely cooled before storing. Any residual warmth can create steam and soften them.
- Airtight Containers: Use tightly sealed jars, cookie tins, or resealable bags. Remove as much air as possible.
- Dry environment: Store in a cool, dry place away from humidity or direct heat sources.
- Desiccant Trick: Place a clean, dry paper towel or a small food‑safe silica packet in the container to absorb any moisture.
Freezing and Reheating
If you’ve got a large batch:
- Freezing: Portion crackers into airtight freezer bags, squeezing out excess air. Freeze for up to 1 month. When ready to eat, let them come to room temperature while still sealed so they don’t absorb moisture.
- Reheating: If crackers soften over time, you can refresh them by placing them on a baking sheet in a 300°F (150°C) oven for 5–7 minutes. Let them cool fully before storing again.
FAQs about Saltine Cracker Recipe
Can I use whole wheat flour or a gluten‑free flour?
Yes! You can substitute up to half of the flour with whole wheat for added nutrition. For gluten‑free, use a suitable gluten‑free flour blend (often with xanthan gum) and experiment lightly, as texture may vary.
Why are my crackers soft or chewy?
The most common reasons are dough being rolled too thick, underbaking, or storing while still warm (leading to trapped moisture). Try rolling thinner, baking a little longer, and ensuring full cooling before storage.
Can I make these crackers ahead of time?
Absolutely. Once cooled and stored properly in airtight containers, they can last up to 10 days at room temperature, or up to a month in the freezer.
Can I add flavors such as herbs or cheese?
Yes. Add dried herbs, garlic or onion powder, grated cheese, cracked pepper, or seeds either into the dough or on top, pressing gently so they adhere.
Can I scale up the recipe for large batches?
Yes, you can multiply the ingredients proportionally. Use a kitchen scale for accuracy, and consider baking in batches so the oven temperature remains stable and even.
Conclusion
Baking your own saltine crackers is a rewarding and surprisingly simple process. With just a few basic ingredients, you can create a crisp, fresh, and customizable snack that outshines commercial alternatives. From rolling ultra‑thin dough and docking it properly to baking at the right temperature and storing it carefully, each step matters—but none are difficult.
Once you master the basics, you can experiment with flavors, try whole grain or gluten‑free versions, and pair your crackers with everything from soups and cheeses to sweet toppings. The freedom to control ingredients and taste, along with the satisfaction of homemade crunch, makes this a recipe worth keeping in your culinary rotation.
Enjoy your baking, and don’t forget—crackers are best when shared!


