Salsa Canning Recipe: Making your own salsa at home is one of the most satisfying and rewarding culinary projects. It’s fresh, flavorful, and most importantly, safe for long-term storage when done right.
Whether you want to spice up your meals or gift your homemade delight, canning salsa gives you the flexibility to enjoy the garden-fresh taste of summer tomatoes all year round.
In this detailed guide, you’ll learn everything from choosing the right ingredients to sealing your jars like a pro.
Why Can Your Own Salsa?
Canning your own salsa is like bottling sunshine. Why settle for the store-bought version loaded with preservatives when you can make your own zesty, flavorful salsa at home? It gives you total control over what goes in—meaning no artificial ingredients, too much salt, or unnecessary sugar.
Beyond control over ingredients, canning allows you to preserve large garden harvests or take advantage of seasonal deals at your local farmer’s market. It’s also an amazing way to capture peak tomato flavor and keep it locked in a jar until you’re ready to pop it open.
Also, imagine being able to pull out a jar of your homemade salsa for tacos, nachos, or chips during winter. It’s convenience and taste bottled up!
Benefits of Home-Canned Salsa
Home-canned salsa isn’t just delicious—it’s practical. Here are a few benefits:
- Long Shelf Life: Properly canned salsa can last up to 12–18 months.
- Customizable Flavors: Add more heat, herbs, or even fruits like mango or peach for your own twist.
- Save Money: Canning in bulk is more economical than constantly buying salsa.
- Gift-Worthy: Homemade salsa in a cute jar with a custom label makes for an awesome gift.
Plus, there’s a special satisfaction in knowing you made it yourself—no preservatives, just pure, vibrant flavor.
Ingredients You’ll Need
Essential Ingredients
Here’s your baseline shopping list for a traditional tomato salsa recipe for canning. This makes about 6–7 pint-sized jars:
- Tomatoes (10 cups, peeled and chopped) – Roma or paste tomatoes are best for their low moisture.
- Onions (2 ½ cups, chopped) – Yellow or white onions work great.
- Jalapeño Peppers (1 ½ cups, finely chopped) – Adjust based on your heat preference.
- Garlic (6 cloves, minced) – Fresh garlic adds bold flavor.
- Cilantro (½ cup, chopped) – Optional, but adds a fresh herbal kick.
- White Vinegar (1 cup, 5% acidity) – Essential for safe canning.
- Tomato Paste (2 tablespoons) – For thicker consistency.
- Salt (1 tablespoon) – Helps enhance and preserve flavor.
- Sugar (1 teaspoon) – Optional, but balances acidity.
This ingredient list balances heat, acidity, and sweetness perfectly, but you can always tweak it to suit your taste—as long as you maintain proper vinegar-to-vegetable ratios for safety.
Optional Add-ins for Flavor Variety
Want to get creative? Here are some ingredients you can add to spice things up:
- Bell Peppers (any color) – For sweetness and crunch.
- Smoked Paprika – Adds a subtle smoky depth.
- Roasted Corn – Perfect for Southwest-style salsa.
- Mango or Pineapple – For a sweet-and-spicy tropical twist.
- Chipotle Peppers in Adobo – Adds heat and smokiness.
Just remember: any ingredient that reduces acidity (like fruits or corn) may require adjustments to vinegar or using a pressure canner.
Tools & Equipment Required for Canning
Before diving in, make sure you have the right gear. Canning isn’t complicated, but the right tools make it safe and smooth:
- Large Stockpot or Water Bath Canner – Essential for processing.
- Canning Jars (Pint-size) – Wide-mouth or regular, with new lids.
- Jar Lifter – For safely removing hot jars.
- Funnel – Makes filling jars easier and cleaner.
- Bubble Remover or Chopstick – Helps remove air pockets.
- Lid Lifter – Magnetic wand to lift lids from hot water.
- Clean Towels & Cloths – To wipe rims and handle jars.
This basic toolkit ensures you can follow the process safely and hygienically, which is non-negotiable when working with canned goods.
Preparing Your Ingredients
Selecting the Best Tomatoes
Not all tomatoes are created equal—especially when it comes to canning. For salsa, Roma or paste tomatoes are preferred due to their lower water content and rich flavor. Beefsteak tomatoes are juicy and sweet but can result in a watery salsa if not cooked down sufficiently.
Look for:
- Firm, ripe tomatoes without blemishes or bruises
- Deep red color for full flavor
- Locally grown or homegrown if possible (they’re usually fresher)
Avoid overripe or mealy tomatoes, as they can throw off the consistency of your salsa and make it more likely to spoil.
Chopping & Measuring Ingredients
Consistency is key in canning. Chop your onions, peppers, and tomatoes uniformly to ensure even cooking and safe preservation. Always use fresh, clean produce and wash everything thoroughly.
Here’s a tip: wear gloves when chopping hot peppers like jalapeños. Trust me, it’s a mistake you only make once!
Use proper measuring cups—liquid for liquids and dry for solids. Follow the measurements closely, especially for vinegar and salt, which are crucial for both flavor and food safety.
Cooking the Salsa Before Canning
You’ll want to combine all your chopped ingredients in a large pot and simmer for at least 15–20 minutes. This step helps:
- Blend the flavors
- Reduce excess moisture
- Ensure all ingredients reach a safe temperature
Stir frequently to avoid burning, especially if you’re making a large batch. Don’t rush this process—it’s the heart of what gives your salsa that deep, developed flavor.
Step-by-Step Guide to Salsa Canning
Step 1: Sterilizing Your Jars
Before you even think about filling your jars, sterilization is key. Wash your canning jars, lids, and rings with hot, soapy water, then rinse thoroughly. Place the jars upright in a large pot, cover with water, and bring to a boil for 10 minutes to sterilize. Keep them hot until you’re ready to fill them — this prevents the glass from cracking when you pour in hot salsa.
Step 2: Cooking Your Salsa
In a large saucepan or stockpot, combine your chopped tomatoes, onions, peppers, garlic, vinegar or lemon juice, salt, and spices. Use recipes designed for canning to ensure proper acidity — this is crucial for safety. Bring the mixture to a boil over medium-high heat, then simmer for 10–15 minutes, stirring occasionally. The salsa should be thick and aromatic, with all ingredients well-blended and softened.
Step 3: Filling the Jars Properly
Using a canning funnel, ladle the hot salsa into your sterilized jars, leaving about ½ inch of headspace at the top. This space allows for expansion during processing. Wipe the rims clean with a damp cloth to ensure a good seal, then place the lid on each jar and screw the bands on until fingertip-tight — not too loose, not too tight.
Step 4: Sealing the Jars
Once your jars are filled and lids are secured, they’re ready to seal. Carefully lower the jars into your canning pot or water bath canner using a jar lifter. Make sure they are completely submerged in hot water, with at least 1 inch of water covering the tops of the jars. This ensures even sealing and sterilization.
Step 5: Processing in a Water Bath
Bring the water bath to a steady boil and process the jars for 15–20 minutes (adjusting for altitude if needed). Once done, turn off the heat and let the jars sit in the hot water for 5 minutes before removing. Place them on a towel-lined surface and let them cool undisturbed for 12–24 hours. As they cool, you’ll hear that satisfying “pop” — a sign your jars are sealed properly.
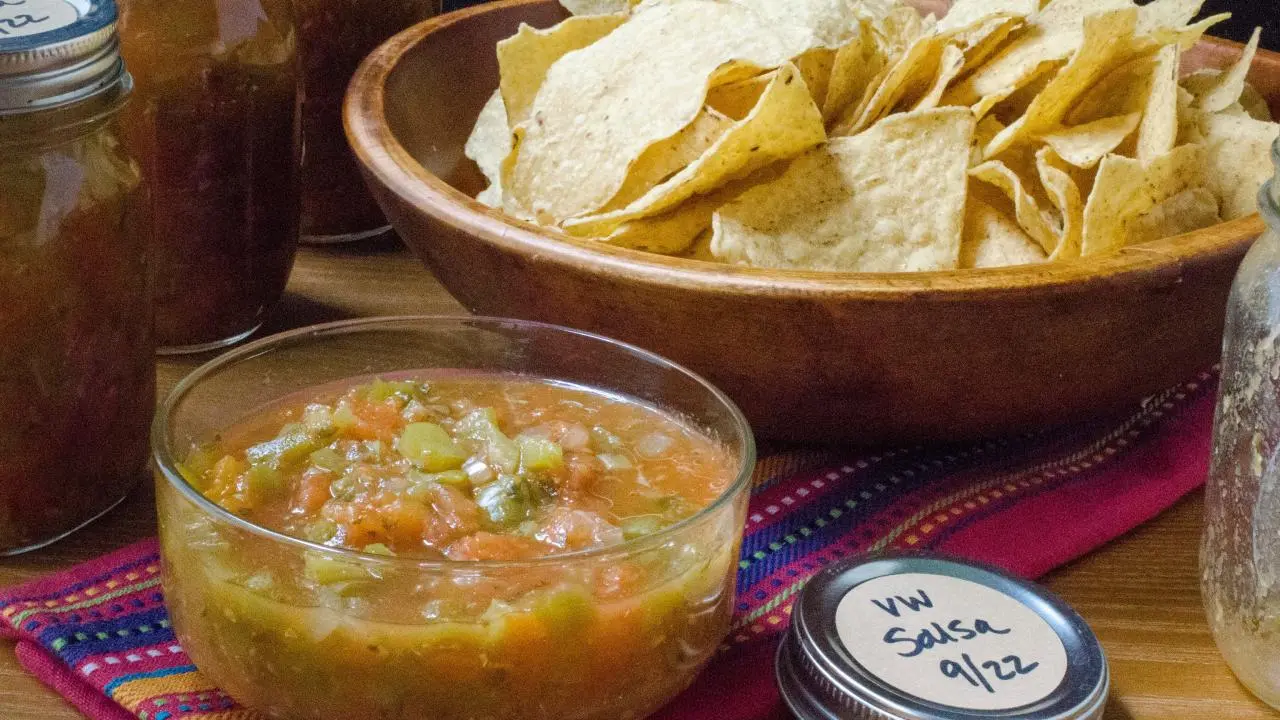
Check each lid after cooling; it should be concave and firm to the touch. Label and store your salsa in a cool, dark place for up to a year. Bright, fresh, and shelf-stable — your homemade canned salsa will be ready to crack open for chips, tacos, or gifts anytime.
Cooling, Storing & Labeling
Cooling the Jars Safely
The cooling process isn’t just about temperature—it’s the final phase of the sealing process. During cooling, the pressure inside the jar drops, pulling the lid down to create an airtight seal. That’s why it’s vital to:
- Place jars on a heat-safe surface with a towel or cloth underneath.
- Keep them in a draft-free area.
- Avoid touching or pressing on the lids while they cool.
- Never invert the jars—this was an old method that’s no longer considered safe.
How to Check the Seal
Here are a few easy ways to check whether your salsa jars sealed correctly:
- Press Test: Press the center of the lid—if it’s firm and doesn’t bounce, it’s sealed.
- Sound Test: A properly sealed jar produces a dull “thunk” sound when tapped.
- Visual Check: The lid will be slightly concave (pulled down) after sealing.
If any jar fails the seal test, place it in the fridge and eat it within 7–10 days, or reprocess it within 24 hours using a fresh lid.
Labeling and Shelf Life Tips
Every jar should have:
- Date canned
- Type of salsa (mild, spicy, mango, etc.)
Use permanent marker, label stickers, or even custom printable labels. Keep a notebook or spreadsheet if you’re making big batches so you can track flavor variations and shelf life.
For best flavor, use your salsa within 12 months. While it may still be safe after that, the texture and taste may start to degrade. Always inspect the jar before opening—if you see mold, leaks, or off-smells, toss it.
Tips for the Best Home-Canned Salsa
Adjusting Heat Levels
One of the beauties of homemade salsa is that you control the heat. Whether you like your salsa smoky and mild or fiery enough to make your eyes water, the spice level is completely up to you.
Here’s how to adjust the heat without compromising the safety of your canned salsa:
- Milder Salsa: Use sweet bell peppers instead of hot peppers, or reduce the number of jalapeños. Anaheim or poblano peppers are also great mild alternatives.
- Medium Heat: Stick with 1½ cups of seeded jalapeños, as in the base recipe. Leaving some seeds in can slightly increase the heat.
- Hot & Spicy: Add serranos, habaneros, or chipotle peppers. You can also leave all the seeds and ribs from your hot peppers for maximum fire.
Important Safety Tip: Always wear gloves when chopping hot peppers. The capsaicin can cause painful burning sensations on your skin or eyes.
While adjusting heat levels is fine, never reduce the amount of vinegar or acid in the recipe to tone down sharpness. Doing so can create an unsafe environment for bacteria. If you find the salsa too tart, you can add a small amount of sugar to balance it, but keep the vinegar levels as is for safe canning.
Balancing Acidity for Safety
Acidity is what makes canning salsa safe using the water bath method. Without enough acidity, dangerous bacteria like botulism can thrive.
Key acidity elements:
- Vinegar (5% acidity) – the safest and most common acid used
- Bottled lemon or lime juice – if you’re adjusting for flavor
- Citric acid powder – an alternative for precise control
Always measure your acids carefully and never substitute fresh lemon juice for bottled in canning recipes—fresh citrus can vary in acidity, making it unreliable for safe preservation.
If you’re experimenting with low-acid ingredients like corn, mango, or beans, you’ll need to either increase vinegar or switch to pressure canning to ensure food safety.
Preventing Common Canning Mistakes
Canning is simple once you understand it, but mistakes can happen. Here are a few to avoid:
- Skipping Sterilization: Always start with clean, sterilized jars and lids. It’s not optional.
- Overfilling or Underfilling Jars: Leave exactly ½ inch of headspace. Too little, and the jar may not seal; too much, and there’s excess air.
- Not Adjusting for Altitude: At higher elevations, water boils at lower temperatures. Add more processing time if you live over 1,000 feet above sea level.
- Improper Seals: Make sure the rims are clean before placing the lid. If salsa spills onto the rim, the jar might not seal.
- Not Using a Tested Recipe: Follow established, safe canning recipes, especially when starting out. Freestyling is great in cooking, not in preserving.
Stick to these tips and your canned salsa will not only be delicious—it’ll be 100% safe for you and your loved ones to enjoy.
Salsa Canning Recipe Variations
Chunky Salsa
If you’re a fan of thick, hearty salsa with visible chunks of tomato, onion, and pepper, then a chunky salsa variation is your go-to.
Here’s how to make your canned salsa chunky:
- Use a food processor on pulse or chop vegetables by hand for better control.
- Don’t overcook your salsa during the simmering stage—less cooking = chunkier texture.
- Consider adding diced bell peppers or corn kernels for added texture and color.
This style is perfect for chip dipping or spooning over grilled chicken or fish. Just make sure you still follow the same vinegar-to-vegetable ratio for safe canning.
Roasted Tomato Salsa
Roasting your tomatoes before making salsa adds a rich, smoky flavor that elevates the final product.
Steps to roast:
- Halve Roma tomatoes and place on a baking sheet with skin side up.
- Add garlic cloves and onion wedges.
- Roast at 400°F (200°C) for about 30 minutes or until the skins are blistered.
- Let cool, peel off the skins, and then chop or pulse in a food processor.
Combine with vinegar, peppers, and salt, then proceed with cooking and canning as usual.
Roasted salsa pairs wonderfully with grilled meats or as a smoky dip. It’s also less watery than raw tomato-based salsas, making it a favorite for thicker consistency.
Fruit-Infused Salsa
Adding fruits like mango, pineapple, or peaches gives salsa a delightful sweet-and-spicy profile. These tropical-style salsas are fantastic with tacos, fish, or even as a glaze for grilled chicken.
Tips for fruit salsa:
- Use ripe but firm fruits to prevent mushiness.
- Balance sweetness with heat—jalapeños or habaneros work well.
- Increase vinegar to maintain proper acidity.
Because fruits are low-acid, some fruit salsas may not be safe for water bath canning without adjustments. Use tested recipes from trusted sources or freeze them instead.
FAQs about Salsa Canning Recipe
1. How long does canned salsa last?
Properly sealed and stored in a cool, dark place, home-canned salsa can last 12 to 18 months. Always check for spoilage signs before use—like bulging lids, mold, or off-smells.
2. Can I can salsa without a pressure canner?
Yes, as long as your salsa has sufficient acidity (from vinegar or lemon juice), you can use a water bath canner. If you’re adding low-acid ingredients (like corn or black beans), then a pressure canner is required for safety.
3. What type of vinegar is best for salsa?
Use white vinegar (5% acidity) for the most neutral flavor and reliable acidity. You can also use apple cider vinegar, but be aware it adds a slight sweetness and tang.
4. How spicy should I make it?
That’s completely up to you. For mild salsa, use bell peppers. For medium, go with jalapeños. Want it hot? Add habaneros or serranos. Always wear gloves when chopping hot peppers to protect your skin.
5. Can I freeze instead of canning salsa?
Absolutely! If you’re not ready for canning, you can freeze cooked salsa in freezer-safe containers. Just leave room for expansion and use within 3–6 months for best quality.
Conclusion
If this is your first time canning, it might seem overwhelming at first. But once you go through the process step-by-step—prepping ingredients, cooking your salsa, filling jars, and sealing them—you’ll realize how simple and fun it can be. With each batch, your confidence will grow, and soon you’ll be experimenting with your own twists and sharing jars with family and friends.
Best of all, when you open a jar of your salsa in the middle of winter, you’ll taste the freshness of summer all over again. That’s the magic of canning—capturing flavor, one jar at a time.
So what are you waiting for? Gather your tomatoes, sharpen your knife, and let’s get canning. Your chips are begging for something homemade.


