Russian Tea Cookies Recipe: There’s something magical about a cookie that crumbles perfectly, melts in your mouth, and leaves behind a delicate sweetness.
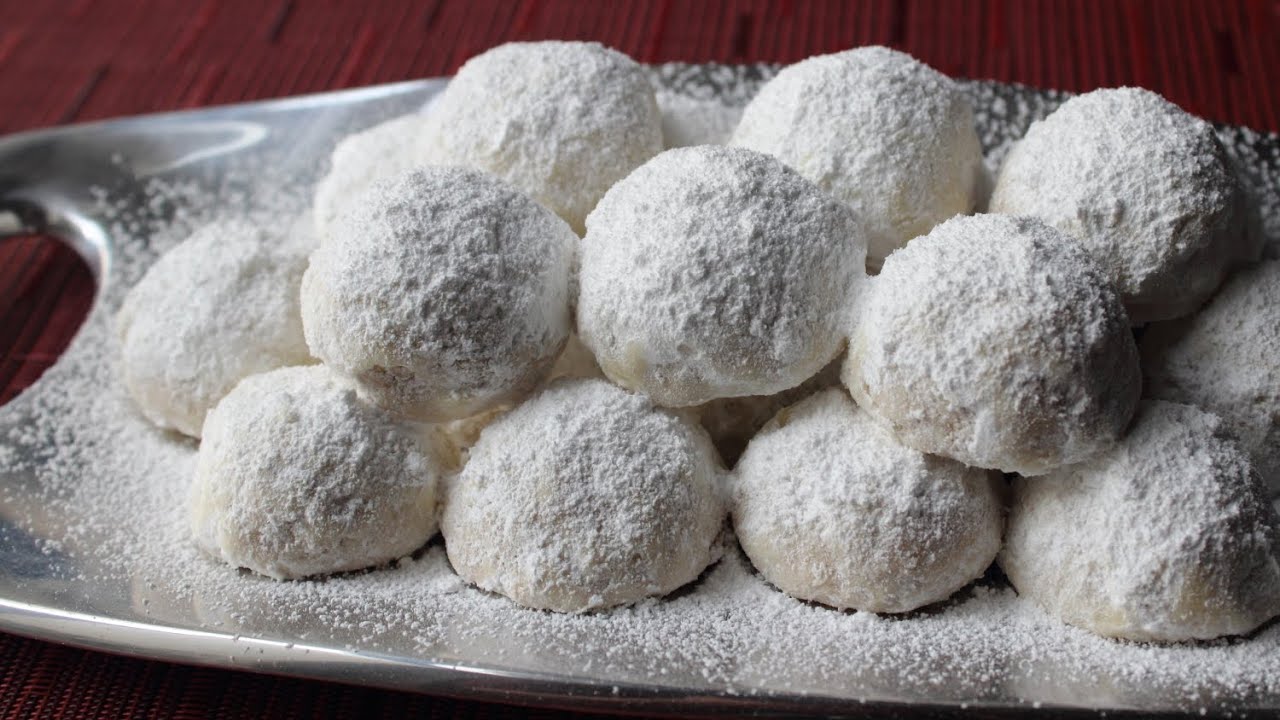
Russian Tea Cookies, also known as Snowball Cookies, are the kind of treat that brings nostalgia, comfort, and pure joy with every bite.
Whether you’re baking them for the holidays or just for an afternoon tea, this guide will walk you through everything you need to know—from ingredients to flawless execution.
What Are Russian Tea Cookies?
Russian Tea Cookies are buttery, nutty, powdered sugar-coated delights traditionally served during Christmas, weddings, or tea parties. Despite the name, they’re not exclusive to Russia. In fact, you may have heard of their many aliases—Mexican Wedding Cookies, Italian Butterball Cookies, or even Snowball Cookies. But no matter what you call them, the recipe is pretty much the same: a shortbread-style dough made with butter, flour, and finely chopped nuts, rolled into balls, baked, and coated in powdered sugar.
These cookies don’t just look pretty—they carry a melt-in-your-mouth texture that’s incredibly satisfying. The powdered sugar gives them that snow-dusted, festive look while locking in moisture and enhancing the rich, nutty flavor.
Why You’ll Love This Recipe
- Simple Ingredients: Nothing fancy—just what you already have in your pantry.
- Quick to Make: You can whip up a batch in under an hour.
- Perfect for Gifting: These cookies are ideal for packing in cookie boxes or tins.
- Festive and Elegant: They’re a hit at every event, from Christmas dinners to bridal showers.
- Customizable: You can tweak the recipe to suit your taste—change the nuts, add chocolate chips, or even spice them up with cinnamon or cardamom.
Ingredients You’ll Need
Let’s start with the foundation of any great recipe—the ingredients. The beauty of Russian Tea Cookies lies in their simplicity, but the magic is in how these humble ingredients come together to create something extraordinary.
Main Ingredients
Here’s what you’ll need for a classic batch:
- 1 cup (2 sticks) unsalted butter, softened
- 1/2 cup powdered sugar (plus more for coating)
- 1 teaspoon vanilla extract
- 2 1/4 cups all-purpose flour
- 1/4 teaspoon salt
- 3/4 cup finely chopped nuts (walnuts, pecans, or almonds)
Each of these plays a key role. Butter gives the dough its soft, rich texture. Powdered sugar blends smoothly into the dough and helps coat the cookies beautifully. Vanilla adds that warm aroma, and the flour provides structure. The salt might seem like a small player, but it enhances all the flavors. And, of course, the nuts—these are the stars that bring crunch, depth, and an earthy richness.
Optional Add-ins and Variations
Want to add your personal twist? Consider these ideas:
- Mini chocolate chips for a choco-nutty blend.
- Cinnamon or nutmeg for a spiced version.
- Orange zest or lemon zest to add a citrusy brightness.
- Coconut flakes for a tropical hint.
- Swap vanilla for almond extract for a deeper nutty flavor.
Ingredient Substitutes for Dietary Preferences
Need to make it vegan, gluten-free, or allergen-free? Here’s how:
- Vegan Version: Use plant-based butter and ensure your sugar is vegan-certified.
- Gluten-Free: Swap all-purpose flour for a 1:1 gluten-free baking flour.
- Nut-Free: Skip the nuts entirely or replace with seeds like sunflower or pumpkin.
Don’t be afraid to play around with these. The core structure of the dough is forgiving enough to handle a little experimentation.
Tools and Equipment Required
Now that you’ve got your ingredients lined up, let’s talk gear. While Russian Tea Cookies don’t demand fancy equipment, having the right tools makes the baking process smoother and more enjoyable.
Baking Tools You’ll Need
- Mixing bowls – One large, one medium.
- Electric mixer or hand whisk – For creaming the butter and sugar.
- Measuring cups and spoons – Accuracy is key here.
- Spatula or wooden spoon – To combine the ingredients gently.
- Baking sheet – Standard size, ideally with a rim.
- Parchment paper or silicone baking mat – Prevents sticking and ensures even baking.
- Wire cooling rack – To cool the cookies properly.
- Small bowl of powdered sugar – For the final roll.
These are basic, everyday tools you likely already have in your kitchen. No stand mixer? No problem. A hand whisk and a bit of muscle power will work just fine.
Alternatives You Can Use at Home
Missing something from the list? Improvise with these:
- No parchment paper? Just grease your baking sheet with butter.
- No cooling rack? Use a clean, dry baking sheet lined with paper towels.
- No cookie scoop? Use a tablespoon and roll by hand.
Remember, baking should be fun—not stressful. These cookies are rustic by nature, so precision isn’t as critical as with delicate pastries.
Step-by-Step Instructions to Make Russian Tea Cookies
Step 1: Prepping Your Workspace
Before you start mixing, preheat your oven to 350°F (175°C) and line a baking sheet with parchment paper. Gather your ingredients — butter, powdered sugar, flour, finely chopped nuts (like walnuts, pecans, or almonds), salt, and vanilla extract. Having everything ready makes the process smoother and keeps your dough consistent.
Step 2: Creaming Butter and Sugar
In a large mixing bowl, beat softened butter and ½ cup of powdered sugar together until light and creamy. This step creates the base for that melt-in-your-mouth texture Russian Tea Cookies are famous for. Mix in vanilla extract for flavor depth — simple, sweet, and aromatic.
Step 3: Mixing in Dry Ingredients
In a separate bowl, whisk together flour and a pinch of salt. Gradually add the dry mixture to the butter mixture, stirring until just combined. Fold in the chopped nuts — these give the cookies their signature crunch and nutty warmth. The dough should be soft but not sticky; if it feels too crumbly, gently knead it until it holds together.
Step 4: Shaping the Dough into Balls
Scoop out small portions of dough and roll them between your palms to form 1-inch balls. Place them on the prepared baking sheet about an inch apart. These cookies don’t spread much, so you can fit plenty on one tray. Keep the shapes neat — their charm lies in that perfect, petite roundness.
Step 5: Baking to Perfection
Bake for 12–15 minutes, or until the bottoms are lightly golden. The tops should stay pale and soft to the touch. Let the cookies cool slightly (but not completely), then roll them gently in powdered sugar while still warm — this helps the sugar stick beautifully. Once cooled, give them a second sugar coating for that dreamy, snowy finish.
Delicate, buttery, and irresistibly nutty — Russian Tea Cookies are the perfect treat with a cup of tea or coffee.
How to Roll in Powdered Sugar Like a Pro
One of the signature features of Russian Tea Cookies is their snowy, powdered‑sugar coating. That “snowball” effect not only looks beautiful but enhances their melt‑in‑your‑mouth texture. But getting it just right takes a little technique. Here’s how to do it like a pro.
Double‑Coating Method
- First Roll While Warm
As soon as the cookies come out of the oven and are still warm (but not piping hot), gently roll them in a bowl of powdered sugar. The residual heat helps the sugar adhere to the surface’s cracks and crevices. - Cool on a Wire Rack
Place the sugar‑coated cookies on a wire rack and let them cool completely. This allows the sugar to set and adhere without melting off. - Second Roll When Cool
After they are fully cooled, roll them again in powdered sugar for a second layer. This gives you that signature white, snow‑dusted finish and seals in the sugar layer.
This double‑roll technique ensures the sugar doesn’t just sit on the surface—it melds slightly into the cookie’s outer layer for a unified look and taste. If you stop at one roll, the sugar may rub off easily.
Tips for the Perfect Snowy Finish
- Use Finely Milled Powdered Sugar — A finer sugar gives a smoother, more delicate coating; coarser sugar can make the surface grainy.
- Use a Deep but Wide Bowl — So rolling is easy and the cookies can be fully covered without breaking.
- Gently Shake Off Excess — Give the cookie a light shake before placing it on the rack to avoid thick clumps of sugar.
- Roll Quickly — Don’t over‑handle the cookies; a quick roll preserves their shape.
- Keep Some Extra Sugar on Standby — If any spots look bare, you can dust a little more sugar after the second roll.
When you follow these steps, your cookies will emerge with a delicate white crust that looks as beautiful as they taste.
Tips and Tricks for Perfect Cookies
Even a simple recipe benefits from insider tips. Over the years, bakers have discovered small tweaks that turn a good batch into a great one. Here are my favorite pro tips.
Texture Tips
- Don’t Overmix the Dough
Once you add the flour and nuts, mix just until the dough comes together. Overmixing activates gluten in the flour and can lead to tougher, less crumbly cookies. - Chill the Dough (Optional but Helpful)
You can chill the dough for 30 minutes before shaping. This helps firm it up so the balls hold shape better and don’t spread too much in the oven. - Uniform Size Matters
Use a small cookie scoop (about 1 inch) so all cookies bake uniformly. Uneven sizes lead to some cookies being underdone or overbaked. - Bake on Middle Rack
The center of your oven gives the most consistent heat. If you have two racks, rotate the trays halfway through. - Watch the Time
These cookies bake fast—generally in about 10–12 minutes. They shouldn’t brown. If you see any color change, that’s a signal to pull them.
Flavor Enhancements
- Toasted Nuts
Gently toast your nuts (walnuts, pecans or almonds) for 5 minutes until fragrant. Let them cool, then chop finely. Toasting deepens the flavor and removes moisture from the nuts. - Citrus Zest
Add ½ teaspoon of lemon or orange zest to the dough for a fresh zing that complements the butteriness. - Extract Variations
Try swapping half or all vanilla with almond extract to emphasize the nutty notes. - Spices
A pinch of cinnamon, cardamom, or nutmeg adds warmth and complexity. Don’t overdo it—these should remain subtle. - Salt Finish
A very light sprinkle of fine sea salt on top (just after the second sugar roll) can enhance sweetness and contrast beautifully.
These tweaks are optional but can elevate your cookies from “delicious” to “memorable.”
Storing and Freezing Your Cookies
One of the great things about Russian Tea Cookies is their longevity—they keep well and also freeze beautifully. Here’s how to maintain their texture and flavor over time.
Best Way to Store
- Use an Airtight Container
Store them in a tightly sealed tin or plastic container. Preventing air exposure keeps them crisp and avoids the sugar absorbing moisture. - Layer with Parchment or Wax Paper
Put a sheet between each layer of cookies to prevent steaming or sticking together. - Room Temperature is Fine
You don’t need to refrigerate them. At room temperature, they remain great for 7–10 days. The powdered sugar might fade slightly, but the flavor remains intact.
How to Freeze and Reheat
Freezing Method:
- First, Fully Coat with Sugar
Do your double sugar roll before freezing. That way the coating is locked in. - Wrap Individually (Optional)
Wrap each cookie in plastic wrap or wax paper, especially if packing tightly. - Use Freezer-Safe Containers or Bags
Place cookies in a freezer-safe container or ziplock bag, removing as much air as possible to prevent freezer burn. - Label and Date
Though they last well, use them within 2–3 months for optimal flavor.
Reheating from Frozen:
- Bring them to room temperature sealed in the container. The sugar will re-establish itself.
- If a bit of sugar has rubbed off, roll them lightly in powdered sugar again once thawed.
- You can crisp them up in a 300°F (150°C) oven for 5 minutes (watch carefully) if they feel too soft.
With these storage protocols, you can bake ahead for the holidays or events without sacrificing freshness.
Variations of Russian Tea Cookies Around the World
One of the fun things about Russian Tea Cookies is their global appeal. Many cultures have adopted variants with slight twists. Let’s explore some of the most famous ones and see how they compare—and how you can make them at home.
Mexican Wedding Cookies
These are essentially the same as Russian Tea Cookies, and often the names are used interchangeably. Sometimes, Mexican Wedding Cookies include a bit more vanilla or cinnamon. The nut choice often favors pecans or walnuts, and the texture tends to be slightly softer. If you want to make a Mexican twist, add a pinch of cinnamon or ¼ teaspoon of ground cloves.
Italian Wedding Cookies (Bocconcini di Nozze / Brutti ma Buoni)
In Italy, variations like bocconcini di nozze (wedding bites) or brutti ma buoni (“ugly but good”) exist. The dough may be flavored more strongly with almond or anise, and sometimes pistachios or hazelnuts are used. Occasionally, Italian versions are shaped slightly different—some flatter or pressed.
Greek Kourabiedes
Greek kourabiedes are very close cousins. They often incorporate brandy or ouzo into the dough and use rosewater, orange blossom water, or vanilla as flavoring. They’re heavily coated with confectioners’ sugar (sometimes even after baking, while warm) and often decorated with a single almond on top. The dough is a bit richer due to the alcohol and a higher fat content.
Common Mistakes to Avoid
Even seasoned bakers can hit a few snags with Russian Tea Cookies. They may be simple, but a few missteps can lead to dry, flat, or tasteless results. Let’s talk about the most common mistakes and how to sidestep them.
Overmixing the Dough
This is one of the biggest culprits behind tough cookies. When you overmix the dough—especially after adding the flour—you activate the gluten, which leads to a dense, chewy texture instead of that soft, crumbly melt-in-your-mouth bite you’re going for.
Fix:
Once your butter, sugar, and vanilla are creamed, add the dry ingredients and nuts gently. Stir just until the dough comes together—no more.
Not Chilling Before Baking
Although not strictly necessary, chilling the dough helps in multiple ways:
- Prevents cookies from spreading too much
- Helps develop richer flavor
- Makes dough easier to shape
Fix:
If your kitchen is warm or your dough feels sticky, chill it for 20–30 minutes before rolling.
Skipping the Double Powdered Sugar Roll
That first roll right after baking allows the sugar to cling. Skipping this step often leads to an uneven coating or a dull finish.
Fix:
Roll the cookies in powdered sugar while still warm, then again after they cool. Don’t rush the process—let them cool completely for the second roll to stick properly.
Using Cold Butter
Cold butter doesn’t cream well with sugar, which affects the dough’s texture and structure.
Fix:
Always use room-temperature butter—soft enough to press with your finger but not melted.
Wrong Nut Texture
Too large or uneven nut pieces can create chunky dough and bake unevenly.
Fix:
Finely chop or pulse the nuts in a food processor for a consistent texture. You want tiny bits, not big chunks.
By avoiding these pitfalls, you’re far more likely to bake a batch that not only looks the part but tastes divine.
Nutritional Information
While Russian Tea Cookies are more of a treat than a health food, knowing what’s in each bite helps you enjoy them mindfully or tweak the recipe for dietary needs.
Calories and Macronutrient Breakdown (Per Cookie)
Here’s a rough estimate based on a batch of 24 cookies:
| Nutrient | Amount (Per Cookie) |
|---|---|
| Calories | 120–130 |
| Total Fat | 8g |
| Saturated Fat | 4g |
| Carbohydrates | 11g |
| Sugar | 5g |
| Protein | 1g |
| Fiber | <1g |
Note: These values may vary depending on the nuts, sugar, and butter brands you use.
Healthier Tweaks You Can Try
- Use Whole Wheat Pastry Flour – Lighter than regular whole wheat but adds a touch of fiber and nutrients.
- Reduce Sugar – You can cut the powdered sugar in the dough slightly without compromising too much on taste.
- Use Plant-Based Butter – For a vegan-friendly and cholesterol-free alternative.
- Swap Nuts – Try walnuts for omega-3s, or use seeds like sunflower for a nut-free version.
- Bake Smaller Cookies – Smaller sizes can help with portion control while still satisfying your craving.
While these cookies aren’t designed to be low-calorie, they can definitely fit into a balanced diet when enjoyed in moderation.
Serving Suggestions
You’ve baked a beautiful batch of Russian Tea Cookies—now how do you present them? Whether you’re hosting a party, preparing holiday gifts, or just serving dessert at home, presentation and pairing matter.
With Tea or Coffee
- Traditional Pairing: Russian Tea Cookies were originally served with—you guessed it—tea. A warm cup of black tea, green tea, or even a spiced chai makes the perfect companion.
- Coffee Friendly: They pair wonderfully with cappuccinos, lattes, or even a strong espresso.
- Hot Chocolate Bonus: During the holidays, serve them alongside rich, creamy hot cocoa with whipped cream on top.
Perfect for Holidays and Celebrations
- Holiday Cookie Platters: Add them to a festive tray alongside gingerbread, sugar cookies, and chocolate truffles.
- Gift in Tins or Mason Jars: Line with parchment paper and tie with a ribbon for an easy, heartfelt present.
- Wedding Favors: Package 2–3 cookies in clear cello bags with a tag saying “Love is sweet.”
- Party Treats: Serve them dusted fresh with powdered sugar on a dessert table with other mini bites.
They’re small, elegant, and always a hit. Their subtle sweetness makes them a neutral partner for bolder desserts and drinks, too.
FAQs about Russian Tea Cookies Recipe
1. Can I Use Margarine Instead of Butter?
Technically yes, but you won’t get the same flavor or texture. Margarine contains more water and less fat than butter, which can make your cookies less rich and more prone to spreading.
Tip: Use high-quality unsalted butter for the best results.
2. Why Are My Cookies Crumbly?
These cookies are meant to be tender and crumbly. But if they’re falling apart before you can even roll them, the dough might be too dry.
Fix: Add a teaspoon of milk or softened butter at a time and mix gently until the dough holds together better.
3. How Long Do They Stay Fresh?
At room temperature in an airtight container, they stay fresh for 7–10 days. Frozen, they last up to 3 months.
Tip: If the sugar coating fades, give them a light dusting before serving again.
4. Can I Add Chocolate Chips?
Yes! Mini chocolate chips (about 1/4 cup) work best. They complement the nutty flavor without overpowering it.
Tip: Freeze the chips slightly before mixing them in to prevent them from melting during baking.
5. Is It Okay to Skip the Nuts?
Absolutely. If you’re allergic or not a fan of nuts, you can omit them entirely. The texture will be slightly different—less crumbly—but still delicious.
Alternative: Try shredded coconut or finely chopped dried fruit as a mix-in.
Conclusion
Russian Tea Cookies are more than just a sweet treat—they’re a tradition wrapped in powdered sugar, with roots stretching across multiple cultures. Whether you know them as Snowball Cookies, Mexican Wedding Cookies, or Greek Kourabiedes, the joy they bring is universal.
With just a few pantry staples, a bit of mixing, and some powdered sugar magic, you can whip up a batch that’s perfect for any occasion—or no occasion at all. And the best part? You now know exactly how to make them like a seasoned baker.
So heat up that oven, grab your mixing bowl, and get rolling. These cookies are waiting to melt in your mouth!


