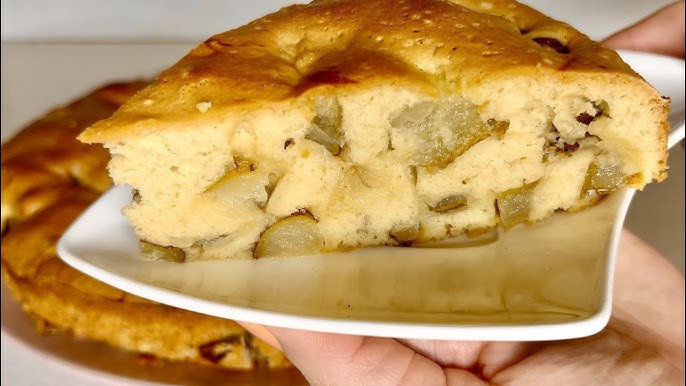
Pear Pie Recipe: There’s something magical about the aroma of freshly baked pie wafting through your kitchen. And when that pie happens to be a Pear Pie, you’re in for a delightful, elegant, and heartwarming dessert experience. Pear pies aren’t as common as their apple counterparts, but they’re every bit as delicious—if not more! With their soft, juicy texture and delicate sweetness, pears lend themselves perfectly to baking.
Baking a pear pie isn’t just about following a recipe—it’s an experience that brings warmth, comfort, and a touch of nostalgia. Whether you’re baking for a cozy family gathering, a festive occasion, or simply because you crave something sweet, this step-by-step pear pie recipe will guide you to perfection. You’ll learn how to select the best pears, prepare the perfect crust, and bake a golden, flaky masterpiece that melts in your mouth.
Ready to make your kitchen smell divine? Let’s dive right into this homemade pear pie journey.
Ingredients You’ll Need
Creating the perfect pear pie starts with using the right ingredients. Each component—whether it’s the fruit, the crust, or the spices—plays an important role in achieving that classic, mouthwatering flavor.
Fresh Pears – The Star of the Pie
Pears are the hero of this recipe, so choosing the right ones matters. Look for pears that are ripe but firm—they should give slightly when pressed near the stem. Varieties like Bosc, Bartlett, or Anjou work wonderfully because they hold their shape when baked.
You’ll need:
- 5 to 6 medium-sized ripe pears (about 2 lbs), peeled, cored, and sliced
- 1 tablespoon lemon juice (to prevent browning)
Pears bring natural sweetness, a smooth texture, and that gentle, floral aroma that makes this dessert special. When sliced thinly and layered in a buttery crust, they create a filling that’s soft yet structured.
The Perfect Pie Crust Ingredients
A great pie crust is the foundation of any excellent pie. You can use a store-bought crust, but if you’re up for it, making your own from scratch gives a flakier and richer result.
For the crust, you’ll need:
- 2 ½ cups all-purpose flour
- 1 cup (2 sticks) unsalted butter, chilled and cubed
- 1 teaspoon salt
- 1 tablespoon sugar
- 6–8 tablespoons ice-cold water
This buttery, flaky crust balances beautifully with the sweet pear filling. The secret is keeping everything cold—cold butter and cold water ensure those irresistible layers that puff and crisp as the pie bakes.
Spices and Sweeteners for a Flavor Burst
Spices are what make a pear pie sing. While pears have a mild sweetness, spices like cinnamon and nutmeg add warmth and depth.
You’ll need:
- ½ cup granulated sugar
- ¼ cup brown sugar
- 1 teaspoon cinnamon
- ¼ teaspoon nutmeg
- 2 tablespoons cornstarch (for thickening the filling)
- ¼ teaspoon salt
These ingredients work together to create a perfectly sweet, aromatic, and slightly spiced filling that captures the essence of fall in every bite.
Optional Add-ins for Creative Twists
Want to make your pear pie stand out? Add a few creative touches:
- ½ teaspoon ginger for a spiced kick
- ¼ cup chopped walnuts or almonds for a nutty crunch
- A splash of vanilla extract for extra depth
- A drizzle of honey for natural sweetness
Each of these additions can elevate your pie from classic to gourmet. Feel free to experiment and find your signature twist.
Kitchen Tools You’ll Need
Before diving into the baking process, make sure your tools are ready. Having everything on hand will make the process smoother and more enjoyable.
Must-Have Baking Equipment
You’ll need:
- Mixing bowls
- Measuring cups and spoons
- Rolling pin
- 9-inch pie dish
- Pastry cutter or fork
- Peeler and knife
- Baking sheet (to catch drips)
These essentials will help you handle each step with ease—from slicing pears to rolling out the dough.
Optional Tools to Make Baking Easier
If you bake often, a few extra tools can make the experience even better:
- Food processor (for making the crust quickly)
- Pastry brush (for egg wash)
- Pie weights or dry beans (for blind baking)
- Cooling rack
While not necessary, these tools help streamline your process and give your pie a more professional finish.
Step-by-Step Guide to Making Pear Pie
Now comes the fun part—assembling and baking your pear pie! Follow these detailed steps, and you’ll have a bakery-quality dessert that impresses every time.
Step 1 – Preparing the Pears
Start by peeling, coring, and slicing about 5–6 ripe but firm pears. Place them in a bowl and toss with a squeeze of lemon juice to prevent browning. Add sugar, cinnamon, nutmeg, and a tablespoon of flour or cornstarch to help thicken the filling. Stir gently so every pear slice is coated with flavor.
Step 2 – Crafting the Pie Dough
In a mixing bowl, combine flour, salt, and cold butter cubes. Use a pastry cutter or your hands to blend until the mixture resembles coarse crumbs. Add cold water, a tablespoon at a time, until the dough just comes together. Divide it in half, shape into discs, wrap in plastic, and chill for at least 30 minutes.
Step 3 – Assembling the Pie
Roll out one dough disc and fit it into a pie dish. Pour in the pear filling, spreading it evenly. Dot the top with a few small pieces of butter. Roll out the second dough disc and place it over the filling, trimming and crimping the edges to seal. Cut small slits on top to let steam escape.
Step 4 – Baking to Golden Perfection
Brush the top crust with a little beaten egg or milk for a golden finish. Bake in a preheated oven at 375°F (190°C) for 45–50 minutes, until the crust is beautifully browned and the filling bubbles through the vents.
Step 5 – Cooling and Serving the Pie
Let the pie cool for at least 2 hours before slicing — this helps the filling set. Serve warm or at room temperature with a scoop of vanilla ice cream or a dollop of whipped cream for pure comfort in every bite.
Expert Tips for the Best Pear Pie
Perfecting your pear pie takes a little know-how. Here are some pro tips to ensure it turns out perfectly every time.
Choosing the Right Pear Variety
Not all pears are ideal for baking. Some become mushy or too watery when heated. For the best results, use Bosc, Anjou, or Bartlett pears. Bosc pears, in particular, maintain their shape beautifully while adding a subtly spicy note.
Avoid overly ripe pears—they release too much liquid and can make your filling soupy. Instead, go for pears that are ripe but firm. If you press near the stem and it gives slightly, it’s perfect for baking.
If you want a more complex flavor, mix different pear varieties. Combining Bosc for structure and Bartlett for sweetness creates a beautiful balance.
Balancing Sweetness and Texture
Pears vary in sweetness depending on the season and type. Taste a slice before you start baking, then adjust the sugar level in your filling accordingly. Remember, you can always add sweetness, but you can’t take it away.
For texture, consider leaving some pear slices thicker than others. This mix of soft and slightly firm pears gives your pie a wonderful contrast—one bite tender, the next a little crisp.
If you prefer a deeper flavor, sprinkle a little brown sugar over the filling before adding the top crust. It’ll caramelize during baking, creating a gorgeous glaze and richer taste.
How to Avoid a Soggy Bottom
One of the most common pie problems is a soggy bottom crust—but don’t worry, there are a few easy fixes.
- Pre-bake (blind bake) the bottom crust for about 10 minutes before adding the filling. This gives it a head start and keeps it crisp.
- Brush the crust with egg white before adding the pears. The thin coating acts as a barrier against moisture.
- Bake your pie on a preheated baking sheet—the direct heat helps cook the bottom evenly.
With these tricks, your crust will stay firm and buttery, even with juicy pears inside.
Creative Variations of Pear Pie
If you love experimenting in the kitchen, here are a few exciting twists on the classic pear pie to try next time.
Pear and Almond Pie
This version combines the delicate sweetness of pears with the nutty flavor of almonds. Add a layer of almond cream (frangipane) at the bottom of your crust before layering the pears. The almond filling bakes into a soft, rich base that complements the fruit beautifully.
Top with sliced almonds before baking for an elegant finish that’s as pretty as it is delicious.
Spiced Ginger Pear Pie
Add a warm, zesty twist to your pie by mixing ½ teaspoon of ground ginger or freshly grated ginger into the filling. The result is a bold and aromatic dessert with a subtle heat that balances the pears’ natural sweetness.
A pinch of allspice or cloves can also give your pie an extra punch of warmth—perfect for chilly autumn evenings.
Rustic Free-Form Pear Galette
If you want a simpler version, make a pear galette instead of a traditional pie. Roll out your dough into a circle, spoon the pear mixture in the center, and fold the edges inward, leaving the middle exposed. Bake until golden.
It’s rustic, charming, and requires no pie dish—ideal for a quick yet impressive dessert.
Pairing Ideas for Pear Pie
A well-made pear pie is delightful on its own, but the right pairing can turn it into a truly unforgettable dessert experience. Whether you’re hosting a dinner party or treating yourself to a cozy evening indulgence, these pairing suggestions will elevate your pear pie to the next level.
Best Drinks to Serve with Pear Pie
Pairing beverages with dessert is all about balance—complementing the pie’s sweetness and enhancing its delicate pear flavor.
- Coffee: A freshly brewed cup of coffee, especially a medium roast with caramel notes, pairs beautifully with the buttery crust and spiced filling.
- Tea: For a lighter touch, try Earl Grey or chamomile tea. The floral undertones blend perfectly with the pears’ natural sweetness.
- Wine: If you want to go elegant, pour a glass of Moscato, Riesling, or Ice Wine. Their fruity, slightly tart flavor balances the richness of the pie.
- Sparkling Cider: For a non-alcoholic option, a chilled glass of pear or apple cider adds a crisp, refreshing contrast.
Each sip complements the soft, fragrant sweetness of the pears, making your dessert moment even more memorable.
Ice Cream and Toppings that Elevate Flavor
No pie is complete without the right topping. Here are a few irresistible pairings:
- Classic Vanilla Ice Cream: Smooth, creamy, and timeless. It melts into the warm pie filling, creating a silky texture.
- Cinnamon or Caramel Ice Cream: Adds a deeper, spiced flavor that enhances the cinnamon in your pie.
- Whipped Cream: Light and airy, it balances out the richness of the filling.
- Caramel Drizzle: A drizzle of warm caramel sauce over each slice brings out the pie’s natural sweetness.
- Chopped Nuts or Toasted Coconut: Sprinkle some on top for a crunchy contrast to the tender pears.
These additions not only make your dessert look stunning but also add layers of texture and flavor that make each bite an experience.
Storing and Reheating Your Pear Pie
Your homemade pear pie can easily last for several days if stored correctly. The key is maintaining its flaky crust and keeping the filling moist but not soggy.
How to Store Leftovers the Right Way
Once the pie has cooled completely, cover it loosely with aluminum foil or plastic wrap. You can keep it at room temperature for up to 2 days or refrigerate it for up to 5 days.
If refrigerating, make sure to wrap it tightly to prevent the crust from drying out. For longer storage, you can freeze your pear pie. Wrap it securely in foil, then place it in a freezer-safe bag or container. It will stay fresh for up to 3 months.
When you’re ready to enjoy it again, thaw it overnight in the fridge before reheating.
Reheating Without Losing the Crisp
To bring back that freshly baked taste and texture, skip the microwave—it tends to make the crust soggy. Instead, preheat your oven to 350°F (175°C) and warm your pie (or slices) for 10–15 minutes.
This method crisps up the crust and refreshes the filling, making it taste almost as good as the day it was baked. If reheating a single slice, a toaster oven works great too.
For a little indulgence, serve it warm with a scoop of ice cream—it’s pure comfort in every bite.
Nutritional Information (Approximate)
While pear pie is a treat, it can still be enjoyed in moderation. Here’s an approximate breakdown of a standard 9-inch pie divided into 8 slices.
| Nutrient | Per Slice (1/8 of pie) |
|---|---|
| Calories | 370–420 kcal |
| Total Fat | 18 g |
| Saturated Fat | 11 g |
| Carbohydrates | 55 g |
| Sugars | 28 g |
| Protein | 4 g |
| Fiber | 3 g |
| Sodium | 180 mg |
Note: These values can vary based on ingredient brands and portion sizes. For a lighter version, use less butter in the crust, reduce sugar, or substitute half the flour with almond flour for added nutrients and flavor.
Common Mistakes to Avoid
Even the most experienced bakers occasionally face pie mishaps. Here are some common pitfalls and how to prevent them.
Overbaking or Undercooking the Pie
It’s easy to overbake a pie if you’re waiting for the filling to look thick in the oven—but remember, it thickens more as it cools. Overbaking dries out the pears and toughens the crust.
Tip: Look for bubbling juices through the vents or lattice top as a sign the filling has cooked properly. The crust should be golden, not dark brown.
Undercooking is another issue—it can leave your filling runny and the bottom crust raw. If your oven runs cool, bake an extra 5–10 minutes. Always place your pie on the lower-middle rack to ensure the bottom cooks evenly.
Using the Wrong Type of Pears
Choosing overly ripe pears is the biggest mistake you can make. They might taste good raw but turn mushy when baked. Similarly, unripe pears won’t soften enough during baking.
Stick with firm-ripe pears like Bosc, Bartlett, or Anjou. Avoid high-water-content varieties like Comice unless you mix them with firmer ones. A balanced blend ensures a pie that’s both flavorful and texturally perfect.
FAQs about Pear Pie Recipe
1. Can I use canned pears instead of fresh ones?
Yes, but fresh pears are highly recommended for the best flavor and texture. If using canned pears, drain them thoroughly and reduce added sugar by half.
2. How do I make the pie crust flakier?
Use cold butter and ice-cold water, and avoid overworking the dough. Keeping small butter chunks in the dough creates air pockets that lead to flakiness when baked.
3. What’s the best way to prevent the filling from being watery?
Use firm pears and mix them with cornstarch or flour to thicken the filling. Let the pear mixture rest before baking to release excess moisture.
4. Can I freeze pear pie before baking?
Absolutely! Assemble the pie, wrap it tightly in foil, and freeze it unbaked. When ready to bake, pop it in the oven directly from frozen—just add about 20 extra minutes to the baking time.
5. What other fruits pair well with pears in a pie?
Apples, cranberries, and raspberries complement pears beautifully. Try mixing them for a fruity, colorful twist on the classic pear pie.
Conclusion
There you have it—a classic pear pie recipe that combines elegance, simplicity, and pure comfort. From the buttery, golden crust to the spiced, tender pear filling, every slice is a celebration of flavor and texture. Whether it’s for a holiday gathering, a family dinner, or just a quiet evening treat, this dessert never fails to impress.
Baking a pear pie is more than just making a dessert—it’s an act of love. The careful preparation, the scent of cinnamon and pears filling your kitchen, the first bite of that flaky crust—it’s all part of the magic that turns ingredients into memories.
So, roll up your sleeves, gather your ingredients, and let your oven work its magic. Once you taste your homemade pear pie, you’ll know it was worth every minute.


