Nanaimo Bar Recipe: Nanaimo Bars are one of those desserts that seem too good to be true. Imagine three heavenly layers — a crunchy, nutty base, a smooth custard center, and a glossy chocolate top — all without needing to turn on your oven. That’s right, this Canadian classic is a no-bake dessert that’s as simple as it is indulgent. Whether you’re a seasoned baker or a complete beginner, this step-by-step Nanaimo bar recipe will walk you through everything you need to make this rich, creamy treat from scratch.
What Are Nanaimo Bars?
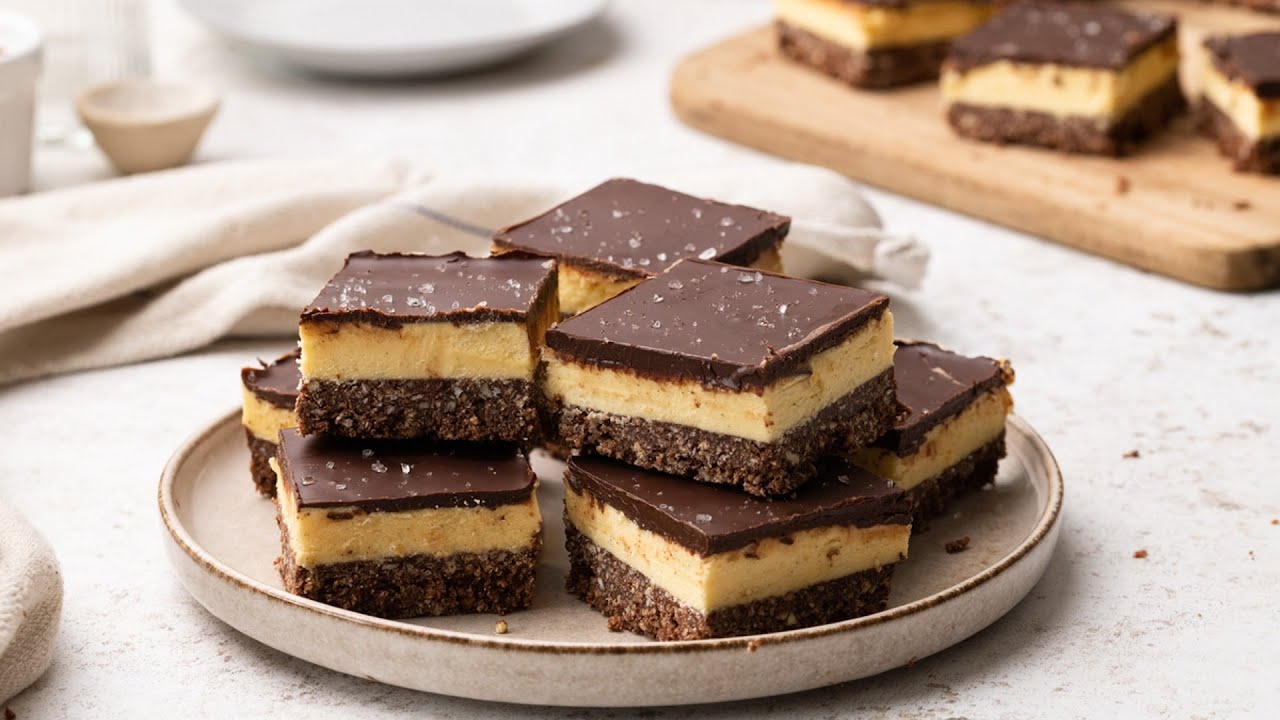
A Nanaimo bar is a traditional Canadian dessert named after the city of Nanaimo in British Columbia. It’s a layered bar that doesn’t require baking and is famous for its perfect combination of textures and flavors. The bottom layer is made of crumbly chocolate-coconut-nut mixture, the middle layer features a velvety custard buttercream, and the top is a shiny chocolate glaze that gives it that signature snap when you bite into it.
This dessert is ideal for those who love rich, creamy sweets but don’t want to spend hours in the kitchen. The balance of the chocolate base, custard filling, and ganache topping creates a flavor explosion that’s both nostalgic and sophisticated.
The History Behind This Canadian Dessert
The Nanaimo bar’s origins date back to the 1950s. The earliest known recipe was published in a local Nanaimo hospital cookbook, and from there, it spread across Canada and beyond. Over time, it became a symbol of Canadian culinary pride. What started as a humble community treat turned into an iconic dessert, loved worldwide.
Each region and family has its own version — some use graham crackers for the base, others prefer digestive biscuits. Some add espresso to the custard for a mocha twist. Yet, the heart of the recipe remains unchanged: a no-bake, three-layer dessert that’s easy, elegant, and irresistibly delicious.
Why You’ll Love This Nanaimo Bar Recipe
Perfect for Every Occasion
Nanaimo bars are perfect for almost any event — from casual family gatherings to formal dinner parties. They’re elegant enough to serve on a dessert platter but simple enough to whip up for a weekend treat. Their neat, square shape makes them easy to transport and serve, ideal for potlucks, holidays, and bake sales.
Plus, since they’re rich and flavorful, a small piece goes a long way. That means you can make one pan and have enough to serve a crowd. And because they don’t require baking, you won’t need to worry about oven timing or rising mishaps — just layer, chill, and enjoy.
No-Bake Dessert with Layers of Delight
One of the best things about Nanaimo bars is how effortlessly they come together. The base layer combines crushed biscuits, cocoa powder, and shredded coconut for a chewy crunch. The middle custard layer adds creamy sweetness, while the top layer of melted chocolate provides the final glossy finish. The result is a beautifully layered dessert that looks professional but takes minimal effort.
Unlike traditional cakes or pastries, you don’t need to worry about overbaking or underbaking — just focus on layering and chilling properly. Even if you’re new to baking, this recipe will make you look like a pro.
Ingredients You’ll Need for Nanaimo Bars
To make authentic Nanaimo bars, you’ll need simple pantry staples. Let’s break them down by layer.
For the Base Layer
- 1/2 cup (115 g) unsalted butter, melted
- 1/4 cup (50 g) granulated sugar
- 5 tbsp unsweetened cocoa powder
- 1 large egg, lightly beaten
- 1 3/4 cups (175 g) graham cracker crumbs
- 1 cup (75 g) sweetened shredded coconut
- 1/2 cup (65 g) finely chopped walnuts or almonds
- A pinch of salt
This layer provides the perfect combination of crunch and chewiness, forming the sturdy base for the soft custard and chocolate topping.
For the Custard Filling
- 1/2 cup (115 g) unsalted butter, softened
- 2 tbsp vanilla custard powder (or instant vanilla pudding mix as a substitute)
- 2 cups (250 g) powdered sugar, sifted
- 2 tbsp heavy cream or milk
- 1 tsp vanilla extract
The custard filling gives the Nanaimo bar its signature creamy yellow center. It’s smooth, buttery, and sweet — a perfect contrast to the rich chocolate layers.
For the Chocolate Topping
- 4 oz (115 g) semi-sweet chocolate, chopped
- 2 tbsp unsalted butter
This glossy chocolate layer seals the dessert with a satisfying snap. It also provides the beautiful, professional-looking finish that makes Nanaimo bars so recognizable.
Optional Add-Ons for Flavor Enhancement
If you like to experiment, you can add:
- 1 tbsp espresso powder for a mocha twist
- 1/2 tsp peppermint extract for a refreshing flavor
- Toasted coconut flakes or sea salt sprinkled on top for added texture
These little tweaks can elevate your Nanaimo bars from classic to gourmet in no time.
Tools and Equipment Required
Basic Kitchen Tools
You don’t need any fancy baking tools for this recipe. Here’s what you’ll need:
- 8×8 inch (20×20 cm) square baking pan
- Parchment paper for easy removal
- Mixing bowls (three, one for each layer)
- Spatula or wooden spoon
- Hand mixer or whisk
- Measuring cups and spoons
- Microwave-safe bowl or double boiler for melting chocolate
Having these ready before you begin makes the process smooth and efficient.
Tips for Efficient Preparation
- Line the pan with parchment paper: This will make it easier to lift the bars out once they’re chilled.
- Use room temperature butter: It creams better and gives a smoother texture to the custard layer.
- Chill between layers: To prevent mixing, always let one layer set before adding the next.
- Use a sharp knife: When slicing, run the knife under hot water for clean cuts without cracking the chocolate.
Following these small but important tips will help you achieve bakery-quality Nanaimo bars right at home.
Step-by-Step Guide to Making Nanaimo Bars
Step 1 – Prepare the Base Layer
Start by building the deliciously crunchy foundation of your Nanaimo Bars.
In a medium saucepan, melt ½ cup (1 stick) of unsalted butter over low heat. Stir in ¼ cup of granulated sugar and 5 tablespoons of unsweetened cocoa powder until the mixture becomes smooth and glossy.
Remove from heat, and quickly whisk in 1 beaten egg to thicken it slightly—it’ll form a rich, fudgy texture. Then, fold in the dry ingredients:
- 1¾ cups graham cracker crumbs
- 1 cup sweetened shredded coconut
- ½ cup chopped walnuts or almonds (optional for a nutty crunch)
Press the mixture firmly and evenly into the bottom of a parchment-lined 8×8-inch baking pan. This layer should be compact to support the creamy filling. Set aside to cool while you move on to the next step.
Step 2 – Make the Creamy Custard Filling
In a large bowl, combine:
- ½ cup unsalted butter, softened
- 2 tablespoons vanilla custard powder (or instant vanilla pudding mix if that’s what you have)
- 2–3 tablespoons heavy cream or milk
- 2 cups powdered sugar
Beat the mixture together until smooth and fluffy. It should have the consistency of soft frosting. If it feels too thick, add a teaspoon of milk at a time; if too thin, sprinkle in more powdered sugar.
Spread the custard filling evenly over the cooled base. Use a spatula to smooth the surface—it’s the middle layer, so neatness counts. Refrigerate the pan for 15–20 minutes to let the filling set before adding the chocolate topping.
Step 3 – Add the Rich Chocolate Topping
In a heatproof bowl, combine:
- 4 ounces semi-sweet chocolate, chopped
- 2 tablespoons unsalted butter
Melt together using a double boiler or microwave in 20-second bursts, stirring until completely smooth. Allow the melted chocolate to cool for a couple of minutes—it should be warm but not hot. Pour it gently over the custard layer, tilting the pan to spread evenly.
Give the pan a few gentle taps on the counter to eliminate bubbles and create a glossy, professional finish.
Step 4 – Chill, Slice, and Serve
Place the pan in the refrigerator and let it chill for at least 2 hours, or until the chocolate is firm. Once set, remove the bars by lifting the parchment paper edges.
Pro tip: To slice cleanly without cracking the chocolate, warm your knife under hot water, wipe it dry, and cut slowly.
Slice into neat squares or rectangles, depending on how generous you’re feeling. Keep the Nanaimo Bars refrigerated in an airtight container for up to a week, or freeze them for up to three months.
Expert Tips for the Perfect Nanaimo Bars
Achieving the Right Texture
The secret to perfect Nanaimo bars lies in balancing textures. The base should be firm but slightly chewy, the custard creamy but stable, and the chocolate firm yet easy to slice through. Here are a few texture-perfecting tips:
- Don’t skip chilling each layer: This helps the layers stay distinct and prevents them from blending.
- Avoid overmixing the custard: Overmixing can cause it to become too soft or greasy.
- Use high-quality chocolate: The smoother the chocolate, the better your topping will turn out.
If you prefer a slightly softer top layer, add an extra teaspoon of butter when melting your chocolate. This keeps it glossy and less likely to crack when slicing.
Preventing Chocolate Cracks
One of the most common frustrations with Nanaimo bars is cracked chocolate when cutting. Fortunately, there’s a simple fix:
- Cool the chocolate slightly before pouring: Hot chocolate will harden too quickly and can crack easily.
- Slice with a warm knife: Heat the knife under hot water, dry it, then slice slowly.
- Don’t rush chilling: Allowing the chocolate to set gradually ensures a smooth, firm top layer that slices cleanly.
If cracks do occur, don’t worry — the bars will still taste heavenly. You can even dust the tops with cocoa powder or coconut flakes to disguise imperfections.
Creative Variations of Nanaimo Bars
Once you’ve mastered the classic version, you can have fun experimenting with flavor twists. Here are a few creative variations to try:
Peanut Butter Nanaimo Bars
Replace half the butter in the custard layer with creamy peanut butter. The nutty richness pairs beautifully with the chocolate and coconut base, giving you a flavor reminiscent of Reese’s cups.
Mocha or Mint Nanaimo Bars
For mocha lovers, add a teaspoon of espresso powder to the custard and a hint of coffee extract to the chocolate topping.
If mint is your thing, stir in a few drops of peppermint extract to the custard layer and sprinkle crushed candy canes on top during the holidays.
White Chocolate Raspberry Nanaimo Bars
For an elegant twist, swap the dark chocolate topping for melted white chocolate and swirl in a few teaspoons of raspberry jam before it sets. It adds a touch of tartness that balances the sweetness perfectly.
These variations make the dessert adaptable to any season, mood, or event — and each version still carries that iconic Nanaimo bar magic.
How to Store and Preserve Nanaimo Bars
Storing in the Refrigerator
Nanaimo bars are known for their long shelf life when stored correctly. Once your bars are fully chilled and cut, store them in an airtight container to keep them fresh and flavorful. Place a sheet of parchment or wax paper between layers if you’re stacking them — this prevents the chocolate tops from sticking together.
They can easily last up to one week in the refrigerator without losing texture or taste. The chocolate stays firm, the custard remains creamy, and the base maintains its signature chewiness. Before serving, let them sit at room temperature for 10–15 minutes so the layers soften slightly, creating the perfect bite.
If you’re planning to make them ahead for parties or holidays, this dessert is a dream come true — prepare them a few days early, refrigerate, and they’ll be just as delicious when it’s time to serve.
Freezing for Long-Term Use
Nanaimo bars also freeze beautifully, which makes them a great make-ahead dessert option. To freeze, simply arrange the bars in a single layer on a baking sheet and place them in the freezer for about an hour, or until solid. Then transfer the frozen bars into an airtight freezer-safe container or a ziplock bag, again layering parchment paper between them.
They’ll stay fresh for up to 3 months in the freezer. When you’re ready to enjoy them, remove the desired amount and let them thaw in the refrigerator overnight or at room temperature for about 30–40 minutes. The texture and flavor remain remarkably consistent — it’s like enjoying freshly made Nanaimo bars all over again.
Pro Tip:
If you live in a warm climate, you can enjoy them straight from the freezer. The bars have a delightful ice-cold crunch that still melts smoothly in your mouth.
Common Mistakes to Avoid
Even though Nanaimo bars are fairly simple to make, there are a few common pitfalls that can affect the texture and taste. Here’s how to avoid them:
Overheating the Chocolate
One of the biggest mistakes is overheating the chocolate while melting it. Chocolate burns easily, and once it scorches, there’s no saving it. Always melt it slowly and gently, using either a double boiler or short microwave intervals (15–20 seconds at a time). Stir frequently to ensure it melts evenly.
If the chocolate becomes grainy or clumpy, that’s a sign it was overheated. To rescue it, you can try adding a teaspoon of butter or cream and stirring vigorously, but prevention is always better than cure.
Not Allowing Proper Cooling Time
Patience is key when making Nanaimo bars. Rushing the chilling process can cause layers to mix or the chocolate to crack. Each layer needs enough time to set properly before the next one is added. Ideally:
- Chill the base for at least 15 minutes before adding the custard.
- Chill the custard for 30 minutes before adding the chocolate topping.
- Chill the finished bars for 2 hours minimum before slicing.
The extra waiting time pays off — you’ll get clean, even layers and a dessert that holds its shape beautifully.
Using Warm Ingredients
Always make sure the ingredients, especially butter and chocolate, are at the right temperature. Melted butter or hot chocolate can ruin the layers, while cold butter won’t mix properly. The goal is smooth, cohesive layers that complement one another in both taste and texture.
Serving Suggestions and Pairings
Best Drinks to Serve With Nanaimo Bars
Nanaimo bars are rich, creamy, and full of chocolate flavor, so pairing them with the right beverage enhances the experience. Here are a few delicious options:
- Coffee or Espresso: The bitterness of coffee perfectly balances the sweetness of the bars.
- Hot Chocolate: For a decadent dessert combo, enjoy Nanaimo bars with a creamy mug of cocoa.
- Black Tea or Chai: The subtle spices in chai or the earthy flavor of black tea cut through the richness.
- Cold Milk: The classic choice — refreshing, simple, and always satisfying.
For adults, a dessert wine like port or a splash of Baileys Irish Cream pairs wonderfully with the creamy custard filling.
Presentation Tips for Parties
If you’re making Nanaimo bars for a gathering, presentation can take them from homemade to stunning. Here are some creative serving ideas:
- Mini Bites: Cut the bars into bite-sized squares and place them in mini paper cups.
- Dessert Platter: Arrange them with other no-bake treats like truffles or fudge for a visually appealing spread.
- Drizzle Decor: Add an elegant drizzle of white or dark chocolate over the top before chilling for a professional look.
- Toppings Bar: Offer guests different garnishes like toasted nuts, shredded coconut, or sprinkles for a DIY dessert experience.
You can even wrap individual bars in parchment paper with a ribbon for a thoughtful edible gift.
Nutritional Information (Per Serving)
Here’s a general nutritional breakdown for one Nanaimo bar (assuming 16 bars per batch):
| Nutrient | Amount (Approximate) |
|---|---|
| Calories | 310 kcal |
| Total Fat | 20 g |
| Saturated Fat | 12 g |
| Carbohydrates | 31 g |
| Sugars | 24 g |
| Protein | 3 g |
| Fiber | 2 g |
| Sodium | 75 mg |
These bars are rich and indulgent, so a small piece goes a long way. They’re perfect for occasional treats or special celebrations — moderation is key to fully enjoying their sweetness without overindulging.
FAQs about Nanaimo Bar Recipe
1. Can I make Nanaimo bars without nuts?
Yes! Simply skip the nuts or replace them with extra coconut or crushed graham crackers for texture. The bars will still hold together perfectly.
2. What can I use instead of custard powder?
If you can’t find custard powder, instant vanilla pudding mix works as a great substitute. It offers a similar flavor and consistency.
3. How long should I chill Nanaimo bars before serving?
At least 2 hours, but overnight is ideal. The longer chilling time helps the layers firm up and makes slicing easier.
4. Can I make vegan Nanaimo bars?
Absolutely! Use vegan butter, plant-based milk, and dairy-free chocolate. Swap the custard powder for cornstarch and turmeric (for color), and you’ll have delicious vegan Nanaimo bars.
5. How do I keep my chocolate layer from cracking?
Use slightly cooled chocolate and a warm knife when cutting. Let the bars sit at room temperature for 10–15 minutes before slicing for smooth, crack-free edges.
Conclusion
The Nanaimo bar is more than just a dessert — it’s a sweet slice of Canadian heritage. With its rich chocolate base, smooth custard center, and glossy chocolate top, this no-bake treat is as simple to make as it is impressive to serve. Whether you’re preparing them for a cozy family dessert, a festive celebration, or just to satisfy a late-night craving, these bars never disappoint.
What makes them truly special is their versatility. You can play with flavors, adjust the sweetness, or add your favorite toppings — and they’ll still taste heavenly every time. So grab your ingredients, clear some space in your fridge, and whip up a batch of these iconic bars today. Once you take that first bite, you’ll understand why the Nanaimo bar has become a timeless favorite across the globe.


