Meringues Recipe: Light, airy, and delicately sweet—meringues are a timeless treat that never go out of style. Whether you’re crafting bite-sized cookies or the base for a pavlova, learning how to make the perfect meringue is a baking skill everyone should master. This in-depth guide walks you through every step of the process, from gathering your ingredients to troubleshooting any issues. Get ready to whisk your way into dessert heaven!
What Are Meringues?
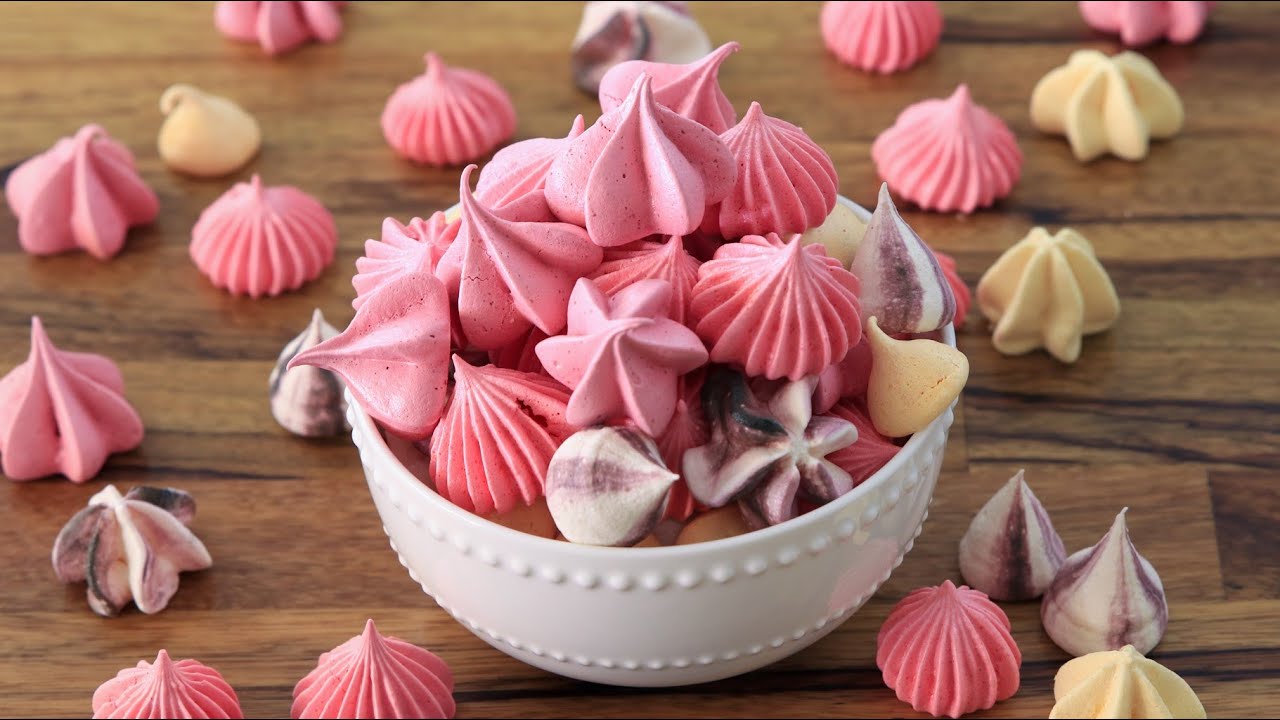
Meringues are sweet, crisp confections made primarily from whipped egg whites and sugar. They’re incredibly light and airy, almost like edible clouds. Depending on how they’re prepared and baked, meringues can be crispy throughout or have a soft, marshmallow-like center. From cookies to pies and cakes, meringue serves both as a standalone treat and a beautiful topping.
What makes meringues so captivating is the way simple ingredients can transform into something extraordinary with a bit of technique. With just egg whites, sugar, and a few flavorings, you can create a dessert that looks elegant and tastes divine.
The Origin and Popularity of Meringues
The history of meringues dates back to 17th-century Europe, with both the French and Swiss claiming ownership of the original recipe. Over time, they became a staple in French patisserie and across the globe. Today, meringues are found everywhere—from rustic homemade cookies to high-end desserts at Michelin-starred restaurants.
Part of their enduring popularity is their versatility. They can be rustic and simple or glossy and decorative. And let’s not forget how naturally gluten-free and low-fat they are, which makes them a favorite for many dietary lifestyles.
Why Make Meringues at Home?
Store-bought meringues can never quite replicate the freshness and flavor of homemade ones. Plus, making them yourself lets you control everything from sweetness levels to flavor variations. Want lavender-vanilla meringues? Or maybe coffee-infused swirls? You can make it all when you whip up your own batch at home.
Homemade meringues also make delightful DIY gifts, perfect for birthdays, holidays, or simply cheering someone up. They’re budget-friendly, visually stunning, and incredibly customizable. Once you master the basics, a whole world of creative options opens up.
List of Ingredients You’ll Need
Core Ingredients for Classic Meringues
Here’s what you’ll need to make a classic meringue recipe:
- Egg whites – The backbone of the recipe. Use fresh, room-temperature egg whites for best results.
- Granulated sugar – This stabilizes the egg whites and gives the meringues their structure.
- Cream of tartar – Optional, but helps stabilize the egg whites and maintain stiff peaks.
- Vanilla extract – For a touch of flavor. You can also use almond or lemon extract.
- Salt – Just a pinch, to balance sweetness.
This basic lineup will give you that crisp, white meringue we all know and love. But it’s only the beginning if you want to get creative.
Optional Add-ins for Flavor and Style
Meringues are incredibly flexible. You can jazz them up with:
- Cocoa powder – For chocolate meringues.
- Espresso powder – To make coffee-flavored treats.
- Food coloring – For a fun twist, especially during holidays.
- Chopped nuts – Pistachios, almonds, or hazelnuts work beautifully.
- Extracts – Peppermint, coconut, or orange extract can elevate your flavor game.
- Sprinkles or edible glitter – Especially great for party meringues.
The possibilities are endless. Choose your flavors and colors depending on the occasion, season, or even your mood.
Ingredient Substitutions for Dietary Needs
Have dietary restrictions? No worries! Here are some substitutions that still produce great results:
- Egg replacer or aquafaba – Great for vegan meringues.
- Coconut sugar or powdered erythritol – For sugar-free or low-glycemic versions.
- Lemon juice instead of cream of tartar – Another acid that helps stabilize the meringue.
While substitutions might slightly alter the final texture, with a little practice, you can make meringues that cater to virtually any diet without sacrificing taste or style.
Essential Tools and Equipment
Must-Have Kitchen Tools
You don’t need a professional kitchen to make stellar meringues, but a few tools will make your life much easier:
- Electric hand mixer or stand mixer – Whipping egg whites by hand is possible, but very tiring and time-consuming.
- Mixing bowls – Preferably metal or glass. Avoid plastic, as it can retain oils that interfere with whipping.
- Baking sheets – Line them with parchment paper or silicone mats.
- Piping bags and tips – For beautifully shaped meringues.
- Measuring cups and spoons – Accuracy is key in baking.
These tools are relatively inexpensive and can be used for a range of other baking tasks, making them worthwhile additions to your kitchen.
Tips on Choosing the Right Equipment
Here are a few quick tips to keep in mind:
- Avoid plastic bowls when whipping egg whites. Even a trace of fat can ruin your meringue.
- Go for a stand mixer if you’re making large batches.
- Use a scale for more precise measurements if you’re looking to perfect your technique.
Preparing to Make Meringues
Prepping Ingredients
Before you start whipping, take a few minutes to get everything ready. This includes:
- Separating the eggs carefully – Even a tiny bit of yolk can prevent the whites from whipping properly.
- Bringing egg whites to room temperature – Cold whites don’t whip as well.
- Wiping down your bowl and beaters with lemon juice or vinegar to remove any greasy residue.
Taking the time to prep properly sets you up for success. It’s like warming up before a workout—you’ll perform better and avoid problems.
Setting Up Your Workspace
Have your piping bag ready, line your baking sheets in advance, and preheat your oven. Having a clean, organized space makes the process smoother and more enjoyable. Trust us—nothing ruins baking flow like stopping mid-recipe to search for parchment paper.
Step-by-Step Meringue Recipe
Step 1 – Separate the Egg Whites
Begin by cracking your eggs and carefully separating the whites from the yolks. Make sure no yolk slips into the whites, as even a tiny bit of fat will prevent them from whipping properly. For best results, use eggs at room temperature and separate them into a small bowl one at a time before adding them to your mixing bowl.
Step 2 – Whip Egg Whites to Soft Peaks
Place the egg whites into a clean, dry, grease-free bowl (metal or glass works best). Using a hand or stand mixer, start whisking on medium speed. The whites will first look foamy, then gradually turn opaque. Continue until you reach the soft peak stage—when you lift the whisk, the peaks should gently curl over instead of standing stiff.
Step 3 – Gradually Add Sugar
With the mixer still running, begin adding superfine sugar slowly—about a tablespoon at a time. This gradual process helps the sugar dissolve evenly, giving your meringues a glossy texture. If you rush and dump it all in, the meringues may turn grainy. Keep whisking as you add until all the sugar is incorporated.
Step 4 – Beat Until Stiff Peaks Form
Increase the speed to high and continue whisking until stiff, shiny peaks form. This means when you lift the whisk, the peaks should stand tall without drooping. The mixture should look smooth, glossy, and thick—if it looks grainy or the sugar hasn’t dissolved, keep whisking a little longer.
Step 5 – Shape and Bake the Meringues
Preheat your oven to a low 225°F (110°C) and line a baking tray with parchment paper. Spoon or pipe the meringue mixture into small swirls, nests, or kisses—get creative! Bake slowly for 1.5 to 2 hours, allowing the meringues to dry out rather than brown. Once finished, switch off the oven and let them cool inside with the door slightly ajar to prevent cracks. The result? Crisp, light, and melt-in-your-mouth meringues.
Baking and Cooling
Oven Temperature and Baking Time
When it comes to baking meringues, low and slow wins the race. Unlike cookies or cakes that thrive in a hot oven, meringues need a gentle, consistent heat to slowly dry out without browning. Preheat your oven to 200°F (93°C)—and don’t crank it higher thinking it’ll speed things up. A higher temperature will brown the meringues too quickly or cause them to crack.
The exact baking time depends on the size of your meringues. Small, kiss-sized meringues need around 1.5 hours, while larger ones or pavlova bases can take 2–3 hours. You’re not so much baking them as you are dehydrating them, slowly removing moisture until they’re crisp and light.
If you live in a humid climate, it may take longer for meringues to fully dry out. Consider using a convection oven setting if available—it helps circulate dry air for even baking.
Here’s a tip: Place a wooden spoon in the oven door to keep it slightly ajar during baking. This lets out moisture and helps your meringues stay glossy and crack-free.
How to Know When Meringues Are Done
How do you tell when your meringues are fully baked? Great question. They should feel dry and light to the touch. Gently tap the bottom of one—it should sound hollow and feel crisp.
Don’t remove them immediately from the oven. Instead, turn off the oven, crack the door open, and let the meringues cool gradually. This slow cooldown helps prevent collapsing or cracking caused by a sudden temperature drop.
If your meringues feel sticky after cooling, they probably need more time. Pop them back in the oven at the same low temperature for another 30 minutes. Better safe than soggy.
Common Mistakes to Avoid
Troubleshooting Meringue Problems
Meringues are simple in ingredients but tricky in execution. Here are some common mistakes and how to avoid them:
- Fat in the egg whites: Even a tiny bit of yolk or grease from a bowl will prevent the whites from whipping. Always separate eggs carefully and use clean, dry, oil-free bowls.
- Sugar added too quickly: Dumping sugar all at once can cause gritty, unstable meringue. Always add it slowly while whipping.
- Overbeating the egg whites: This leads to dry, clumpy meringue that’s hard to shape and bakes unevenly. Stop whipping once stiff, glossy peaks form.
- Baking at too high a temperature: This causes browning, cracking, or weeping. Always bake low and slow.
- Humidity: Meringue is sensitive to moisture. Don’t try to make meringues on a rainy day or in a steamy kitchen. They’ll turn sticky and sad.
How to Fix Runny or Grainy Meringues
If your meringue turns out runny or grainy, don’t panic just yet.
- Runny meringue: Usually means the egg whites were under-whipped, or sugar was added too soon. If the sugar hasn’t fully dissolved, keep whipping slowly until stiff peaks form.
- Grainy texture: Caused by overbeating or undissolved sugar. You can’t always save overbeaten meringue, but you can prevent it next time by testing sugar with your fingers for smoothness during whipping.
A well-made meringue is smooth, glossy, and holds its shape. Don’t get discouraged if it takes a few tries—it’s part science, part art.
Flavor Variations and Add-Ins
Chocolate, Lemon, and Vanilla Meringues
Once you’ve mastered the basic meringue, you can flavor them however you like. Here are some delicious ideas:
- Chocolate meringues: Fold in 2 tablespoons of cocoa powder or swirl melted chocolate into the meringue before piping.
- Lemon meringues: Add 1 teaspoon of lemon zest and a few drops of lemon extract for a bright, citrusy twist.
- Vanilla meringues: Keep it classic with 1 teaspoon of pure vanilla extract. You can also use vanilla bean paste for a more intense flavor and pretty specks.
Make sure to fold in flavorings gently after stiff peaks form, so you don’t deflate the meringue.
Adding Nuts, Sprinkles, or Drizzles
You can add both flavor and visual flair with extra ingredients:
- Crushed nuts like almonds, pistachios, or hazelnuts add texture.
- Food coloring can make your meringues pop—try swirling two colors for a tie-dye effect.
- Sprinkles or edible glitter make them perfect for parties or themed occasions.
- Drizzle with chocolate or caramel once cooled for that final gourmet touch.
Remember to add heavy ingredients after piping, or they might sink the meringue. A light sprinkle on top before baking is usually safest.
Serving Suggestions
Meringues as Standalone Desserts
Meringues are delightful all on their own. Serve them with a cup of tea or coffee for an elegant afternoon treat. Their light, crisp texture makes them the perfect sweet bite after a heavy meal.
For a more dramatic presentation, try stacking meringues with whipped cream and berries for a quick pavlova. The contrast between the crunchy meringue and soft cream is divine.
Pairing Meringues with Other Desserts
Meringue isn’t just a dessert—it’s also a building block for others. Try these combos:
- Meringue and ice cream: Crumble meringue over ice cream for extra texture.
- Lemon meringue pie: A zesty classic with a toasted meringue topping.
- Baked Alaska: A showstopping dessert with ice cream wrapped in meringue and briefly baked.
- Meringue nests: Fill with fruit compote, lemon curd, or chocolate mousse for an elegant dessert.
With meringue, the sky’s the limit.
Storing and Preserving Meringues
How Long Do Meringues Last?
Properly made and stored meringues can last up to two weeks at room temperature, which makes them a fantastic make-ahead treat. However, the key is keeping moisture out. Meringues are extremely sensitive to humidity—if they absorb too much moisture from the air, they become sticky and lose their crisp texture.
If you’re not planning to eat them right away, let them cool completely after baking before storing. Warm meringues can produce condensation inside your container, which ruins their crunch.
Once fully cooled, place them in an airtight container layered with parchment paper to prevent sticking. Store at room temperature, away from direct sunlight or heat sources. Never refrigerate meringues—the fridge introduces moisture that will soften and ruin their texture.
If the air in your kitchen tends to be humid, you can add a small packet of silica gel (like the kind that comes in new shoes or bags) to your storage container to help absorb excess moisture.
Best Storage Practices
Here’s how to get the most shelf-life out of your meringues:
- Store them in plastic or glass containers with tight-sealing lids.
- Avoid storing with other soft baked goods that may release moisture.
- For maximum crunch, don’t frost or fill them until right before serving.
Want to keep them even longer? Meringues can be frozen, although this isn’t ideal. If you must freeze them, place in a freezer-safe container with parchment paper between layers. Thaw at room temperature, uncovered, to prevent sogginess.
Health and Nutritional Information
Calorie Count and Macros
One of the reasons meringues are a favorite treat is because they’re light, low in calories, and fat-free—especially when compared to richer baked goods like cookies or cakes. A single small meringue (about 10g) contains:
- Calories: 25–35
- Fat: 0g
- Carbohydrates: 6–8g
- Protein: 0.5–1g
Since the main ingredients are egg whites and sugar, meringues are naturally gluten-free, making them a perfect treat for people with gluten intolerance or celiac disease.
Just keep in mind—they may be low in calories, but they’re still high in sugar. So while they’re a “lighter” option, moderation is key if you’re watching your sugar intake.
Meringues for Special Diets
If you or your guests have specific dietary needs, meringues can easily be adapted:
- Vegan? Use aquafaba (the liquid from canned chickpeas) in place of egg whites. It whips up beautifully and creates a similar texture.
- Keto or sugar-free? Use a sugar alternative like erythritol or monk fruit sweetener, but make sure it’s finely powdered for the best consistency.
- Dairy-free and gluten-free? You’re in luck! Traditional meringues contain no dairy or gluten.
Whether you’re cutting carbs, avoiding allergens, or just being mindful, meringues are one of the most flexible desserts out there.
Meringues for Holidays and Special Occasions
Themed Meringues for Celebrations
One of the best things about meringues is how easy it is to customize them for any celebration. With a little color and creativity, you can make these dainty treats the star of any party:
- Christmas: Add peppermint extract and red swirl coloring.
- Easter: Pastel shades in lemon or coconut flavor.
- Valentine’s Day: Heart shapes or pink food coloring with rose water.
- Halloween: Ghost shapes with chocolate chip eyes!
- Baby showers: Light blue or pink with vanilla bean specks.
They’re festive, fun, and easy to theme. Use sprinkles, edible glitter, or even gold leaf to take your designs up a notch.
Packaging Meringues as Gifts
Meringues make beautiful homemade gifts. Pack them in:
- Clear cellophane bags tied with ribbon
- Small mason jars with a decorative tag
- Gift boxes lined with parchment paper
Add a handwritten note and you’ve got a thoughtful, personal gift that looks like it came from a gourmet bakery.
Make them in advance, store them properly, and you’re always ready with a last-minute gift that delights.
DIY Meringue Gift Boxes
Crafting a Homemade Gift with Meringues
Creating your own meringue gift boxes is as fun as it is rewarding. Start by selecting a theme: holiday, birthday, baby shower, thank-you, or just a “thinking of you” surprise. Then, choose flavors and colors that match the theme.
Bake a variety of meringue shapes—kisses, swirls, stars, hearts—and allow them to cool completely. You can make them days in advance as long as they’re stored airtight.
Place the meringues in mini cupcake liners to keep them from sticking and bouncing around. Add a few extras like:
- A bag of tea
- A tiny jar of lemon curd or chocolate spread
- A personal note or quote
Layer everything in a decorative box or tin. For that extra special touch, add washi tape, ribbon, or custom stickers. Homemade doesn’t mean amateur—your gift can look boutique-level with just a bit of effort.
Presentation and Packaging Ideas
Here’s how to make your meringue gift box Insta-worthy:
- Choose color themes that match your event.
- Use tissue paper or shredded paper filler to cushion the meringues.
- Add a custom label or tag with ingredients or a personal message.
- Use a clear window box to show off the beautiful contents.
They’re perfect for party favors, teacher gifts, wedding giveaways, or holiday treats—and they cost next to nothing to make.
FAQs about Meringues Recipe
Why did my meringues crack?
Cracks often happen due to sudden temperature changes. Make sure to let your meringues cool slowly in the oven after baking by turning it off and leaving the door ajar.
Can I freeze meringues?
Yes, but it’s not ideal. If you must freeze them, use airtight containers, and allow them to thaw at room temperature, uncovered, to avoid sogginess.
What sugar is best for meringues?
Superfine (caster) sugar dissolves more quickly, giving a smoother finish. If using regular granulated sugar, just make sure it dissolves completely during whipping.
How do I fix overbeaten meringue?
Unfortunately, once meringue is overbeaten and grainy, it’s hard to fix. Start over, and this time, stop whipping as soon as stiff, glossy peaks form.
Can I make meringues without a mixer?
Technically yes, with a whisk and a lot of elbow grease, but it’s tough. A hand or stand mixer makes the job far easier and more consistent.
Conclusion
Meringues may be delicate in appearance, but don’t let that fool you—they’re strong contenders in the world of impressive, yet simple, desserts. With just a few ingredients, a bit of technique, and a sprinkle of creativity, you can whip up treats that are beautiful, delicious, and endlessly customizable.
Whether you’re baking for a fancy dinner, a casual afternoon snack, or creating thoughtful gifts for loved ones, meringues bring elegance and joy to every occasion. So go ahead—whisk, pipe, and bake your way to cloud-like perfection.
Happy baking!


