Lip Scrub Recipe: Taking care of your lips is just as important as caring for your skin. Dry, chapped, or flaky lips are not only uncomfortable but can also make your smile less appealing. One of the easiest and most effective ways to maintain smooth and soft lips is by using a lip scrub. The best part? You don’t have to spend a fortune on fancy products—you can make your own lip scrub at home with simple ingredients that are already in your kitchen.
This article will walk you through everything you need to know: the importance of lip care, the benefits of exfoliating your lips, the ingredients required for making a homemade scrub, and a complete step-by-step guide on how to prepare and use it. By the end, you’ll be equipped with natural, cost-effective, and fun recipes to keep your lips soft, supple, and kissable.
Why Lip Care Is Important
Most of us invest heavily in skincare routines, focusing on our face and body, but lips are often neglected. Unlike the skin on the rest of your body, your lips don’t have oil glands to keep them moisturized. This makes them more prone to dryness, cracking, and peeling. Cold weather, wind, sun exposure, and even dehydration can take a toll on your lips, leaving them chapped and uncomfortable.
Proper lip care ensures that your lips stay hydrated, smooth, and healthy. Regular exfoliation, along with moisturizing, can prevent painful cracks and make your lips look naturally plump. Think of it as giving your lips the same level of attention you give your skin—after all, they’re one of the first things people notice when you smile.
Common Lip Problems and Their Causes
Before diving into lip scrubs, it’s important to understand some common lip concerns:
- Chapped Lips: Often caused by dehydration, harsh weather, or licking your lips too much.
- Pigmentation: Dark patches may appear due to sun damage, smoking, or excessive caffeine intake.
- Peeling/Flaking: Usually a sign of dead skin build-up or lack of exfoliation.
- Dryness: Can occur from using harsh lip products or not drinking enough water.
A lip scrub works as the first line of defense against these issues. By gently removing dead skin cells, it allows new, fresh skin to shine through while also improving the absorption of lip balms and oils.
Benefits of Using a Lip Scrub
Exfoliation and Dead Skin Removal
Just like your facial scrubs, a lip scrub gently buffs away the dead skin cells that accumulate on your lips. When these dead cells pile up, your lips start looking dull and flaky. Regular exfoliation ensures your lips are always smooth, making your lipsticks and glosses apply evenly and last longer.
Enhancing Lip Softness and Smoothness
One of the most noticeable benefits of lip scrubs is the instant softness they provide. The natural exfoliants, like sugar or coffee grounds, remove rough patches, while moisturizing ingredients like honey and oils keep your lips soft and supple. It’s like giving your lips a spa treatment right at home.
Boosting Lip Health and Color
When dead skin is removed, blood circulation to your lips improves, giving them a naturally rosy and healthy appearance. Instead of relying on chemical-laden lip tints, a scrub can naturally enhance your lip color over time. Plus, it prepares your lips to absorb nourishing oils and balms more effectively.
Ingredients You’ll Need for a Lip Scrub
Homemade lip scrubs are incredibly versatile because you can customize them according to your preferences and skin type. Here are some essential ingredients to consider:
Natural Sweeteners (Sugar or Honey)
- Sugar: Acts as the primary exfoliant. Brown sugar is softer and gentler, while white sugar provides a slightly stronger exfoliation.
- Honey: Not only adds sweetness but also has antibacterial and healing properties. It helps hydrate the lips while protecting them from infections.
Essential Oils for Fragrance and Healing
- A few drops of essential oils can add both aroma and therapeutic benefits. For example:
- Peppermint oil: Refreshing and plumping effect.
- Lavender oil: Soothing and healing.
- Rose oil: Hydrating and luxurious fragrance.
Carrier Oils (Coconut, Olive, or Almond Oil)
Carrier oils provide the moisturizing base of your scrub. They help soften lips, lock in hydration, and prevent further dryness. Popular options include:
- Coconut oil: Lightweight and deeply moisturizing.
- Olive oil: Rich in antioxidants and vitamins.
- Almond oil: Nourishing and ideal for sensitive skin.
Optional Additions (Coffee, Cinnamon, or Vitamin E)
- Coffee grounds: Add a boost of exfoliation and a natural aroma.
- Cinnamon powder: Stimulates blood flow, giving your lips a natural plump.
- Vitamin E capsules: Act as a preservative while nourishing and healing lips.
Step-by-Step Guide to Making a Lip Scrub
Making your own lip scrub is quick, fun, and cost-effective. You can prepare a batch in under 10 minutes. Here’s a simple guide:
Step 1 – Gather Your Ingredients
Start by deciding which base you want to use. A common beginner-friendly combination is sugar, honey, and coconut oil. Make sure you also have a clean bowl and spoon for mixing, and a small airtight container for storing the finished scrub.
Step 2 – Mix the Exfoliant and Oil
Take 2 tablespoons of sugar and add 1 tablespoon of your chosen carrier oil. Mix well until the sugar is coated with the oil. This will form the exfoliating base of your scrub.
Step 3 – Add Honey or Flavoring
Now, add 1 teaspoon of honey for extra moisture and healing. If you want fragrance, this is the stage where you can add 2–3 drops of essential oil.
Step 4 – Blend Until Smooth
Mix all the ingredients thoroughly until you get a paste-like consistency. The mixture should hold together without being too runny. If it’s too dry, add a few more drops of oil. If too liquidy, add more sugar.
Step 5 – Store in a Small Container
Transfer the scrub into a small, airtight jar or container. Glass jars work best, but you can also use old lip balm containers. Store it in a cool, dry place, and your scrub will last for 1–2 weeks.
How to Use Your Homemade Lip Scrub
Prepping Your Lips Before Scrubbing
Before you start exfoliating, it’s important to prepare your lips. Think of it as preheating your oven before baking—you want everything ready for best results. First, wash your face and lips with lukewarm water to remove any dirt, makeup, or leftover lip products. Then, gently pat your lips dry with a clean towel. For an extra boost, press a warm damp cloth against your lips for about 30 seconds. This softens the skin and makes exfoliation more effective.
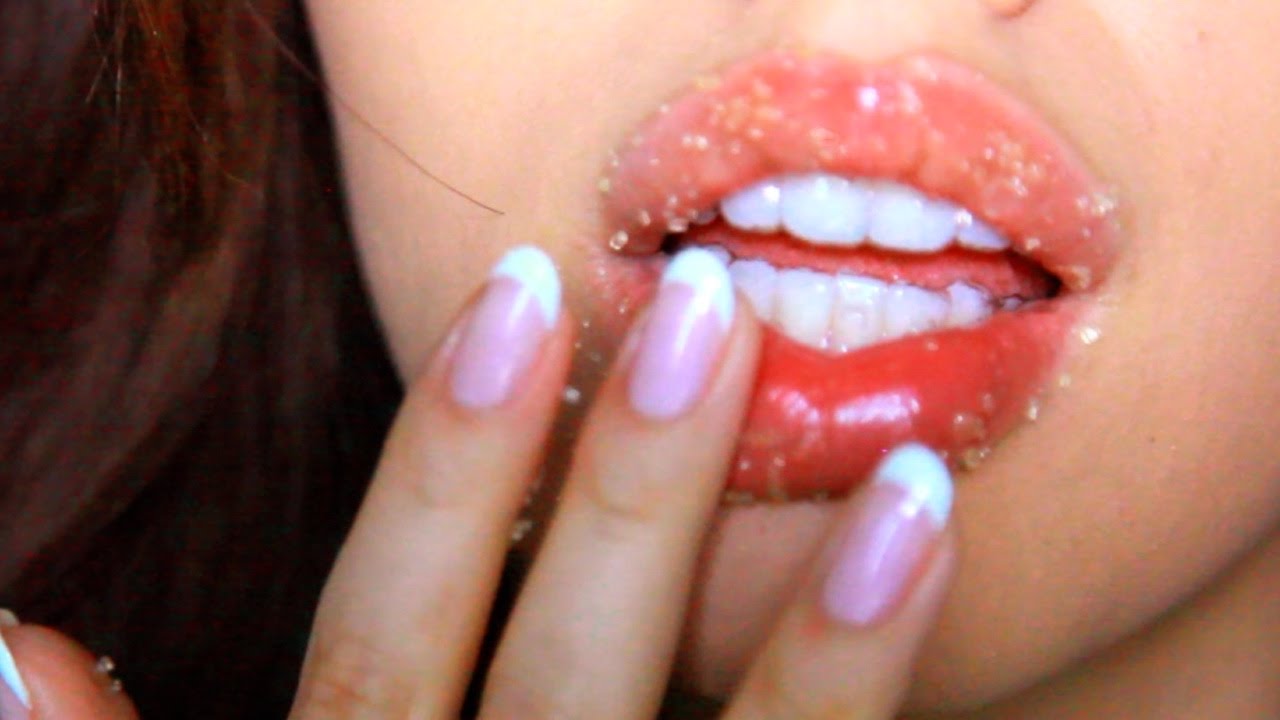
Application Technique for Best Results
Now comes the fun part—scrubbing! Scoop out a pea-sized amount of your homemade lip scrub with a clean finger or spatula. Gently massage it onto your lips using circular motions for about 1–2 minutes. Don’t be too harsh; your lips are delicate and need gentle care. The sugar granules will remove dead skin while the oils and honey hydrate your lips. After scrubbing, rinse off with lukewarm water and pat dry with a soft towel. You’ll instantly notice smoother and softer lips.
Aftercare for Soft and Hydrated Lips
Exfoliation is only half the story—hydration seals the deal. After rinsing off the scrub, apply a nourishing lip balm or natural oil like coconut or almond oil. This locks in the moisture and prevents dryness. Avoid licking your lips afterward since saliva can dry them out again. For best results, use your lip scrub 2–3 times a week, depending on how dry your lips get. Over-exfoliation can cause irritation, so moderation is key.
Different Variations of Lip Scrubs
One of the best things about DIY lip scrubs is the endless customization. You can mix and match ingredients based on your preferences, mood, or even season. Here are a few fun and effective recipes you can try:
Coffee Lip Scrub Recipe
- Ingredients: 1 tbsp coffee grounds, 1 tbsp sugar, 1 tsp honey, 1 tsp coconut oil.
- Why it works: Coffee not only exfoliates but also wakes up your lips with a natural energizing aroma. The caffeine may help improve circulation, giving your lips a fresh, rosy glow.
Mint and Sugar Lip Scrub Recipe
- Ingredients: 2 tbsp sugar, 1 tbsp olive oil, 2 drops peppermint essential oil.
- Why it works: Mint has a refreshing and cooling effect that leaves your lips feeling rejuvenated. Plus, peppermint oil gives a subtle plumping effect.
Honey-Cinnamon Lip Scrub Recipe
- Ingredients: 2 tbsp sugar, 1 tsp cinnamon powder, 1 tsp honey, 1 tsp almond oil.
- Why it works: Cinnamon stimulates blood flow, making lips appear fuller, while honey heals cracks and dryness. It’s like a sweet and spicy treatment for your lips.
Chocolate Lip Scrub Recipe
- Ingredients: 1 tbsp cocoa powder, 1 tbsp sugar, 1 tsp honey, 1 tsp coconut oil.
- Why it works: This delicious scrub not only smells amazing but also nourishes your lips with antioxidants from cocoa. Perfect for a self-care treat that feels indulgent.
Tips for Making Your Lip Scrub Last Longer
Storage Tips and Shelf Life
Homemade lip scrubs don’t contain preservatives, so they won’t last as long as store-bought ones. Typically, they stay fresh for 1–2 weeks if stored in an airtight container. To extend the shelf life, keep the scrub in the refrigerator. Always use a clean spoon or spatula to scoop out the product instead of dipping your finger directly in the jar. This helps prevent bacteria from contaminating your scrub.
Avoiding Bacterial Growth Naturally
If you want to make your scrub last longer naturally, consider adding a few drops of Vitamin E oil. Not only does it act as a preservative, but it also nourishes and heals dry lips. Another option is to prepare small batches instead of one large jar. This way, your scrub is always fresh, and you can experiment with different recipes without wasting ingredients.
Safety Precautions and Things to Avoid
Sensitive Skin Considerations
While lip scrubs are generally safe, people with sensitive skin should be extra cautious. If your lips are severely chapped, cracked, or bleeding, avoid scrubs until they heal. Exfoliating broken skin can make the condition worse. Instead, stick to gentle moisturizers until your lips are healthy again.
Ingredients That May Cause Irritation
Some natural ingredients can still cause irritation for certain individuals. For example:
- Cinnamon: While great for plumping, it can be too strong for sensitive lips.
- Essential oils: Always use in moderation. Too much peppermint or citrus oil may cause stinging.
- Coarse exfoliants: Avoid using salt or very coarse sugar, as they can scratch delicate skin.
Always perform a patch test before applying new ingredients to your lips. This ensures you won’t have an allergic reaction or irritation.
FAQs about Lip Scrub Recipe
1. How often should I use a lip scrub?
It’s best to exfoliate your lips 2–3 times a week. Daily scrubbing can strip away natural moisture and cause irritation, so moderation is key.
2. Can I use body scrub on my lips instead?
No, body scrubs are often too harsh for the delicate skin on your lips. Always use a gentler, specially formulated lip scrub or make your own with safe, natural ingredients.
3. What’s the best natural oil for lip scrubs?
Coconut oil is the most popular choice because it’s lightweight, deeply moisturizing, and has antibacterial properties. Almond and olive oil are also excellent alternatives.
4. How long does homemade lip scrub last?
Most DIY lip scrubs last 1–2 weeks if stored in an airtight container in a cool, dry place. To extend freshness, store it in the refrigerator and always use clean utensils.
5. Can I make vegan lip scrubs?
Absolutely! Instead of honey, you can use agave syrup or maple syrup for sweetness and hydration. All other ingredients like sugar, oils, and essential oils are vegan-friendly.
Conclusion
The beauty of DIY lip scrubs lies in their versatility. Whether you prefer the sweet aroma of honey, the refreshing tingle of mint, or the indulgent scent of chocolate, there’s a recipe that suits your taste. With regular use (about 2–3 times a week), your lips will feel refreshed, moisturized, and ready for any lipstick—or even better, to go naturally bare with confidence.
In the end, healthy lips are all about balance: gentle exfoliation, proper hydration, and protection from harsh elements. Treat them kindly, and they’ll reward you with a naturally radiant smile.


