Krumkake Recipe: If you’ve ever been intrigued by the beauty of Scandinavian baking, you’ve probably heard of Krumkake. This delicate, crispy Norwegian cookie is more than just a treat—it’s a cherished family tradition, often passed down through generations and enjoyed during holidays. With its thin, rolled shape and beautiful designs imprinted from the iron, krumkake is as much a work of art as it is a dessert.
In this article, we’ll walk through everything you need to know to make the perfect krumkake at home. From the ingredients and tools required, to a step-by-step guide that even beginners can follow, you’ll be able to bring a taste of Norway into your kitchen.
What is Krumkake?
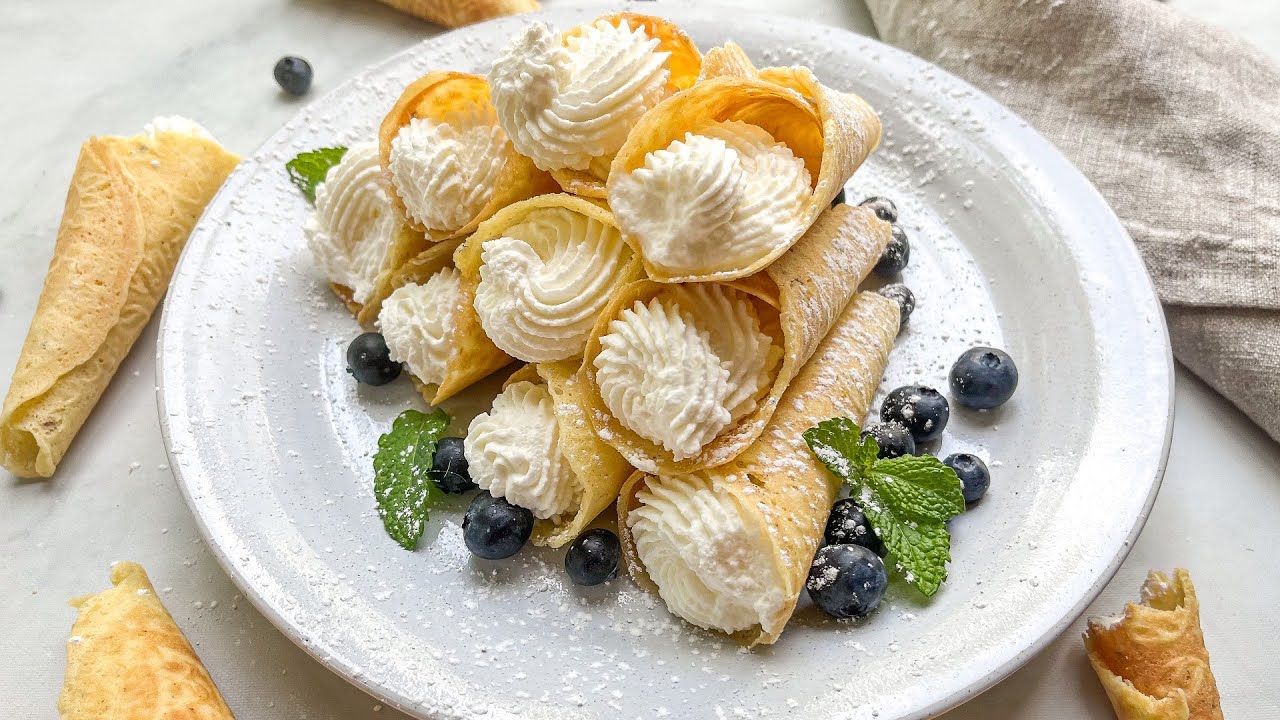
Krumkake, pronounced kroom-kah-keh, literally means “curved cake” in Norwegian. It is a wafer-thin cookie made on a special decorative iron and then rolled into a cone shape while still warm. Traditionally, it is served plain or filled with whipped cream, berries, or other sweet fillings. Its crisp texture and delicate taste make it a festive treat during Christmas, weddings, and other special occasions.
Unlike waffles or pancakes, krumkake is more fragile, almost like a cross between a cookie and a wafer. It holds its shape beautifully when rolled and can be customized with different flavors depending on the occasion.
The History and Cultural Significance of Krumkake
Krumkake dates back to Norway in the 1800s, when it was commonly made during Christmas celebrations. Families would gather around the hearth, and each household often had its own uniquely designed iron. The intricate floral or geometric patterns pressed into the krumkake were a point of pride and tradition, passed down through generations.
Even today, krumkake holds a special place in Norwegian and Scandinavian-American households. It’s not just a cookie; it’s a symbol of heritage, family, and festive celebration. While modern appliances have made the process easier, the essence of krumkake remains rooted in tradition—connecting families across time and place.
Ingredients You’ll Need
Essential Ingredients for Traditional Krumkake
To make authentic krumkake, you only need a handful of basic ingredients, many of which you likely already have in your pantry. Here’s the classic list:
- Eggs (4 large) – These provide structure and help the batter bind.
- Granulated sugar (1 cup) – For sweetness and a light caramelized flavor.
- Butter (½ cup, melted and cooled) – Adds richness and helps achieve a crisp texture.
- All-purpose flour (1 cup) – The main dry ingredient that creates the structure of the cookie.
- Heavy cream or milk (½ cup) – Helps thin out the batter for the right consistency.
- Vanilla extract (1 tsp) – Enhances flavor and adds warmth.
This combination creates the signature delicate, buttery flavor of traditional krumkake.
Optional Flavor Enhancements and Variations
One of the joys of baking krumkake is experimenting with flavors. While the traditional recipe is beloved, you can make small adjustments to suit your taste:
- Cardamom or cinnamon – For a spiced twist.
- Almond extract – Adds a nutty, aromatic flavor.
- Lemon or orange zest – For a refreshing citrus note.
- Cocoa powder – To make chocolate krumkake.
These variations allow you to personalize the cookies while keeping the authentic texture and shape.
Tools and Equipment for Making Krumkake
Krumkake Iron vs. Modern Electric Makers
Traditionally, krumkake was made with a stovetop iron. These irons clamp shut and are held over an open flame or burner, imprinting delicate designs into the cookie. Today, electric krumkake makers are also available, which make the process quicker and more consistent.
- Stovetop Krumkake Iron – Provides the most authentic flavor and appearance but requires more attention and skill.
- Electric Krumkake Maker – Easier for beginners and ensures even heating, but the designs may differ slightly.
Both work beautifully, so it really comes down to your preference and whether you want the traditional experience or modern convenience.
Other Essential Tools for Preparation
In addition to the iron, here are some other tools you’ll need:
- Mixing bowls – For combining wet and dry ingredients.
- Whisk or hand mixer – To achieve a smooth batter.
- Measuring cups and spoons – Precision is key in baking.
- Cone roller – A wooden or plastic tool used to shape the hot cookie into its traditional cone. If you don’t have one, you can improvise with a clean wooden spoon handle.
- Cooling rack – Helps cookies cool evenly and retain their crispness.
Having these tools ready before you start will make the process smooth and enjoyable.
Preparing the Krumkake Batter
Mixing the Dry Ingredients
Start by sifting together the flour and sugar into a large mixing bowl. This ensures that the dry ingredients are evenly distributed and prevents lumps in the batter. If you’re using spices like cardamom or cinnamon, add them here as well so they blend evenly throughout the mixture.
Incorporating Wet Ingredients for the Perfect Consistency
In another bowl, whisk together the eggs, melted butter, cream (or milk), and vanilla extract until smooth. Slowly pour this wet mixture into the dry ingredients while stirring continuously. The goal is to achieve a silky batter that’s slightly thinner than pancake batter but not too watery.
If the batter feels too thick, add a splash of milk. If too thin, sprinkle in a little more flour. The perfect batter spreads easily when poured into the krumkake iron but still holds its shape without running everywhere.
Step-by-Step Guide to Making Krumkake
Heating and Greasing the Iron
Before cooking, preheat your krumkake iron (or electric maker). Lightly grease the surface with melted butter or cooking spray to prevent sticking.
Pouring the Batter and Cooking the Krumkake
Spoon about a tablespoon of batter into the center of the hot iron. Close the lid and cook for about 30–60 seconds per side, depending on your iron. The krumkake should turn golden brown with a delicate crispness.
Rolling the Krumkake into Its Traditional Shape
Remove the hot cookie carefully and immediately roll it around the cone roller. Hold it for a few seconds until it sets, then place it on a cooling rack. Work quickly, as krumkake hardens fast once removed from the heat.
Tips for Perfecting Krumkake
Common Mistakes to Avoid
Baking krumkake looks simple, but a few small errors can completely change the outcome. The first mistake many beginners make is using too much batter. Because krumkake irons are thin, adding extra batter causes overflow, messy edges, and uneven cooking. Always start with a small spoonful—about a tablespoon—and adjust after your first attempt.
Another common mistake is not heating the iron properly. If your iron is too cold, the batter will stick, and the krumkake will be pale and limp instead of golden and crispy. On the other hand, if it’s too hot, the cookies will burn in seconds. Aim for medium-high heat and adjust based on trial runs.
Overmixing the batter is also a trap to avoid. When you whisk too long, the flour develops gluten, which makes the krumkake chewy instead of delicate. Mix just until combined for the best texture. Finally, don’t wait too long before rolling the cookie. If it cools even slightly, it will harden and crack when you try to shape it.
How to Get the Right Crispness
The hallmark of perfect krumkake is its crisp, light texture. To achieve this, the iron must be hot enough to cook quickly but not scorch. Cooking times usually range from 30 seconds to one minute, depending on your iron. Watch the color closely—it should be golden brown but not dark.
The batter consistency also plays a role. A thinner batter spreads better and cooks more evenly. If your cookies come out too thick and chewy, add a tablespoon of milk or cream to loosen the batter slightly.
Once rolled, place krumkake on a wire rack to cool completely. Laying them on a flat surface traps steam underneath and makes them soggy. For extra crispness, some bakers place finished krumkake in a warm oven (about 200°F / 90°C) for 5–10 minutes to dry them out further. This is especially useful if you live in a humid climate.
Flavor Variations and Creative Twists
Sweet Fillings for Krumkake
While krumkake is delicious on its own, filling it turns this simple cookie into a show-stopping dessert. Traditional fillings include lightly sweetened whipped cream and fresh berries, but you can get creative with your own combinations.
- Chocolate ganache – Rich, decadent, and perfect for holidays.
- Nutella with hazelnuts – A modern twist kids and adults both love.
- Custard or pastry cream – Adds a bakery-style touch.
- Lemon curd – Tart and refreshing against the buttery cookie.
When filling krumkake, do so right before serving. Because the cookie is so delicate, it will soften quickly if filled in advance.
Savory Krumkake Ideas
Believe it or not, krumkake doesn’t have to be sweet. You can easily adapt the batter by reducing the sugar and adding herbs, spices, or cheese. Once baked, fill the cones with savory ingredients for a unique appetizer.
- Cream cheese with smoked salmon – A nod to Scandinavian traditions.
- Herbed goat cheese and roasted vegetables – Light and elegant.
- Chicken salad or tuna salad – Great for picnics or parties.
Savory krumkake is still not very common, but it’s a creative way to elevate this traditional cookie into something completely new.
Serving Suggestions
Pairing Krumkake with Drinks and Desserts
Krumkake pairs beautifully with a wide range of beverages. Coffee and tea are classics, making this cookie a cozy afternoon treat. During festive occasions, pair them with mulled wine or hot chocolate for a comforting holiday spread. For something refreshing, serve krumkake alongside sparkling cider or champagne—perfect for celebrations.
In terms of desserts, krumkake makes a fantastic companion to ice cream. Imagine a scoop of vanilla nestled in a krumkake cone—it’s both elegant and fun. You can also crumble krumkake over cakes, parfaits, or puddings for added texture.
Holiday and Celebration Serving Ideas
In Norway, krumkake is a holiday staple, often stacked in tins alongside other traditional cookies like sandbakkels and pepperkaker. For a festive platter, mix krumkake with assorted cookies, nuts, and dried fruits. They also make beautiful edible gifts. Pack a dozen in a decorative tin or clear cellophane bag tied with ribbon, and you have a thoughtful homemade present.
During weddings or family reunions, krumkake can be filled with whipped cream and fruit to create an elegant dessert buffet. Their cone shape makes them easy to serve individually, and guests always appreciate the personal touch of a handmade treat.
Storage and Preservation
How to Store Krumkake for Freshness
Because krumkake is delicate and absorbs moisture quickly, proper storage is key. Once cooled completely, store them in an airtight container lined with parchment paper. Layer them gently to avoid breakage. Stored at room temperature, krumkake usually stays crisp for about 3–5 days.
If you’ve made a large batch, consider storing them in tins—a traditional Norwegian method. These tins protect the cookies from humidity and light, helping them last longer.
Freezing and Reheating Tips
Krumkake can be frozen successfully if you need to make them ahead. Place cooled cookies in a freezer-safe container, separating layers with wax paper. They’ll keep well for up to two months.
To re-crisp frozen krumkake, place them in a 200°F (90°C) oven for about 5 minutes. Avoid microwaving, as it will soften and ruin their delicate texture.
Nutritional Value of Krumkake
Calories and Macronutrients
A single plain krumkake typically contains about:
- Calories: 70–90
- Carbohydrates: 10–12 g
- Fat: 3–5 g
- Protein: 1–2 g
Keep in mind that fillings like whipped cream or chocolate will increase these values.
Healthier Ingredient Alternatives
For a lighter version of krumkake, try swapping ingredients:
- Whole wheat flour instead of all-purpose for added fiber.
- Coconut sugar or honey instead of refined sugar for a more natural sweetness.
- Greek yogurt instead of cream to cut down fat and add protein.
- Plant-based butter and almond milk for a dairy-free option.
These small changes won’t compromise flavor but will make your krumkake a little healthier.
FAQs about Krumkake Recipe
Q1: Can I fill krumkake in advance for a party?
It’s best to fill them right before serving, as the moisture from creams or fruits can soften the cookie. For parties, prepare the cones in advance and fill them just before guests arrive.
Q2: Is krumkake gluten-free?
The traditional recipe isn’t, but you can substitute a 1:1 gluten-free flour blend for great results.
Q3: What designs can I get on a krumkake iron?
Most irons feature floral, lace, or geometric designs, giving each cookie a beautiful, embossed look. Some modern makers even allow interchangeable plates.
Q4: Can I make savory krumkake ahead of time?
Yes, but store the cones separately and add fillings right before serving, so they don’t get soggy.
Q5: Do I need to flip the iron when cooking?
If you’re using a stovetop krumkake iron, yes—flip it halfway to ensure even cooking. Electric versions cook both sides at once.
Conclusion
With just a few simple ingredients, the right tools, and a little patience, you can master the art of krumkake in your own kitchen. Remember to keep the batter light, the iron hot, and your hands quick when rolling. Soon enough, you’ll have a plate of golden, crispy cones that look as beautiful as they taste.
So, gather your ingredients, heat up your iron, and let the wonderful tradition of krumkake baking bring warmth and joy to your home.


